Home >Backend Development >Python Tutorial >What is the implementation principle of floating point numbers in the Python virtual machine?
What is the implementation principle of floating point numbers in the Python virtual machine?
- 王林forward
- 2023-04-21 18:43:091254browse
Float data structure
The data structure definition of floating point number type in the cpython virtual machine is as follows:
typedef struct {
    PyObject_HEAD
    double ob_fval;
} PyFloatObject;
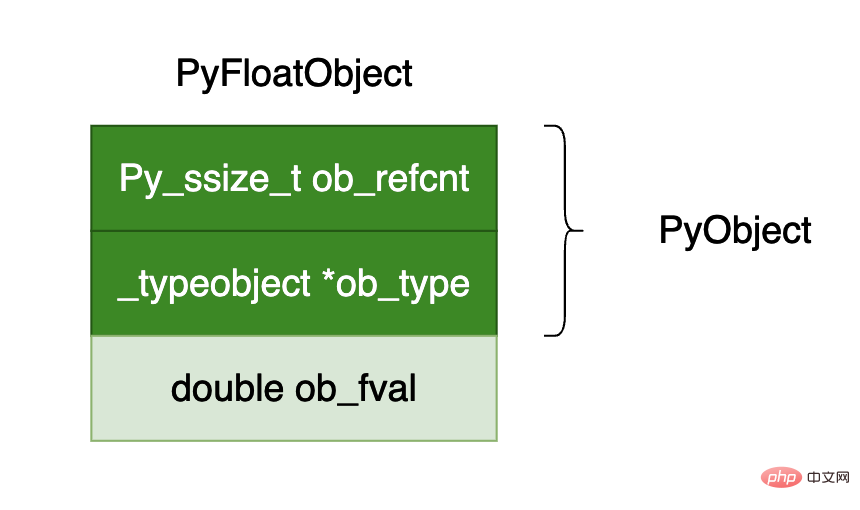
The above data The structure definition diagram is as follows:

The most important field in the above data structure is ob_fval, which is where floating point numbers are actually stored.
ob_refcnt is the reference count of the object.
ob_type is the type of object.
Related methods of floating point numbers
Create float objects
It is the same as the tuple and list objects we discussed earlier, inside cpython When implementing the float type, an intermediate layer will also be added to the float object to speed up the memory allocation of floating point numbers. The specific relevant code is as follows:
#define PyFloat_MAXFREELIST    100
static int numfree = 0;
static PyFloatObject *free_list = NULL;
Doing more inside cpython will cache 100 float objects. If the memory space exceeds 100, the memory will be released directly. What needs to be noted here is that all float objects can be cached with only one pointer. How is this achieved?
This is implemented using the struct _typeobject *ob_type; field in the object PyFloatObject. Use this field to point to the memory space of the next float object, because the data in free_list is not used, so you can use this Features Save some memory space. The following is the specific process of creating a float object:
PyObject *
PyFloat_FromDouble(double fval)
{
    // 首先查看 free_list 当中是否有空闲的 float 对象
    PyFloatObject *op = free_list;
    if (op != NULL) {
        // 如果有 那么就将让 free_list 指向 free_list 当中的下一个 float 对象 并且将对应的个数减 1
        free_list = (PyFloatObject *) Py_TYPE(op);
        numfree--;
    } else {
      	// 否则的话就需要申请内存空间
        op = (PyFloatObject*) PyObject_MALLOC(sizeof(PyFloatObject));
        if (!op)
            return PyErr_NoMemory();
    }
    /* Inline PyObject_New */
    (void)PyObject_INIT(op, &PyFloat_Type); // PyObject_INIT 这个宏的主要作用是将对象的引用计数设置成 1
    op->ob_fval = fval;
    return (PyObject *) op;
}
Addition
The following is the specific implementation of the addition of floating point numbers in cpython. The whole process is relatively simple, just get the new value and create a new one. The PyFloatObject object and returns this object.
static PyObject *
float_add(PyObject *v, PyObject *w)
{
    double a,b;
    CONVERT_TO_DOUBLE(v, a); // CONVERT_TO_DOUBLE 这个宏的主要作用就是将对象的 ob_fval 这个字段的值保存到 a 当中
    CONVERT_TO_DOUBLE(w, b); // 这个就是将 w 当中的 ob_fval 字段的值保存到 b 当中
    a = a + b;
    return PyFloat_FromDouble(a); // 创建一个新的 float 对象 并且将这个对象返回
}
Subtraction
The same goes for subtraction.
static PyObject *
float_sub(PyObject *v, PyObject *w)
{
    double a,b;
    CONVERT_TO_DOUBLE(v, a);
    CONVERT_TO_DOUBLE(w, b);
    a = a - b;
    return PyFloat_FromDouble(a);
}
Multiplication
static PyObject *
float_mul(PyObject *v, PyObject *w)
{
    double a,b;
    CONVERT_TO_DOUBLE(v, a);
    CONVERT_TO_DOUBLE(w, b);
    PyFPE_START_PROTECT("multiply", return 0)
    a = a * b;
    PyFPE_END_PROTECT(a)
    return PyFloat_FromDouble(a);
}
Division
static PyObject *
float_div(PyObject *v, PyObject *w)
{
    double a,b;
    CONVERT_TO_DOUBLE(v, a);
    CONVERT_TO_DOUBLE(w, b);
    if (b == 0.0) {
        PyErr_SetString(PyExc_ZeroDivisionError,
                        "float division by zero");
        return NULL;
    }
    a = a / b;
    return PyFloat_FromDouble(a);
}
Negation
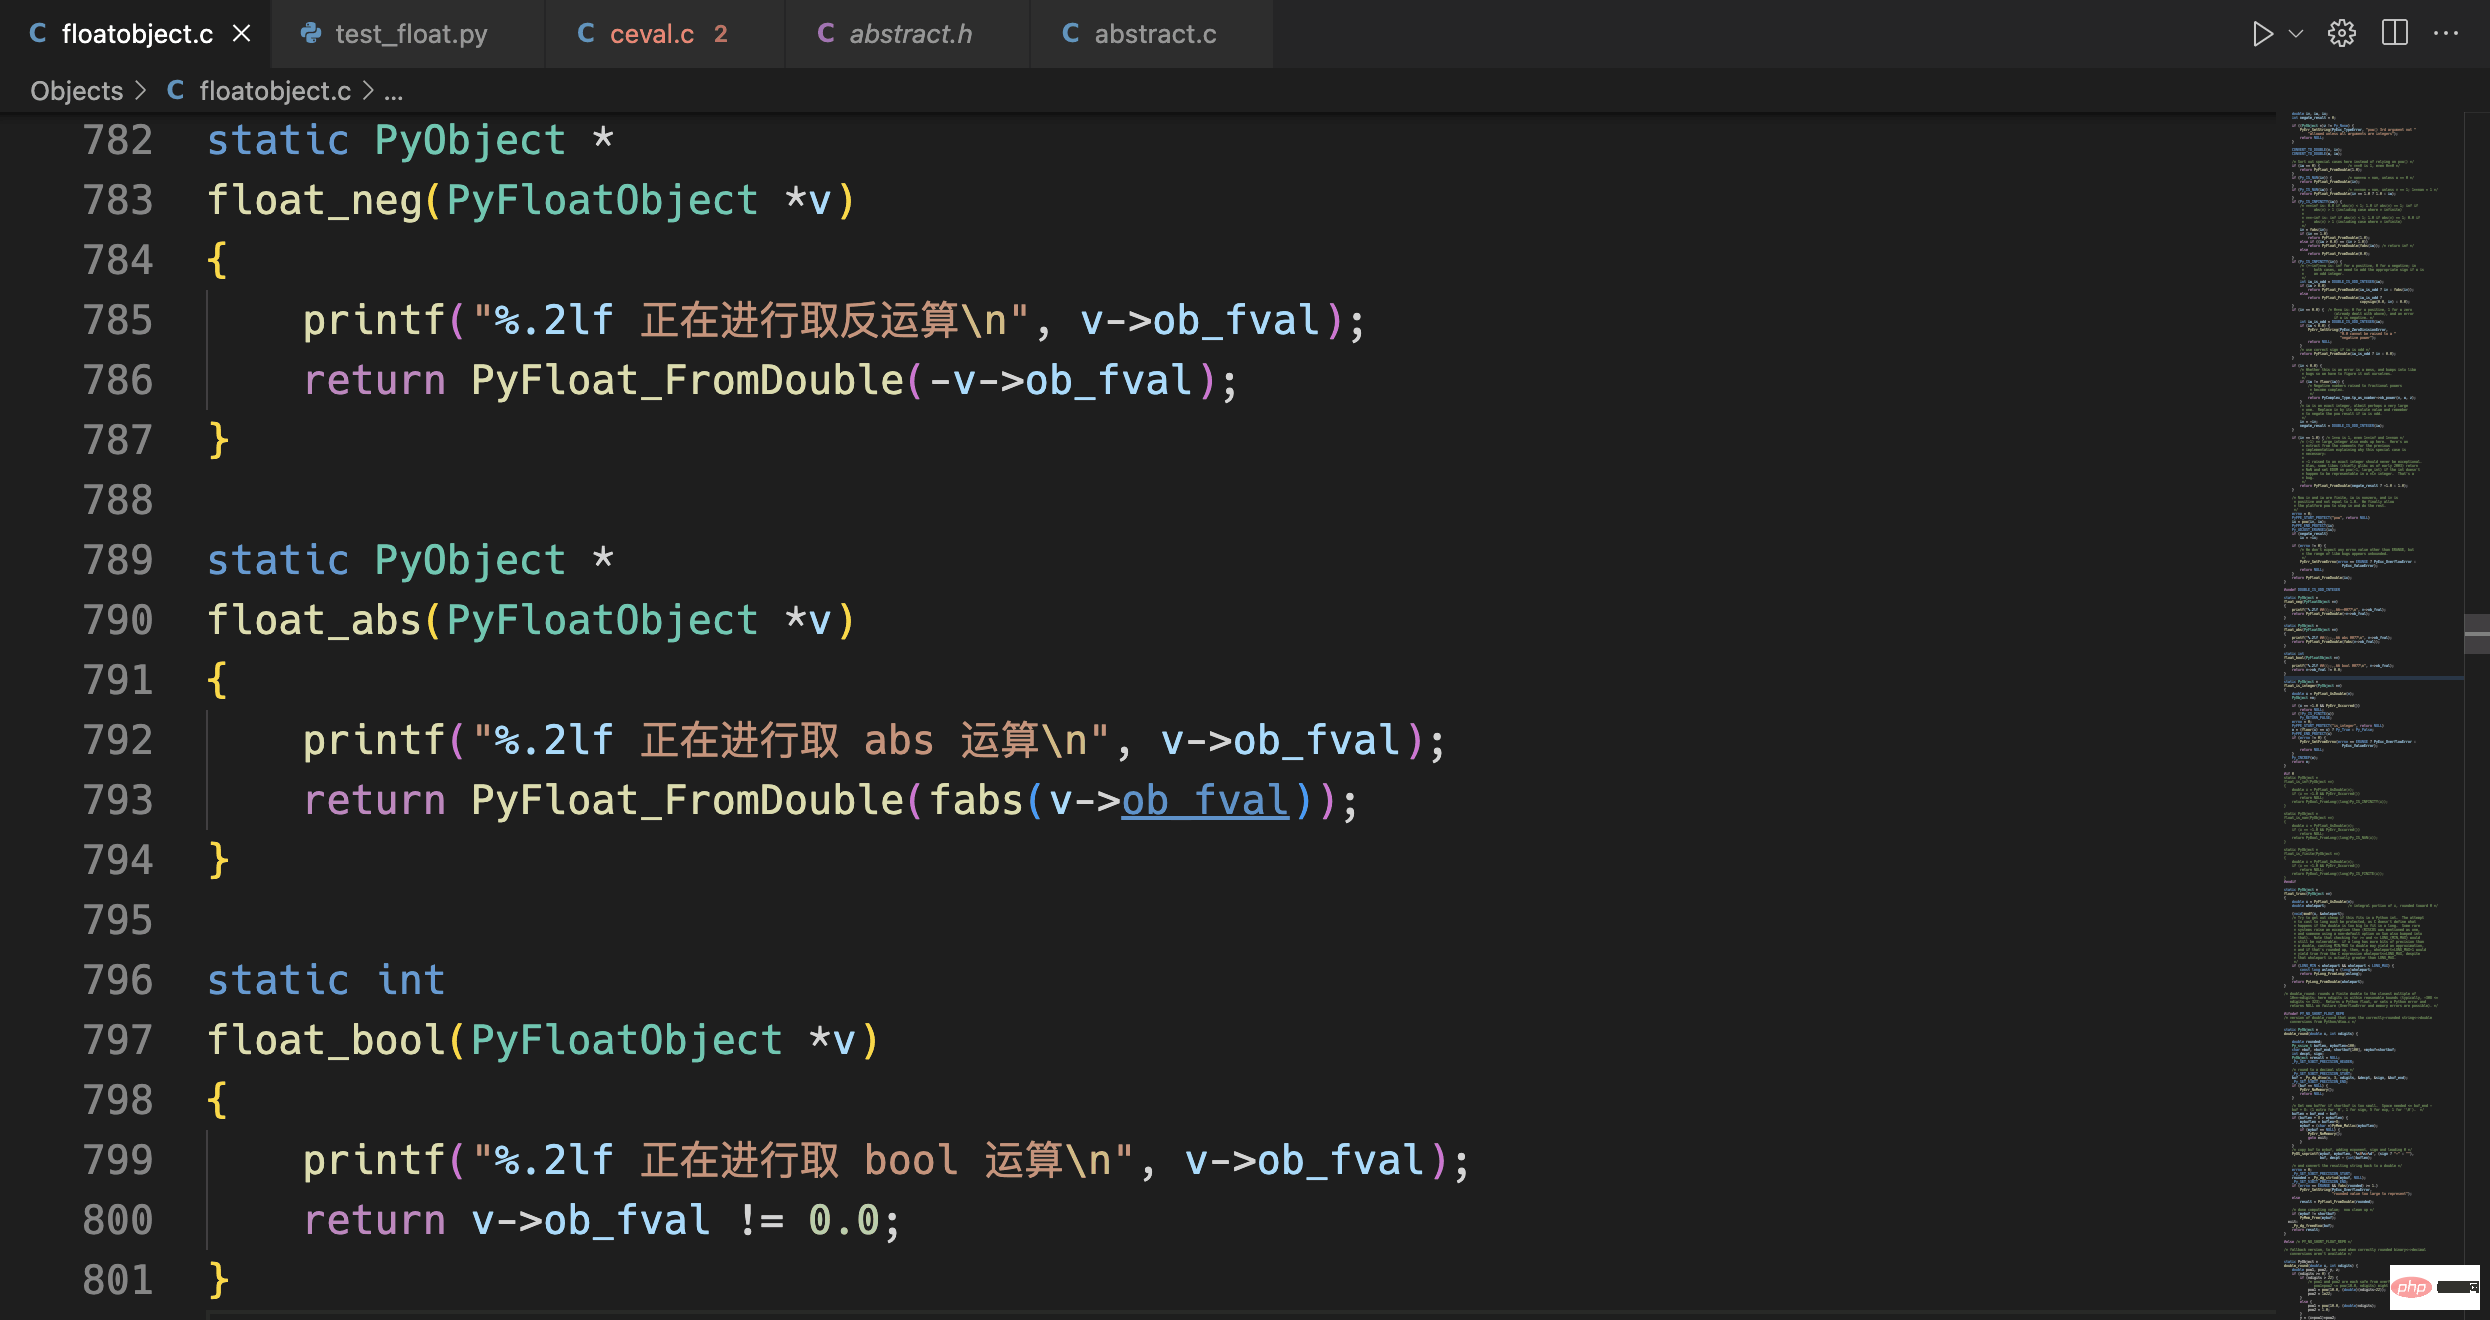
A line of output statements is added here, this is for our convenience in testing later.
static PyObject *
float_neg(PyFloatObject *v)
{
    printf("%.2lf 正在进行取反运算\n", v->ob_fval);
    return PyFloat_FromDouble(-v->ob_fval);
}
Find the absolute value
static PyObject *
float_abs(PyFloatObject *v)
{
    printf("%.2lf 正在进行取 abs 运算\n", v->ob_fval);
    return PyFloat_FromDouble(fabs(v->ob_fval));
}
Find the bool value
static int
float_bool(PyFloatObject *v)
{
    printf("%.2lf 正在进行取 bool 运算\n", v->ob_fval);
    return v->ob_fval != 0.0;
}
The picture below is our modification of the cpython program!

The following is the output when we operate floating point numbers again after the modification. What you can see is that the statements we added in the above code are output.

The above is the detailed content of What is the implementation principle of floating point numbers in the Python virtual machine?. For more information, please follow other related articles on the PHP Chinese website!

