Home >Common Problem >How to display legacy desktop icons on Windows 11
How to display legacy desktop icons on Windows 11
- PHPzforward
- 2023-04-20 11:19:061651browse
How to Restore Old Desktop Icons on Windows 11
To restore old desktop icons on Windows 11, follow these steps:
- Click "Start" button or press the Windows key on your keyboard to open the Start menu, and then click Settings.
- Alternatively, you can use the keyboard shortcut Windows key I to open Settings directly.
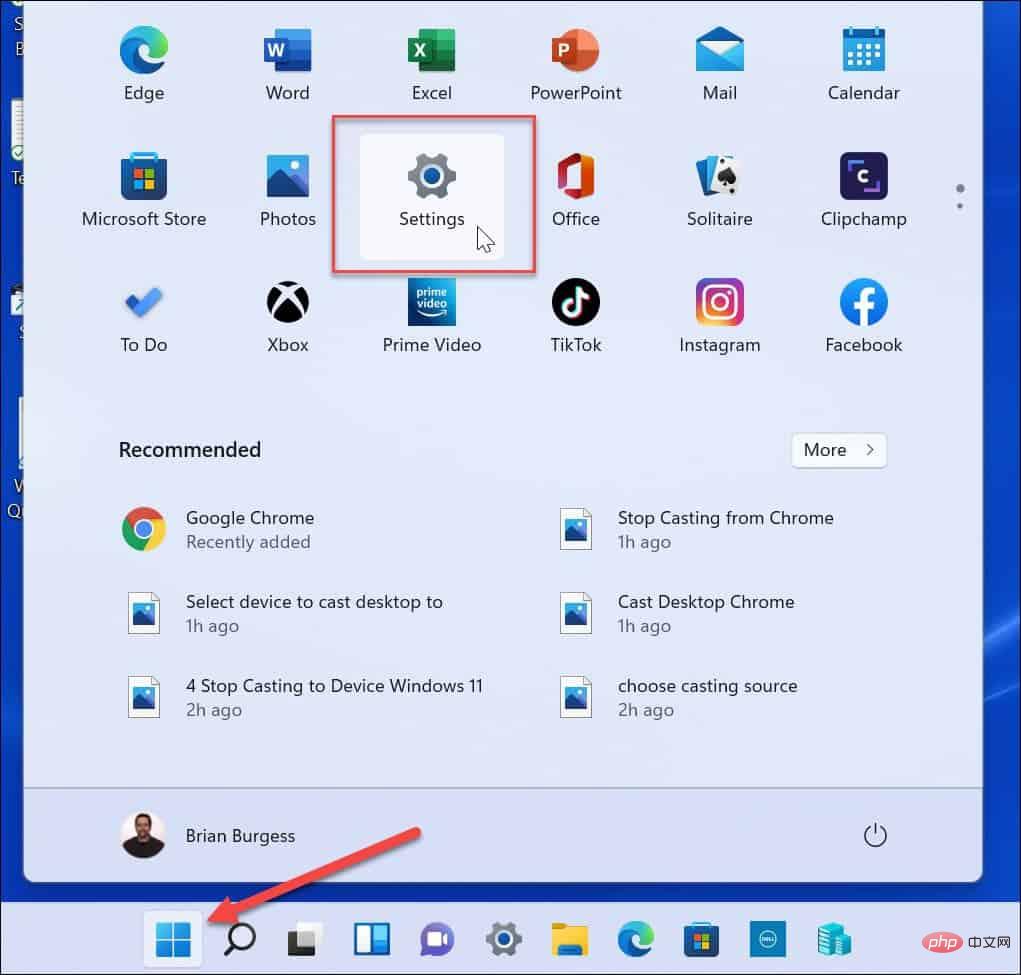
- When Settings opens, click Personalization on the left and scroll down And select the theme on the right.
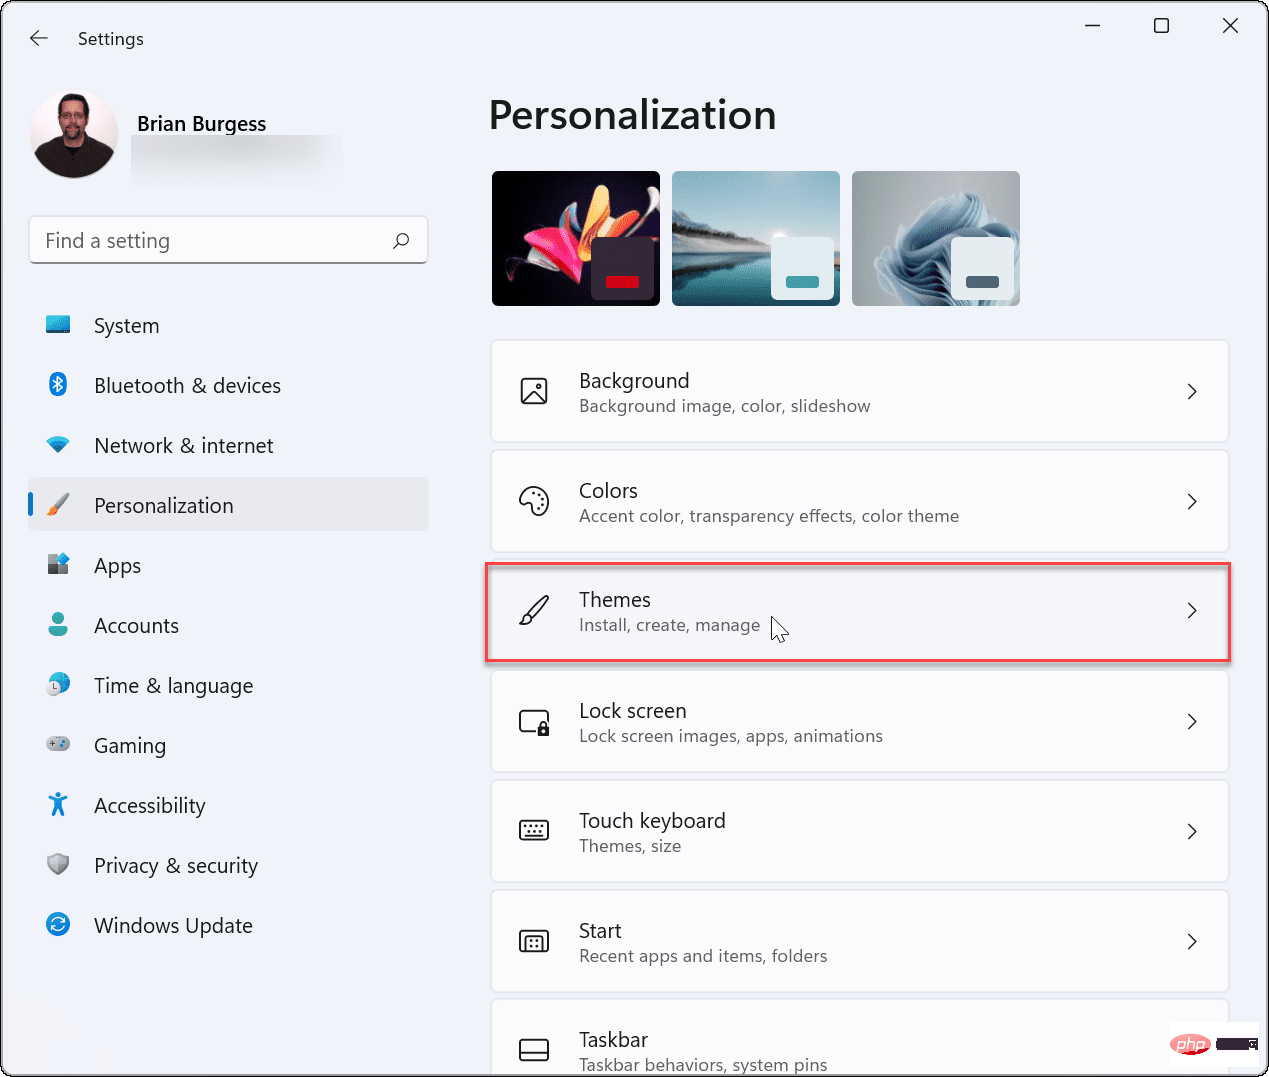
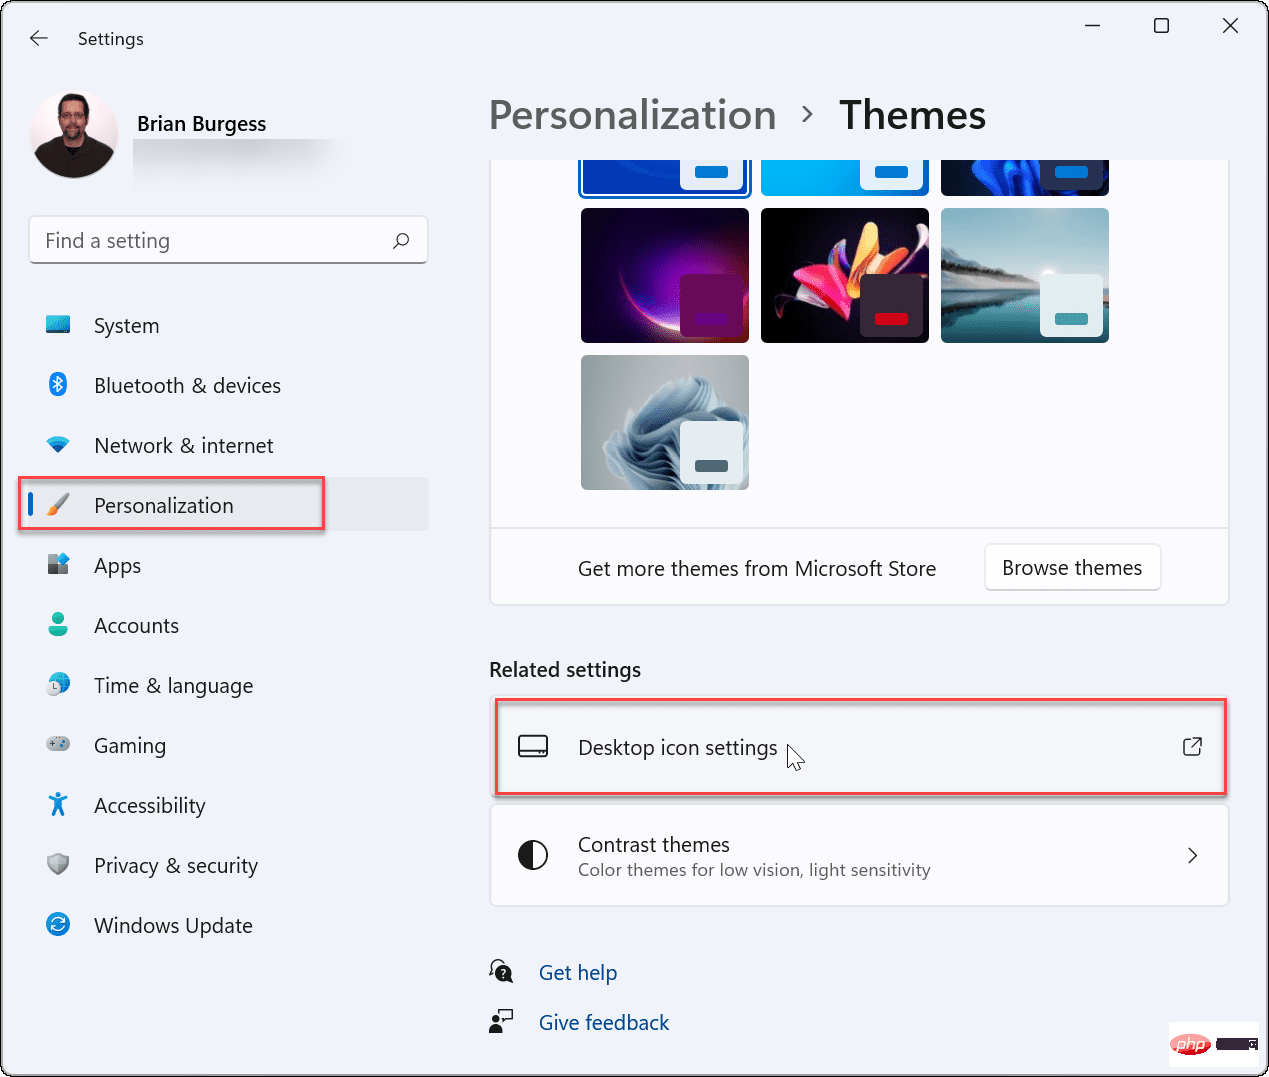
- In the Theme menu, click the Desktop Icon Settings option.
- When the "Desktop Icon Settings" window appears, select the check next to each icon you want to display on the desktop frame. Click
- OK to save your selection.
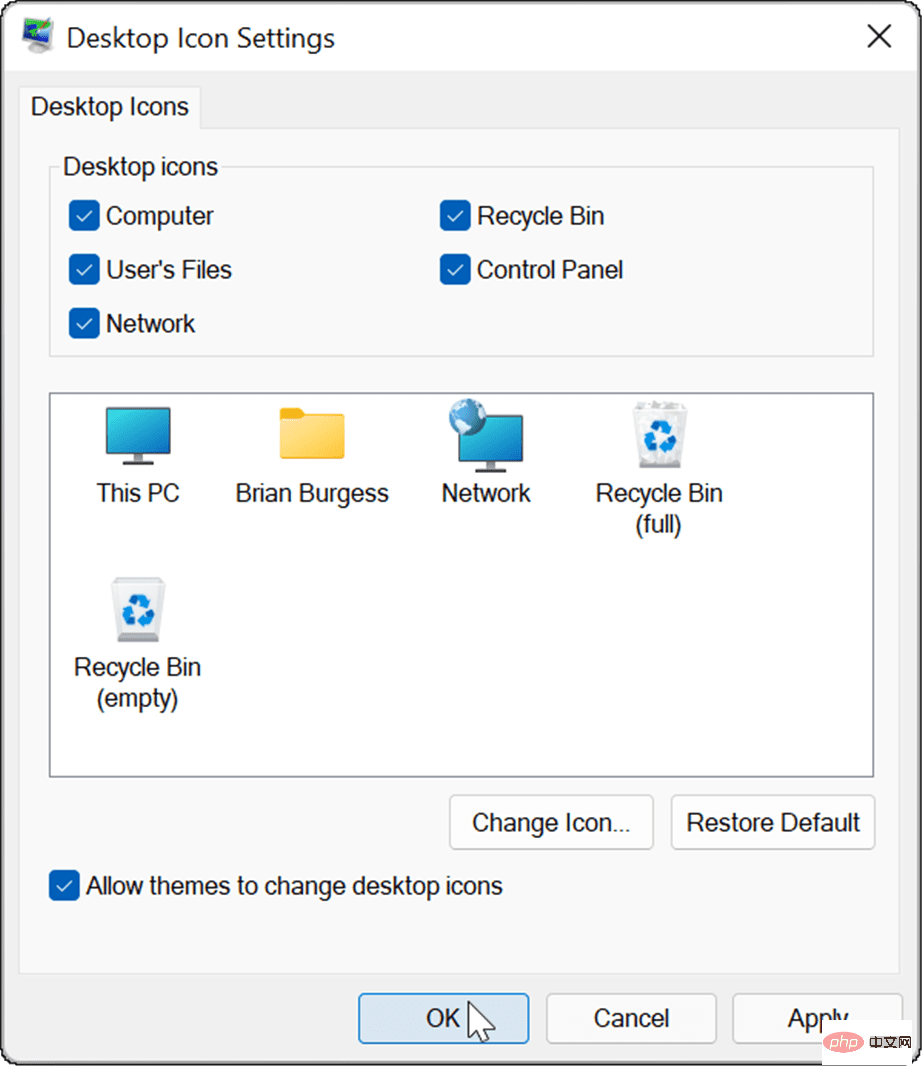
- After completing the above steps, the old system icon of your choice will appear on the desktop.
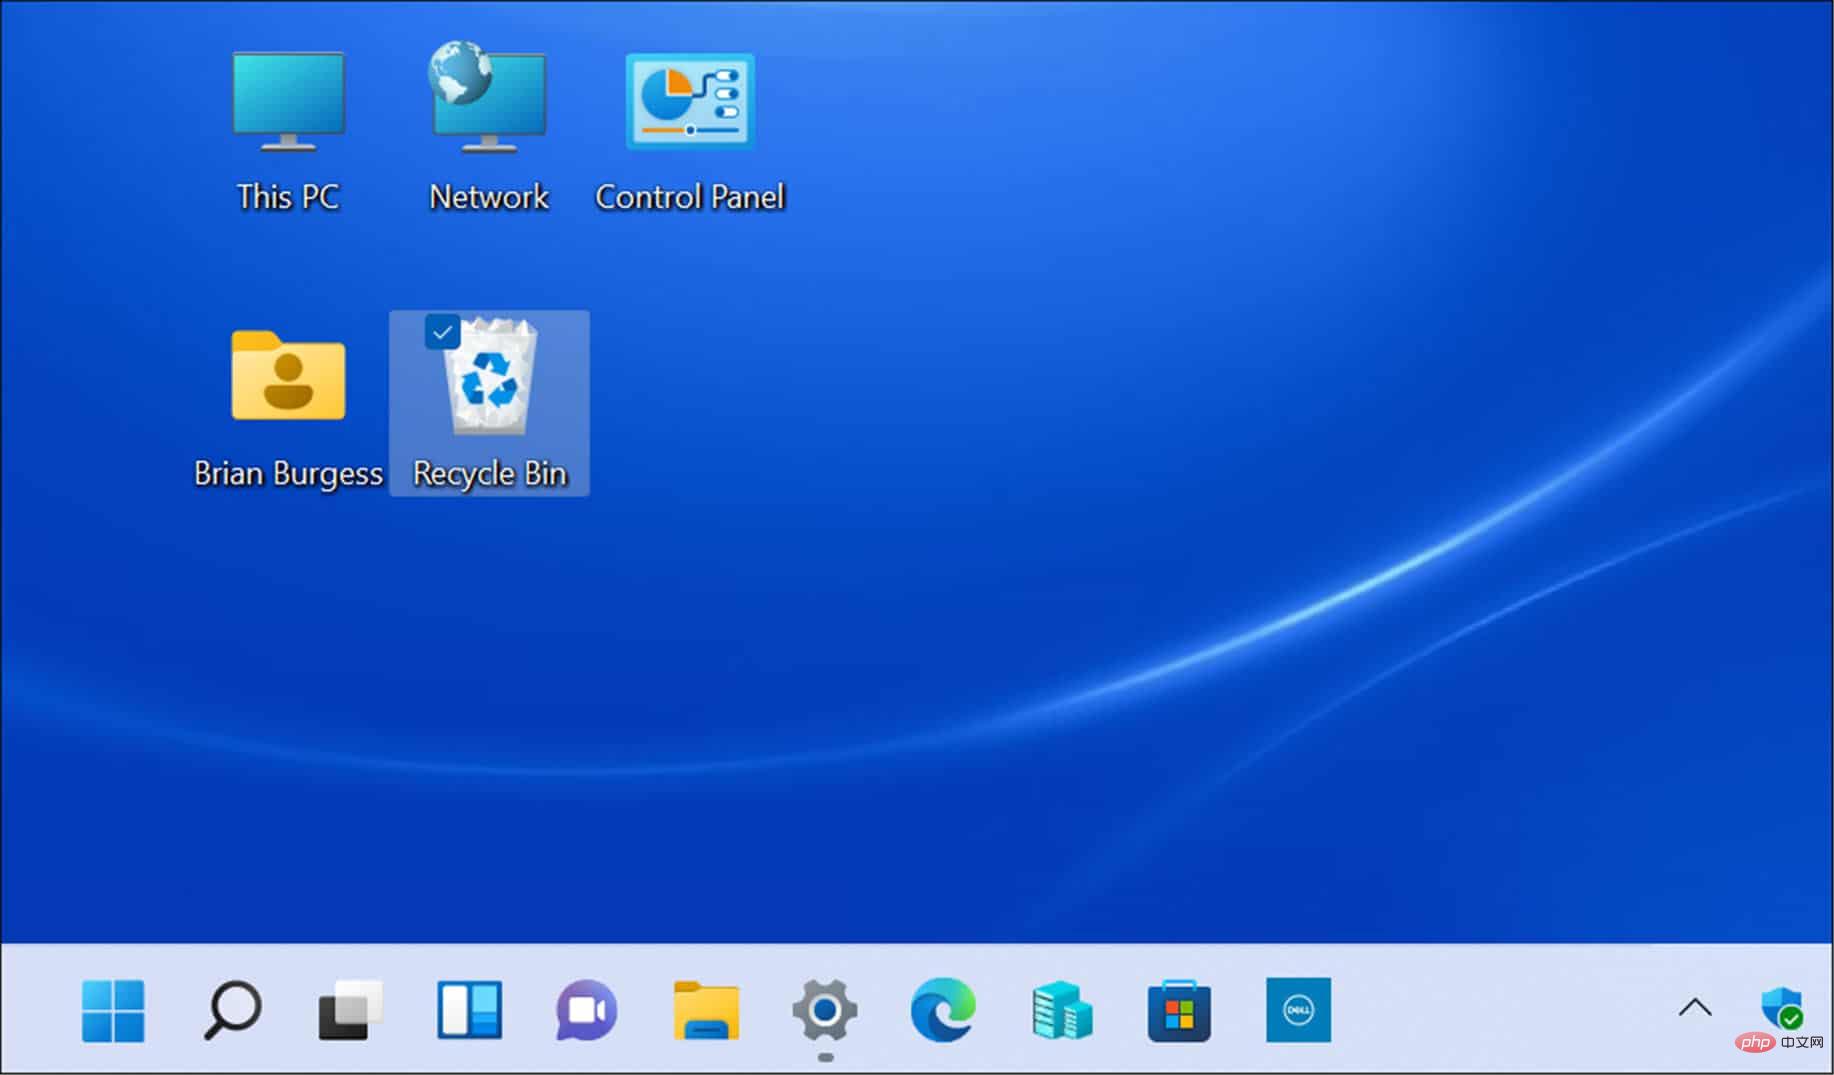
- Open the
- Start Menu and press Settings. In the "
- Settings" menu, go to "Personalization" >"Theme".

- Scroll down and click
- Desktop Icon Settings under the Related Settings section.

- When the
- Desktop Icon Settings menu opens, highlight the icon you want to change and click Change Icon Button.
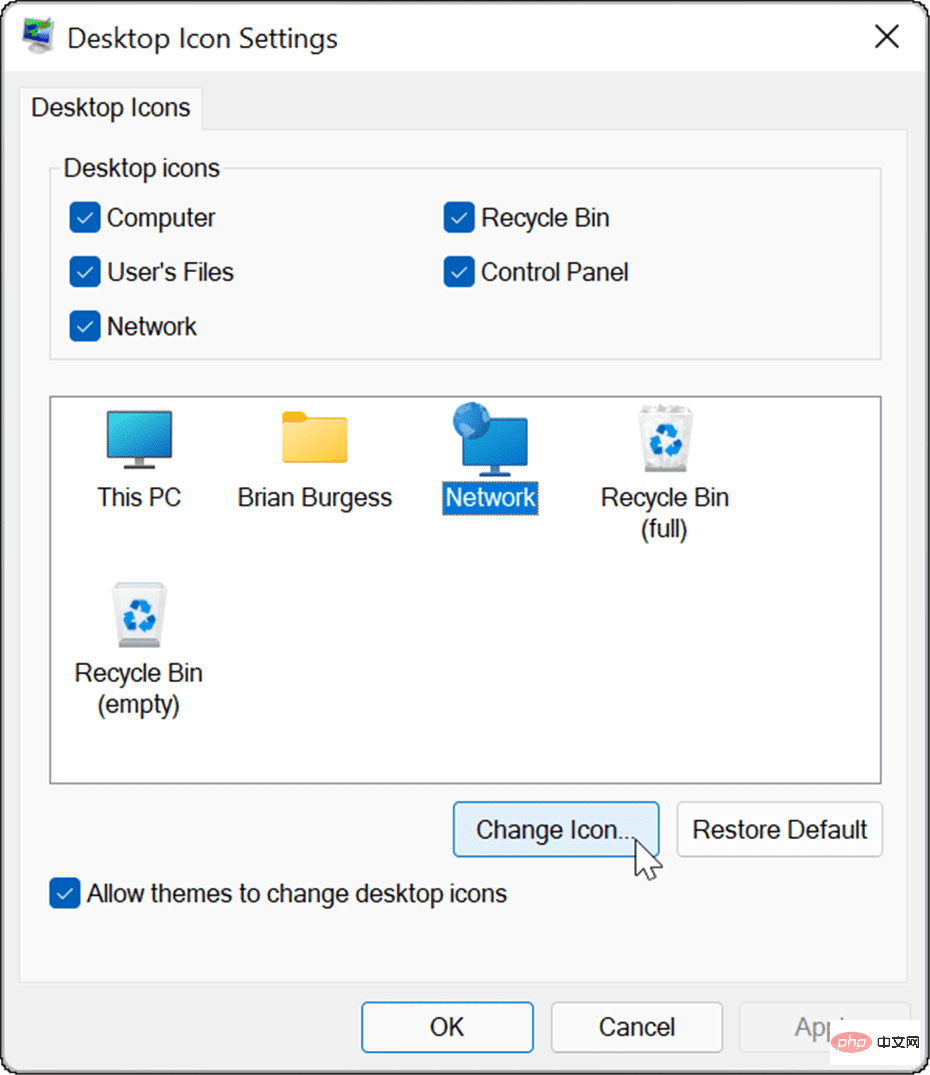
- In the
- Change Icon window, select the new icon you want to use and click OK. If you don't like any of the available options, click the Browse button and select an icon from your saved image file. Click
- OK again in the Desktop Icon Settingsmenu and exit the settings.
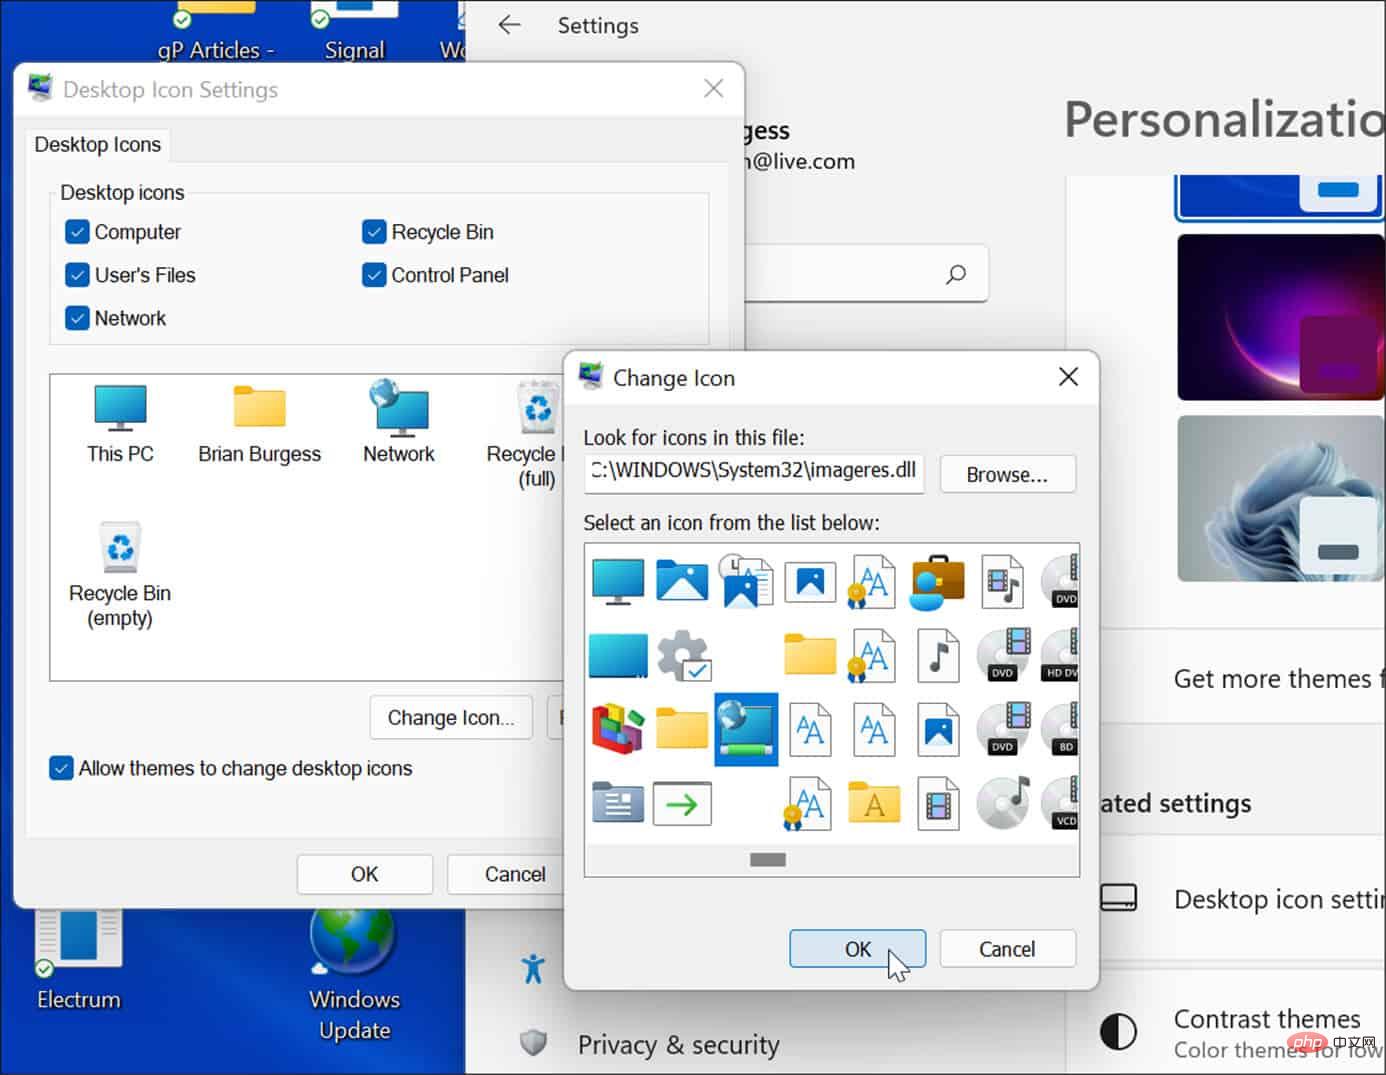
The above is the detailed content of How to display legacy desktop icons on Windows 11. For more information, please follow other related articles on the PHP Chinese website!
Statement:
This article is reproduced at:yundongfang.com. If there is any infringement, please contact admin@php.cn delete
Previous article:Global PC shipments decline, Mac shipments rise in Q1 2022Next article:Global PC shipments decline, Mac shipments rise in Q1 2022

