Open Shell is a free software utility that can be used to customize the Windows 11 Start menu to resemble a classic-style menu or a Windows 7-style menu. The Start menu on previous versions of Windows provided users with an easy way to browse the contents of their system.
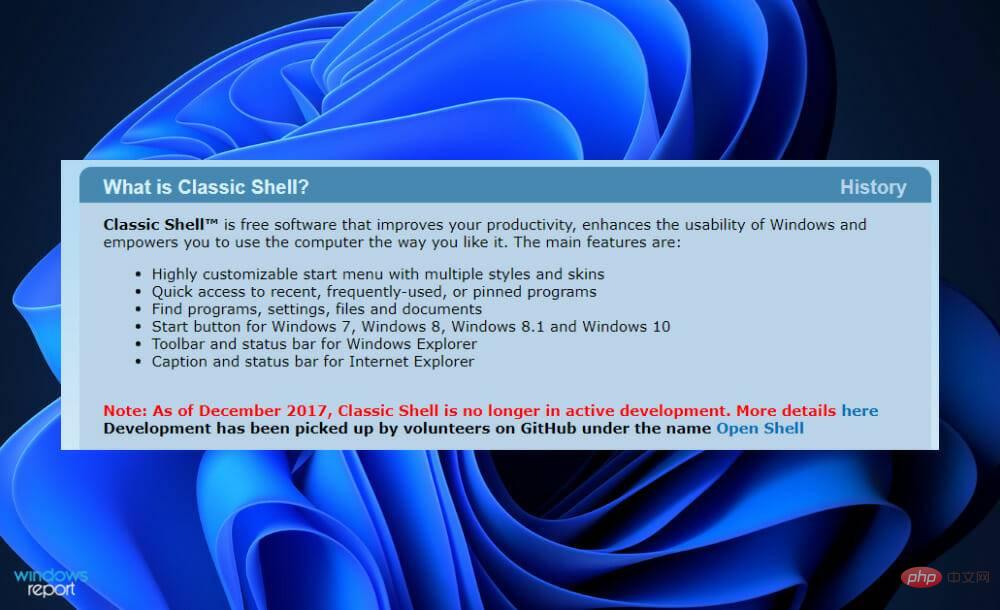
Basically, Open Shell is a replacement for Classic Shell that provides different user interface elements that help to get the functionality of the latter version from previous Windows versions. Once development of Classic Shell ceased in 2017, it was maintained and developed by GitHub volunteers under the name Open Shell. It is compatible with Windows 11 and can be used to customize the user interface according to your needs.
If you're looking to get back to the classic Start menu on your Windows 11 PC, you've landed in the right place. In this article, we provide detailed steps to download and install Open Shell on Windows 11.
Step 1 – Download Open Shell for Windows 11
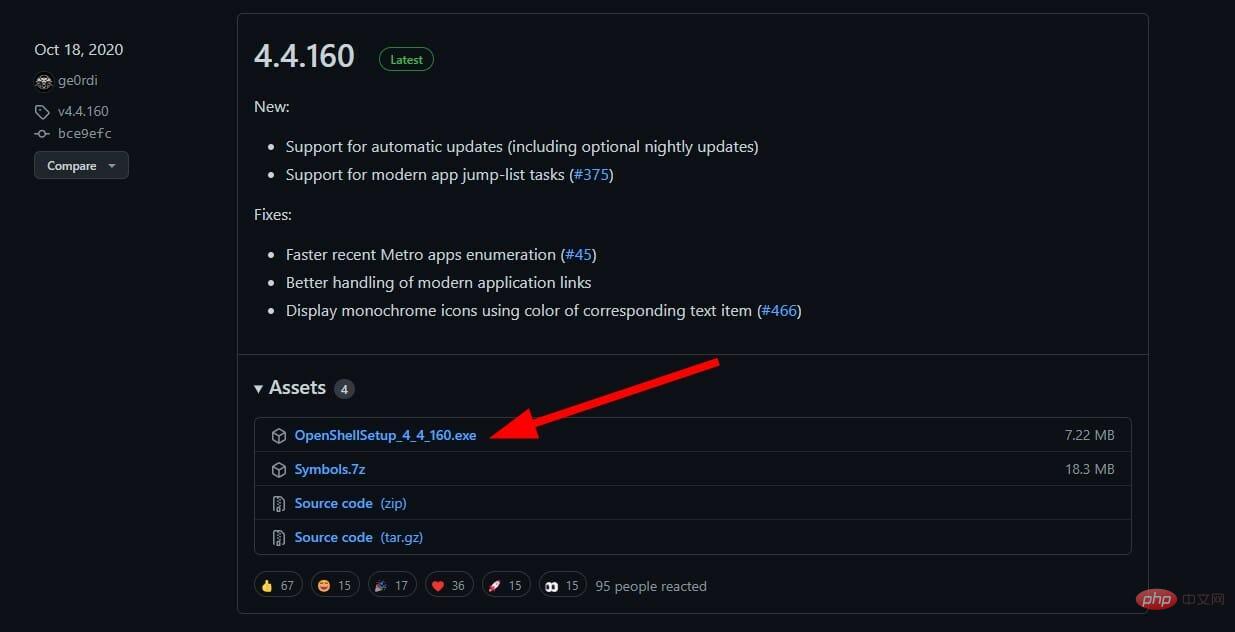
Step 1. Click here to go to Open Shell's GitHub page.
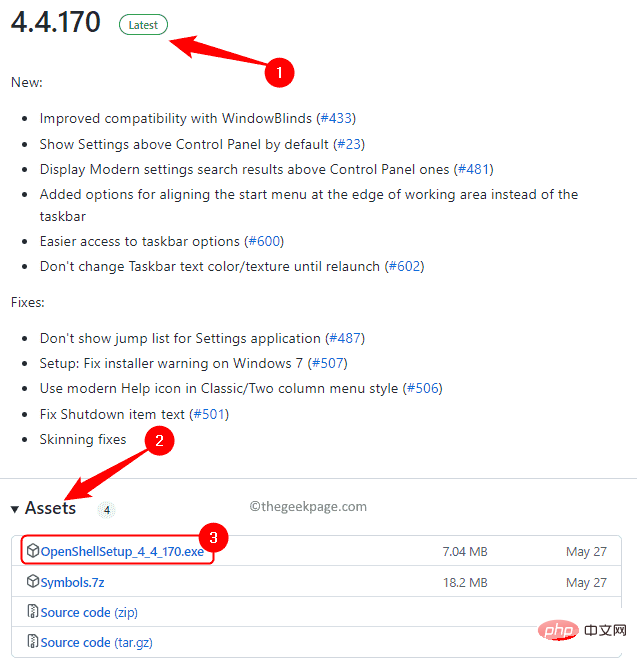
Step 2. Find the version tagged latest version.
The latest version is 4.4.170.
Step 3. Scroll down to the "Assets" section at the bottom of this release.
Step 4. Click OpenShellSetup_4_4_170.exe to download it.

Step 5. You will be prompted to choose a location on your PC to save the downloaded file.
Step 6. Select a folder and click to save.

Step 2 – Install Open Shell Windows 11
Step 1. Go to the folder containing the downloaded exe file.
Step 2. Double-click this file to start the installation process.

Step 3. On the main welcome screen, click Next.

Step 4. In the End User License Agreement screen, check the box next to "I accept the terms in the license agreement".
Then, click Next.

Step 5. In the Customize Settings screen, you can change how features are installed on your computer.
You can also use the "Browse" button to change the location where the program is installed.

Step 6. Finally, click Install.
When UAC prompts for permissions, click "Yes".

# Step 7. After installation and opening the shell, click to complete.

Step 3 – Customize the Windows 11 Start Menu
Step 1. Click the Windows key and type Open Shell in the search box.
In the search results, click Open-Shell Menu Settings to customize the Start menu.

Step 2. Go to the Start Menu Style tab.
This can be done by selecting the "Classic" style or "Classic with two columns " or "Windows 7" Style to change the style of the Start menu.
Step 3. If you want to replace the Start button, check the box at the bottom next to Replace Start button.
Then, select the style "Aero" or "Classic" or "Custom".
Step 4. Finally, click OK to apply the settings.
Now you will see the Start menu at the left end of the taskbar.

Step 5. Go to the Basic Settings tab to customize key and mouse functionality.
This contains options for changing the Start menu behavior for left-click, shift-click, Windows key, etc. You can choose any of the listed options as per your choice.

Step 6. Using the Skin tab you can change the appearance of your Start menu.
To do this, select any skin from the drop-down list.
After you select a look, you can use different options to further customize the appearance of your Start menu. You can check or uncheck the option to modify your settings

Step 7. Using Open Shell, you can also change the appearance of the taskbar.
Go to the Taskbar tab.
Here, check the box next to to customize the taskbar.
There are different options to change the taskbar appearance, taskbar opacity, taskbar color, tasks Column text color etc.

Step 8. The Customize Start Menu tab allows you to further customize the menu items in the Start menu, such as adding or removing items, editing menu items, and creating submenus. You can click the
iconof a specific menu item to further edit its settings.
 In the Edit Menu Item dialog box, you can change the commands for
, labels, prompts, and icons. It also provides options to sort submenu items, track recently used items, hide extensions, and more.
 If a menu item has
" in the "Show" column, it means it won't show up in the "Start" ” menu. To make it visible, use the drop-down list in the Show column and select Show as Link.
 After making the necessary changes to the settings that open the shell, click OK. You will now see your customized Start Menu
 #If you no longer want Open Shell to customize your Start menu, you can remove this program from your computer. Please follow the steps below to
from your computer. step 1. Press
Windows Rto open "Run". Step 2. Type
ms-settings:appsfeaturesand press Enter to go to the Installed Apps page.
 Step 3. On this page, search for "
" in the list of apps. Step 4. Click the
three-dot menuassociated with Open Shell and select Uninstall.

again at the confirmation prompt.
 Step 5. Wait for the program to be uninstalled.
You will now have the Windows 11 Start Menu.
The above is the detailed content of How to install Open Shell to restore the classic Start menu on Windows 11. For more information, please follow other related articles on the PHP Chinese website!
 如何在 Windows 11 上安装经典 Shell?Apr 21, 2023 pm 09:13 PM
<p>定制您的操作系统是让您的日常生活更加愉快的绝佳方式。您可以更改用户界面、应用自定义主题、添加小部件等等。因此,我们今天将向您展示如何在Windows11上安装ClassicShell。</p><p>该程序已经存在了很长时间,并允许您修改操作系统。志愿者现在已经开始运营该组织,该组织于2017年解散。新项目名为OpenShell,目前在Github上可供感兴趣的人使用。</p>&a
![Explorer.exe 在系统启动时不启动 [修复]](https://img.php.cn/upload/article/000/887/227/168575230155539.png) Explorer.exe 在系统启动时不启动 [修复]Jun 03, 2023 am 08:31 AM
Explorer.exe 在系统启动时不启动 [修复]Jun 03, 2023 am 08:31 AM如今,许多Windows用户开始遇到严重的Windows系统问题。问题是系统加载后Explorer.exe无法启动,用户无法打开文件或文件夹。虽然,Windows用户在某些情况下可以使用命令提示符手动打开Windows资源管理器,并且每次系统重新启动或系统启动后都必须这样做。这可能是有问题的,并且是由于下面提到的以下因素造成的。损坏的系统文件。启用快速启动设置。过时或有问题的显示驱动程序。对系统中的某些服务进行了更改。修改后的注册表文件。请记住以上所有因素,我们提出了一些肯定会对用户有所帮助
 PowerShell 部署失败并出现 HRESULT 0x80073D02 问题修复May 10, 2023 am 11:02 AM
您在运行脚本时是否看到此错误消息“Add-AppxPackage:部署失败,HRESULT:0x80073D02,无法安装该包,因为它修改的资源当前正在使用中。PowerShell中出现错误0x80073D02…”?如错误消息所述,当用户在前一个进程运行时尝试重新注册一个或所有WindowsShellExperienceHost应用程序时,确实会发生这种情况。我们已经获得了一些简单的解决方案来快速解决这个问题。修复1–终止体验主机进程您必须在执行powershell命令之前结束
 Linux快速删除文件末尾行的操作步骤Mar 01, 2024 pm 09:36 PM
Linux系统下在处理文件时,有时候需要删除文件末尾的行。这种操作在实际应用中很常见,可以通过一些简单的命令来实现。本文将介绍在Linux系统中快速删除文件末尾行的操作步骤,同时提供具体的代码示例。步骤一:查看文件末尾行在进行删除操作之前,首先需要确认文件的末尾行是哪一行。可以使用tail命令来查看文件的末尾行,具体命令如下:tail-n1filena
 在 Windows 上运行 shell 脚本文件的不同方法Apr 13, 2023 am 11:58 AM
适用于 Linux 的 Windows 子系统第一种选择是使用适用于 Linux 或 WSL 的 Windows 子系统,这是一个兼容层,用于在 Windows 系统上本地运行 Linux 二进制可执行文件。它适用于大多数场景,允许您在 Windows 11/10 中运行 shell 脚本。WSL 不会自动可用,因此您必须通过 Windows 设备的开发人员设置启用它。您可以通过转到设置 > 更新和安全 > 对于开发人员来完成。切换到开发人员模式并通过选择是确认提示。接下来,查找 W
 超硬核!11个非常实用的 Python 和 Shell 拿来就用脚本实例!Apr 12, 2023 pm 01:52 PM
Python 脚本部分实例:企业微信告警、FTP 客户端、SSH 客户端、Saltstack 客户端、vCenter 客户端、获取域名 ssl 证书过期时间、发送今天的天气预报以及未来的天气趋势图;Shell 脚本部分实例:SVN 完整备份、Zabbix 监控用户密码过期、构建本地 YUM 以及上篇文章中有读者的需求(负载高时,查出占用比较高的进程脚本并存储或推送通知);篇幅有些长,还请大家耐心翻到文末,毕竟有彩蛋。Python 脚本部分企业微信告警此脚本通过企业微信应用,进行微信告警,可用于
 以下是 Open Shell Windows 11 无法正常工作问题的修复Apr 14, 2023 pm 02:07 PM
无法在Windows 11上运行的 Open shell 并不是一个新问题,并且自从这个新操作系统问世以来一直困扰着用户。Open-Shell Windows 11 不工作问题的原因并不具体。它可能是由程序中的意外错误、病毒或恶意软件的存在或损坏的系统文件引起的。对于那些不知道的人,Open-Shell 是 2017 年停产的 Classic Shell 的替代品。您可以查看我们的教程,了解如何在 Windows 11 上安装 Classic Shell。如何替换 Windows 11 的开始菜
 如何安装 Open Shell 以恢复 Windows 11 上的经典开始菜单Apr 18, 2023 pm 10:10 PM
OpenShell是一个免费的软件实用程序,可用于自定义Windows11开始菜单,使其类似于经典风格的菜单或Windows7样式的菜单。以前版本的Windows上的开始菜单为用户提供了一种浏览其系统内容的简单方法。基本上,OpenShell是ClassicShell的替代品,它提供了不同的用户界面元素,有助于从以前的Windows版本获取后一个版本的功能。一旦ClassicShell的开发在2017年停止,它就由GitHub志愿者以OpenShell的名义维护和开发。它与Win

Hot AI Tools

Undresser.AI Undress
AI-powered app for creating realistic nude photos

AI Clothes Remover
Online AI tool for removing clothes from photos.

Undress AI Tool
Undress images for free

Clothoff.io
AI clothes remover

AI Hentai Generator
Generate AI Hentai for free.

Hot Article

Hot Tools

MantisBT
Mantis is an easy-to-deploy web-based defect tracking tool designed to aid in product defect tracking. It requires PHP, MySQL and a web server. Check out our demo and hosting services.

Atom editor mac version download
The most popular open source editor

Dreamweaver Mac version
Visual web development tools

Notepad++7.3.1
Easy-to-use and free code editor

SublimeText3 English version
Recommended: Win version, supports code prompts!


