


If there is any problem with the hard drive causing any problem, CHKDSK command is executed on the system to scan for any errors and repair and repair them properly.
But recently, we have received many reports from Windows users that when they are unable to perform CHKDSK operations on their system hard drive, they receive an error message that says "CHKDSK cannot continue in read-only mode" ” and the operation stops immediately.
There may be many reasons for this error message when running the chkdsk command, and these reasons are listed below.
- Corrupted system data files in the system.
- Corrupted/damaged hard drive.
- The file or drive is currently in use by software or applications installed on the system.
- Some services/applications are still running in the background.
In this article, we will guide users on how to resolve this chkdsk not continuing in read-only mode issue on their Windows PC.
If you also face this problem, don’t worry! Read on to learn more.
Workaround – You can try running the chkdsk command in recovery mode with Safe Boot by referring to this article by Click here.
Fix 1 – Run the CHKDSK *: /f /r /x command
Some users claim to have resolved the CHKDSK not continuing in read-only mode issue by running this command on their systems . Therefore, we strongly recommend our users to run this command using the steps explained below.
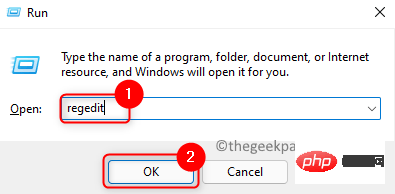
Step 1: Press the Windows and R keys simultaneously to open the Run Command box.
Step 2: Once open, type cmd and press the Ctrl, Shift and Enter keys simultaneously to become an administrator ##Open the Command Prompt application.
Step 3: Continue accepting any UAC prompts on the screen by clickingYes.
![Fix - CHKDSK cannot continue in read-only mode [Resolved]](https://img.php.cn/upload/article/000/465/014/168171810442369.png?x-oss-process=image/resize,p_40)
Enter key.
chkdsk *: /f /r /x
NOTE – You need to replace the * symbols with the drive letter you want to run the command on (example: C, D, E, etc.).
![Fix - CHKDSK cannot continue in read-only mode [Resolved]](https://img.php.cn/upload/article/000/465/014/168171810488808.png?x-oss-process=image/resize,p_40)
NOTE – If you are using the C: drive to execute the chkdsk command, press Y and then Enter. This will reboot the system and when the system boots, it will execute the chkdsk command.
Step 6: Restart your system and see if that helps. Fix 2 – Perform CHKDSK operation on system restartSometimes the chkdsk operation does not work on the system if the C: drive is selected because it is currently in use by the system operating system, and Can be run on system restart. Therefore, you can schedule the chkdsk operation after the system begins to reboot. Follow the steps below to learn how to schedule chkdsk operations using an elevated command prompt. Step 1: Press theWin R keys simultaneously on your keyboard, then type cmd in the run command box that appears on the screen.
Step 2: Next, press theCtrl Shift Enter keys simultaneously.
only after you accept the on-screen UAC prompt by clicking Yes.
Step 4: Type the following lines into the Command Prompt window and pressEnter.
chkdsk /r C:Step 5: This will display a message "Chkdsk cannot be run because the volume is in use by another process. Do you want to schedule this volume to be checked the next time the system restarts? (Y/N) ". Step 6: Enter
Y and press Enter.
![Fix - CHKDSK cannot continue in read-only mode [Resolved]](https://img.php.cn/upload/article/000/465/014/168171810599773.png?x-oss-process=image/resize,p_40)
Windows R key to open the "Run" command box.
Step 2: Entercmd and press the Ctrl Shift Enter key at the same time.
Step 3: Continue to accept the on-screen UAC prompt by clicking Yes.
Step 4: Typediskpart and press Enter.
![Fix - CHKDSK cannot continue in read-only mode [Resolved]](https://img.php.cn/upload/article/000/465/014/168171810599978.png?x-oss-process=image/resize,p_40)
步骤 5:现在它将进入DISKPART模式。
第6步:如下所示,一一执行下面给出的这些行。
列出磁盘
选择磁盘 1
注意– 您可以将磁盘 1 替换为命令提示符上显示的数字。
列表分区
选择分区 1
注意 – 您需要将分区 1 替换为命令提示符上显示的数字。
属性磁盘清除只读
![Fix - CHKDSK cannot continue in read-only mode [Resolved]](https://img.php.cn/upload/article/000/465/014/168171810592064.png?x-oss-process=image/resize,p_40)
第 7 步:现在您可以关闭命令提示符窗口并尝试在您的系统上运行 chkdsk,看看这是否有效。
修复 4 – 检查所有进程和应用程序是否已关闭
如果任何系统或数据文件被应用程序或进程占用,那么它将中断 chkdsk 操作并抛出上述错误消息。因此,在尝试检查系统上的磁盘之前,最好确保使用任务管理器关闭所有在后台运行的进程和应用程序。
第1 步:同时按下Ctrl + Shift + Esc键,打开任务管理器。
第 2 步:单击“进程”选项卡并确保没有列出任何应用程序。
第 3 步:如果列出了任何应用程序,请右键单击它们,然后从上下文菜单中选择结束任务,如下所示。
注意– 对所有应用程序执行此操作以结束它。
![Fix - CHKDSK cannot continue in read-only mode [Resolved]](https://img.php.cn/upload/article/000/465/014/168171810524805.png?x-oss-process=image/resize,p_40)
第4步:完成后,关闭任务管理器窗口,您可以继续进行chkdsk操作。
修复 5 – 在您的系统上执行 SFC 扫描
系统上损坏的文件可能会在系统中产生问题,例如本文中提到的问题。因此,替换任何损坏的文件可以解决系统中存在的大部分问题。因此,为了找到损坏的系统文件,您需要运行系统文件检查器扫描,这在以下步骤中进行了说明。
步骤 1:同时按Win+R键并键入cmd,然后同时按Ctrl + Shift + Enter键。
第 2 步:然后在 UAC 提示上单击“是”以继续。
第 3 步:现在输入sfc /scannow并按Enter键。
![Fix - CHKDSK cannot continue in read-only mode [Resolved]](https://img.php.cn/upload/article/000/465/014/168171810613107.png?x-oss-process=image/resize,p_40)
第 4 步:这将开始扫描系统中存在的所有损坏文件。
第5步:扫描完成后,如果发现有损坏的文件,请更换。
步骤6:替换损坏的文件后,关闭命令提示符窗口。
第 7 步:现在尝试运行 chkdsk 操作,看看它是否有效!
The above is the detailed content of Fix - CHKDSK cannot continue in read-only mode [Resolved]. For more information, please follow other related articles on the PHP Chinese website!

 修复:Windows 11 激活错误 0xc004f213Apr 13, 2023 pm 05:40 PM
激活 Windows 11 操作系统的过程变得非常简单。还有一种情况是密钥已预先编程到 BIOS 中,您不需要输入任何信息。但是,用户报告收到 Windows 11 激活错误 0xc004f213 消息。许可证密钥有助于确认您的操作系统副本是正版的,并且它没有安装在超过 Microsoft 软件许可条款允许的设备上。跟随我们将向您展示如何修复 Windows 11 激活错误 0xc004f213,就在我们看到为什么在您获得新的笔记本电脑/计算机后立即激活您的 Windows 副本很重要之后。跟上
 Windows 10/11 上的病毒和威胁防护引擎不可用问题Apr 13, 2023 pm 02:01 PM
Windows Defender是一种保护系统免受病毒攻击的功能。尝试安装最新的安全更新时,一些用户收到一条错误消息,指出“病毒和威胁防护引擎不可用”。此错误主要是由于系统文件损坏,系统上的更新过时或Windows更新中的某些问题等。可以通过安装最新更新、重置 Windows 安全中心应用程序、调整注册表编辑器项等来解决。在本文中,我们提供了一些解决方案,可帮助您在Windows计算机上解决此问题。方法 1 – 运行 Windows 更新疑难解答步骤 1 –一起使用Windows + I键打开窗
 修复 Windows 11 中 Sxstrace.exe 运行时错误的 5 种方法Apr 13, 2023 pm 04:13 PM
Windows 用户有时会发现启动程序很困难,在这种情况下可能会收到一条错误消息,要求使用命令行 sxstrace.exe 工具了解更多详细信息。sxstrace.exe 由 Microsoft 于 2006 年 11 月首次为 Windows 引入,从那时起,它一直是 Windows 不可或缺的一部分。什么是sxstrace exe?sxstrace.exe 是 Windows 中的可执行应用程序文件。通常,这些类型的文件包含许多指令,这些指令在打开文件时由您的计算机执行。如果您一直在寻找解决
 如何在 Windows 11 / 10 的文件资源管理器中仅搜索和获取视频文件Apr 13, 2023 pm 04:55 PM
一些用户浏览每个文件夹来搜索电影,这很忙,但现在好消息是您可以只搜索视频文件,它会在 Windows 系统的文件资源管理器的搜索结果中列出它们。您不仅可以搜索视频文件,还可以搜索带有文件名或文件格式的视频文件。如果你也在考虑怎么做,别担心!我们在本文中通过简短的步骤对其进行解释,以便用户可以轻松地仅检索视频文件。如何在 Windows 11 文件资源管理器中仅搜索和获取视频文件用户可以通过 3 种方式在 Windows 系统上搜索视频文件。用户可以仅搜索视频文件,该视频文件检索所有类型为视频或使
 如何修复您尝试安装的应用不是 Windows 上经过 Microsoft 验证的应用Apr 13, 2023 pm 05:52 PM
Microsoft Windows 10 和 11 可能配置为仅允许在设备上安装某些类型的应用程序。该限制可能是有意的,例如,当限制可以安装在设备上的内容的策略到位时,但有时也是无意的。以下指南提供了易于遵循的分步说明,以解决意外出现的错误消息。尝试安装某些类型的应用程序的 Windows 用户可能会收到错误消息“您尝试安装的应用程序不是 Microsoft 验证的应用程序”。该对话框几乎没有提供有关安装被阻止原因的信息。它指出“从商店安装应用程序有助于保护您的 PC 并使其平稳运行”,并链接到
 联系人未同步到 Apple Watch?怎么修Apr 13, 2023 pm 02:04 PM
Apple Watch 让您可以轻松地直接从手腕上给某人打电话和发送消息,但如果您的手表上缺少联系人,您可能会遇到多个问题。识别出您是从谁那里接到电话或消息可能会很烦人,因此,您可能无法使用 Siri 给手表上不可用的联系人打电话或发短信。如果你的 iPhone 上有一堆联系人在你的 Apple Watch 上丢失了,下面的帖子应该可以帮助你解决这个问题,这样你就可以帮助你找回丢失的联系人。 为什么联系人没有同步到我的 Apple Watch?如果您的 Apple Watch 显示的联系人与您保
 如何修复 Microsoft Office 365 卡在准备就绪上Apr 13, 2023 pm 06:28 PM
许多用户在他们的 Windows PC 上安装Microsoft Office 365时报告了一个问题。问题是安装程序卡在“我们正在准备就绪” 消息上。看到此消息后,用户将无法再次安装 Office 365。当以前的 Office 365 文件未正确安装或损坏时,可能会发生这种情况。有时兼容性问题或安装过程中缺少某些权限可能会导致此错误。在 Office 365 安装过程中,您是否还停留在“准备就绪”错误?然后,继续阅读这篇文章。在这里,我们讨论了一些故障排除策略,可以帮助您解决计算机上的此错误
![如何修复 Windows 11 代理错误 [快速修复]](https://img.php.cn/upload/article/000/887/227/168138349363585.jpg) 如何修复 Windows 11 代理错误 [快速修复]Apr 13, 2023 pm 06:58 PM
如何修复 Windows 11 代理错误 [快速修复]Apr 13, 2023 pm 06:58 PM无论您运行的是 Windows 11 还是其他操作系统,收到代理错误的烦人体验都是相同的。通常,代理错误消息表明您无权进入特定网站或网页。此外,它表明在短时间内有多个请求来源。例如,如果您尝试多次登录您的帐户,服务器将阻止该请求并阻碍连接。这些问题通常是服务器端问题。但是,在某些情况下,错误源会追溯到 Windows 11 中的客户端,例如某些系统配置错误。因此,要修复 Windows 11 代理错误,您需要应用一些更改或重置您的设置。因此,我们为您提供了解决此问题的有用说明。是什么导致代理错误

Hot AI Tools

Undresser.AI Undress
AI-powered app for creating realistic nude photos

AI Clothes Remover
Online AI tool for removing clothes from photos.

Undress AI Tool
Undress images for free

Clothoff.io
AI clothes remover

AI Hentai Generator
Generate AI Hentai for free.

Hot Article
Hot Tools

mPDF
mPDF is a PHP library that can generate PDF files from UTF-8 encoded HTML. The original author, Ian Back, wrote mPDF to output PDF files "on the fly" from his website and handle different languages. It is slower than original scripts like HTML2FPDF and produces larger files when using Unicode fonts, but supports CSS styles etc. and has a lot of enhancements. Supports almost all languages, including RTL (Arabic and Hebrew) and CJK (Chinese, Japanese and Korean). Supports nested block-level elements (such as P, DIV),

Safe Exam Browser
Safe Exam Browser is a secure browser environment for taking online exams securely. This software turns any computer into a secure workstation. It controls access to any utility and prevents students from using unauthorized resources.

MinGW - Minimalist GNU for Windows
This project is in the process of being migrated to osdn.net/projects/mingw, you can continue to follow us there. MinGW: A native Windows port of the GNU Compiler Collection (GCC), freely distributable import libraries and header files for building native Windows applications; includes extensions to the MSVC runtime to support C99 functionality. All MinGW software can run on 64-bit Windows platforms.

Notepad++7.3.1
Easy-to-use and free code editor

SublimeText3 Linux new version
SublimeText3 Linux latest version

