Many Windows users have reported seeing BSOD errors with the following error message on their systems:
您的 PC 遇到问题,需要重新启动。我们只是在收集一些错误信息,然后我们会为您重新启动。如果您想了解更多,可以稍后在线搜索此错误:bddci.sys
In this article, let’s see how you can easily fix this issue in Windows 11.
Steps to fix bddci.sys BSOD error in Windows 11:
1. Press and hold the Windows and R keys simultaneously to open Run terminal.
2. Enter ms-settings:recovery and press OK.

3. In the window that opens, find the Recovery Options section. Next to Advanced startup, click the Restart Now button as shown below.

4. You will see a blue screen saying Please wait.
5. In the window that appears, click the Troubleshooting tile.

6. Now, click on the Advanced Options tile.

7. Click the Command Prompt tile sticker.

#8. In the command prompt window that opens, enter the following commands in sequence. Make sure to press Enter after each command.
bcdedit /enum
9. Now, check where Windows is installed. Under the Windows Boot Loader section, check the value corresponding to the device option.

10. After completion, execute the following commands in sequence.
C:cd C:\Windows\System32\driversdel bddci.sys

10. After deletion, you can use the following command to verify whether the file was successfully deleted.
dir bd*.*
If you see the message File Not found, this confirms that the file was successfully deleted.
The above is the detailed content of How to Easily Fix bddci.sys BSOD Error in Windows 11. For more information, please follow other related articles on the PHP Chinese website!
 修复:Windows 11 激活错误 0xc004f213Apr 13, 2023 pm 05:40 PM
激活 Windows 11 操作系统的过程变得非常简单。还有一种情况是密钥已预先编程到 BIOS 中,您不需要输入任何信息。但是,用户报告收到 Windows 11 激活错误 0xc004f213 消息。许可证密钥有助于确认您的操作系统副本是正版的,并且它没有安装在超过 Microsoft 软件许可条款允许的设备上。跟随我们将向您展示如何修复 Windows 11 激活错误 0xc004f213,就在我们看到为什么在您获得新的笔记本电脑/计算机后立即激活您的 Windows 副本很重要之后。跟上
 无法在 Windows 11 中安装 RSAT?应用这些修复Apr 15, 2023 pm 03:07 PM
RSAT或远程服务器管理工具是一个组件,允许管理员远程管理运行相同操作系统的其他计算机。但是,如果事情不正确,您可能无法在Windows11中安装RSAT。您在这里遇到了一堆错误,例如,RSAT安装程序遇到错误0x8024001d。不管是什么原因,有很多方法在每种情况下都证明是有效的。因此,如果您还无法在Windows11中安装RSAT,请执行下一节中列出的修复程序。如果我无法在Windows11中安装RSAT,我该怎么办?笔记请记住,RSAT仅适用于Windows
 如何在 Windows 11 中清除桌面背景最近的图像历史记录Apr 14, 2023 pm 01:37 PM
<p>Windows 11 改进了系统中的个性化功能,这使用户可以查看之前所做的桌面背景更改的近期历史记录。当您进入windows系统设置应用程序中的个性化部分时,您可以看到各种选项,更改背景壁纸也是其中之一。但是现在可以看到您系统上设置的背景壁纸的最新历史。如果您不喜欢看到此内容并想清除或删除此最近的历史记录,请继续阅读这篇文章,它将帮助您详细了解如何使用注册表编辑器进行操作。</p><h2>如何使用注册表编辑
 5 个最好的免费 Windows 11 屏幕保护程序资源Apr 13, 2023 pm 05:07 PM
优雅的屏保通常是一种被低估的艺术形式。这是一种耻辱,因为当您不使用它时,它们可以将您的计算机变成一个漂亮的工作室。屏幕保护程序很容易混淆壁纸,但这是一个错误。有一些区别,但最突出的是屏幕保护程序的动画性质。该动画是壁纸中的明显遗漏,壁纸通常是静态艺术作品。是时候赋予屏保他们真正应得的价值了。本文将探索一些最优雅的免费 Windows 11 屏幕保护程序,并向您展示它们为何非常适合您的计算机。在下载屏幕保护程序之前你应该知道什么?您将在本文中看到推荐的许多 Windows 11 屏幕保护程序,并且
 Windows 11 重启和关闭简易键盘快捷键Apr 14, 2023 pm 01:10 PM
大多数用户可以通过使用键盘快捷键来节省使用系统的时间。这些快捷方式可用于打开运行命令框、打开文件资源管理器、激活设置程序、锁定屏幕等。有几种方法可以快速重启或关闭 Windows 操作系统。有时鼠标坏了,使用笔记本电脑上的触摸板可能会让使用快捷方式快速完成的任务感到不愉快。如果您想知道如何使用键盘快捷键关闭或重新启动计算机,本文将向您展示如何通过三种不同的方法进行操作。使用“开始”按钮上下文菜单重新启动和关闭键盘快捷键步骤 1:要打开任务栏上“开始”按钮的上下文菜单,请同时按下键盘上的Windo
![如何在 Windows 11 上反转颜色 [使用快捷方式]](https://img.php.cn/upload/article/000/887/227/168145458732944.png) 如何在 Windows 11 上反转颜色 [使用快捷方式]Apr 14, 2023 pm 02:43 PM
如何在 Windows 11 上反转颜色 [使用快捷方式]Apr 14, 2023 pm 02:43 PM使用 Windows 电脑时,可能需要反转电脑的颜色。这可能是由于个人偏好或显示驱动程序错误造成的。如果你想要反转 Windows 11 电脑的颜色,本文为你提供了在 Windows 电脑上反转颜色所需的所有必要步骤。在本文中反转图像上的颜色是什么意思?简单来说,反转图像的颜色意味着将图像的当前颜色翻转到色轮上的相反色调。你也可以说这意味着将图像的颜色更改为负片。例如,蓝色图像将反转为橙色,黑色变为白色,绿色变为洋红色等。如何在 Windows 11 上反转颜色?1. 使用微软画图按键 + ,输
 如何在 Windows 11/10 上修复 FFMPEG.DLL Not Found 错误Apr 14, 2023 pm 07:10 PM
最近,Windows用户报告遇到ffmpeg.dll文件丢失或未找到错误。基本上,此错误可能会在应用程序安装时、系统启动时或访问某些网站时引发。当系统文件损坏时,可能会出现ffmpeg.dll错误,从而使系统目录无法发现DLL文件。此错误还与MicrosoftTeams、Skype、Discord、适用于Windows的WhatsApp、Deezer等应用程序相关联。向用户显示的错误消息是:程序无法启动,因为您的计算机缺少ffmpeg.dll。尝试重新安装程序以解决此问题。如果
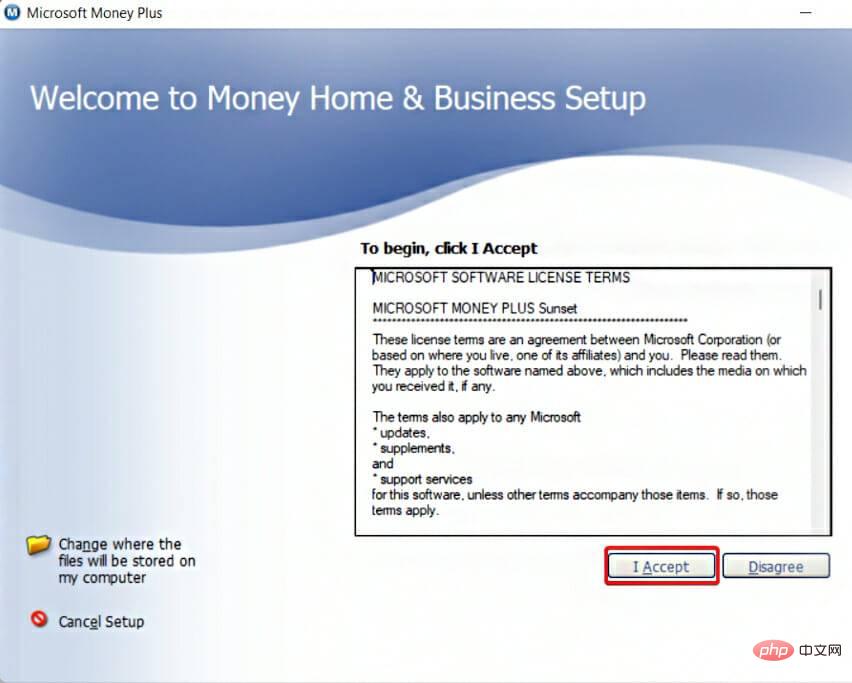 如何在 Windows 11 上下载 Microsoft Money SunsetApr 15, 2023 pm 12:34 PM
即使不再开发,MicrosoftMoneyPlusSunset仍然是Windows11上最受欢迎的财务软件之一。微软于2009年6月30日停止销售该程序,并于2011年1月限制对现有Money安装的在线服务的访问。MicrosoftMoneyPlusSunset是2010年发布的替代版本,使人们能够访问和编辑Money数据文件,但缺乏任何在线功能或支持。有两个版本:Deluxe和Home&Business。Money在2012年作为Wi

Hot AI Tools

Undresser.AI Undress
AI-powered app for creating realistic nude photos

AI Clothes Remover
Online AI tool for removing clothes from photos.

Undress AI Tool
Undress images for free

Clothoff.io
AI clothes remover

AI Hentai Generator
Generate AI Hentai for free.

Hot Article

Hot Tools

Atom editor mac version download
The most popular open source editor

DVWA
Damn Vulnerable Web App (DVWA) is a PHP/MySQL web application that is very vulnerable. Its main goals are to be an aid for security professionals to test their skills and tools in a legal environment, to help web developers better understand the process of securing web applications, and to help teachers/students teach/learn in a classroom environment Web application security. The goal of DVWA is to practice some of the most common web vulnerabilities through a simple and straightforward interface, with varying degrees of difficulty. Please note that this software

VSCode Windows 64-bit Download
A free and powerful IDE editor launched by Microsoft

SecLists
SecLists is the ultimate security tester's companion. It is a collection of various types of lists that are frequently used during security assessments, all in one place. SecLists helps make security testing more efficient and productive by conveniently providing all the lists a security tester might need. List types include usernames, passwords, URLs, fuzzing payloads, sensitive data patterns, web shells, and more. The tester can simply pull this repository onto a new test machine and he will have access to every type of list he needs.

SAP NetWeaver Server Adapter for Eclipse
Integrate Eclipse with SAP NetWeaver application server.


