Home >Common Problem >How to use Nearby Sharing on Windows 11
How to use Nearby Sharing on Windows 11
- WBOYWBOYWBOYWBOYWBOYWBOYWBOYWBOYWBOYWBOYWBOYWBOYWBforward
- 2023-04-14 21:34:272709browse
Using Nearby Sharing on Windows 11
To use this feature, both devices need to have Bluetooth and Nearby Sharing enabled. You can transfer files and links between Windows 10 and Windows 11 devices.
To enable Nearby Sharing on Windows 11, follow these steps:
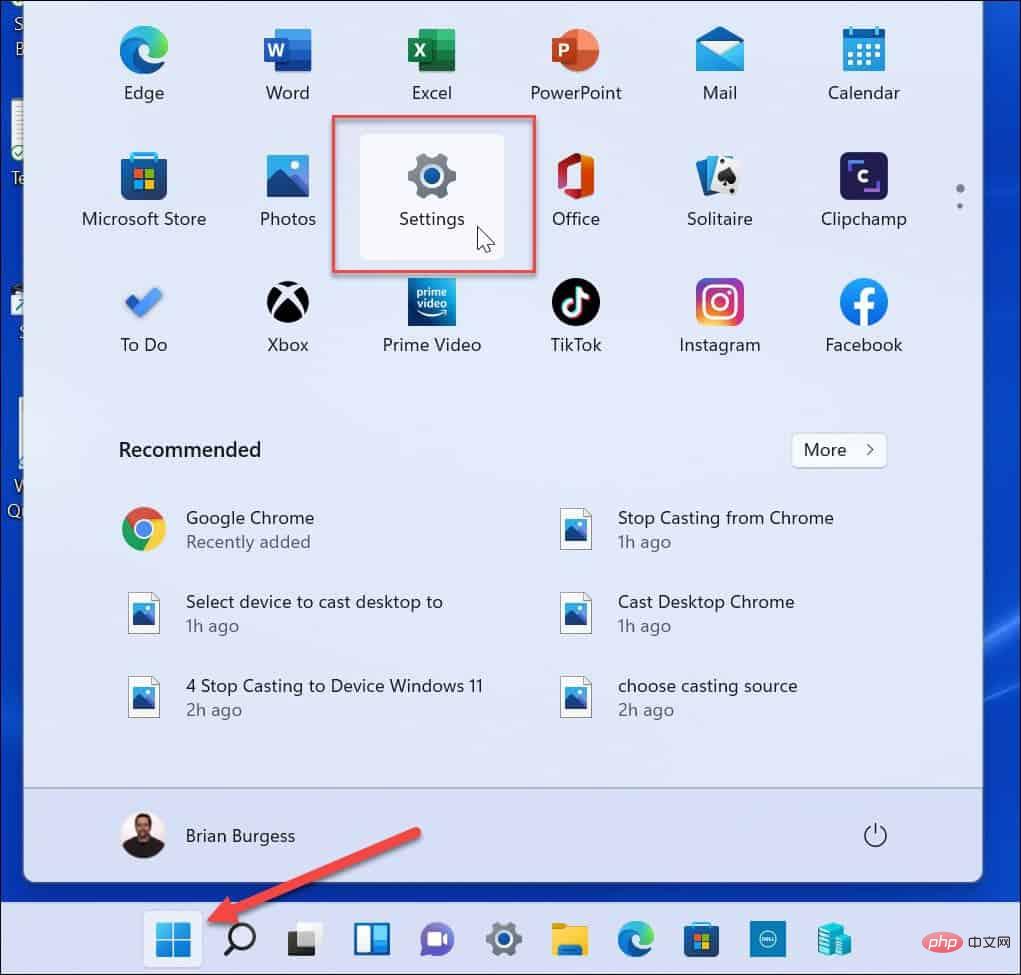
- Press the Start button or the Windows key to open Start Menu.
- In Start, press Settings.
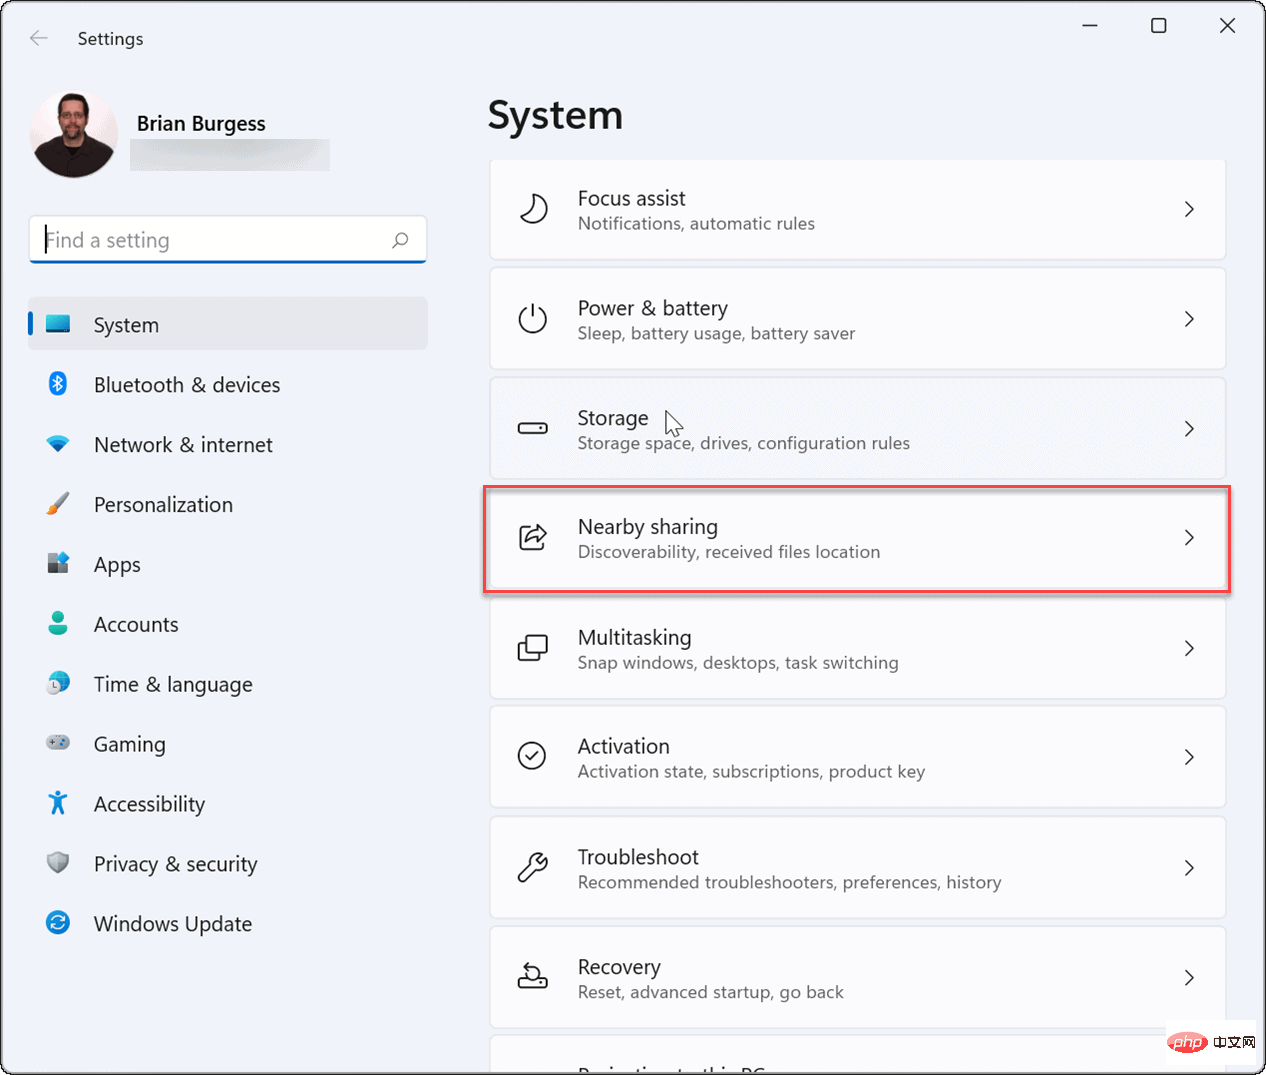
- In the Settings menu, click System on the left, then press the Share nearby.
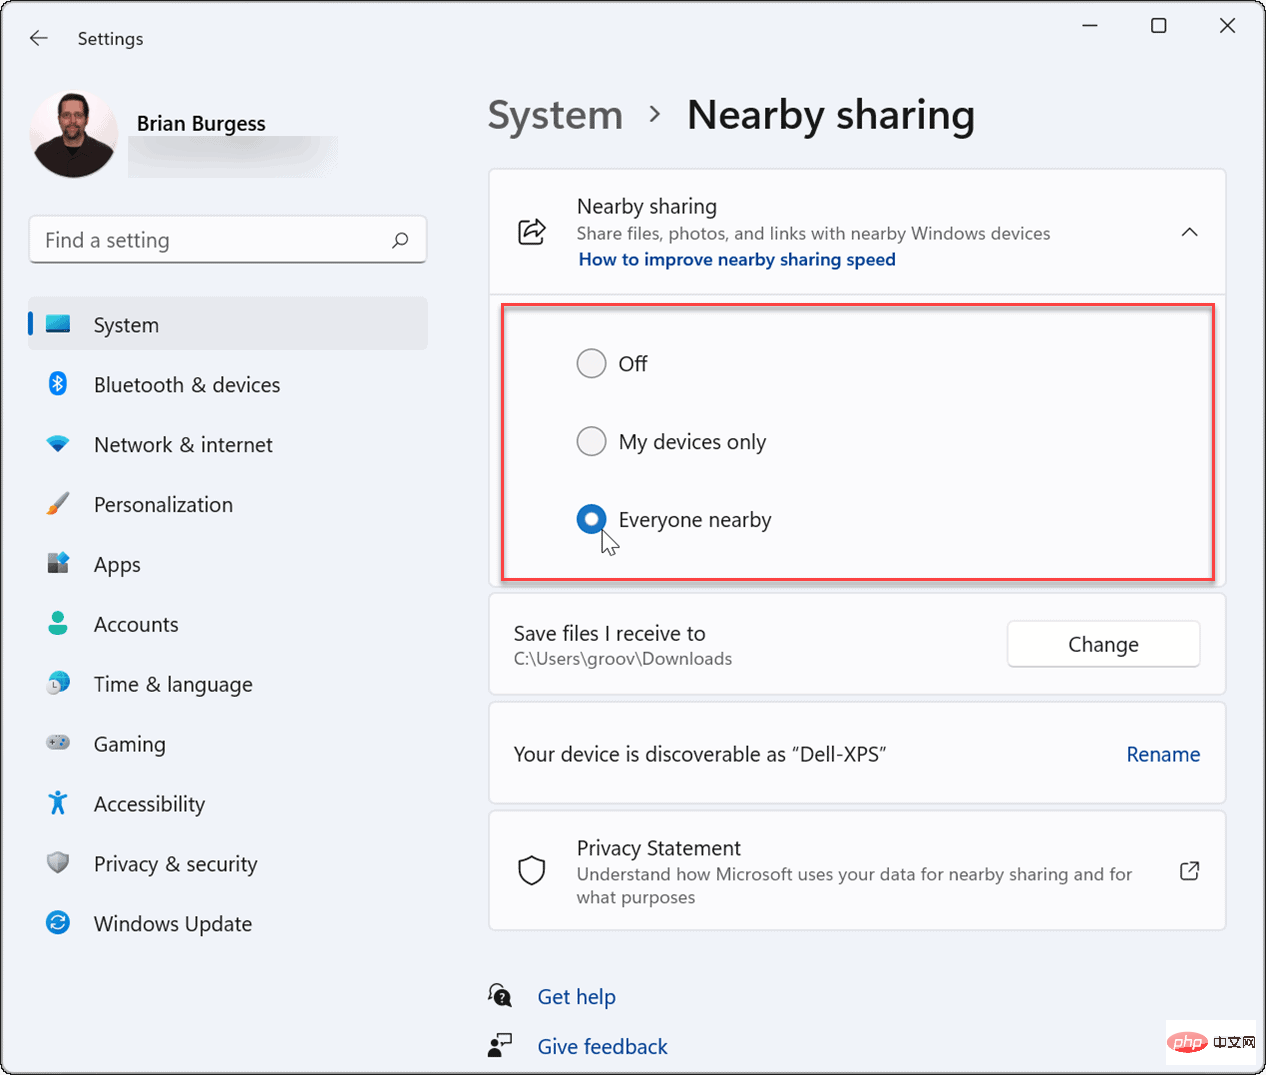
- Select the Nearby Sharing option you want to use. You have three options:
- My devices only: Allows file sharing between PCs configured with the same Microsoft account.
- Everyone Nearby: Provides easy file sharing with any nearby device.
- Off: Disable nearby sharing.
- ##After enabling nearby sharing, exit the "
- Settings"menu.
Menu .
To add Nearby Sharing to the Quick Settings menu:- Use the keyboard shortcut
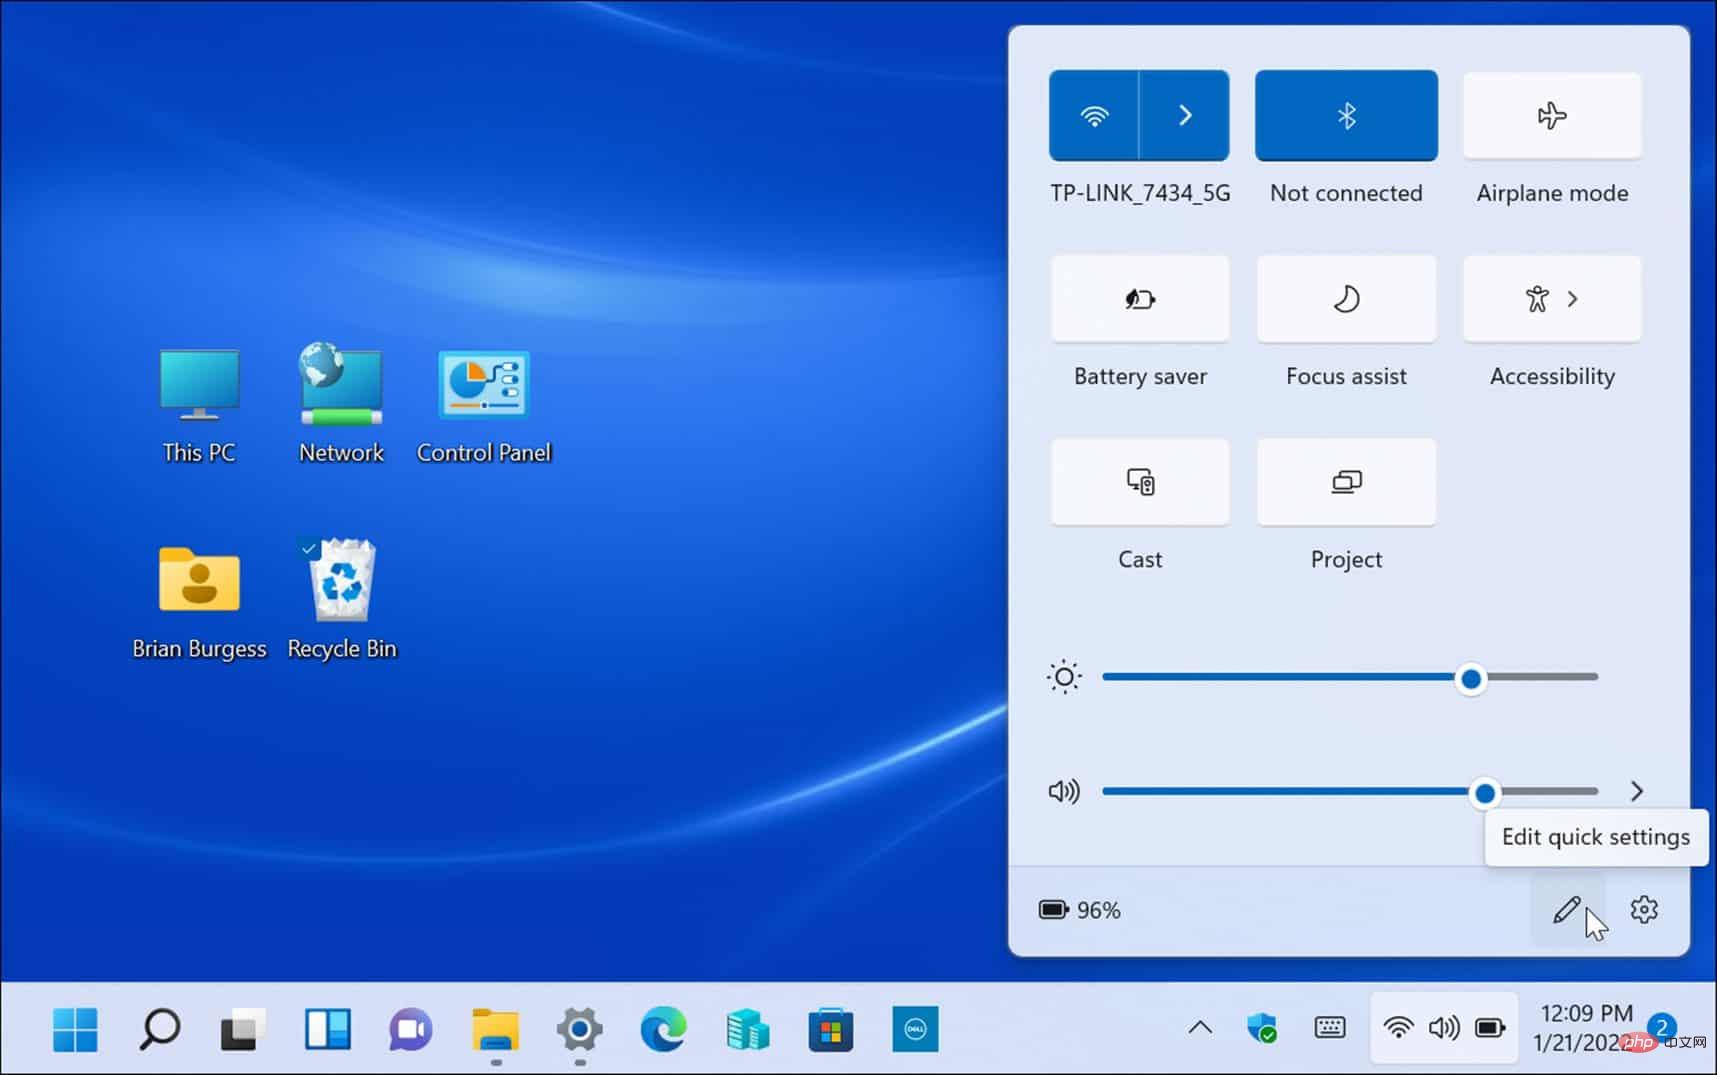
- Windows key AOpen Quick Settings.
- Next, click the
- Edit (pencil icon) button, click the Add button, Then select Nearby Sharing from the list.
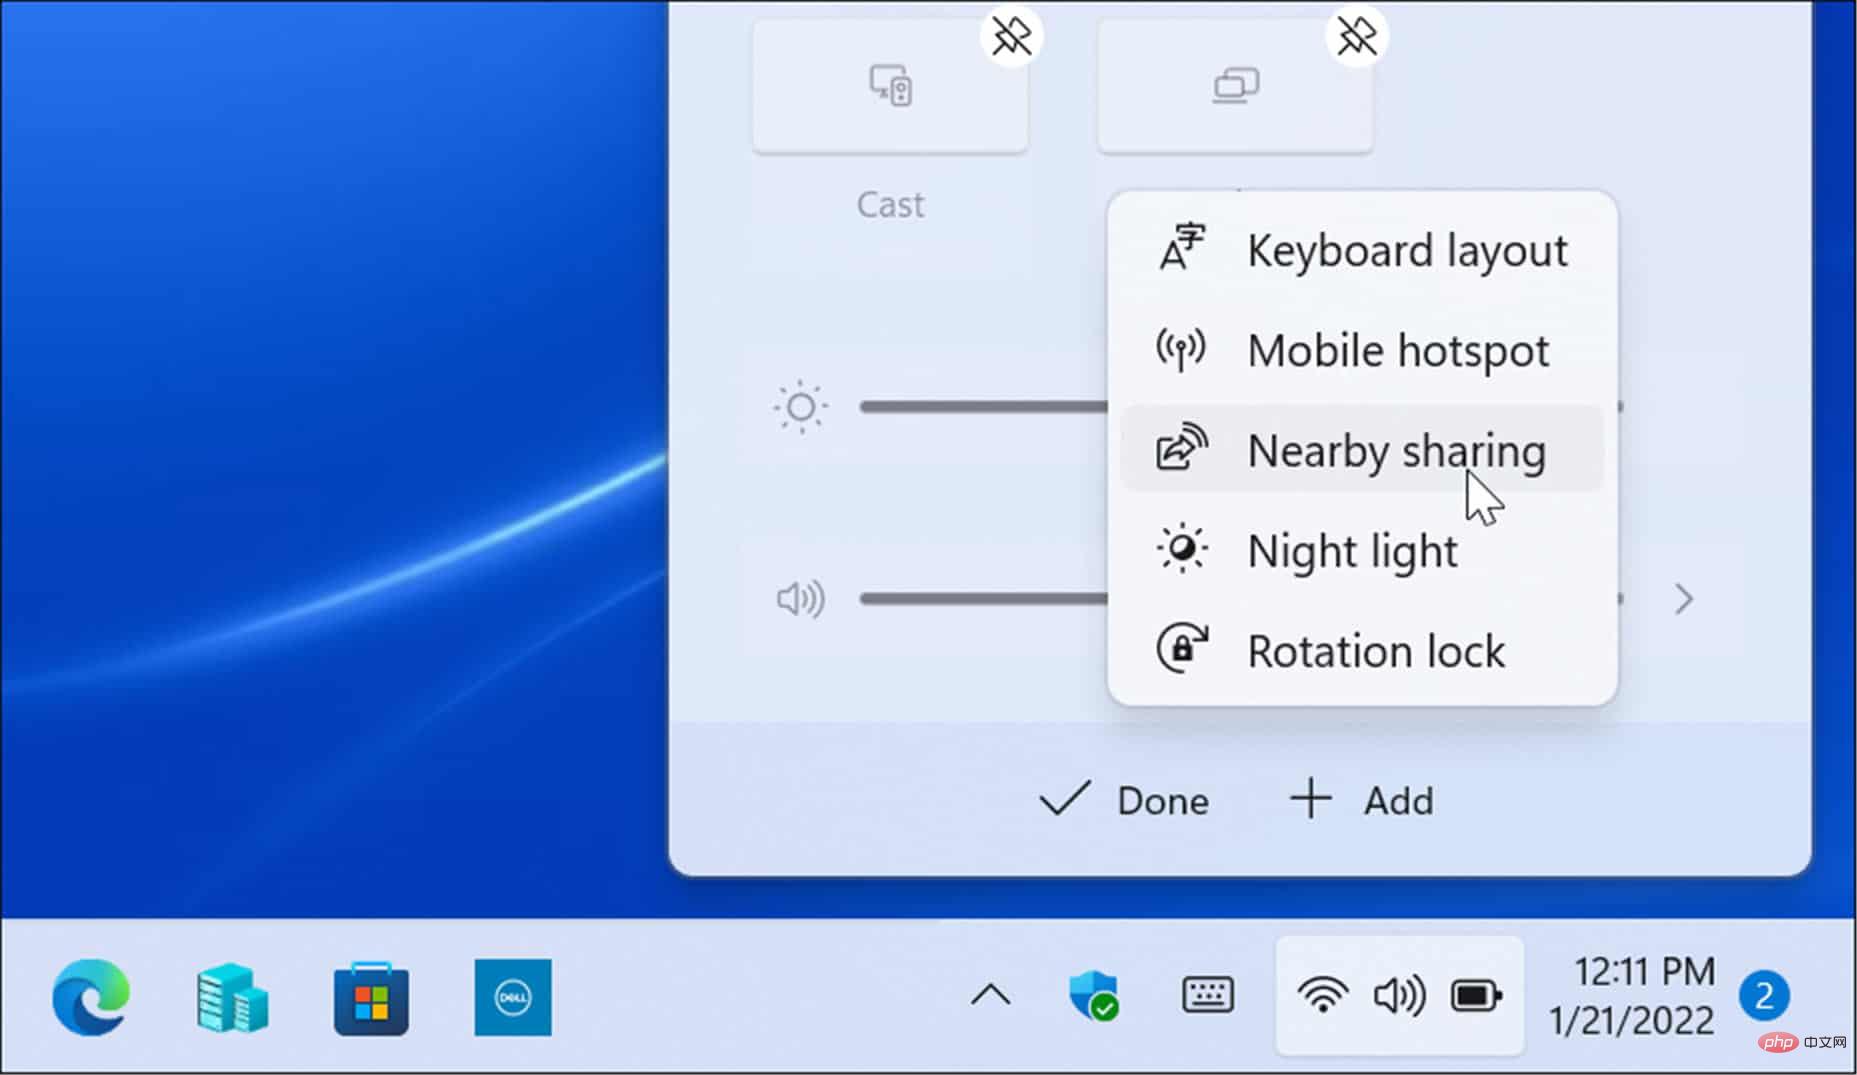
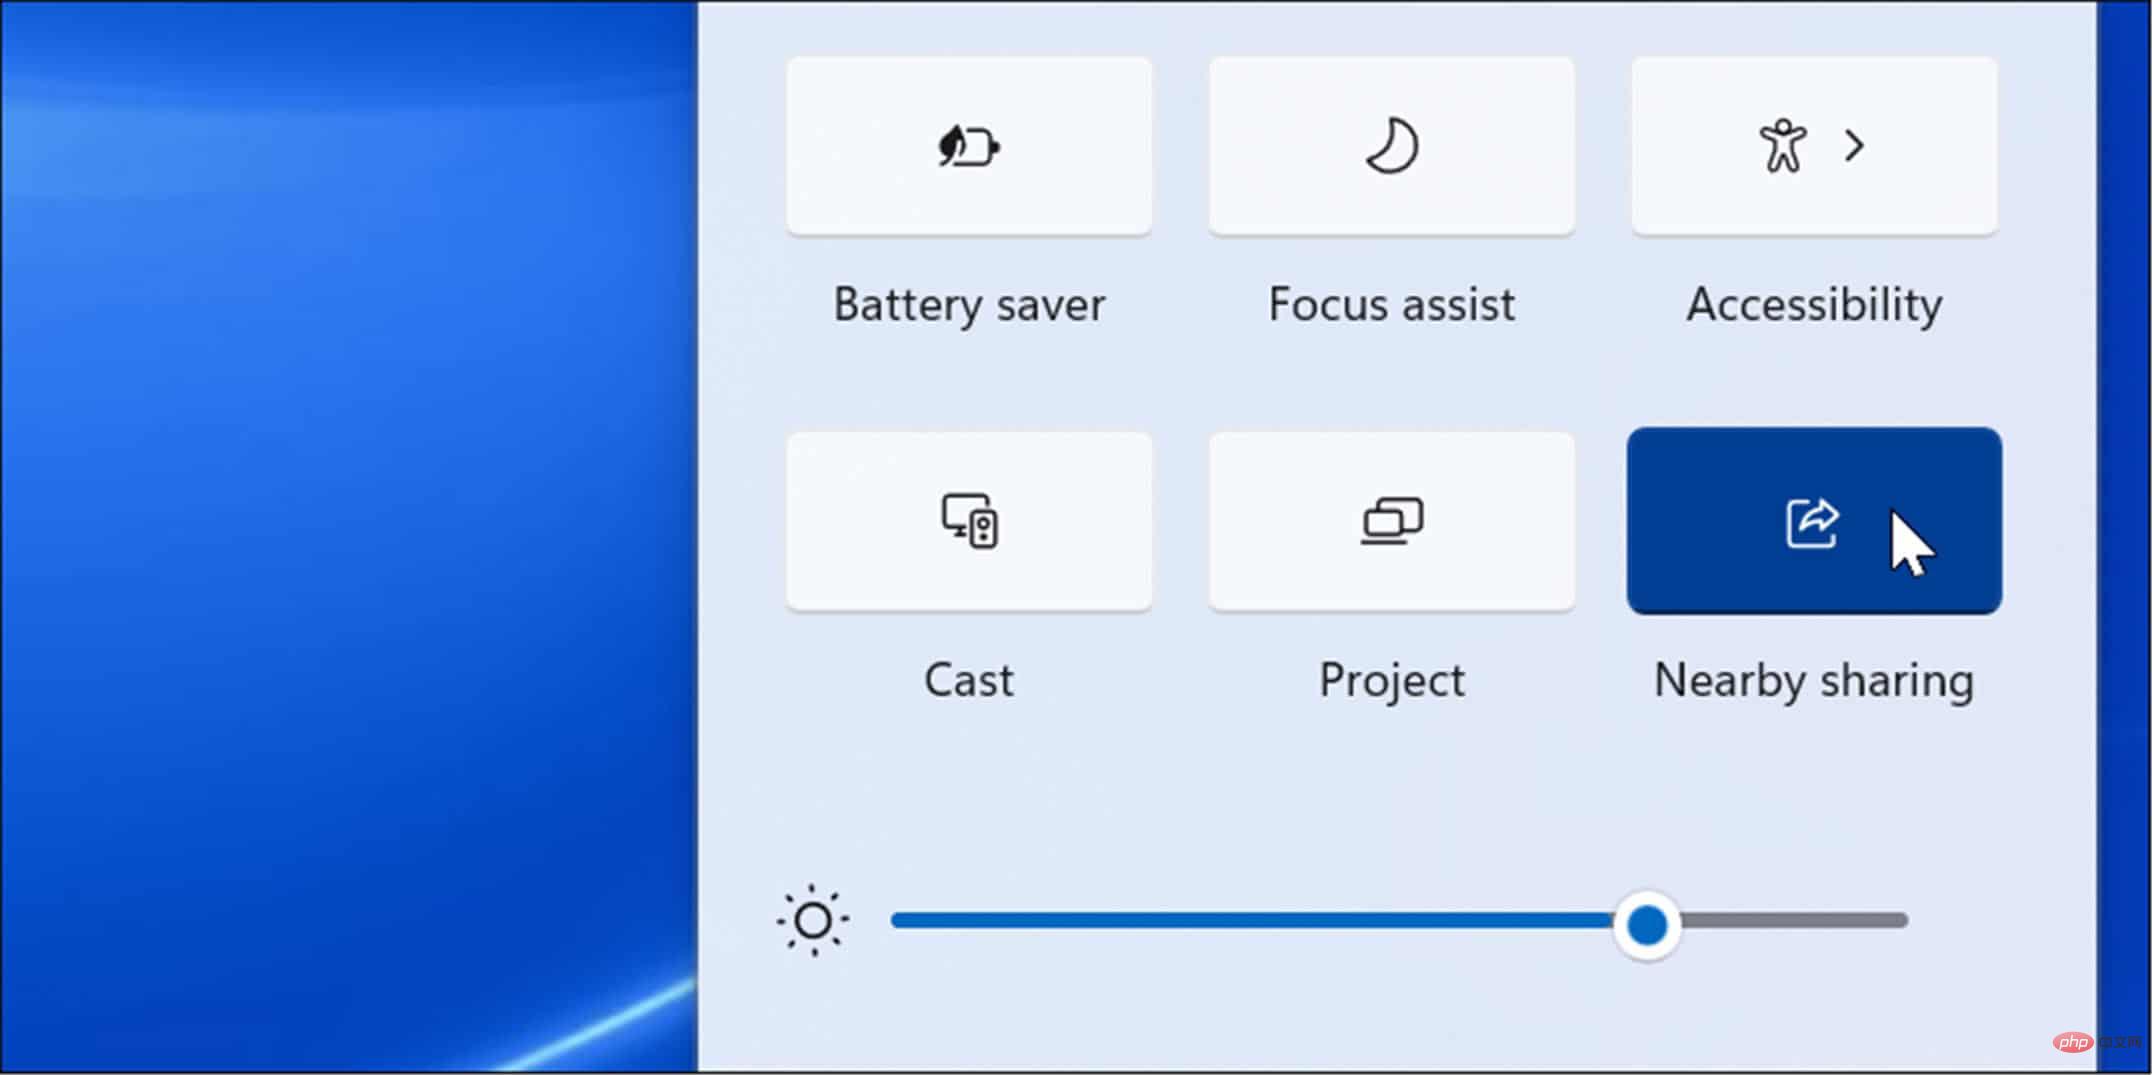
- The Nearby Sharing option will be added to Quick Settings, and you can then enable or disable the feature with a single click.
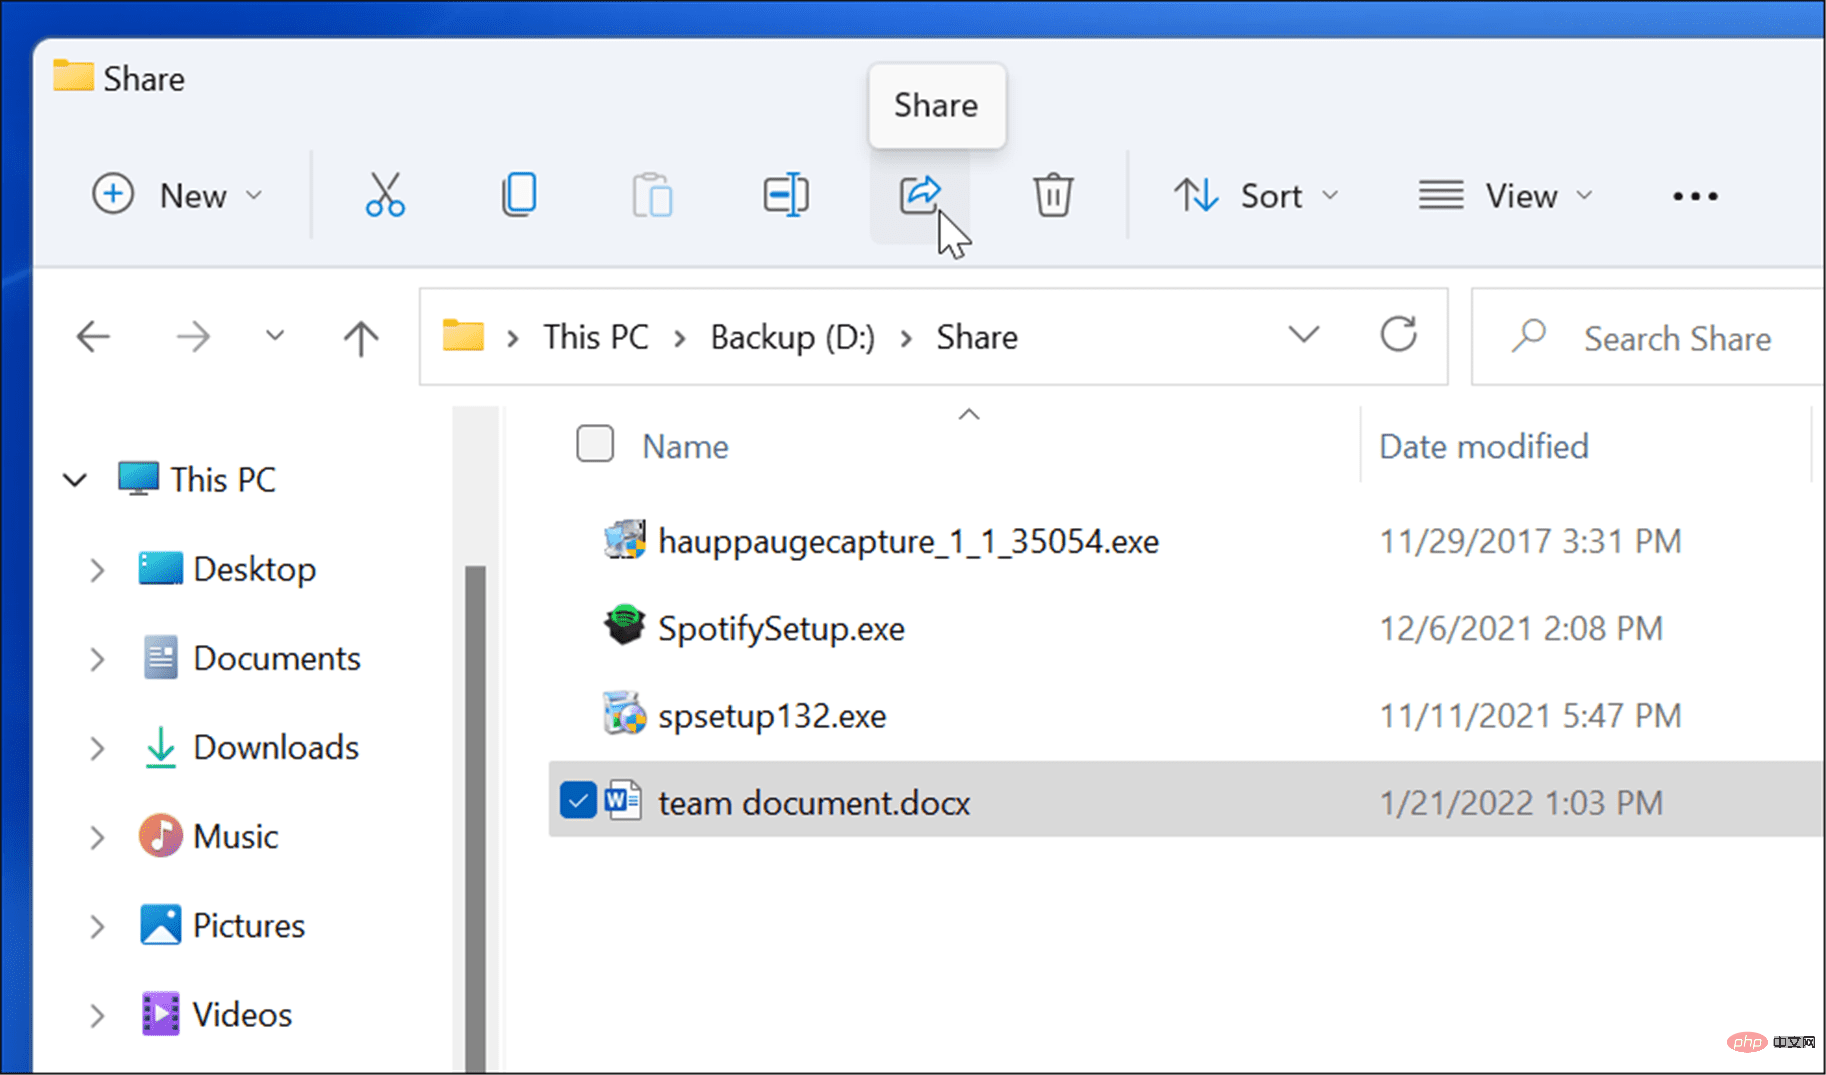
- Press the
- folder icon on the taskbar to open File Explorer. In
- File Explorer, find the file you want to share. Highlight the file and click the
- Share button on the command bar.
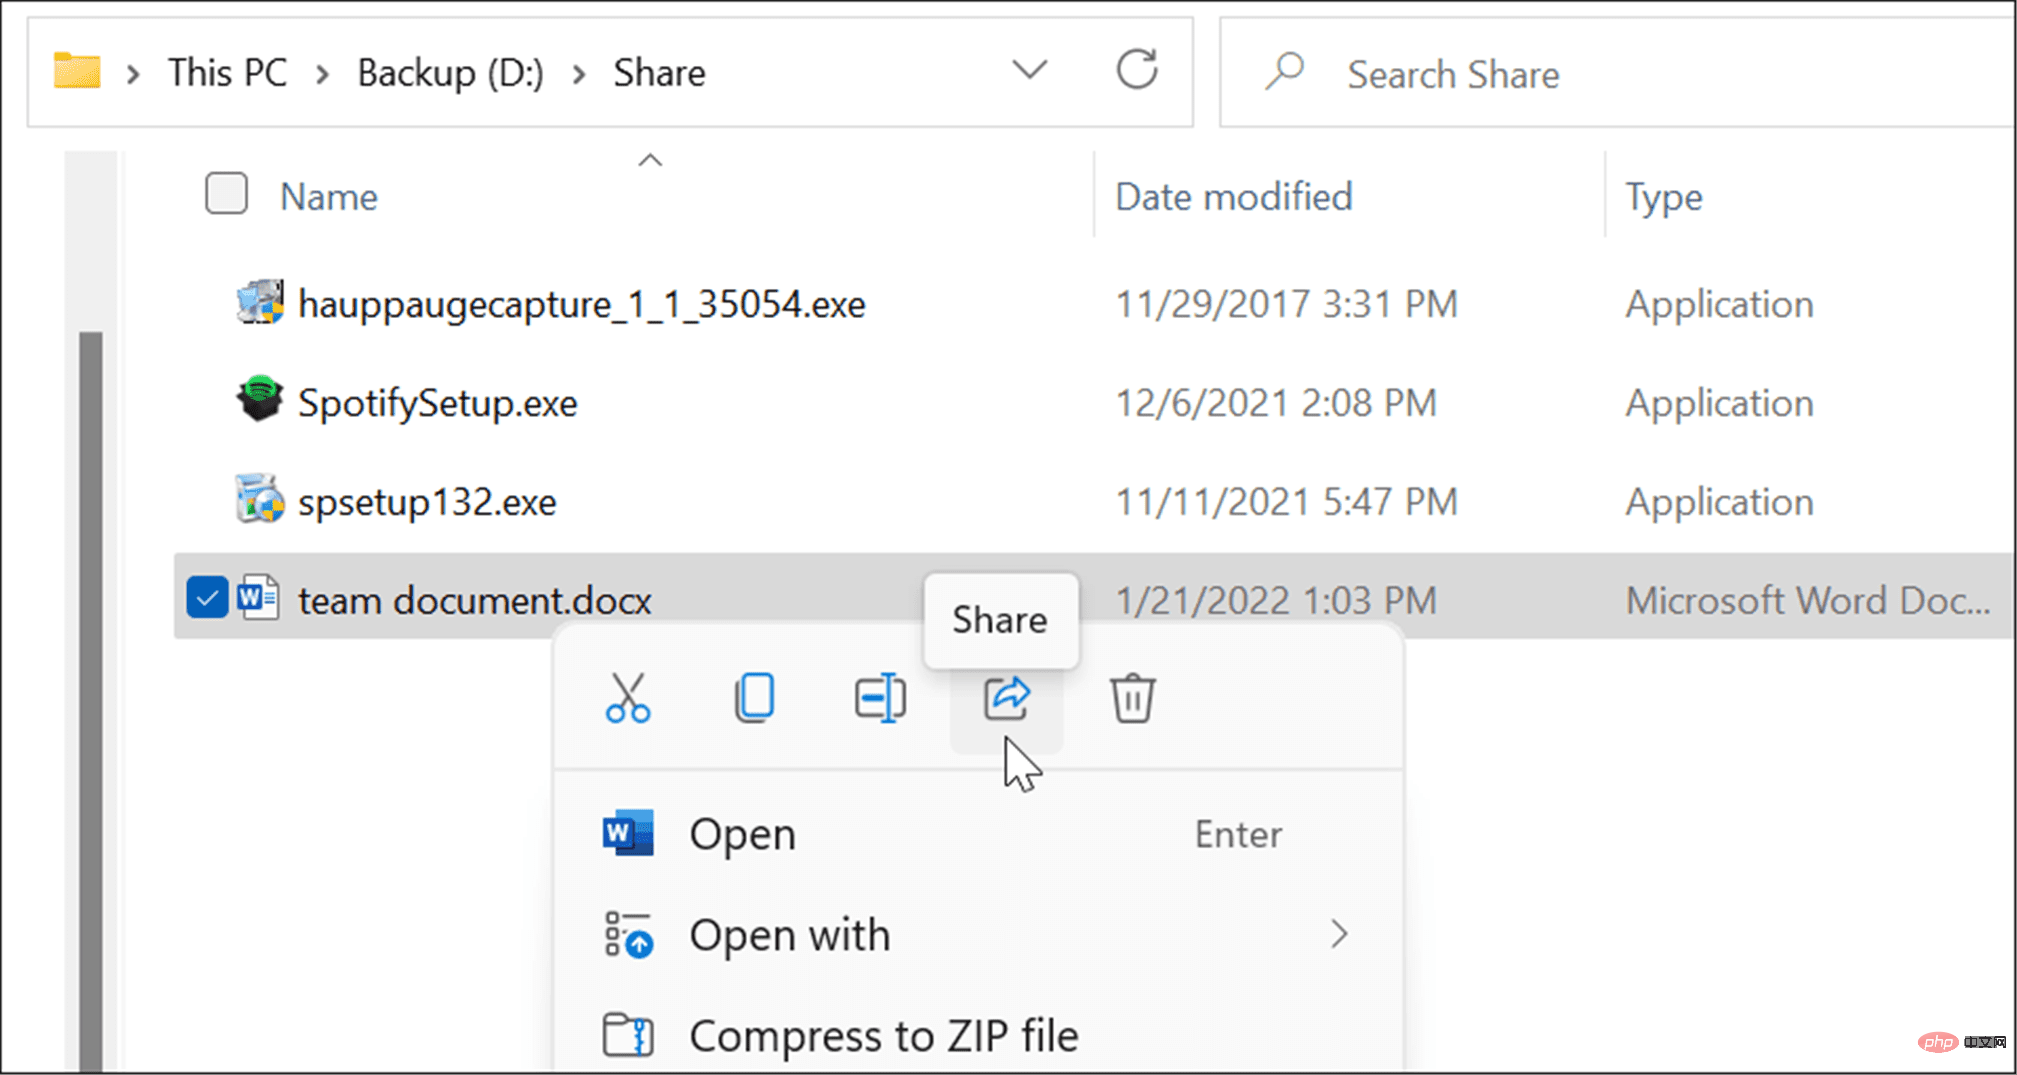
- Alternatively, you can right-click the file and select
- Share from the context menu.
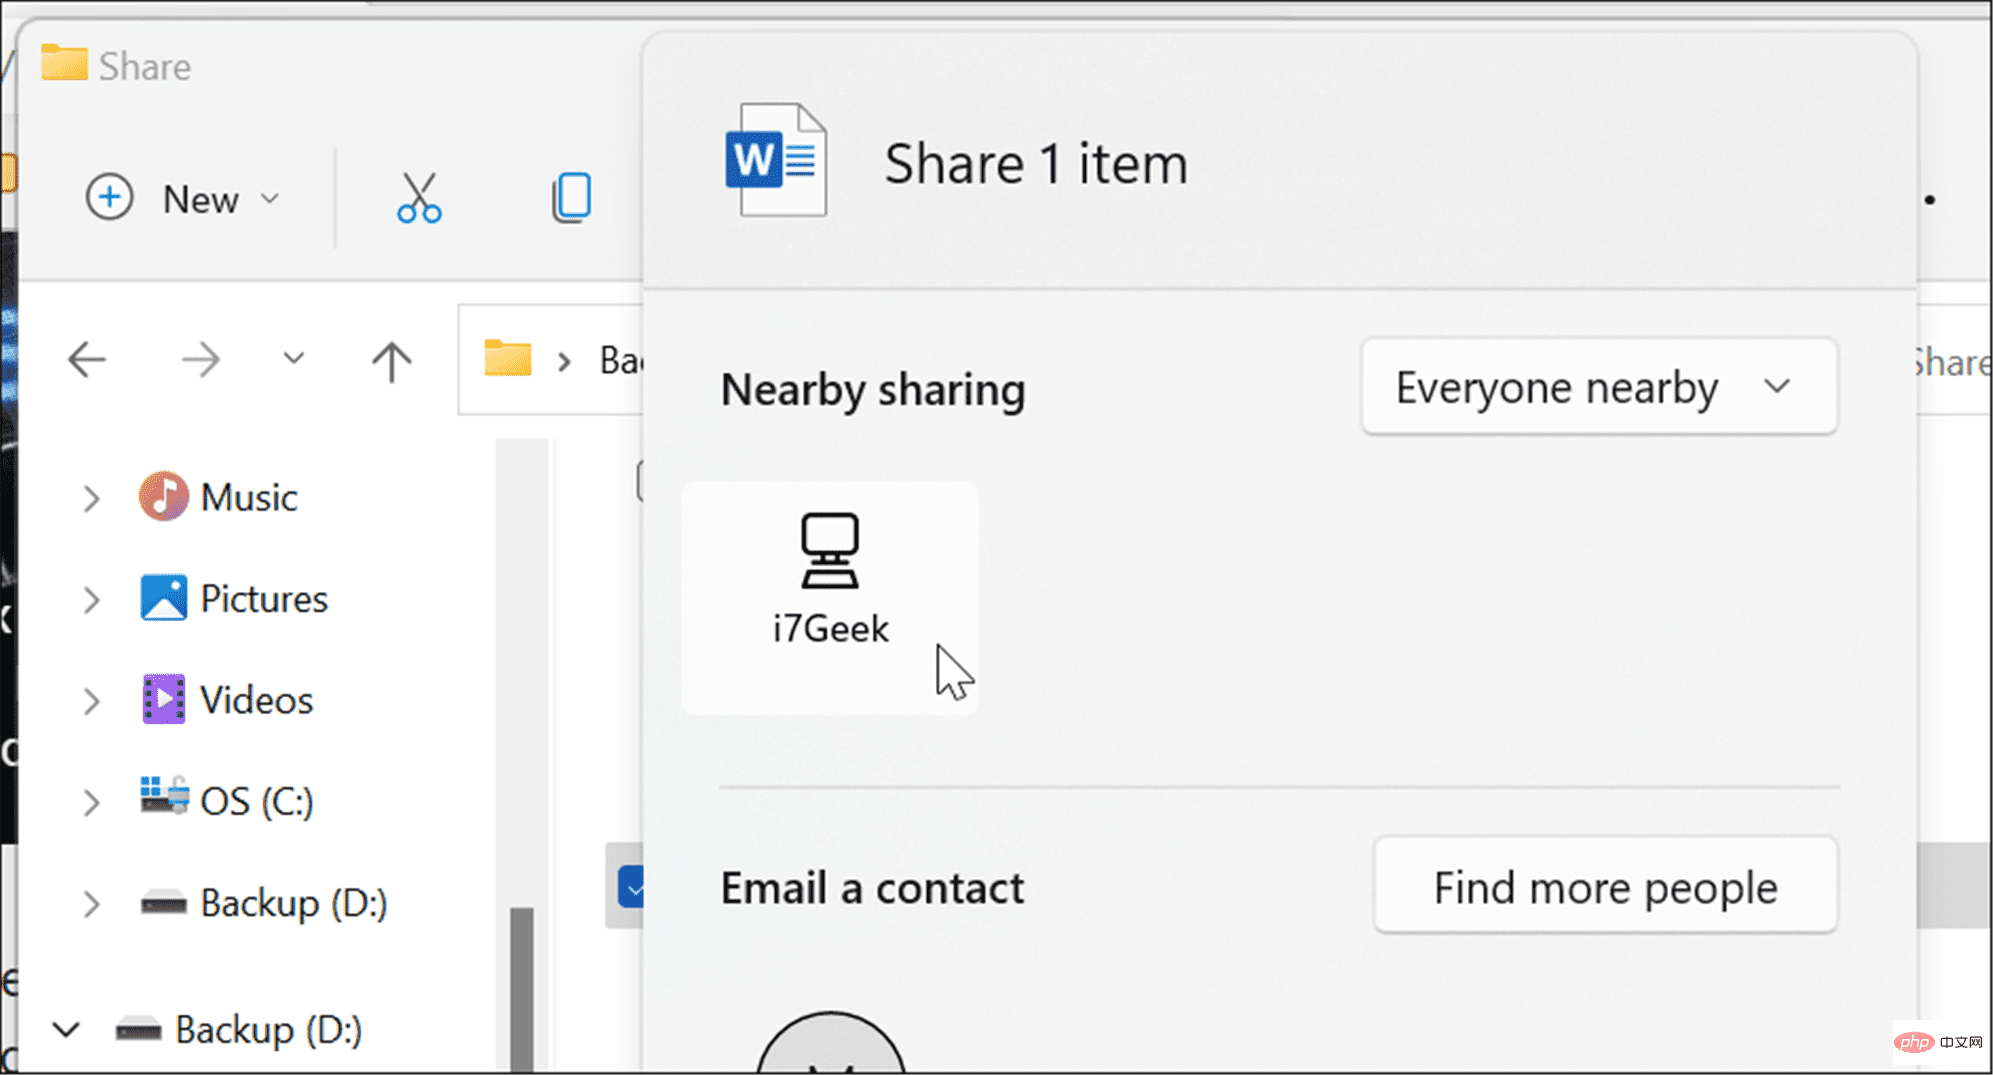
- Select the device you want to send the file to in the Nearby Sharing popup that appears. Both devices need to be nearby to work.
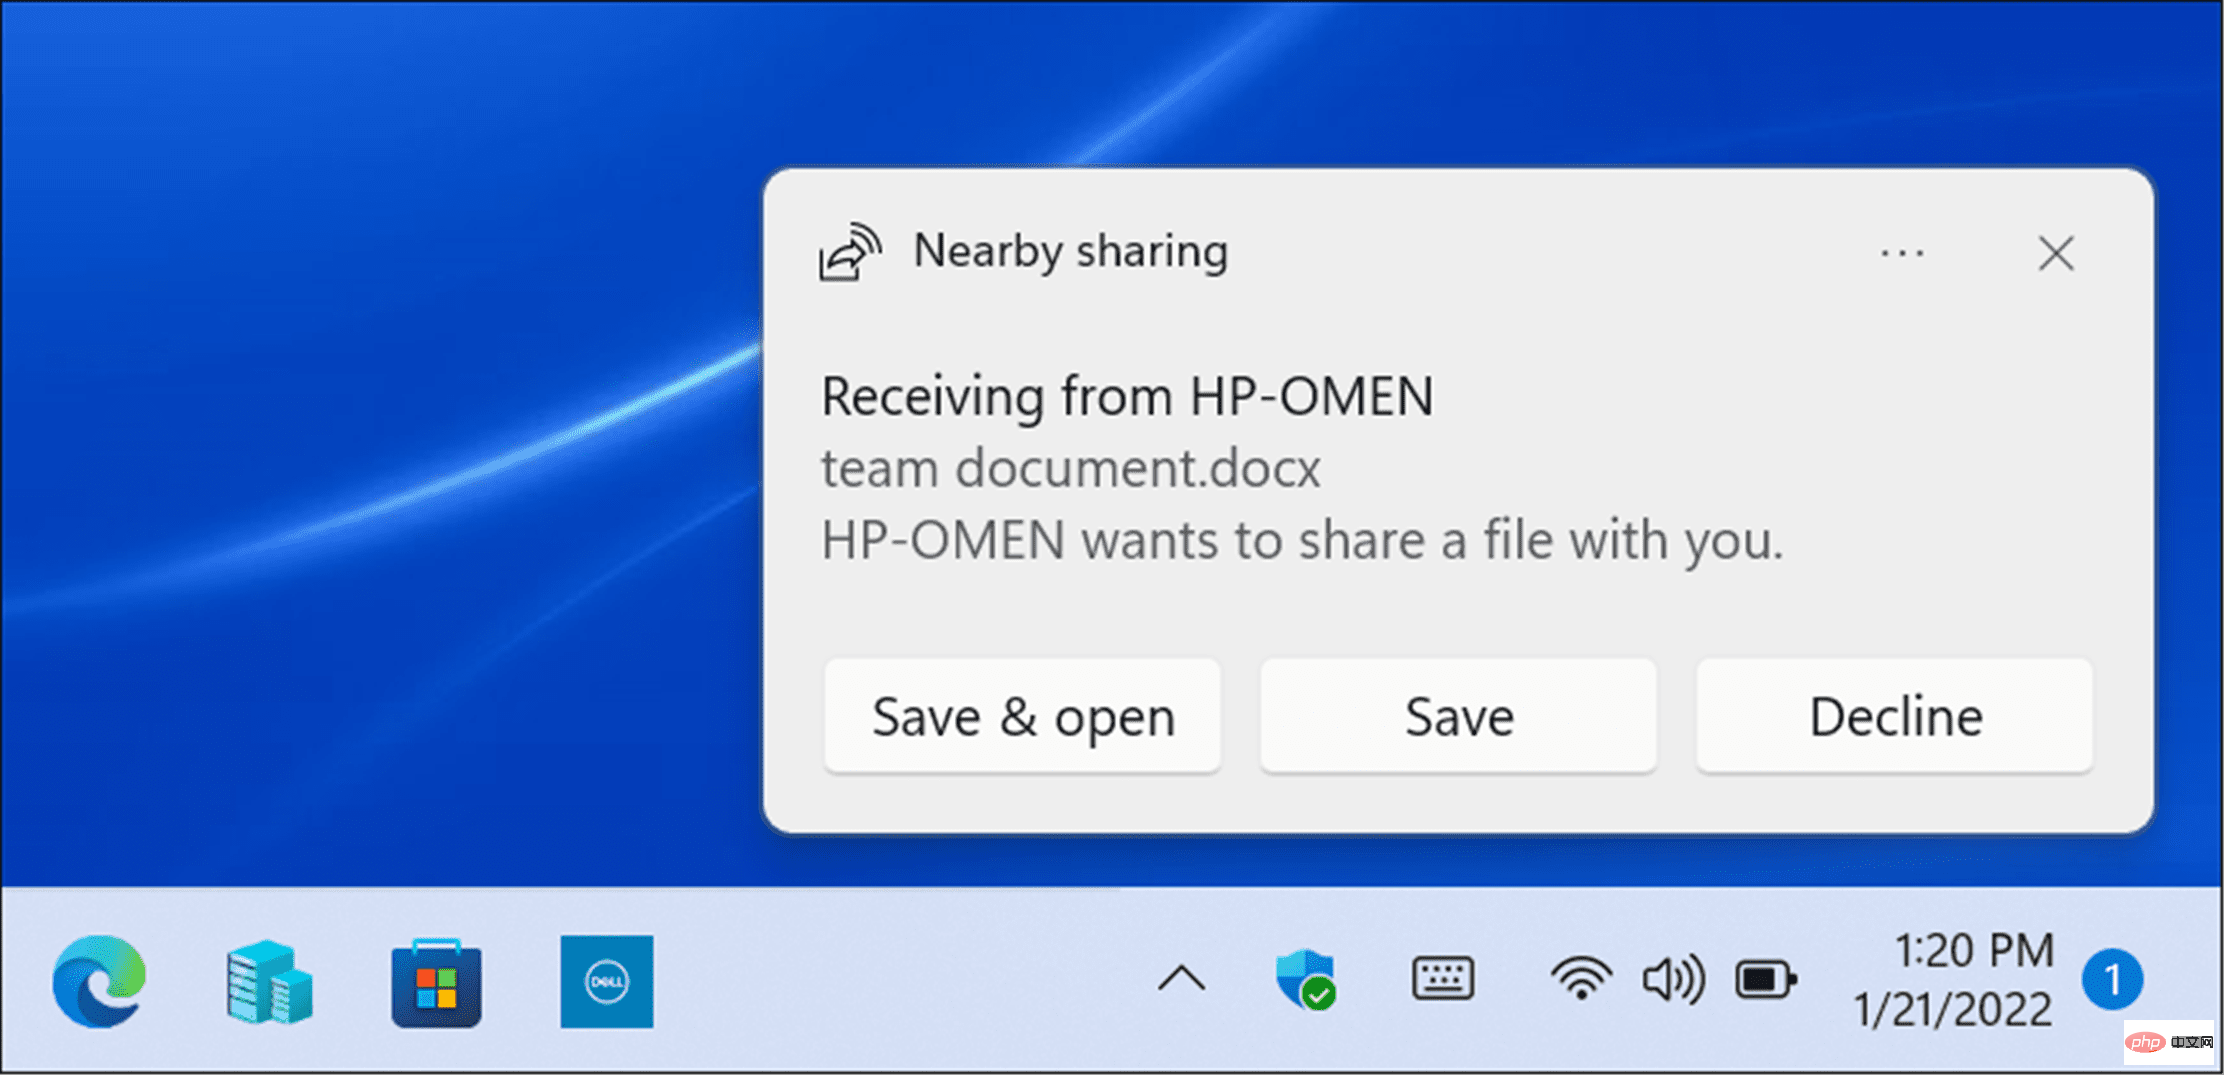
- A notification will appear on the target device - click
- Save and Open or Save" button. If you don't want the file, you can also reject it.
- Open
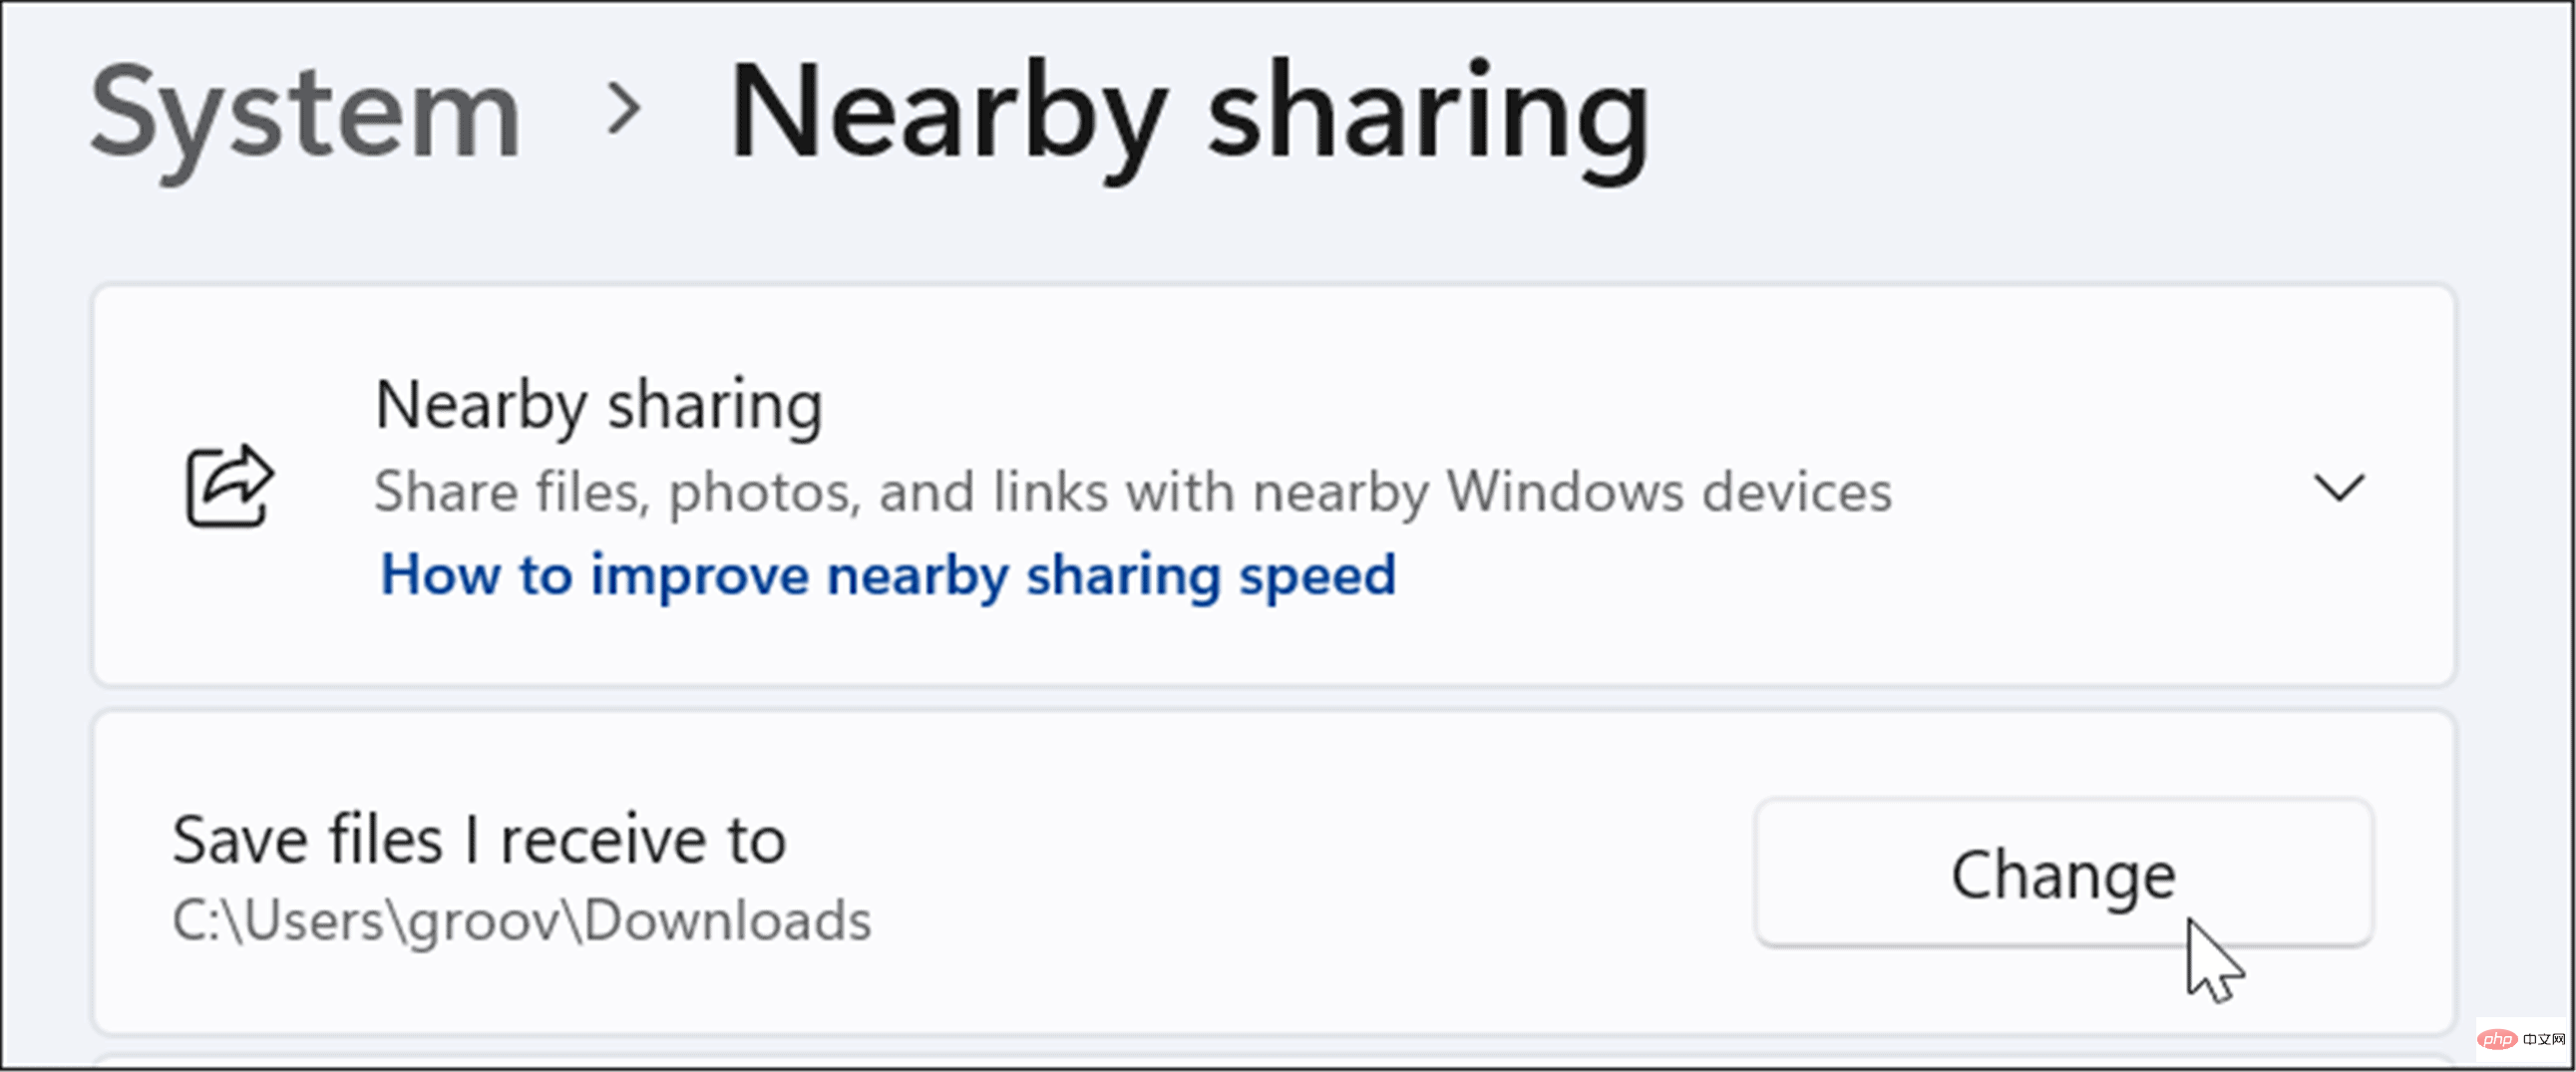
- Start and select Settingsor press the Windows key IOpen "Settings" directly. Click
- System in the left column and Nearby Sharing in the list on the right.

- Click the Change button next to the Save Received Files to option.
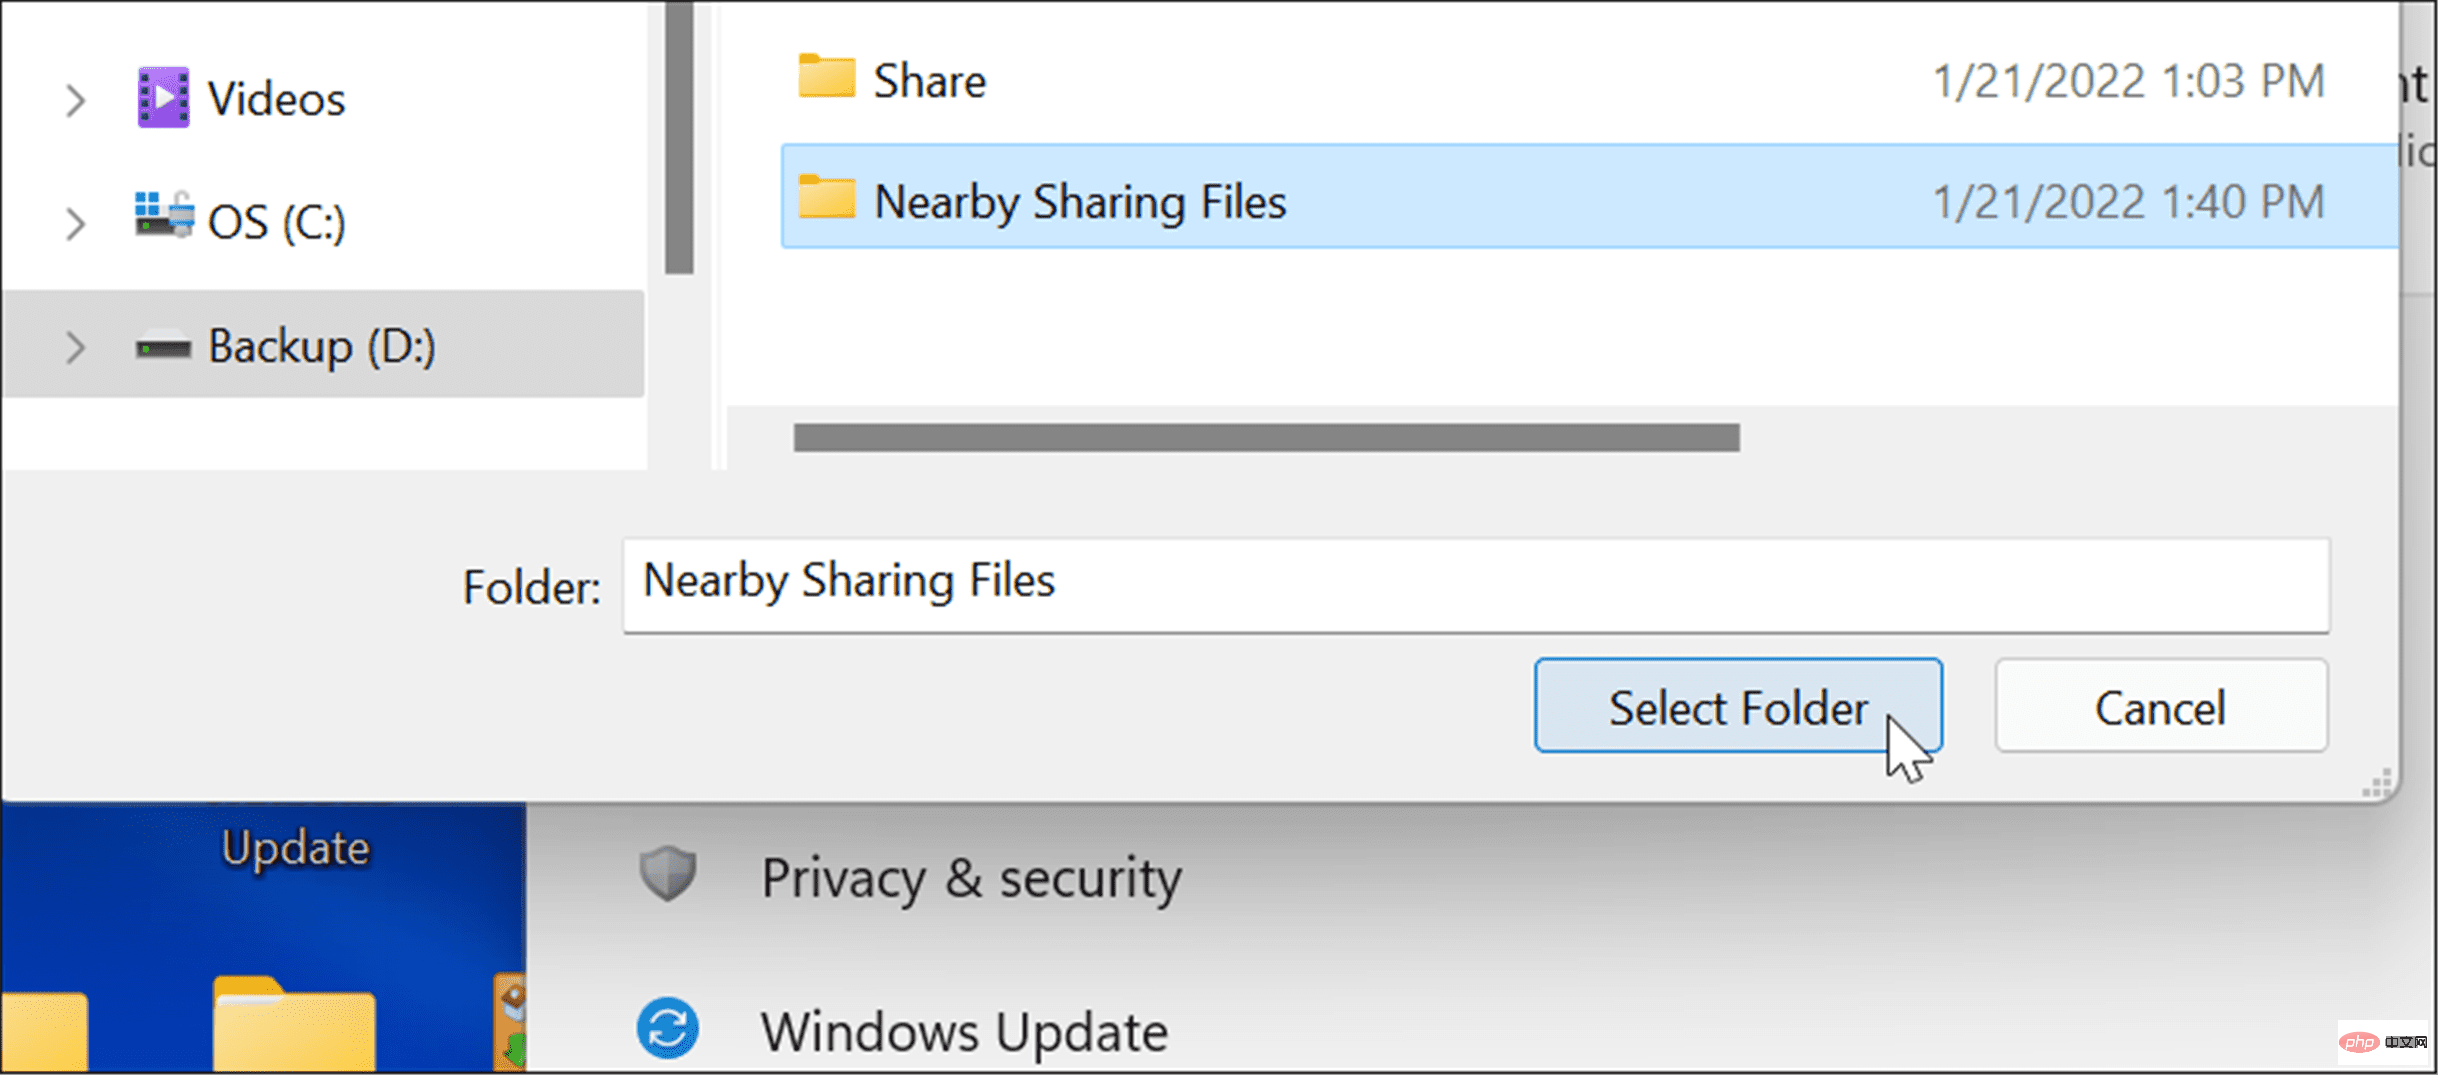
- Select a new save location in the pop-up menu and click the Select Folder button.
How to share links from Microsoft Edge using Nearby Sharing
Nearby Sharing can also be used to quickly share links to web pages in Microsoft Edge between devices . For example, if you want to share a news page with another device on your network, you can use Nearby Sharing to do this.
To use Nearby Sharing to send a link to another device:
- Open Microsoft Edge and browse to the page you want to share.
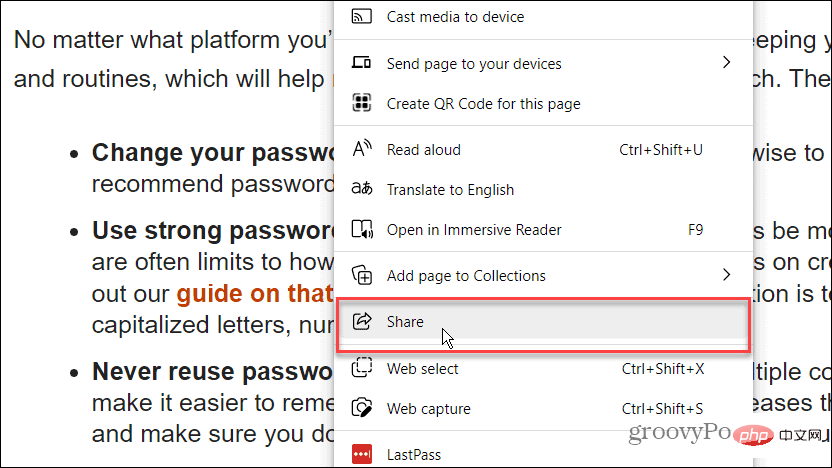
- Right-click on the web page and select the Share option from the menu.
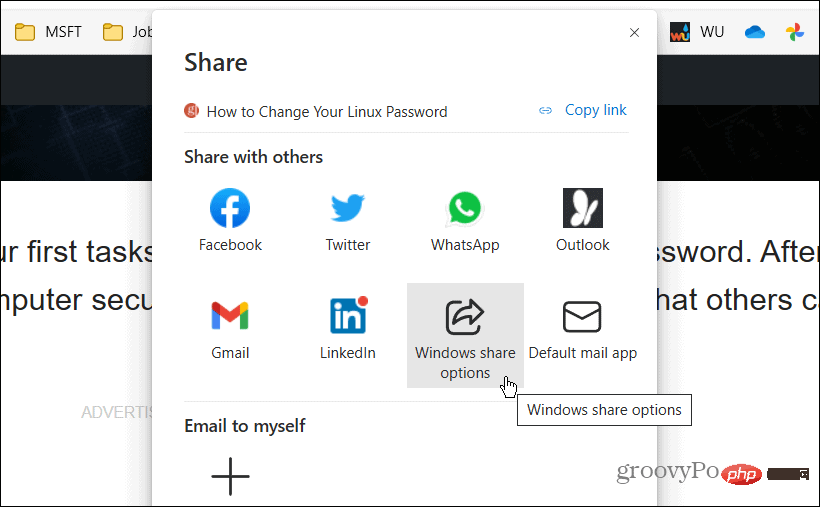
- Next, click the Windows Sharing Options button.
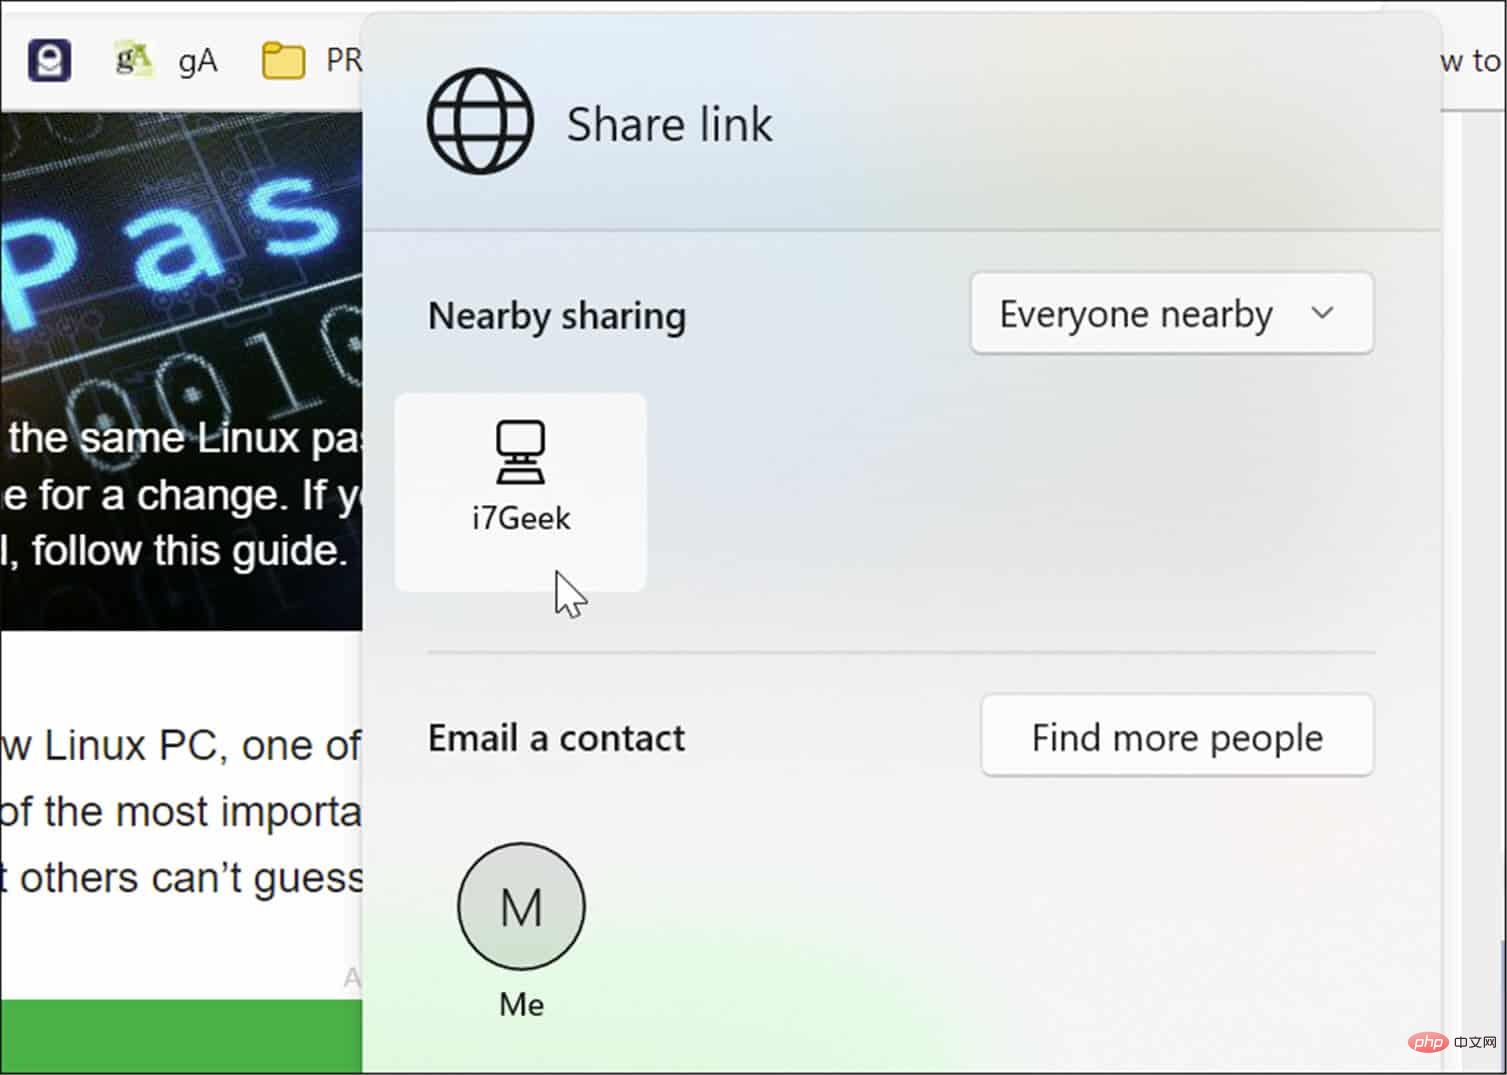
- Under the Nearby Sharing section, select a nearby device in the section.
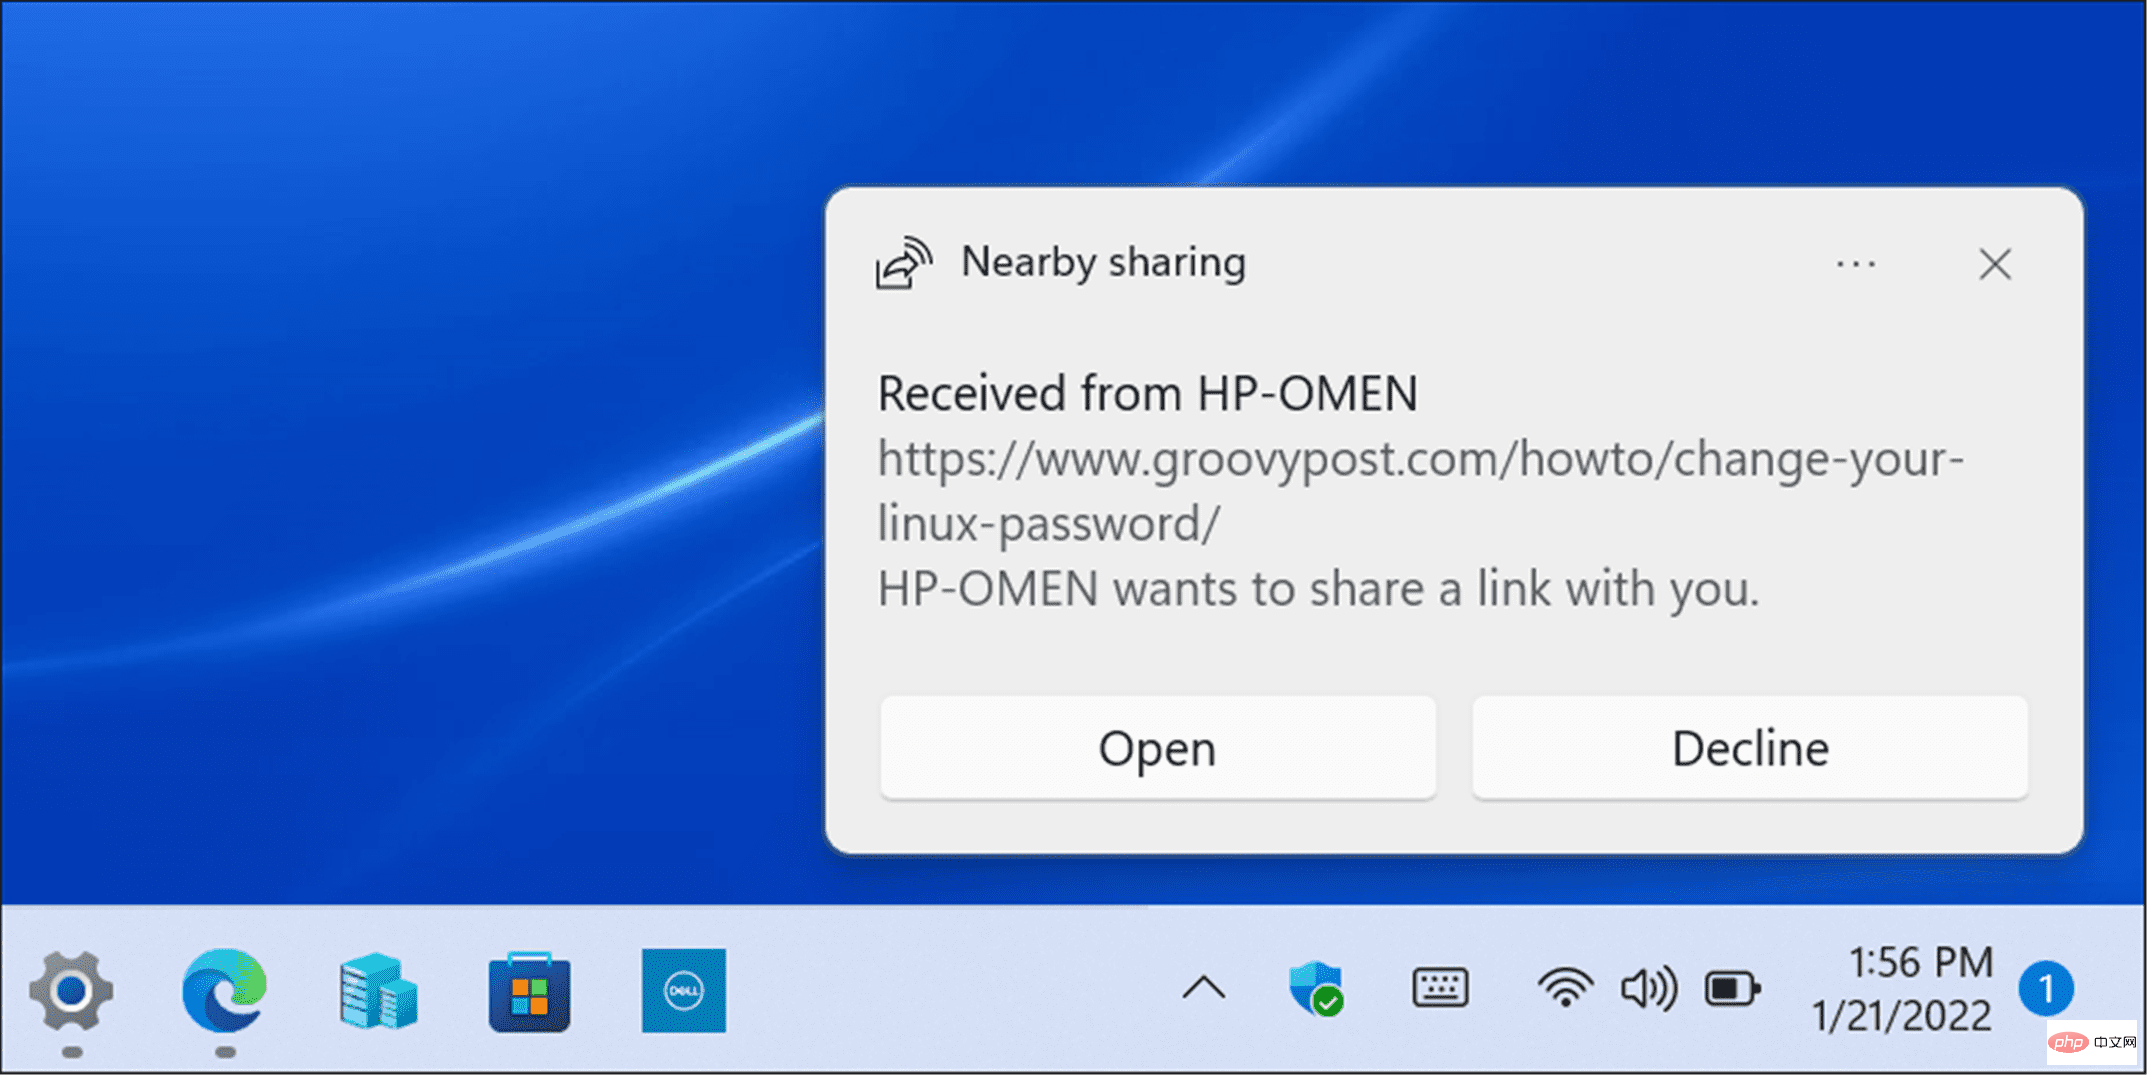
- A notification will appear on the receiving PC - click the "Open" button to view the page or click " Deny" button if you don't want it.
Make Sharing Easier
If you frequently move between different Windows devices on your local network, Nearby Sharing has you covered help. You can use it to easily share important files or web links.
However, as the name suggests, it only works on nearby devices. If you want to share files between different types of devices, or with more distant PCs and servers, you still need to consider network shares, cloud storage services, email attachments, or encrypted USB flash drives to transfer your projects.
The above is the detailed content of How to use Nearby Sharing on Windows 11. For more information, please follow other related articles on the PHP Chinese website!

