


Method One: Using Settings
The options mentioned below come with the 22H2 update. So if you haven't updated Windows yet, go to the Settings app (press the Win I shortcut), select Windows Update, and click Check for Updates.
After updating, open the Settings app again and select "Personalization".

Then select Start.

This will open the Start Menu settings page.

Alternatively, you can access this page by opening the Start menu, right-clicking to open the context menu, and selecting Start Settings.

Get More or Less Pins and Recommendations
Previously, the start menu layout was fixed. The default setup has an upper section for "pinned" apps and a "recommended" section for recently opened apps and files.
In the latest update, in addition to the default settings, we have two layout settings - "More Pins" and "More Recommendations".

Here’s what the three Start Menu settings look like:
More Pins: This layout is set for you to pin The application provides two additional lines. It's perfect for those who want to access more pinned apps from the Start menu without scrolling.

More Recommendations: This layout allows more space in the "Recommendations" area. If you prefer to access your recently opened apps and files from the Start menu, then this Start menu layout will come in handy.

Default value: The default start menu layout is the middle ground between the "Pins" and "Recommended" sections, with three lines respectively. on Pins and Recommended Files/Apps.

To get more space to pin apps and folders, select More Pinned. Likewise, to get more referrals and fewer pins, select More Referrals. To revert your changes and agree to what Microsoft considers the best settings, simply select Default.
Enable or disable most used apps, recently installed apps, etc.
Additionally, you can customize whether you want recently added apps to be Programs, your most used applications, and recently opened files appear in the Recommended section of the Start menu. You can even choose which folder shortcuts appear near the power button in the Start menu.

#To determine what works for you and what doesn’t, experiment by turning these three options off or on. If you turn all of these off, you won't see anything in the Recommended section. But that part will still exist.

Add folder shortcut near the power button
In addition, there is now a "Folder" option in the start settings page.

These are all the folders you can have next to the Power button in the Start Menu for quick access. Open the ones you want by switching them...

and see them appear in the Start Menu.
 ##
##
Method 2: Using the Registry
The Registry Editor can also be used to change the Start menu layout. Here's how to do it:
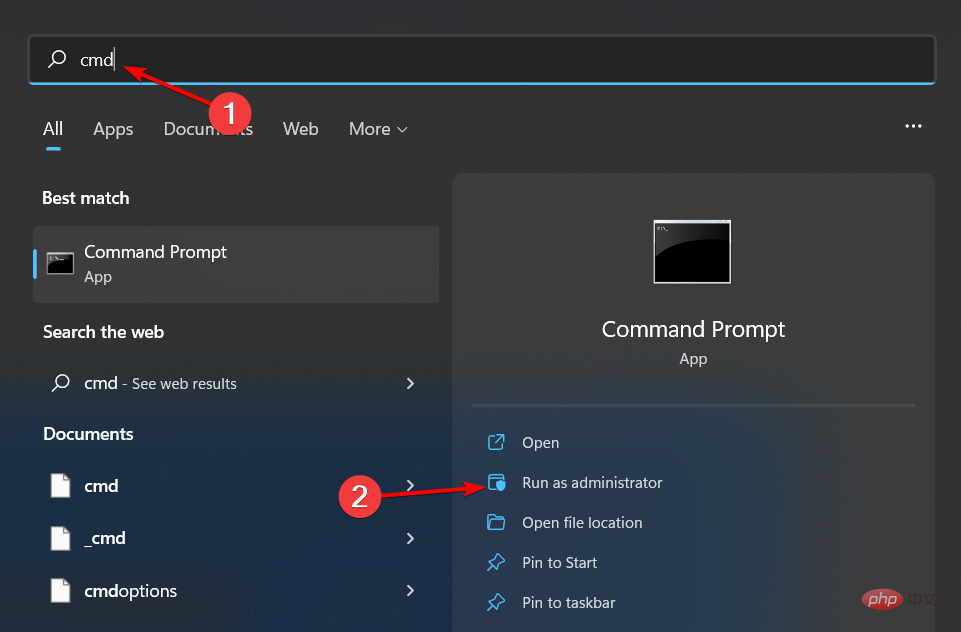
Press Start, type regedit, and then press Enter.

After the Registry Editor opens, navigate to the following address:
Computer\HKEY_CURRENT_USER\Software\Microsoft\Windows\CurrentVersion\Explorer\ Advanced
Alternatively, copy and paste the above into the address bar of Registry Editor and press Enter.

Now, on the right side, scroll down and find the Start_Layout key. Then double click on it.

Here we will change the numerical data to reflect the different start menu layout. Here are the three values you can enter and what they mean.
0 – Default Start Menu Layout
1 – More Pin Layouts
2 – More Recommended Layouts
According to the desired Start Menu layout input value. In our example, we need more pins, so we enter "1" as our value data.

Then click OK.

This will change your start menu layout.
Method 3: Use the Group Policy Editor
The Group Policy Editor can be used to change the Start menu layout and make additional adjustments to add or remove specific Start Menu sections.
With the latest 22H2 update, Microsoft has also added a new Group Policy list for the Start menu.
First, let’s open the Group Policy Editor and navigate to Start Menu Policies. Press Start, type gpedit, and then press Enter.

In the Group Policy Editor, expand Administrative Templates under User Configuration in the left pane.

Note: If you would like to change your user profile, please do so under "User Configuration". On the other hand, if you want to make changes for everyone regardless of user login, make the changes under Computer Configuration.
Then click Start Menu and Taskbar.

Here you will find a bunch of policies that need to be modified. However, some of them only work if you have Windows 11 Education. Therefore, we have listed the ones that can run on all Windows versions using Group Policy Editor and have a significant impact on the Start menu layout. Here they come:
Remove "Recently Added" from the "Recommended" section using GPE
To remove "Recently Added" apps from the "Recommended" section of the Start Menu, find And double-click to remove the "Recently Added List" from the Start Menu.

Click Enabled.

Then click OK.

Doing this is equivalent to turning off "Show recently added apps" in Start Settings and will disable the setting entirely.

Remove the "All Apps" button in the Start Menu
You can also remove the "All Apps" list button in the Start Menu. To do this, locate the policy named "Remove All Programs" list from the Start menu and double-click it.

Then select Enable.

Now, click the drop-down menu under "Choose one of the following actions" and select Remove and disable setting.

Click OK.

Restart the system for the changes to take effect. If you press the "Start" button now, you will find that the "All Apps" list button has been removed.

Hide the Most Used list
The Group Policy Editor also lets you remove the Most Used list from the Recommended section of the Start menu. ” apps and projects. From the Start MenuPolicies Locate and double-click to show or hide the "Most Used" list.

Click Enabled.

Then click the drop-down menu under "Choose one of the following options."

Select "Hide" to hide the All Apps list in the Start menu.

Click OK.

The Start menu will now not show your most used apps in the recommended section. This will also override "Show must-use apps" in the Start menu settings.

If you have the latest 22H2 update, these are some of the ways you can change the Start menu layout in Windows 11. We hope you get the Start menu layout you want.
The above is the detailed content of How to change the Start menu layout in Windows 11. For more information, please follow other related articles on the PHP Chinese website!

 Windows 10/11 上的病毒和威胁防护引擎不可用问题Apr 13, 2023 pm 02:01 PM
Windows Defender是一种保护系统免受病毒攻击的功能。尝试安装最新的安全更新时,一些用户收到一条错误消息,指出“病毒和威胁防护引擎不可用”。此错误主要是由于系统文件损坏,系统上的更新过时或Windows更新中的某些问题等。可以通过安装最新更新、重置 Windows 安全中心应用程序、调整注册表编辑器项等来解决。在本文中,我们提供了一些解决方案,可帮助您在Windows计算机上解决此问题。方法 1 – 运行 Windows 更新疑难解答步骤 1 –一起使用Windows + I键打开窗
 修复:Windows 11、10 中的错误 CLOCK WATCHDOG TIMEOUTApr 13, 2023 pm 03:07 PM
蓝屏死机问题在 Windows 中并不是什么新鲜事。其中一个问题是“ CLOCK_WATCHDOG_TIMEOUT ”错误代码,它可能会突然使系统崩溃并重新启动系统。尽管此问题背后的实际原因可能因用户而异,但通常这是处理器的问题。核心线程之间响应的不规则性是这个问题的根本原因。但别担心。只需按照这些简单的修复即可快速找到解决方案。修复 1 – 使用驱动程序验证程序如果您的系统上安装了未知驱动程序,则必须使用验证程序。第1步1. 按Windows 键并在搜索框中输入“ verifier ”。2.
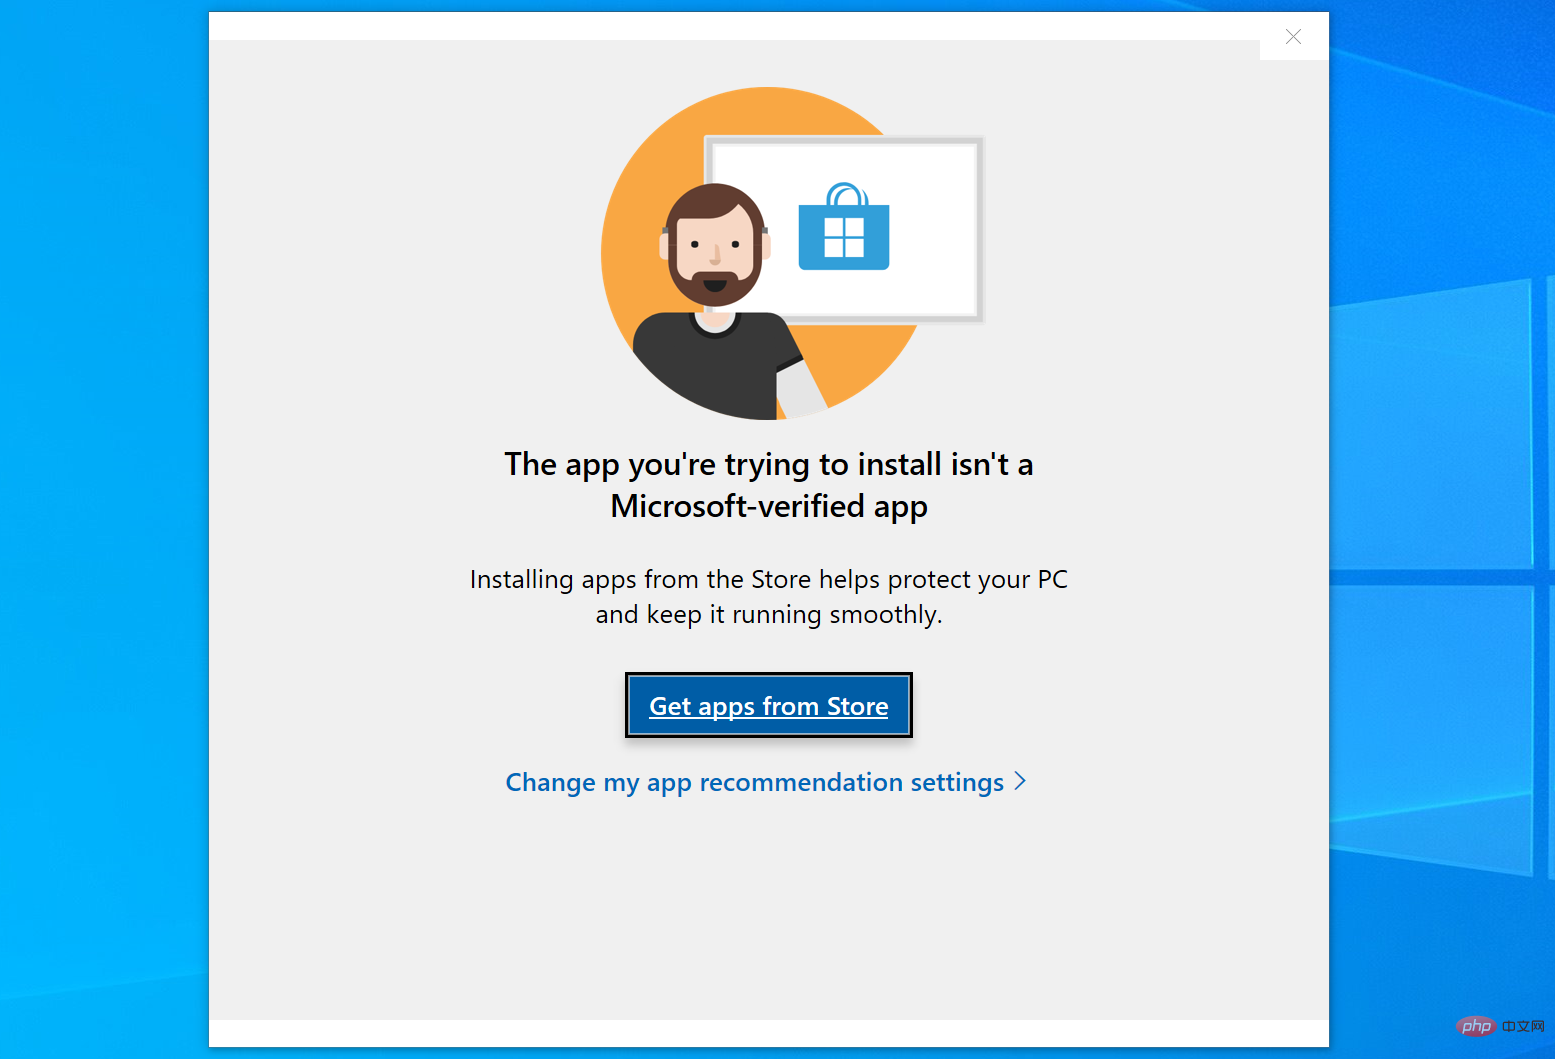 如何修复您尝试安装的应用不是 Windows 上经过 Microsoft 验证的应用Apr 13, 2023 pm 05:52 PM
Microsoft Windows 10 和 11 可能配置为仅允许在设备上安装某些类型的应用程序。该限制可能是有意的,例如,当限制可以安装在设备上的内容的策略到位时,但有时也是无意的。以下指南提供了易于遵循的分步说明,以解决意外出现的错误消息。尝试安装某些类型的应用程序的 Windows 用户可能会收到错误消息“您尝试安装的应用程序不是 Microsoft 验证的应用程序”。该对话框几乎没有提供有关安装被阻止原因的信息。它指出“从商店安装应用程序有助于保护您的 PC 并使其平稳运行”,并链接到
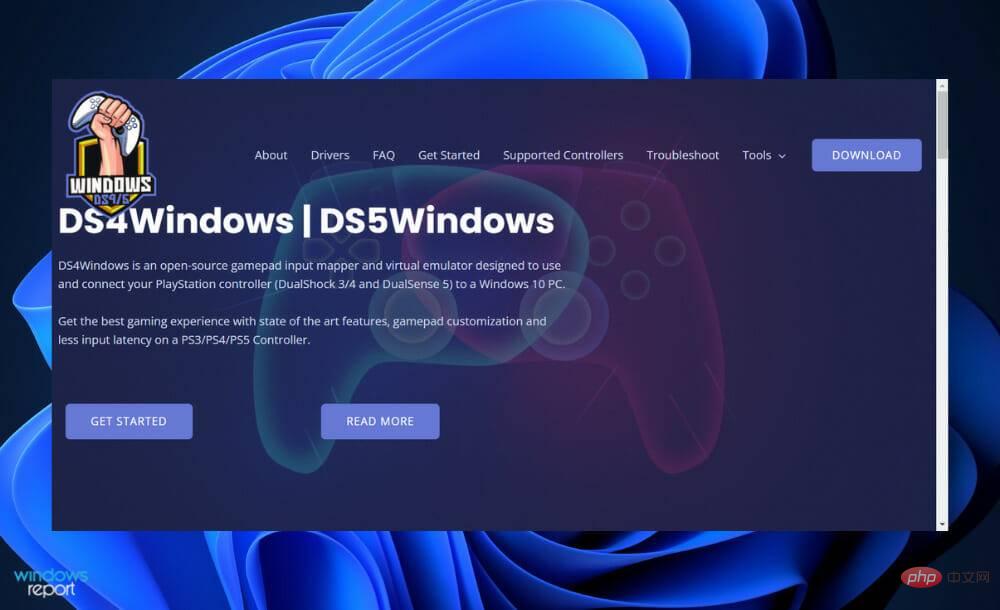 DS4Windows 11 不工作?立即应用这些修复Apr 13, 2023 pm 06:04 PM
<p>在某些情况下,将 DualShock 4 或 DualSense 5 控制器与 Windows PC 一起使用似乎会出现问题,控制器连接不正确或可能根本无法连接。</p><p>另一方面,PS4 和 PS5 都是针对各自的游戏机专门开发和优化的。现在,如果您是在 Windows 11 上遇到 DS4Windows 无法正常工作问题的不幸人士之一,您可以使用本教程来修复错误。</p>
 在 Windows 11 上停止自动更新的三种方法Apr 13, 2023 pm 05:40 PM
<h2>如何在 Windows 11 上停止自动更新</h2><p>在 Windows 11 上停止自动更新的一种方法是调整更新设置。使用此方法时,您可以在 Windows 11 家庭版或专业版上暂停更新长达五周。</p><p>要在 Windows 11 上暂停更新,请使用以下步骤:</p><ol>&a
 修复: Windows 无法初始化此硬件的设备驱动程序Apr 13, 2023 pm 01:19 PM
错误代码 37 表示 Windows 检测到设备驱动程序存在问题,无法启动硬件设备。这意味着您的系统上未正确安装软件设备驱动程序,或者您尝试使用的硬件与 Windows 不兼容。您已经知道驱动程序对于设备的平稳运行至关重要,因此如果您要使用硬件设备,则需要立即解决此错误。在本文中,我们将向您展示绕过此错误的各种方法。是什么原因导致 Windows 错误代码 37?当您得到 Windows 无法初始化此硬件的设备驱动程序时。(代码 37) 消息,它可能由几个问题引起,包括:兼容性问题 – 当您将硬
 如何修复 Roblox 无法在 Windows 10 中安装或下载Apr 13, 2023 am 11:46 AM
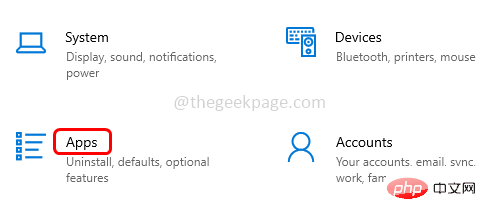
Roblox 是一个帮助创建游戏的在线游戏平台;用户可以在世界任何地方玩它们。但是一些用户在安装 Roblox 时会遇到问题。无法成功安装游戏,它只是在安装过程中崩溃。原因可能是缓存损坏、DNS 设置、防火墙问题、系统可能需要安装最新更新等。在本文中,我们将讨论可以用来解决问题的不同方案和方法。让我们开始吧!方法 1:使用设置重置 Microsoft Store第 1 步:同时使用Windows + I键打开 Windows 设置。第 2 步:点击应用程序第 3 步:在右侧,找到应用和功能下的M
 在 Windows 11/10 中修复 0xC1900101 驱动程序错误的 10 个简单技巧Apr 13, 2023 pm 07:55 PM
当用户尝试升级其操作系统时,驱动程序错误经常发生。我们今天要解决的 0xc1900101 驱动程序错误也是如此。完整的错误消息显示安装更新时出现一些问题,但我们稍后再试。如果您一直看到此内容并想搜索 Web 或联系支持人员以获取信息,这可能会有所帮助:(0xc1900101)。这些错误是由各种与驱动程序相关的 因素触发的:用户尚未在其计算机上安装最新的驱动程序更新,某些驱动程序与最新的 Windows 11 版本不兼容等等。许多尝试升级到 Windows 11的用户报告由于一系列 0xC1900

Hot AI Tools

Undresser.AI Undress
AI-powered app for creating realistic nude photos

AI Clothes Remover
Online AI tool for removing clothes from photos.

Undress AI Tool
Undress images for free

Clothoff.io
AI clothes remover

AI Hentai Generator
Generate AI Hentai for free.

Hot Article
Hot Tools

ZendStudio 13.5.1 Mac
Powerful PHP integrated development environment

SAP NetWeaver Server Adapter for Eclipse
Integrate Eclipse with SAP NetWeaver application server.

EditPlus Chinese cracked version
Small size, syntax highlighting, does not support code prompt function

DVWA
Damn Vulnerable Web App (DVWA) is a PHP/MySQL web application that is very vulnerable. Its main goals are to be an aid for security professionals to test their skills and tools in a legal environment, to help web developers better understand the process of securing web applications, and to help teachers/students teach/learn in a classroom environment Web application security. The goal of DVWA is to practice some of the most common web vulnerabilities through a simple and straightforward interface, with varying degrees of difficulty. Please note that this software

Atom editor mac version download
The most popular open source editor

