


Over the years, the Apple Watch has become its own thing, more of a standalone device, but it's still tethered to your iPhone — especially when you set it up.
So, here's what you need to do when you get your Apple Watch Series 7, or any current model, out of the box and on your wrist. First, turn on your Apple Watch by pressing and holding the Side button until you see the Apple logo.
Apple says this might take a few minutes, but once they're a little overly cautious, it won't take that long at all. Not this part anyway.
Once your watch is turned on, it will tell you to place it near your iPhone. When you do this, your iPhone will recognize that you have it.
Just like Apple does with AirPods, it will display an image of your Apple Watch and ask if you want to continue setup. you do.
One question, though—which Apple will ask you next—is whether you want to set this watch up for yourself or for a family member. The difference is that if you say it was deleted four times for your third-generation cousin, Apple adds a few extra steps.
For example, you must select the family members you want, which means they must be in your contact list. There are also issues related to parental controls.
But other than that, it's pretty much the same thing as setting it up for yourself is probably more common.
This means the next step is that you have to position your iPhone over your Apple Watch. The Watch shows a really beautiful hazy, hazy animation, and the iPhone sees it and pairs the two together.
That watch now belongs to that iPhone, if you will.
You are far from done.
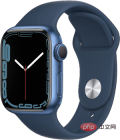
Apple Watch Series 7
Apple Watch Series 7 is equipped with an always-on Retina display, which has nearly 20% more screen area than Series 6, and It is the most crack-resistant front crystal on Apple Watch to date.
Using a Backup
Next, you have to choose whether to set up your watch as a new one, or use a backup of your old watch. If this is your first Apple Watch, you have no choice in the matter, but if it is, you're going to have some extra steps, extra questions, again.
They are all related to issues such as privacy and location services. For the sake of speed, let's do this using a backup of our old watch. You'll see extra steps about location services and such, but you don't have to actually answer them.
Select the latest backup available. Quite a long wait. This is when Apple isn't conservative, and for some reason this can take a few minutes.
 After setting up Apple Watch Series 7
Apple Music, sharing settings, text size, and password
, you must agree to the terms and conditions. You will then be prompted to choose to sign in to the iTunes Store. In fact, you can do it now, you can do it later, and you'll probably never bother.
However, whenever you do this, it allows you to control Apple Music from your Watch, which is convenient.
Next, share settings. Whatever you say, whatever you choose when setting up your iPhone, applies here. Location services, lookup, how you use Siri, and permission to send bug reports to Apple and developers. Whatever you set up on your iPhone, you can now set it up here.
And you have no choice. There is only one OK button.
You do have a choice in the next section, which is a completely new addition to the settings. You can choose the size of text displayed on your watch. You can fiddle around here, you can see examples, but it's best to let it go for now.
Have the Watch display the default text size. After you've used your watch for a while, you can adjust the size in Settings when you go in and out of apps on your watch.
Strictly speaking, you can also drop the next point about setting a password. Choose a long or short password—short passwords are just four digits—but don’t select the Don’t add a password option.
It's so useful. When you put the watch on your wrist and set a passcode, it will ask you to enter your passcode. From that point on, until you take the watch off, when it loses contact with your skin, you are recognized. You can use Apple Pay or confirm your purchase from the App Store.
No one else can access your watch and use it.
So set a password.
Health, Updates, and Apple Pay
Next, two health-related points. You'll be asked if you want to set up Activity, a watch feature that helps you become healthier. Just say yes, but you can set it up later. do not forget. Activity is one of the best reasons to own an Apple Watch.
Enable blood oxygen. This allows you to later use the watch's functionality to check your blood oxygen levels, and there's no benefit in turning it off.
You may want to consider your next steps more carefully to keep your watch up to date. If you let Apple do whatever it wants, your Watch will automatically get new updates and install them.
Instead, if you would rather wait a few days until others download the update and notice any issues, you choose to install the update manually.
However, this does mean you can always stay on top of updates. Watch will prompt you and this site will always warn you if any issues are found.
Now, just like the iPhone, Apple has inserted an Apple Pay section into Settings. There’s really no need for you to use the Watch, Apple is pushing its Apple Pay service — but at some point, be sure to set it up.
The ability to pay with just a twist of your wrist is huge, and it makes paying with an iPhone seem prehistoric. The thing is, you can add all your debit and credit cards to Apple Pay in your Apple Watch, so leave this section for now until you're ready to add them.
But adding your cards to your Apple Watch is a very quick process if you've already done this on your iPhone, you confirm you want to do it, and your bank says OK , you are who you say you are.
Recover health for a while. SOS. You have no choice here, Apple just tells you that your Watch will contact the person you nominate if necessary. Click Continue.
What the Watch Display Shows
Next, Apple once again just tells you something rather than asking you anything. It promotes the fact that Apple Watch Series 5 and later have always-on displays. Instead of going blank, the watch stays on until you turn your wrist or sometimes make a flamenco-style movement.
That's fine. Seriously, it's great. But you can adjust it later in Settings—not in Settings.
And you can set whether you want your Watch apps to appear as what Apple calls a grid, but is actually more like a honeycomb. Choose to display it as a honeycomb or a direct list.
Frankly, the list is boring and the honeycomb "grid" is confusing. So you won't really win here. Choose one or leave it as is - knowing you can change your mind later.
This is the last decision you have to make, this is the last part of the setup you have to do.
 Switch between Grid or List View of your app
 Tidying it up
This is still not the last part of the setup that must be completed. You'll get this "Apple Watch is syncing" message, which will also sink you in a little bit. The length of time it takes depends on various factors, such as how much data you have to install if you use backups.
But for example, this watch took less than five minutes to fill that circle.
However, once it's done, it's done. Your Apple Watch is ready to go—which means it's fun to choose between its different watch faces and really fun to keep its healthy activity ring running.
The above is the detailed content of How to set up your new Apple Watch. For more information, please follow other related articles on the PHP Chinese website!

 苹果xs max是几代Nov 03, 2022 pm 04:58 PM
苹果xs max是苹果第十二代。“X”是罗马数字中的10,“X”代表苹果向iPhone问世十周年的致敬;2017年9月13日,iPhone X正式发布,该产品为苹果第十一代产品;iPhone XS Max是2018年9月13日发布的,为第十二代苹果手机。
 iphone13 mini是双卡还是单卡Nov 22, 2022 pm 05:27 PM
iphone13 mini是单卡。iphone13 mini是苹果公司于2021年9月15日发布的一款智能手机,其SIM卡片类型为nano-SIM卡,并不兼容现有的micro-SIM卡,因此不支持双卡模式;该机为5G(sub-6 GHz)全网通手机(支持中国联通、中国移动和中国电信),支持GSM/EDGE、UMTS/HSPA+、DC-HSDPA网络。
 iphone13 pro可以插几张卡Nov 28, 2022 pm 05:56 PM
iphone13 pro可以插2张卡。iPhone13 Pro是苹果公司于北京时间2021年9月15日发布的智能手机,支持双卡双待,支持双卡nano-SIM卡,但不兼容现有的micro-SIM卡;应用双卡要求运用两项移动通信服务,不支持同一时刻使用两项CDMA移动通信服务,且仅部分运营商支持双VoLTE。
 iphone13摄像头旁边的小孔是什么Nov 07, 2022 pm 02:52 PM
iphone13摄像头旁边的小孔是麦克风,采用双唛降噪设计,是辅助副送话器收音用的,可以用来降低环境噪音和提升通话语音的清晰度的。由于在拍摄视频的时候会由于环境噪音导致被摄主体的收音效果不佳,目前大部分的智能手机都会在机身上设置有多个降噪麦克风,用来录制周围环境的噪音,结合降噪算法,实现降噪效果。
 iphone13是双卡双待吗Aug 11, 2022 pm 03:52 PM
iphone13是双卡双待,iphone13系列中只有“iPhone 13 mini”不是双卡双待;苹果iPhone13支持双卡双待,双卡类型为“nano-SIM”,不支持现有的“micro-SIM”卡,需要正反两面安装SIM卡,一共可以安装两张“12mm*9mm nano-SIM”卡。
 iphone数据漫游是什么意思啊Dec 02, 2022 am 10:52 AM
iphone数据漫游是指iPhone蜂窝网络下的“数据漫游”功能,而数据漫游就是跨运营商的漫游;在国内,该功能无论是打开或者关闭,都是没有任何作用的,因为它只是针对国际上不同的移动运营商起作用。
 苹果iPhone11跟iPhone13的区别是什么Oct 25, 2022 am 10:35 AM
区别:1、苹果11采用A13仿生处理芯片,具有4核图形处理器和8核神经网络引擎;而13采用采用A15仿生处理芯片,具有4核图形处理器和16核神经网络引擎。2、苹果11屏幕尺寸为6.1英寸Liquid 视网膜高清显示屏;而苹果13屏幕尺寸为6.1英寸超视网膜XDR显示屏。3、苹果11的屏幕对比度为1400:1对比度,而苹果13的屏幕对比度为2000000:1对比度。
 苹果教育优惠版和普通版有什么区别Oct 19, 2022 am 09:17 AM
区别:1、教育优惠比官网标价(普通版)要便宜。2、教育优惠官网下单速度会比普通版慢,普通版有货的状态一般是1-3个工作日就发货了,教育优惠版比较快的也是几天时间,如果是遇到了开学前大量学生购买的高峰期,可能要排队几个星期。3、教育优惠适用人群为准大学生、大学生、教职工(包括大中小学以及特殊教育学校的教职工群体);而普通版的适用人群比较广。

Hot AI Tools

Undresser.AI Undress
AI-powered app for creating realistic nude photos

AI Clothes Remover
Online AI tool for removing clothes from photos.

Undress AI Tool
Undress images for free

Clothoff.io
AI clothes remover

AI Hentai Generator
Generate AI Hentai for free.

Hot Article
Hot Tools

Safe Exam Browser
Safe Exam Browser is a secure browser environment for taking online exams securely. This software turns any computer into a secure workstation. It controls access to any utility and prevents students from using unauthorized resources.

PhpStorm Mac version
The latest (2018.2.1) professional PHP integrated development tool

MinGW - Minimalist GNU for Windows
This project is in the process of being migrated to osdn.net/projects/mingw, you can continue to follow us there. MinGW: A native Windows port of the GNU Compiler Collection (GCC), freely distributable import libraries and header files for building native Windows applications; includes extensions to the MSVC runtime to support C99 functionality. All MinGW software can run on 64-bit Windows platforms.

WebStorm Mac version
Useful JavaScript development tools

mPDF
mPDF is a PHP library that can generate PDF files from UTF-8 encoded HTML. The original author, Ian Back, wrote mPDF to output PDF files "on the fly" from his website and handle different languages. It is slower than original scripts like HTML2FPDF and produces larger files when using Unicode fonts, but supports CSS styles etc. and has a lot of enhancements. Supports almost all languages, including RTL (Arabic and Hebrew) and CJK (Chinese, Japanese and Korean). Supports nested block-level elements (such as P, DIV),

