Home >Common Problem >How to fix low audio issues in Windows 11
How to fix low audio issues in Windows 11
- 王林forward
- 2023-04-13 13:19:173008browse
Many Windows 11 users have been experiencing audio issues where system sounds and all other sounds in applications are at low volume. Outdated/incompatible drivers, audio enhancement, or incompatible bitrate formats may be some of the possible reasons for low audio sound on your computer. This issue is usually noticed after upgrading the system to Windows 11 or performing a Windows Update.
Are you annoyed by low audio issues while listening to any music or playing any game on your Windows 11 PC? Read this article to find some troubleshooting methods that have helped other users resolve low capacity issues on their Windows 11 PCs.
Method 1 – Run the Audio Troubleshooter
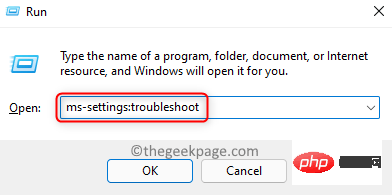
Step 1. Open the Run dialog box by pressing the Windows and R keys simultaneously on your keyboard.
Step 2. Type ms-settings:troubleshooting and press Enter to open the Troubleshooting page in the Settings app.
Step 3. On the Troubleshooting page, click Additional Troubleshooting.

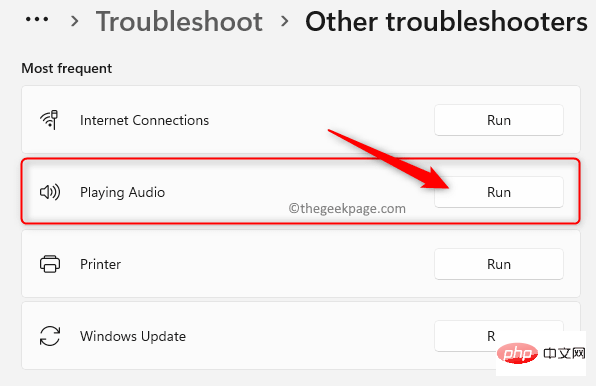
Step 4. You'll see a list of all other troubleshooters you can use.
Here, click the Run button associated with Play Audio.
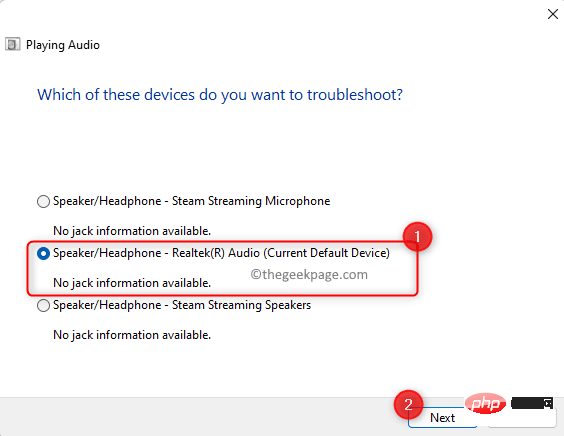
Step 5. Wait for the initial detection phase of troubleshooting to complete.
When you are prompted to select the device to troubleshoot, select the appropriate audio device from the list and click Next.
Step 6. After the scan starts, wait for the analysis of the audio device to complete.
If any issues are detected, follow the on-screen instructions to use the system-suggested fixes.
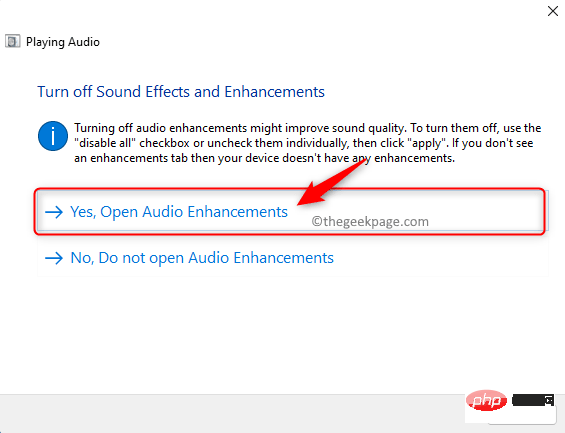
After the troubleshooting process is complete, check to see if the low audio issue has been resolved.
Method 2 – Update Audio Driver
Step 1. Press Windows X to open the menu associated with the Start button.
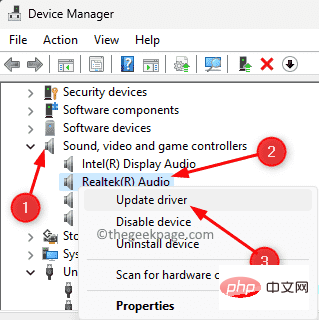
Step 2. In this menu, select Device Manager.

Step 3. Expand the Sound, Video & Game Controllers section by clicking the arrow next to it.
Step 4. Identify the audio device listed here and have low audio issues.
Right-click this audio device and select Update Driver.
Step 5. In the "Update Driver" window, select the "Automatically search for drivers" option.
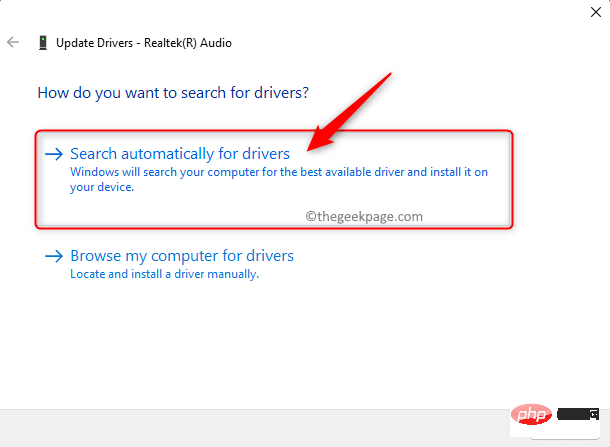
Step 6. After updating the audio driver on your PC, check if the device issue has been resolved.
Step 7. If this does not resolve the issue, click Search for updated drivers on Windows Update.
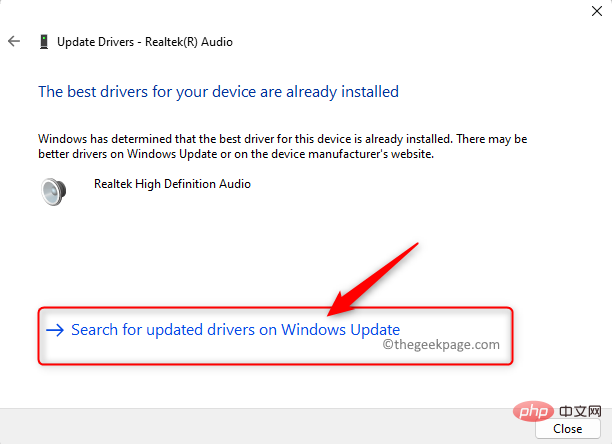
Then, click "Check for updates" on the Windows Update page.

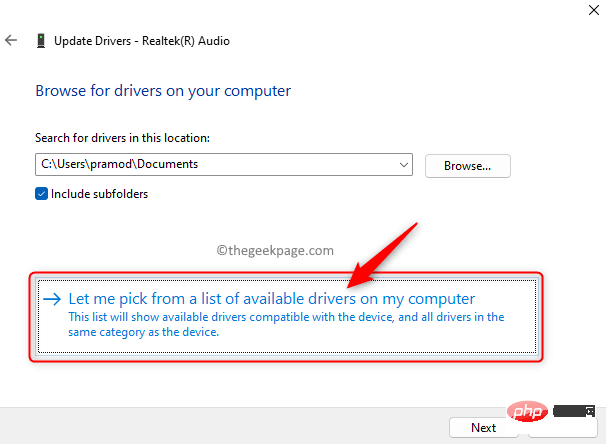
Browse my computer for driver in the Update Driver window.
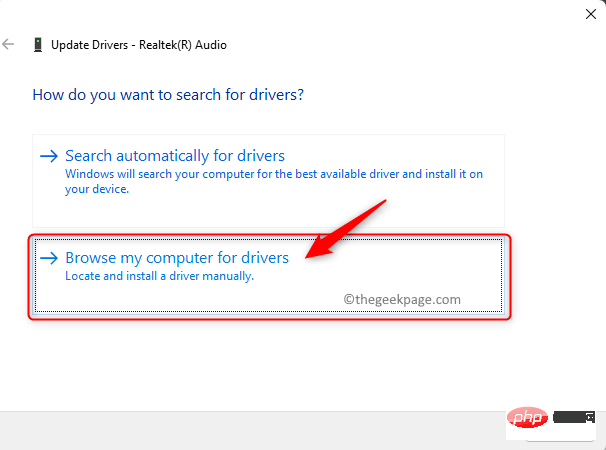
select from the list of available drivers on your computer.
High Definition Audio Device in the list.
ClickNext.
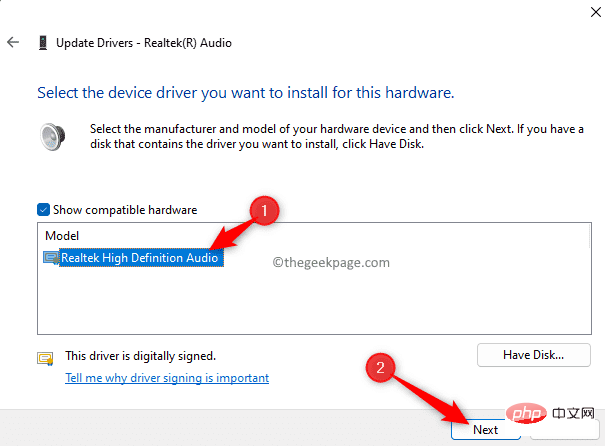
After updating the driver, Restart the PC and check if this helps overcome the low audio issue.
Method 3 – Set the audio device as the default device
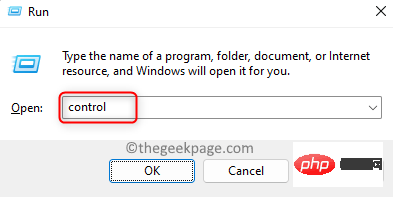
Step 1. Press Windows R to open "Run".
Type Control and press the Enter key to open the Control Panel.
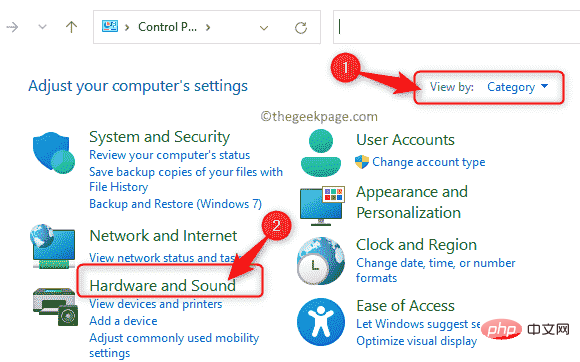
Step 2. Make sure "View by" is set to "Category". If not, use the dropdown and set it to "Category".
Step 3. In Control Panel, clickHardware and Sound.
Step 4. On the next screen, click Sounds.
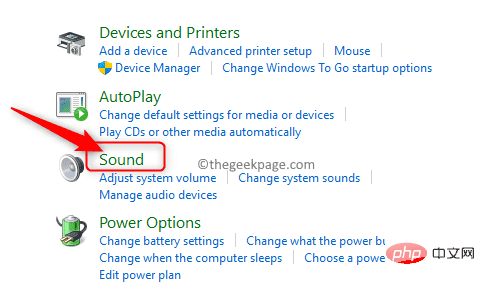
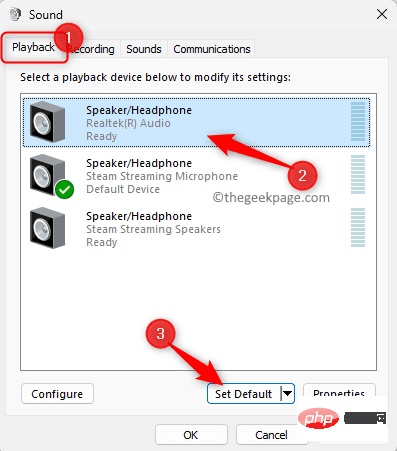
Step 5. In the Playback tab, select the audio device that is having the problem and click the Set as Default button at the bottom.
Then, click OK.
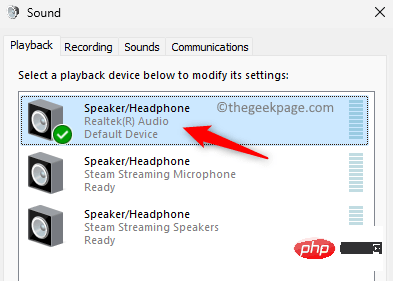
Step 6. After setting the audio device as the default device, check if the problem is resolved.
Method 4 – Turn off audio enhancements in Settings
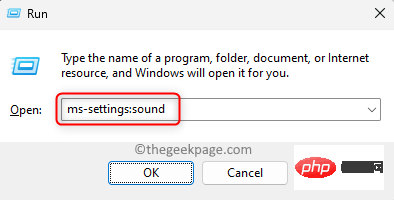
Step 1. Open the Run box by pressing the Windows and R keys simultaneously.
Step 2. Type ms-settings:sound and press enter to open sound settings.
Step 3. On this page, in the "Output" section, click the audio device that is causing the low audio issue.
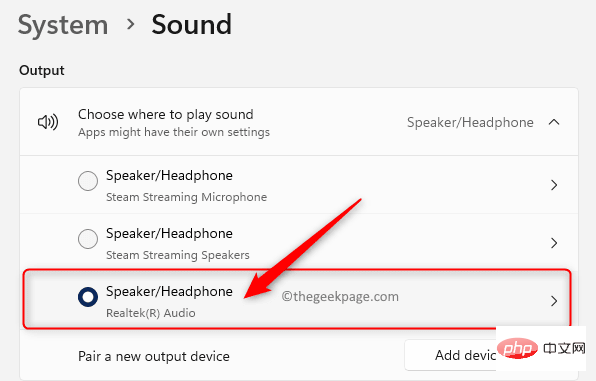
Step 4. This will open the Properties screen for the selected device.
Here, use the drop-down list associated with the Audio Enhancement feature and select Off.
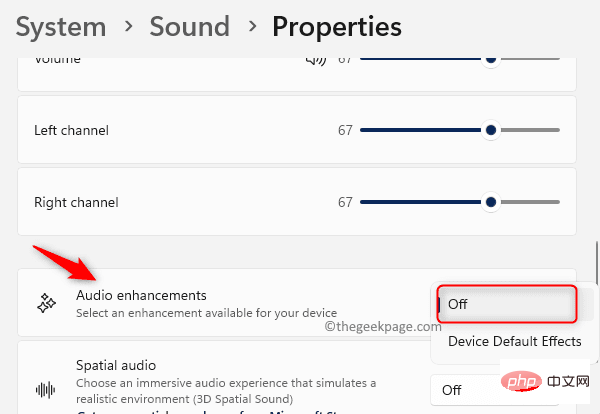
Step 5. Close the Settings app.
Check if the problem still exists.
Method 5 – Uninstall the Audio Device Driver
Step 1. Click the Windows key on your keyboard and type Device Manager in the Windows search box.
Step 2. Click Device Manager in the search results.
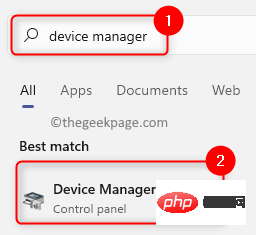
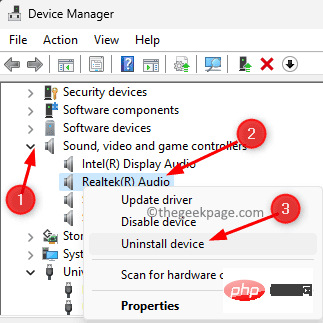
Step 3. In Device Manager, click Sound, Video, and Game Controllers to expand it.
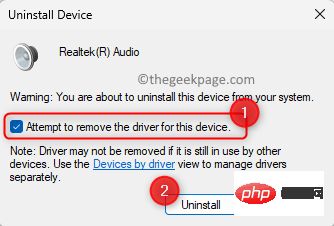
Step 4. Right-click your audio device and select UninstallDevice.
Step 5. In the confirmation dialog box that pops up, check the box next to Attempt to remove the driver for this device.
Then, click the Uninstall button.
Step 6. Close Device Manager and restart the PC.
Step 7. During the system restart, Windows will find the missing audio driver and automatically install and enable the universal driver for the audio device.
Check if the problem has been resolved.
Method 6 – Change Bitrate in Sound Properties
Step 1. Just hold down the Windows and R keys simultaneously on your keyboard to open the Run box.
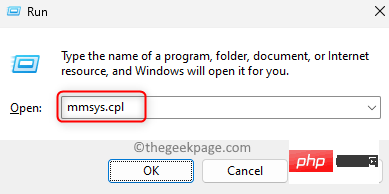
Step 2. Type mmsys.cpl and press Enter to open the Sound window.
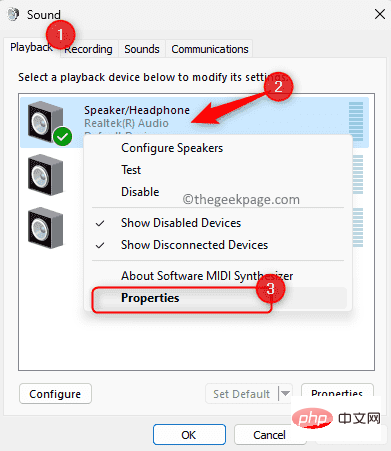
Step 3. In the Playback tab, right-click the audio device and select Properties.
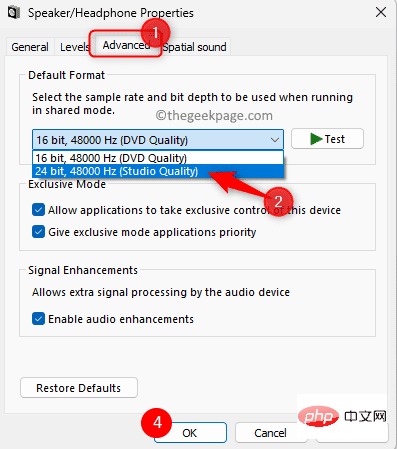
Step 4. In the Speaker Properties window, go to the Advanced tab.
Step 5. Here, use the drop-down list in the Default Format section and change it to 24-bit, 48000 Hz (studio quality).
Step 6. Finally, click Apply and then OK.
Step 7.Restart the system and check if the low volume sound problem is resolved.
Method 7 – Perform a System Restore
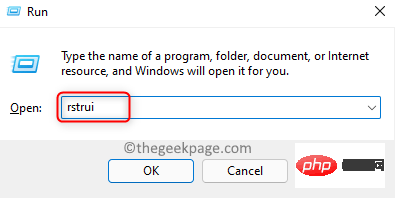
Step 1. Press Windows R to open the "Run" dialog box.
Type rstrui and press Enter to open the System Restore window.
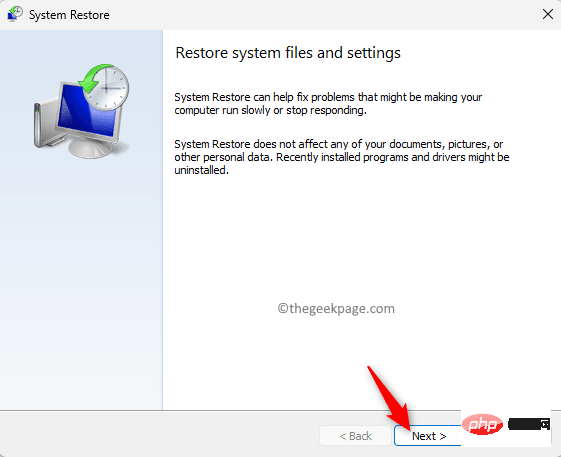
Step 2. In the "System Restore" window, click "Next".
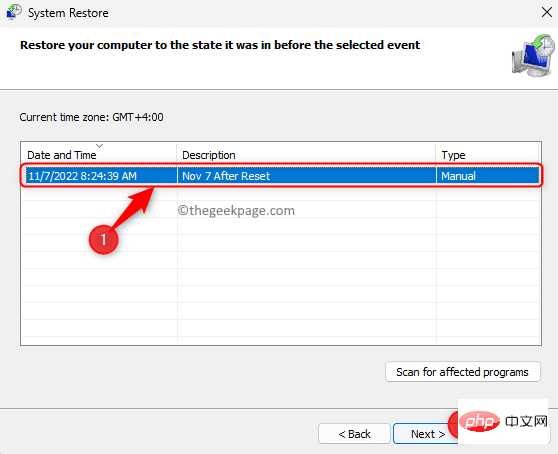
Step 3. On the next screen, you will see a list of restore points created on your system.
Here, select the restore point you created manually.
Then, click Next.
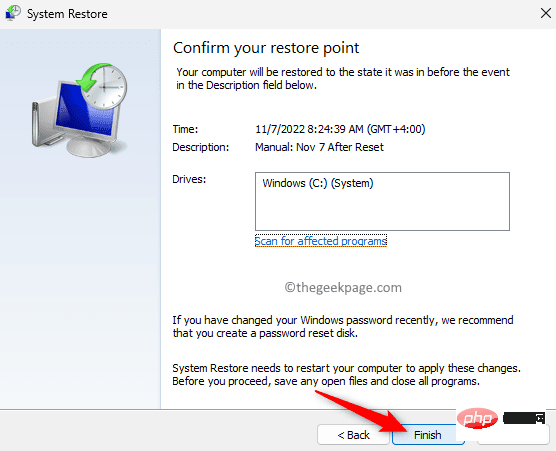
Step 4. In the last screen, check the restore point details and click "Finish" to start the restore process.
Step 5. Wait for your PC to restart and system restore to complete.
After system recovery, your PC will be back to its normal working hours without any problems.
Check if the low audio issue has been resolved.
The above is the detailed content of How to fix low audio issues in Windows 11. For more information, please follow other related articles on the PHP Chinese website!

