


Steps to install Sensu Go on Windows 10 or 11
To start using the Sensu Go monitoring tool on Windows 11 or 10, your system should have 10 GB of free space and 4GB of RAM. However, if you are in a production environment, 8GB RAM is recommended.
1. Enable WSL on Windows 11 or 10
Here we are using Ubuntu 22.04 WSL App on Windows, you can also use Debian or Ubuntu 20.04. If you already have a WSL 1 or 2 application enabled and using it, you can go to the next step.
2. Add the Sensu repository in Ubuntu
The next step is to make the repository provide the packages we need to install the Sensu backend on the Ubuntu WSL system since it cannot use the default system repository to install. So run the given command in your command terminal.
sudo apt install curl
curl -s https://packagecloud.io/install/repositories/sensu/stable/script.deb.sh | sudo bash
3. Install Sensu Go Backend on Windows 10 or 11
We already have the Sesnu repository on our Ubuntu 22.04/20.04 system, now we can use the system’s APT package manager Easy to install backend. Here is the command to follow:
sudo apt install sensu-go-backend
4. Start the Sensu Go background service
We need a supporting configuration file to start the Sensu Go service, without it you will be stuck trying to start the Sensu Go service An error was encountered while serving. So, first, download it using the given command:
sudo curl -L https://docs.sensu.io/sensu-go/latest/files/backend.yml -o /etc/sensu/backend.yml
sudo mkdir /var/run/sensu/
Now, start the service:
sudo service sensu-backend start
To check the service status, use:
sudo service sensu-backend status
5. Configure username and password
Once you are sure that the Sensu Go backend is running without any errors. Set up a username and password to access the web-based graphical user interface of this monitoring tool. To do this, we need to set two environment variables with the required credential values to set the admin user and password. sensu-backend initAfter setting the environment variable, use the command to initialize it.
Method 1:
export SENSU_BACKEND_CLUSTER_ADMIN_USERNAME=h2smedia
export SENSU_BACKEND_CLUSTER_ADMIN_PASSWORD=yourpassword
sensu-backend init
If the system requires allowing Sensu supported firewall, then don’t forget to click the “Allow Access” button.

Method 2:
or , the user can use the given command instead of the above command , set the username and password interactively:
sensu-backend init --interactive
You will be asked to set the username and password as well as the API. However, the API key is optional - press Enter to skip it.
6. Access the web interface
Open the local or remote system browser to access the IP address of the server where you installed the Sensu GO monitoring solution.
Point your browser to the server IP using the port number in the following format:
http://server-ip-address:3000
7. Log in
Use Sensu in step 5 of this tutorial Administrator credentials set. Then click the "Login" button.

8. Sensu Go Monitoring Dashboard
Finally, the Sensu Go dashboard is there from where you can get the metrics extracted from the system. Overview for monitoring with the Sensu agent. But for this, we have to manually install the agent on every system we want to monitor. Go to next step.

9. Install Sensu Go Agent
Now, assuming you want to monitor a remote system using Sensu GO, first we have to make sure that the specific system has Sensu Agent .
For Ubuntu or Debian
curl -s https://packagecloud.io/install/repositories/sensu/stable/script.deb.sh | sudo bash
sudo apt-get install sensu-go-agent
For RHEL/CentOS/Rocky Linux/AlmaLinux/Oracle Linux
curl -s https://packagecloud.io/install/repositories/sensu/stable/script.rpm.sh | sudo bash
sudo yum install sensu-go-agent
For Windows
Go to the Sensu website and download the agent executable - Here is the link.
10. How to configure Agent for Linux
Assume that you have to use the previous step to install the Sensu Go Agent on Linux (such as Ubuntu/Debian or RedHat). Now you want to configure it so that the backend can recognize the system and add it for monitoring.
Here we use Ubuntu/Debian, but the method is the same for other Linux systems.
Copy proxy configuration file
sudo curl -L https://docs.sensu.io/sensu-go/latest/files/agent.yml -o /etc/sensu/agent.yml
Edit the proxy file and add the Sensu backend server URL.
sudo nano /etc/sensu/agent.yml
Remove # from the name, namespace, backend URL and IP address as shown in the given screenshot. Then replace the address 127.0.0.1 with your Sensu Go’s backend server.

Save the file using Ctrl O, press Enter, and exit - Ctrl X.
Now, restart the agent for the changes to take effect.
sudo systemctl restart sensu-agent
11. Start monitoring on Windows 10 or 11
After installing and configuring the Sensu Go Agent on the system to be monitored, refresh the WSL Linux application running on Windows 11 or 10 Sensu Go web interface to view added devices on the dashboard. You can see we have two entities which are the backend and another proxy.

12.如何安装Sensuctl命令工具
Sensuctl 是 Sensu 监控解决方案提供的一种工具,用于使用命令行管理其资源。它通过调用 Sensu 的底层 API 来创建、读取、更新和删除事件、实体和资源。Sensuctl 适用于 Linux、macOS 和 Windows。
下面是在 Debian 或 Ubuntu 系统上安装它的方法。
curl -s https://packagecloud.io/install/repositories/sensu/stable/script.deb.sh | sudo bash
sudo apt install sensu-go-cli
在官方文档页面上了解有关此命令实用程序及其用法的更多信息。
13.卸载后端和代理(可选)
如果您的 Windows WSL 系统上不再需要 Sensu Go 后端和代理,那么这里是删除它们的命令。
sudo apt autoremove --purge sensu-go-backend
sudo apt autoremove --purge sensu-go-agent
The above is the detailed content of How to install Sensu Go Monitoring on Windows 11 or 10 via WSL. For more information, please follow other related articles on the PHP Chinese website!

 在 Mac 上创建 Windows 11 USB 安装程序的 3 种简单方法May 13, 2023 pm 09:43 PM
Windows11引入了丰富的新功能以及全面改进的外观,更加强调统一性和效率。因此,今天的主题是如何在Mac上创建Windows11USB安装程序。执行Windows11的全新安装而不是升级,是在获取操作系统时产生最佳结果的方法。使用可在Windows11中启动的驱动器,您可以执行此任务。如果您使用的是WindowsPC,则为Windows11制作可引导CD是一个非常简单的过程。另一方面,如果您使用的是Mac,则该过程会稍微复杂一些。这篇文章将描述如何在不使用基
 如何在新的 SSD 上安装 macOSApr 13, 2023 pm 04:01 PM
如何使用 macOS Recovery 在新的 SSD 上安装 macOS在 2009 年之后生产的任何 Mac 上,都有一个内置的恢复系统。这允许您将 Mac 启动到恢复模式。在此模式下,您可以修复内部磁盘、从 Time Machine 备份恢复文件、获取在线帮助或重新安装 macOS。您必须能够连接到互联网才能使用这些工具。您可以使用 macOS 安装工具在计算机中安装的新 SSD 上安装 macOS。要使用 Internet Recovery 在 SSD 上安装 macOS:按照制造商针对
 如何在 Windows 10 上使用命令提示符安装 PHPMay 08, 2023 pm 05:13 PM
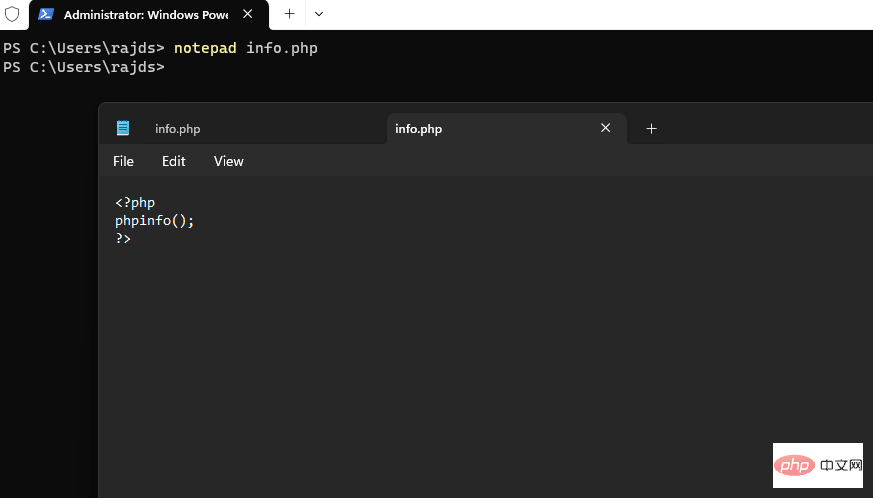
使用命令提示符或PowerShell在Windows上安装PHP安装ChocolateyChoco包管理器我尝试了Windows默认包管理器Winget,但无法通过它安装PHP。因此,剩下的另一个最佳选择是使用流行的Chocolatey包管理器。但与Winget不同的是,Choco默认情况下不存在于我们的Windows系统中,因此我们需要在我们的系统上手动安装它。转到您的Windows10或11搜索框并键入CMD,出现时选择“以管理员身份运行”将给定的命令复制
 Nginx与SSL:配置HTTPS保护Web服务器Jun 09, 2023 pm 09:24 PM
Nginx是一个高性能的Web服务器软件,同时也是一款强大的反向代理服务器和负载均衡器。随着互联网的迅速发展,越来越多的网站开始采用SSL协议保护敏感用户数据,而Nginx也提供了强大的SSL支持,使得Web服务器的安全性能更进一步。本文将介绍如何配置Nginx以支持SSL协议,并保护Web服务器的安全性能。什么是SSL协议?SSL(SecureSocke
 Nginx防火墙如何保障HTTPS安全通信Jun 10, 2023 am 10:16 AM
在当今互联网时代,安全通信已经成为了不可或缺的一部分。尤其是在HTTPS通信中,如何保障其安全性尤为重要。而Nginx作为流行的Web服务器和反向代理服务器,其防火墙也可以在保障HTTPS安全通信中发挥重要作用。本文将就Nginx防火墙从以下几个方面进行讨论。TLS/SSL加密HTTPS通信的安全保障主要是基于TLS/SSL加密技术,其能够防止数据在传输过程
 怎么使用Nginx实现HTTPS双向验证Jun 03, 2023 pm 08:38 PM
单向验证与双向验证的区别:单向验证:指客户端验证服务器端证书,服务器并不需要验证客户端证书。双向验证:指客户端验证服务器端证书,而服务器也需要通过ca的公钥证书来验证客户端证书。详细的握手过程:单向验证浏览器发送一个连接请求给安全服务器。1、服务器将自己的证书,以及同证书相关的信息发送给客户浏览器。2、客户浏览器检查服务器送过来的证书是否是由自己信赖的ca中心所签发的。如果是,就继续执行协议;如果不是,客户浏览器就给客户一个警告消息:警告客户这个证书不是可以信赖的询问客户是否需要继续。3、接着客
 Nginx下如何升级httpsMay 14, 2023 pm 04:49 PM
下载证书在证书控制台下载nginx版本证书。下载到本地的压缩文件包解压后包含:.pem文件:证书文件.key文件:证书的私钥文件(申请证书时如果没有选择自动创建csr,则没有该文件)配置nginx1、在nginx的安装目录下创建cert目录,并且将下载的全部文件拷贝到cert目录中,如果申请证书时是自己创建的csr文件,请将对应的私钥文件放到cert目录下。2、打开nginx安装目录下conf目录中的nginx.conf文件#usernobody;worker_processes1;#error
 nginx如何让浏览器强制跳转HTTPS访问May 15, 2023 pm 02:34 PM
效果可以看如下:但是如果我们现在使用http来访问的话,访问不了。如下图所示:因此我现在首先要做的是使用nginx配置下,当用户在浏览器下输入http请求的时候使用nginx重定向到https下即可。因此我们现在需要做一个简单的nginx重定向功能。因此在我们的nginx中需要加如下重定向配置:server{listenxxx.abc.com;server_namexxx.abc.com;rewrite^/(.*)$https://$host$1permanent;}因此nginx主要的配置代码

Hot AI Tools

Undresser.AI Undress
AI-powered app for creating realistic nude photos

AI Clothes Remover
Online AI tool for removing clothes from photos.

Undress AI Tool
Undress images for free

Clothoff.io
AI clothes remover

AI Hentai Generator
Generate AI Hentai for free.

Hot Article
Hot Tools

SAP NetWeaver Server Adapter for Eclipse
Integrate Eclipse with SAP NetWeaver application server.

EditPlus Chinese cracked version
Small size, syntax highlighting, does not support code prompt function

Dreamweaver Mac version
Visual web development tools

Notepad++7.3.1
Easy-to-use and free code editor

VSCode Windows 64-bit Download
A free and powerful IDE editor launched by Microsoft

