

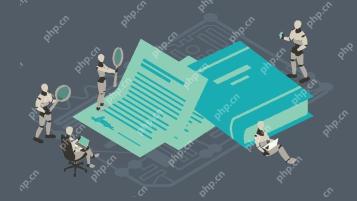
 Technology peripheralsAIThe open source Stable Diffusion plug-in for PS is here: one-click AI brain supplement, ready to install and use
The open source Stable Diffusion plug-in for PS is here: one-click AI brain supplement, ready to install and use

Stable Diffusion is a hot new technology in the AI field this year. Thanks to the open source spirit of Stability AI, it has spawned many AI painting applications. Compared with the traditional painting method, the method of generating images based on text is simple to operate, and the drawing speed is also fast. Each generation will show a different effect.
With the development of technology, consumer-grade GPUs have been able to generate images in tens of seconds, and people have begun to consider using AI drawing capabilities for productivity. Since Stable Diffusion has long been open source, it makes sense for developers to use it to create drawing tools.
For example, the previous Automatic1111 is a commonly used network UI in the Stable Diffusion user community, but it is still not convenient enough for professional users who often use Photoshop.

Now, with the help of Auto-Photoshop-StableDiffusion-Plugin, users can use the function of Automatic1111 Stable Diffusion directly in the most famous drawing software Photoshop, No need to switch between programs.
This means you can easily use Stable Diffusion AI in the familiar Photoshop environment, right out of the box. After installing this plugin, you can edit Stable Diffusion images using all your favorite tools and conveniently save them in Photoshop.
Project link: https://github.com/AbdullahAlfaraj/Auto-Photoshop-StableDiffusion-Plugin
Function introduction
Quick Test
1. Create a new project in PhotoShop.
2. Once the plugin is loaded, do not select or change anything. Just click the "Generate" button.
3. If you see an image of a cat being loaded onto the canvas, then everything is set up correctly.
txt2Img
1. Use the Rectangular Marquee Tool and select the square (1x1 scale)
a. In the selection tool, you can set the ratio to 512x512 or 512x768;
b. Just make sure that the selected ratio is equal to the size of the resulting image.
2. Write prompt and click "Generate".
3. The result will be resized to fit the selected area. But don't worry, the image will be loaded into PhotoShop as a Smart Object. So you can resize it without losing quality.
img2img
1. Select an image that is on its own layer.
a. If you want the generated image to be perfectly placed on the original image, optional "Ctrl-click" on the layer thumbnail.
2. Change the mode to "img2img" in the plugin UI.
3. Click the "Set Initial Image" button. If the image does not change to the selected layer. Clicking multiple times (the author is working on fixing this issue).
4. Click Generate.
inpaint
1. Change the plug-in mode to "inpaint".
2. Create a square selection on the image to be repaired:
a. Use the Rectangular Marquee Tool;
b. Or “ctrl click” the layer thumbnail.
3. Create a new layer and paint white within the selected area. Note that any white areas will be regenerated via Stable Diffusion.
4. Click the "Init Inpaint Mask" button.
a. Make sure you are still on the white layer before clicking;
b. After clicking, the plug-in will generate a suitable black and white mask. Mask and set it to the mask that Stable Diffusion wants to use.
c. It also creates a canvas snapshot under the selected area and uses this snapshot as the initial image.
5. Click the "Generate" button.
outpaint
1. Change plugin mode to Repair. Remember, "outpaint" is just a special case of repair.
2. Create a "rectangular selection" that intersects the image you want to expand.
3. Click "Init Outpaint Mask", this will:
a. Create a snapshot of the canvas under the selection, and It is used as the "initial image" of Stable Diffusion;
b. Create a black and white mask and use it as the "initial mask";
c. It will update the "Initial Image" and "Initial Mask" in the plug-in UI.
Some experiences
- In order to get the best inpaint and outpaint effects, you must choose " stable-diffusion inpainting model".
- img2img's "initial image" cannot have transparency.
- Always check the Initial Image and Initial Mask in the plugin UI and make sure they match the layers on the canvas. If you want to adjust the mismatch, please do the following:
- Select "group_mask" in the layers panel and click the "set init mask" button.
- Select "group_init_image" in the layer panel and click the "set init image" button.
- After selecting a model, you may need to wait for it to load into Stable Diffusion before you can click Generate.
- Check if the progress bar is stuck at 0% or 1%: you can cancel/interrupt the request at any time if you think it's taking too long and want to regenerate again.
- Do not open multiple PhotoShop documents, this will break the plug-in. Please work on one project at a time.
Questions about img2img, inpaint or outpaint
- ##img2img, inpaint and outpaint Use photoshop's "quick export to png" function.
- Random quick export to png gets corrupted, this is a known photoshop bug.
If you want to test whether the feature is broken and the cause of the problem, you can do the following:
- Select one layer and right click on it and select quick export to png. If you get a window prompt, the quick export works fine. On the other hand if nothing happens then you need to restart photoshop and try the export function again until it works.
- You can use this plugin when the export function is enabled, otherwise img2img, inpaint and outpaint will not work properly.
When running the plug-in for the first time:
1. Download the plug-in:
git clone https://github.com/AbdullahAlfaraj/Auto-Photoshop-StableDiffusion-Plugin.git
2. Run "start_server.bat" under "Auto-Photoshop-StableDiffusion-Plugin"
3. In the location where you installed automatic1111, Edit webui-user.bat and change this line:
set COMMANDLINE_ARGS=
到
set COMMANDLINE_ARGS= --api
这将允许插件与 automatic1111 项目进行通信。保存后关闭「webui-user.bat」文件,正常运行即可。
4、运行 photoshop。选择编辑→首选项→插件,确保选中「启用开发者模式」(Enable Developer Mod)选框。
5、安装官方的「Adobe UXP Developer Tool」,此工具会将插件添加到 photoshop:https://developer.adobe.com/photoshop/uxp/devtool/installation/
6、运行 Adobe UXP Developer Tool 并单击右上角的「添加插件」按钮。导航到「Auto-Photoshop-StableDiffusion-Plugin” 文件夹所在的位置并打开「manifest.json」
7、选择插件并点击 Actions → Load Selected,就完成了。
第二次及后续运行插件的步骤:
1、启动 「webui-user.bat」
2、启动 「start_server.bat」
3、启动 「Photoshop」
4、启动 「Adobe UXP Developer Tool」并加载插件
The above is the detailed content of The open source Stable Diffusion plug-in for PS is here: one-click AI brain supplement, ready to install and use. For more information, please follow other related articles on the PHP Chinese website!

 From Friction To Flow: How AI Is Reshaping Legal WorkMay 09, 2025 am 11:29 AM
The legal tech revolution is gaining momentum, pushing legal professionals to actively embrace AI solutions. Passive resistance is no longer a viable option for those aiming to stay competitive. Why is Technology Adoption Crucial? Legal professional
 This Is What AI Thinks Of You And Knows About YouMay 09, 2025 am 11:24 AM
Many assume interactions with AI are anonymous, a stark contrast to human communication. However, AI actively profiles users during every chat. Every prompt, every word, is analyzed and categorized. Let's explore this critical aspect of the AI revo
 7 Steps To Building A Thriving, AI-Ready Corporate CultureMay 09, 2025 am 11:23 AM
A successful artificial intelligence strategy cannot be separated from strong corporate culture support. As Peter Drucker said, business operations depend on people, and so does the success of artificial intelligence. For organizations that actively embrace artificial intelligence, building a corporate culture that adapts to AI is crucial, and it even determines the success or failure of AI strategies. West Monroe recently released a practical guide to building a thriving AI-friendly corporate culture, and here are some key points: 1. Clarify the success model of AI: First of all, we must have a clear vision of how AI can empower business. An ideal AI operation culture can achieve a natural integration of work processes between humans and AI systems. AI is good at certain tasks, while humans are good at creativity and judgment
 Netflix New Scroll, Meta AI's Game Changers, Neuralink Valued At $8.5 BillionMay 09, 2025 am 11:22 AM
Meta upgrades AI assistant application, and the era of wearable AI is coming! The app, designed to compete with ChatGPT, offers standard AI features such as text, voice interaction, image generation and web search, but has now added geolocation capabilities for the first time. This means that Meta AI knows where you are and what you are viewing when answering your question. It uses your interests, location, profile and activity information to provide the latest situational information that was not possible before. The app also supports real-time translation, which completely changed the AI experience on Ray-Ban glasses and greatly improved its usefulness. The imposition of tariffs on foreign films is a naked exercise of power over the media and culture. If implemented, this will accelerate toward AI and virtual production
 Take These Steps Today To Protect Yourself Against AI CybercrimeMay 09, 2025 am 11:19 AM
Artificial intelligence is revolutionizing the field of cybercrime, which forces us to learn new defensive skills. Cyber criminals are increasingly using powerful artificial intelligence technologies such as deep forgery and intelligent cyberattacks to fraud and destruction at an unprecedented scale. It is reported that 87% of global businesses have been targeted for AI cybercrime over the past year. So, how can we avoid becoming victims of this wave of smart crimes? Let’s explore how to identify risks and take protective measures at the individual and organizational level. How cybercriminals use artificial intelligence As technology advances, criminals are constantly looking for new ways to attack individuals, businesses and governments. The widespread use of artificial intelligence may be the latest aspect, but its potential harm is unprecedented. In particular, artificial intelligence
 A Symbiotic Dance: Navigating Loops Of Artificial And Natural PerceptionMay 09, 2025 am 11:13 AM
The intricate relationship between artificial intelligence (AI) and human intelligence (NI) is best understood as a feedback loop. Humans create AI, training it on data generated by human activity to enhance or replicate human capabilities. This AI
 AI's Biggest Secret — Creators Don't Understand It, Experts SplitMay 09, 2025 am 11:09 AM
Anthropic's recent statement, highlighting the lack of understanding surrounding cutting-edge AI models, has sparked a heated debate among experts. Is this opacity a genuine technological crisis, or simply a temporary hurdle on the path to more soph
 Bulbul-V2 by Sarvam AI: India's Best TTS ModelMay 09, 2025 am 10:52 AM
India is a diverse country with a rich tapestry of languages, making seamless communication across regions a persistent challenge. However, Sarvam’s Bulbul-V2 is helping to bridge this gap with its advanced text-to-speech (TTS) t


Hot AI Tools

Undresser.AI Undress
AI-powered app for creating realistic nude photos

AI Clothes Remover
Online AI tool for removing clothes from photos.

Undress AI Tool
Undress images for free

Clothoff.io
AI clothes remover

Video Face Swap
Swap faces in any video effortlessly with our completely free AI face swap tool!

Hot Article
Hot Tools

Safe Exam Browser
Safe Exam Browser is a secure browser environment for taking online exams securely. This software turns any computer into a secure workstation. It controls access to any utility and prevents students from using unauthorized resources.

SublimeText3 Mac version
God-level code editing software (SublimeText3)

mPDF
mPDF is a PHP library that can generate PDF files from UTF-8 encoded HTML. The original author, Ian Back, wrote mPDF to output PDF files "on the fly" from his website and handle different languages. It is slower than original scripts like HTML2FPDF and produces larger files when using Unicode fonts, but supports CSS styles etc. and has a lot of enhancements. Supports almost all languages, including RTL (Arabic and Hebrew) and CJK (Chinese, Japanese and Korean). Supports nested block-level elements (such as P, DIV),

Notepad++7.3.1
Easy-to-use and free code editor

WebStorm Mac version
Useful JavaScript development tools

