Home >Technology peripherals >AI >Generative adversarial network, AI transforms pictures into comic style
Generative adversarial network, AI transforms pictures into comic style
- WBOYWBOYWBOYWBOYWBOYWBOYWBOYWBOYWBOYWBOYWBOYWBOYWBforward
- 2023-04-11 21:58:051739browse
Hello, everyone.
Everyone is playing with AI painting recently. I found an open source project on GitHub to share with you.

The project shared today is implemented using GAN Generative Adversarial Network. We have shared many articles before about the principles and practice of GAN. Friends who want to know more can read it Historical articles.
The source code and data set are obtained at the end of the article. Let’s share how to train and run the project.
1. Prepare the environment
Install tensorflow-gpu 1.15.0, use 2080Ti as the GPU graphics card, and cuda version 10.0.
git download project AnimeGANv2 source code.
After setting up the environment, you need to prepare the data set and vgg19.

Download the dataset.zip compressed file, which contains 6k real pictures and 2k comic pictures for GAN training.

vgg19 is used to calculate the loss, which will be introduced in detail below.
2. Network model
Generative adversarial network requires the definition of two models, one is the generator and the other is the discriminator.
The generator network is defined as follows:
with tf.variable_scope('A'):
inputs = Conv2DNormLReLU(inputs, 32, 7)
inputs = Conv2DNormLReLU(inputs, 64, strides=2)
inputs = Conv2DNormLReLU(inputs, 64)

with tf.variable_scope('B'):
inputs = Conv2DNormLReLU(inputs, 128, strides=2)
inputs = Conv2DNormLReLU(inputs, 128)

with tf.variable_scope('C'):
inputs = Conv2DNormLReLU(inputs, 128)
inputs = self.InvertedRes_block(inputs, 2, 256, 1, 'r1')
inputs = self.InvertedRes_block(inputs, 2, 256, 1, 'r2')
inputs = self.InvertedRes_block(inputs, 2, 256, 1, 'r3')
inputs = self.InvertedRes_block(inputs, 2, 256, 1, 'r4')
inputs = Conv2DNormLReLU(inputs, 128)

with tf.variable_scope('D'):
inputs = Unsample(inputs, 128)
inputs = Conv2DNormLReLU(inputs, 128)

with tf.variable_scope('E'):
inputs = Unsample(inputs,64)
inputs = Conv2DNormLReLU(inputs, 64)
inputs = Conv2DNormLReLU(inputs, 32, 7)
with tf.variable_scope('out_layer'):
out = Conv2D(inputs, filters =3, kernel_size=1, strides=1)
self.fake = tf.tanh(out)
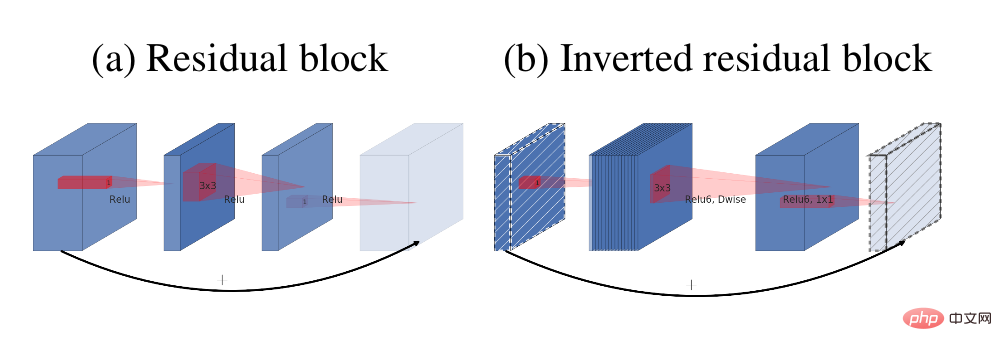
The main module in the generator is the reverse residual block

The residual structure ( a) and reverse residual block (b)
The discriminator network structure is as follows:
def D_net(x_init,ch, n_dis,sn, scope, reuse):
channel = ch // 2
with tf.variable_scope(scope, reuse=reuse):
x = conv(x_init, channel, kernel=3, stride=1, pad=1, use_bias=False, sn=sn, scope='conv_0')
x = lrelu(x, 0.2)

for i in range(1, n_dis):
x = conv(x, channel * 2, kernel=3, stride=2, pad=1, use_bias=False, sn=sn, scope='conv_s2_' + str(i))
x = lrelu(x, 0.2)

x = conv(x, channel * 4, kernel=3, stride=1, pad=1, use_bias=False, sn=sn, scope='conv_s1_' + str(i))
x = layer_norm(x, scope='1_norm_' + str(i))
x = lrelu(x, 0.2)

channel = channel * 2

x = conv(x, channel * 2, kernel=3, stride=1, pad=1, use_bias=False, sn=sn, scope='last_conv')
x = layer_norm(x, scope='2_ins_norm')
x = lrelu(x, 0.2)

x = conv(x, channels=1, kernel=3, stride=1, pad=1, use_bias=False, sn=sn, scope='D_logit')

return x
3. Loss
Before calculating the loss, use the VGG19 network to convert the image Vectorization. This process is a bit like the Embedding operation in NLP.
Eembedding is to convert words into vectors, and VGG19 is to convert pictures into vectors.

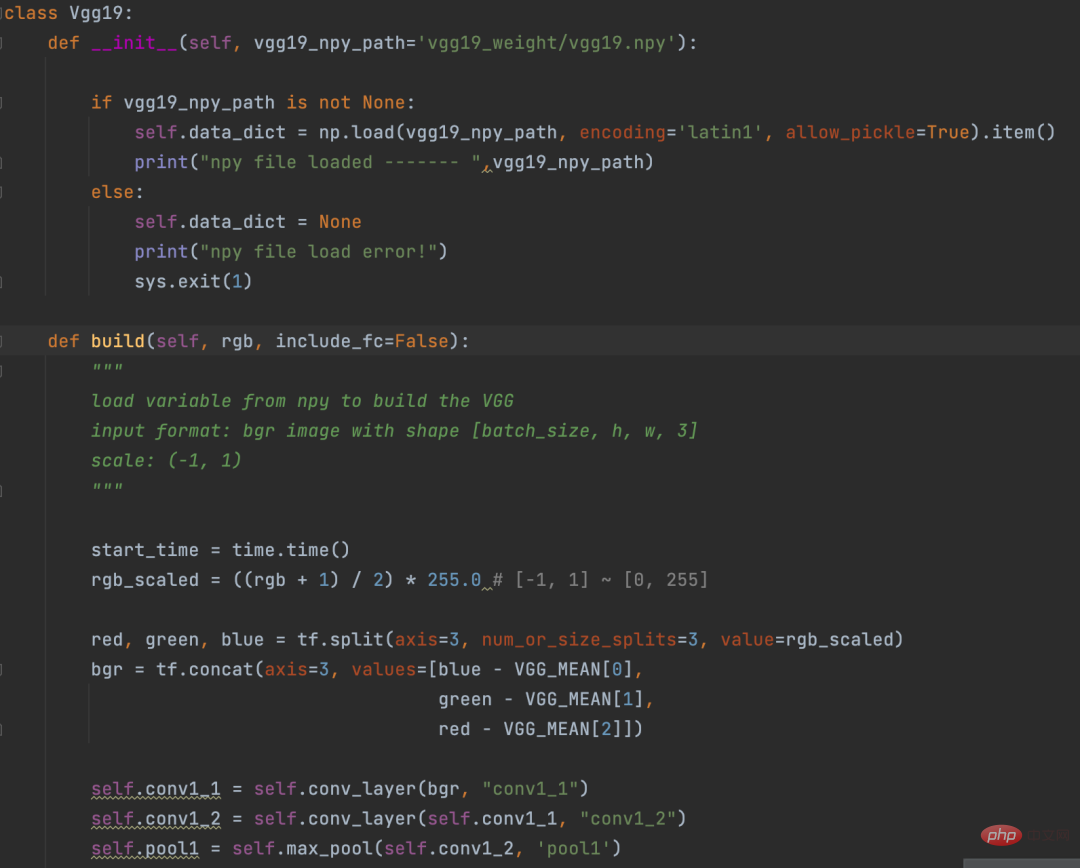
VGG19 definition
The logic of calculating the loss part is as follows:
def con_sty_loss(vgg, real, anime, fake):

# 真实Generative adversarial network, AI transforms pictures into comic style向量化
vgg.build(real)
real_feature_map = vgg.conv4_4_no_activation

# 生成Generative adversarial network, AI transforms pictures into comic style向量化
vgg.build(fake)
fake_feature_map = vgg.conv4_4_no_activation

# 漫画风格向量化
vgg.build(anime[:fake_feature_map.shape[0]])
anime_feature_map = vgg.conv4_4_no_activation

# 真实Generative adversarial network, AI transforms pictures into comic style与生成Generative adversarial network, AI transforms pictures into comic style的损失
c_loss = L1_loss(real_feature_map, fake_feature_map)
# 漫画风格与生成Generative adversarial network, AI transforms pictures into comic style的损失
s_loss = style_loss(anime_feature_map, fake_feature_map)

return c_loss, s_loss
Here vgg19 is used to calculate the real image (parameter real) and generation respectively The loss of the picture (parameter fake), the loss of the generated picture (parameter fake) and the comic style (parameter anime).
c_loss, s_loss = con_sty_loss(self.vgg, self.real, self.anime_gray, self.generated)
t_loss = self.con_weight * c_loss + self.sty_weight * s_loss + color_loss(self.real,self.generated) * self.color_weight + tv_loss
Finally give different weights to these two losses, so that the pictures generated by the generator not only retain the appearance of the real pictures, but also migrate to the comic style
4. Training
Execute the following command in the project directory to start training
python train.py --dataset Hayao --epoch 101 --init_epoch 10
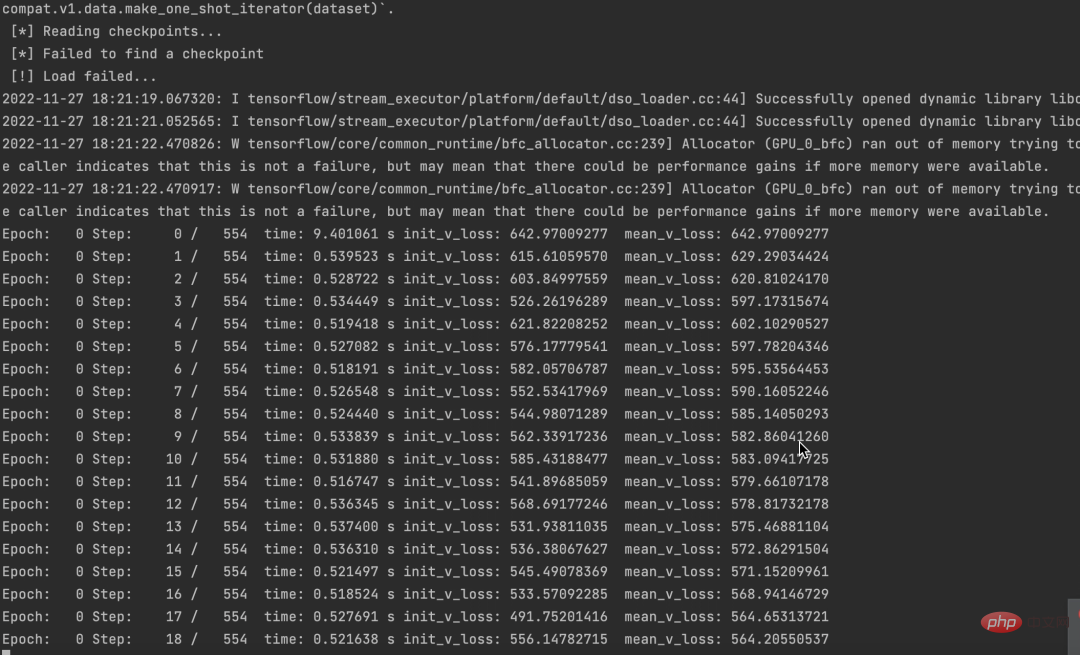
After the operation is successful, you can see the data.

At the same time, we can also see that losses are declining.
The source code and data set have been packaged. If you need it, just leave a message in the comment area.
If you think this article is useful to you, please click and read to encourage me. I will continue to share excellent Python AI projects in the future.
The above is the detailed content of Generative adversarial network, AI transforms pictures into comic style. For more information, please follow other related articles on the PHP Chinese website!
Related articles
See more- Technology trends to watch in 2023
- How Artificial Intelligence is Bringing New Everyday Work to Data Center Teams
- Can artificial intelligence or automation solve the problem of low energy efficiency in buildings?
- OpenAI co-founder interviewed by Huang Renxun: GPT-4's reasoning capabilities have not yet reached expectations
- Microsoft's Bing surpasses Google in search traffic thanks to OpenAI technology

