Home >Backend Development >Python Tutorial >Python testing | Creating unit tests in python
Python testing | Creating unit tests in python
- 王林forward
- 2023-04-11 19:37:151877browse
As a developer or programmer, whenever you write code, there is usually one thing you overlook: testing. Testing is part of development and you should rigorously test your applications to ensure they meet the required functionality.
Let’s start with why we need to test:
1. Reduce the need for manual testing
Because test cases are pre-written, there is no real reason to do them again Manual testing. Most of the time, especially with large applications, you have to run many stages in your software to test whether a feature works. This can be avoided through testing. Imagine having to use a specific input every time you run your application. With the test this will be automatically entered every time it is run.
2. Allow for better code structure
Creating test cases before development is a best practice. This forces you to think about the system as a whole before starting development.
3. Allows faster testing in the long run
While coding, the implementation of the function can change, but the output remains the same. Instead of manually testing a function when its implementation changes, you can simply implement specific test cases that can run multiple test cases at once.
Getting started
We will focus on one specific type of testing, unit testing. This specific type of test is used to test small units of code, such as functions or classes.
To create unit tests, we will use the python standard library unittest. This method of creating test cases uses OOP (Object Oriented Programming) by creating a class that contains all the test cases. This will allow us to run all test cases in the class at once.
Note: You can use any IDE or text editor you are familiar with (the default python IDE can be used). To do this, I will demonstrate using Visual Studio Code with the python extension.
We will first import our unit test library:
import unittest
Now make our class declaration:
class TestingClass(unittest.TestCase):
Note that (unittest.TestCase) is inherited in python. Provide functionality to the class.
Add the first function in the class:

self.assertEqual is a method provided by the previously inherited class (unittest.TestCase). This method tests whether two variables have the same value.
Add our test runner. This is what gets our unit test running:
unittest.main()
This is what the finished code should look like:
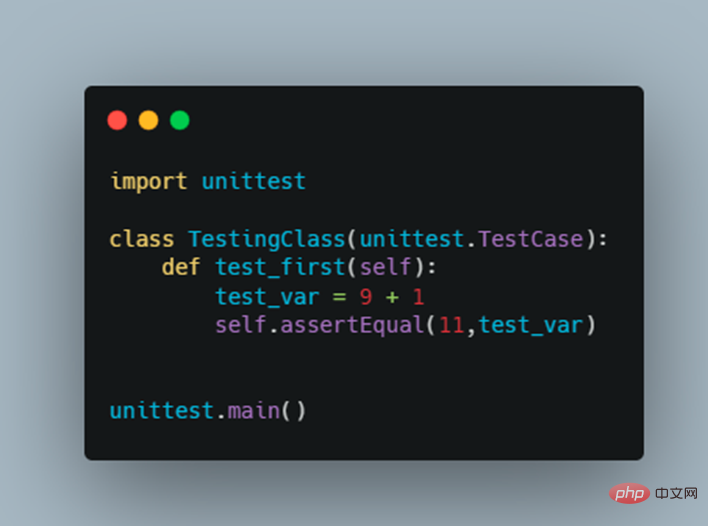
The code above demonstrates test 9 Is 1 equal to 11? If you know basic math, you should know that 9 1 = 10. Therefore, this test case will fail.
Output:

You should have guessed it. Failure!
The solution is simple. Modify the code to:
test_var = 9 + 2
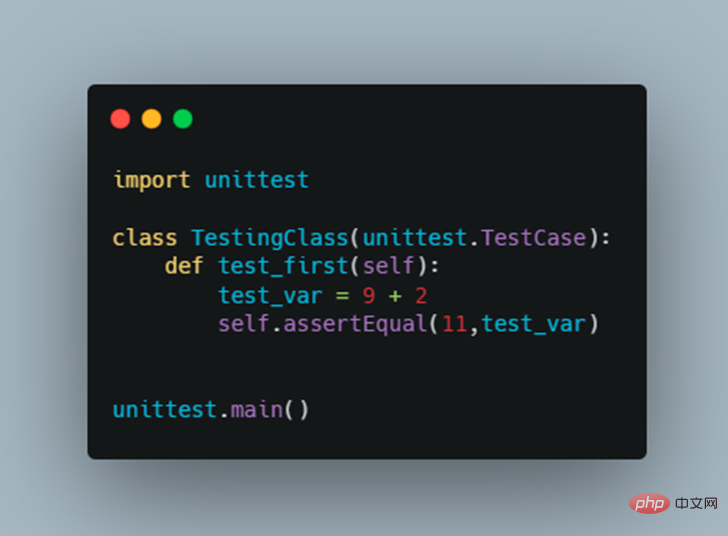
Output:


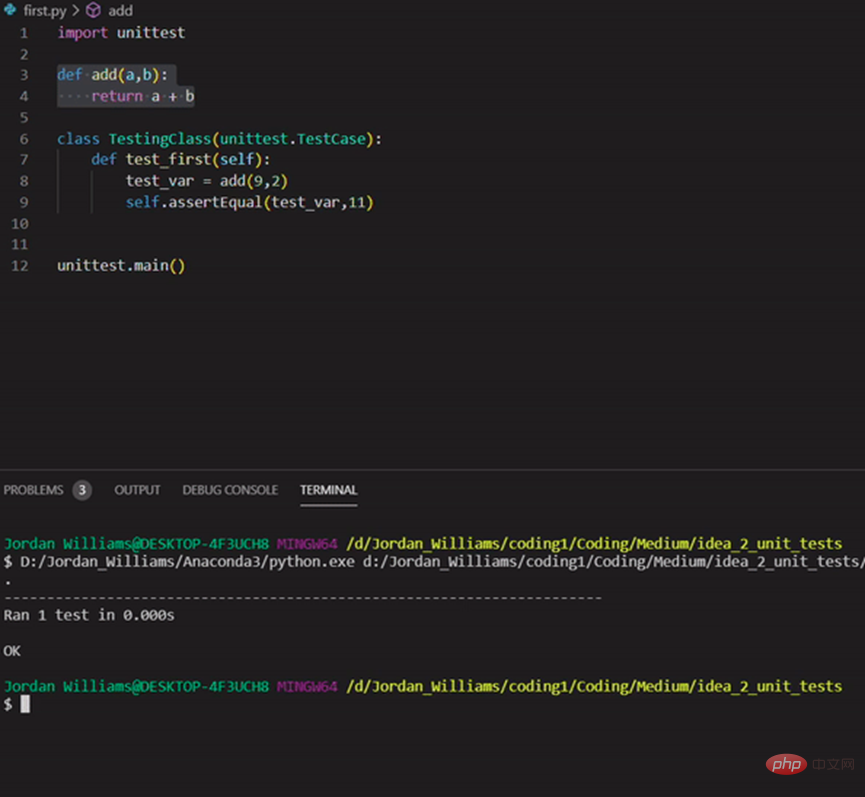

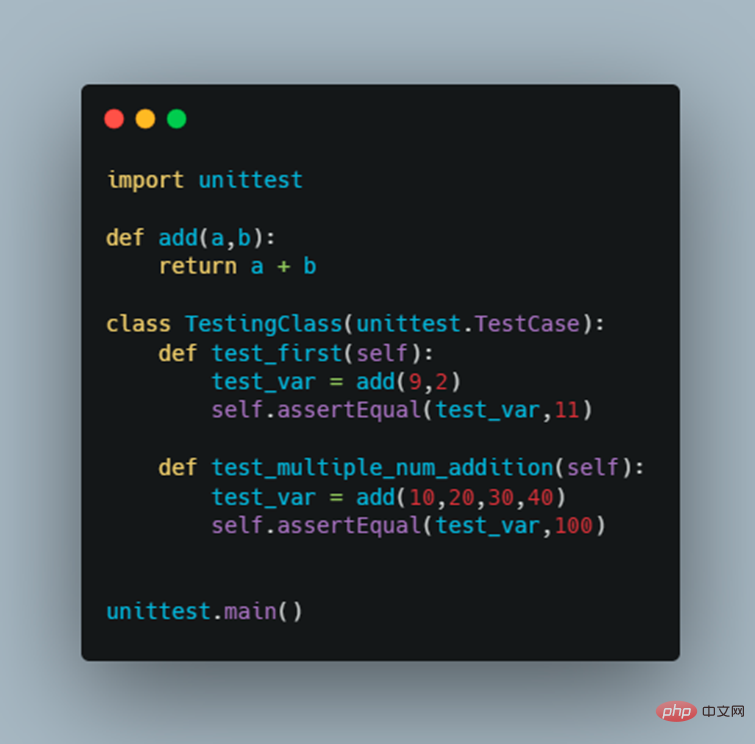
Run:
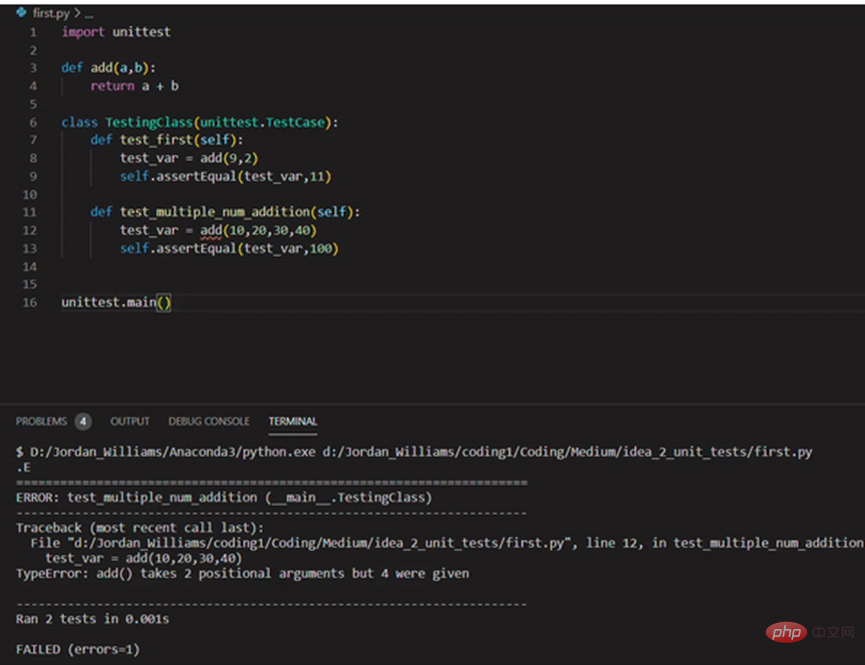
This will obviously fail because the function parameter only accepts two arguments. But what if we really want to add more numbers?
This can be solved by making a change to the add function:

Pay attention to the left side of the values parameter asterisk (*). This allows you to enter multiple parameters and allows values to be stored as tuples.
Code before execution:
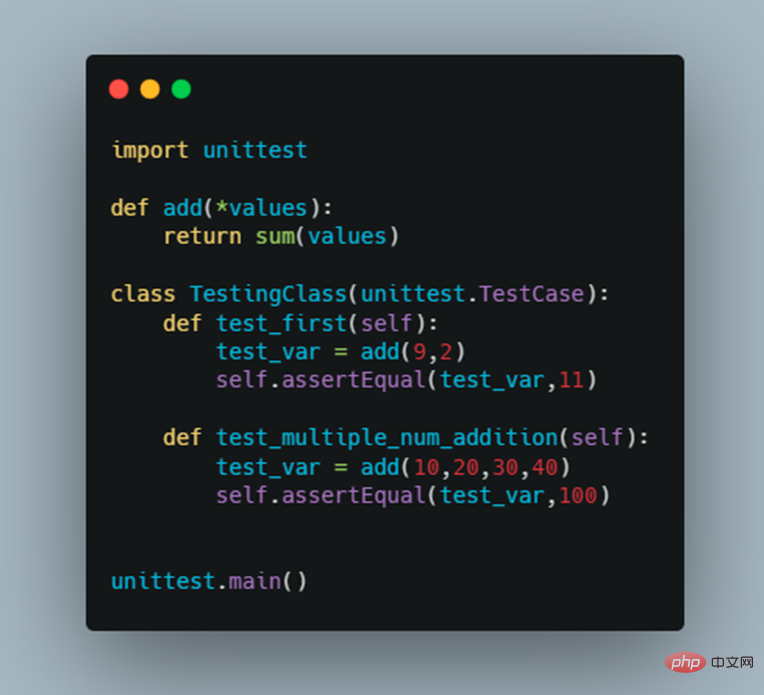
Execution:
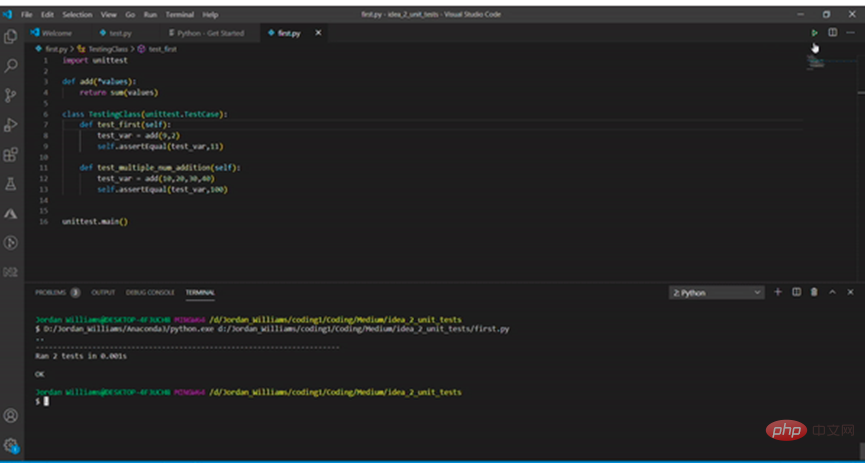
Execution successful!
Placing an asterisk before the variable of the function parameter is called a non-keyword parameter.
Summary
Attempting tests may bring additional robustness to the code. It can also change the way you do development. Having a testing mindset ensures fewer bugs in production and less repetitive manual testing during development.
*Original link: https://medium.com/swlh/python-testing-a8156d022eef
The above is the detailed content of Python testing | Creating unit tests in python. For more information, please follow other related articles on the PHP Chinese website!

