 Technology peripherals
 AI
AI Step-by-step instructions on how to create a chatbot using Azure Bot Services
Translator | Li Rui
Reviewer | Sun Shujuan
Messengers, network services and other software are inseparable from robots (bots). In software development and applications, a bot is an application designed to automatically perform (or perform according to a preset script) actions created in response to user requests. In this article, Daniil Mikhov, developer at NIX United, presents an example of creating a chatbot using Microsoft Azure Bot Services. This article will be helpful to developers who want to develop chatbots using this service. Why use Azure Bot Services?
The advantage of developing chatbots on Azure Bot Services is Microsoft’s high level of support for its products. The company's experts actively communicate with the technical community and quickly identify and fix vulnerabilities in the service. Additionally, Microsoft provides the ability to create custom JSON files to work with some of Messenger’s APIs, giving developers a lot of possibilities when creating chatbots.It’s also important to remember the other benefits of Azure Bot Services:
Azure Bot Services allows Developers use open source SDK tools (software development kits) to create, test and deploy chatbots.
-
- #Integration with cognitive services refers to services that use machine learning tools at work to solve typical tasks. Cognitive services ensure a better interaction process between the chatbot and the user.
- Multi-platform refers to the ability to connect a chatbot to multiple channels without changing the original code.
- Plenty of open source examples to facilitate the development process and get started quickly (there are many ready-made code examples on GitHub).
- Developers can extend the chatbot infrastructure on the Azure platform by adding new features. For example, you can add more channels and use each channel for testing. The Cosmos DB service can be used to store conversation state and user-entered information. To train your chatbot, you can add language understanding (LUIS). It uses machine learning algorithms to better communicate with users. However, LUIS is not free, and not every client wants to allocate additional funds.
Analysis of Chatbot in Azure Bot Services
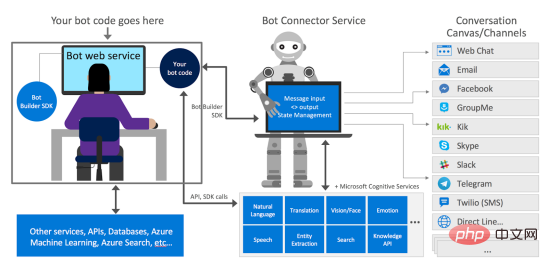
The functional structure of a chatbot created on Azure can be expressed as:
You can see a list of possible channels connected to the chatbot on the right. This list will be continuously updated with new platforms. At the bottom of it are Microsoft Cognitive Services available on the Azure platform. These services allow communication with chatbots through voice requests, facial expressions, gestures, and more. 
Bot Builder SDK is used to develop chatbots on Azure. The product is in the public domain and its main advantage is ongoing support from developers. In a separate fork on GitHub, you can get the latest information about the service, or ask its developers questions.
Create Chatbot
Before writing the code, analyze the nuances that you should consider before creating a chatbot on Azure Bot Service : (1) Can chatbots correctly understand people’s questions? Communication with the chatbot takes place through the user interface. The user interface allows developers to communicate with the chatbot in a language it understands. For this purpose, Microsoft Azure uses a dialog system that follows a specific hierarchy: Here you can See three basic ways to establish a conversation with a chatbot: On the bottom line, you can see the allowed methods for creating custom requests for the chatbot: ; In the second phase, it returns a valid value to the user or restarts the data query loop if an invalid value is received. #Daniil Mikhov, whose main task is to remind him of any action he needs to take in the future. To create the chatbot, Mikhov used the Empty Template provided by Visual Studio, which includes several types of controllers: BotController and NotifyController. BotController receives messages for the chatbot and passes them to the chatbot framework. Chatbot also includes several deployment templates for easier deployment of applications to the Azure platform. The Notify Controller determines when to send a message to the user. This issue will be discussed in more detail later. (3) Start the function and populate the ToDoDialog tab ##Go to Startup.cs tab to view its contents. Here you can see the registered error handler AdapterWithErrorHandler. If an error occurs in a program, the application's reaction to the error is necessary. Note registering ConversationState - use this to let the chatbot know which user it is communicating with and at what stage of the conversation. Let’s take a look at the contents of the ToDoDialog.cs tab. Mikhov declares waterfallSteps, which is a set of steps in the waterfall dialog box, which has been mentioned above. In waterfallSteps, specify which asynchronous functions are used in each step to build the conversation between the user and the chatbot. Below you can see what type of input prompts the chatbot will use. The content here is pretty standard: the chatbot will ask people some questions about the event and then provide scheduling reminders. Now run the chatbot and test its operation using the Bot Framework Emulator interface. # (4) First launch and test in the chatbot framework simulator When running this application, a link to the URL where the chatbot will wait for user messages will appear. Before starting the test, specify this link in the chatbot framework simulator: In the first communication step, the chatbot asks the user to enter the name of the event that needs to be reminded. To do this, call the following code : Now, when When the chatbot is called, it will return the following text: Please enter a description of the event. After declaring the event (such as buying milk) that you want to be reminded of, call the code in the second step. Here, the chatbot will provide one of three reminder time options: Pay attention to the use of stepContext. It saves all information about the dialog box, recording intermediate values. To implement a list of possible reminder times, ChoicePrompt is used. This method will provide the user with three options and a possible reminder time (2 minutes, 5 minutes, or the same time the next day) . There could have been more choices, but only three were chosen. Using selection to represent each new selection time, you can get: In the chatbot framework simulator, this code will be rendered like this: You can use Parse to parse the results. As a reminder, parsing is an automated process of collecting data and structuring it. The chatbot will then ask the user if they are sure about the selected reminder time, using ConfirmPrompt to confirm the agreement: From the visual Look, this method looks like this: The last step is to take out the previously filled in information from stepContext and Generates a SavedNotificationModel to which a conversationReference must be added. Without it, the chatbot cannot resume the conversation with the user or determine which user specifically addressed the issue. MikhovUsing the dictionary method as a temporary repository for these events, thanks to its adoption, The chatbot assigns its unique instanceId to each specific dialog: This will end up with the chatbot dialogue. You can display text to the user indicating the end of the dialog box and create a corresponding reminder request: "Thank you. The notification was saved successfully". (5) How does a chatbot travel through time For To locate the chatbot in time, Mikhov created the notifiedcontroller method NotifyTimeCheck(). This approach allows the application to be systematically polled and if a certain event is about to occur, the chatbot will retrieve the event from the dictionary and send a notification to the user. To get notified, the BotAdapter's ContinueConversationAsync() method is called, passing the ConversationReference to it. The first parameter of ContinueConversationAsync() must always be the appId (application ID) of the chatbot service, otherwise, it will not work. In addition, the chatbot also needs to be reminded that when a certain time arrives, the event must be reminded to the specific user. Developers can use Azure Function (BotTimerFunction), which will be triggered by a time trigger (TimerTrigger). Every minute, the function will send a request to this endpoint and start checking for the specified events. If it reaches the correct time frame, the chatbot will notify the user that the scheduled event is about to occur. Today, WhatsApp, Facebook Messenger, Telegram and other communication tools are not only communication platforms, but also business platforms. Chatbots help businesses effectively sell and promote goods and services online. Automating daily processes, providing necessary product information to customers in a timely manner, receiving and processing requests – all these features of a properly configured chatbot will help convert users into customers. Therefore, as a developer, you should remember how popular this tool is now and how cool it is to be able to create such an application and become a popular expert as a result. Original title: How to Create a Chatbot Using Azure Bot Service: Step-by-Step Instruction,Author: Daniil Mikhov

In essence, the query is a staged dialog: in the first stage, the chatbot requests input data


The above is the detailed content of Step-by-step instructions on how to create a chatbot using Azure Bot Services. For more information, please follow other related articles on the PHP Chinese website!
 Nuitka简介:编译和分发Python的更好方法Apr 13, 2023 pm 12:55 PM
译者 | 李睿审校 | 孙淑娟随着Python越来越受欢迎,其局限性也越来越明显。一方面,编写Python应用程序并将其分发给没有安装Python的人员可能非常困难。解决这一问题的最常见方法是将程序与其所有支持库和文件以及Python运行时打包在一起。有一些工具可以做到这一点,例如PyInstaller,但它们需要大量的缓存才能正常工作。更重要的是,通常可以从生成的包中提取Python程序的源代码。在某些情况下,这会破坏交易。第三方项目Nuitka提供了一个激进的解决方案。它将Python程序编
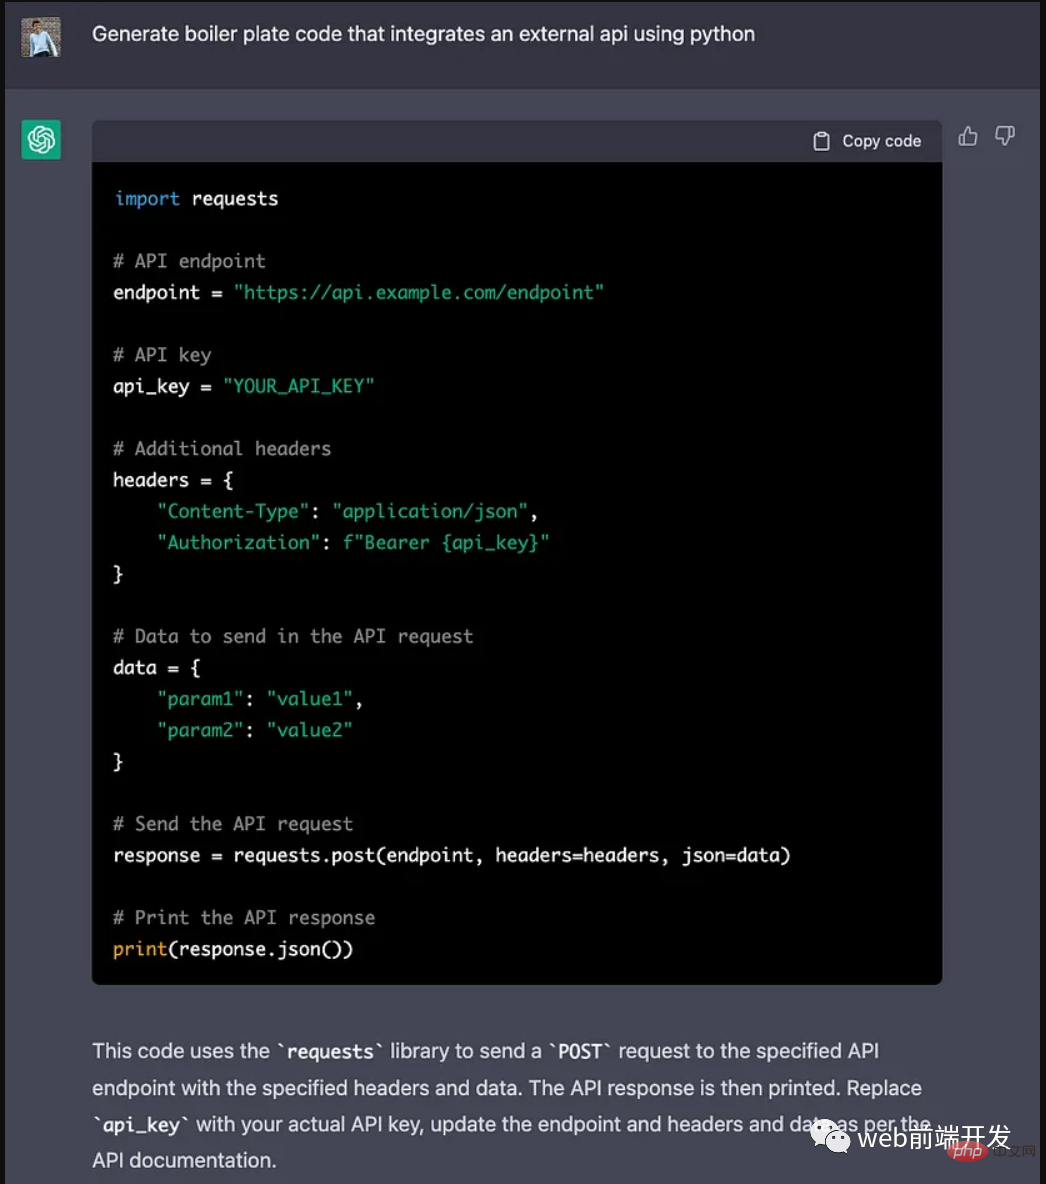 ChatGPT 的五大功能可以帮助你提高代码质量Apr 14, 2023 pm 02:58 PM
ChatGPT 目前彻底改变了开发代码的方式,然而,大多数软件开发人员和数据专家仍然没有使用 ChatGPT 来改进和简化他们的工作。这就是为什么我在这里概述 5 个不同的功能,以提高我们的日常工作速度和质量。我们可以在日常工作中使用它们。现在,我们一起来了解一下吧。注意:切勿在 ChatGPT 中使用关键代码或信息。01.生成项目代码的框架从头开始构建新项目时,ChatGPT 是我的秘密武器。只需几个提示,它就可以生成我需要的代码框架,包括我选择的技术、框架和版本。它不仅为我节省了至少一个小时
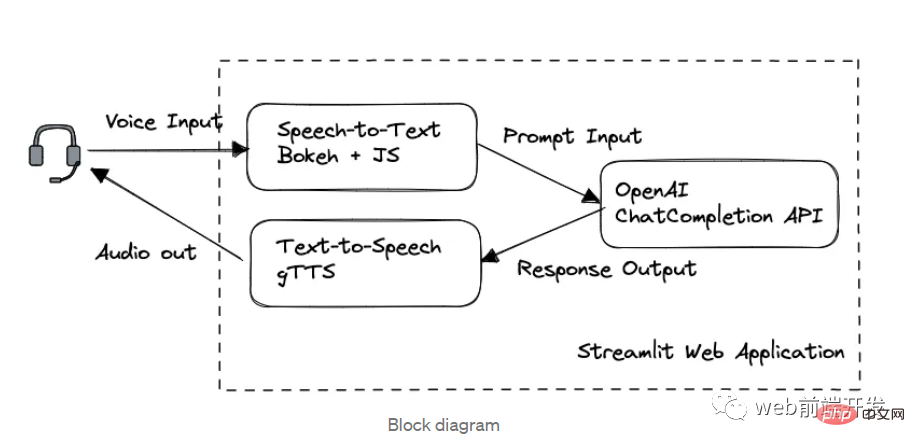 我创建了一个由 ChatGPT API 提供支持的语音聊天机器人,方法请收下Apr 07, 2023 pm 11:01 PM
今天这篇文章的重点是使用 ChatGPT API 创建私人语音 Chatbot Web 应用程序。目的是探索和发现人工智能的更多潜在用例和商业机会。我将逐步指导您完成开发过程,以确保您理解并可以复制自己的过程。为什么需要不是每个人都欢迎基于打字的服务,想象一下仍在学习写作技巧的孩子或无法在屏幕上正确看到单词的老年人。基于语音的 AI Chatbot 是解决这个问题的方法,就像它如何帮助我的孩子要求他的语音 Chatbot 给他读睡前故事一样。鉴于现有可用的助手选项,例如,苹果的 Siri 和亚马
 解决Batch Norm层等短板的开放环境解决方案Apr 26, 2023 am 10:01 AM
测试时自适应(Test-TimeAdaptation,TTA)方法在测试阶段指导模型进行快速无监督/自监督学习,是当前用于提升深度模型分布外泛化能力的一种强有效工具。然而在动态开放场景中,稳定性不足仍是现有TTA方法的一大短板,严重阻碍了其实际部署。为此,来自华南理工大学、腾讯AILab及新加坡国立大学的研究团队,从统一的角度对现有TTA方法在动态场景下不稳定原因进行分析,指出依赖于Batch的归一化层是导致不稳定的关键原因之一,另外测试数据流中某些具有噪声/大规模梯度的样本
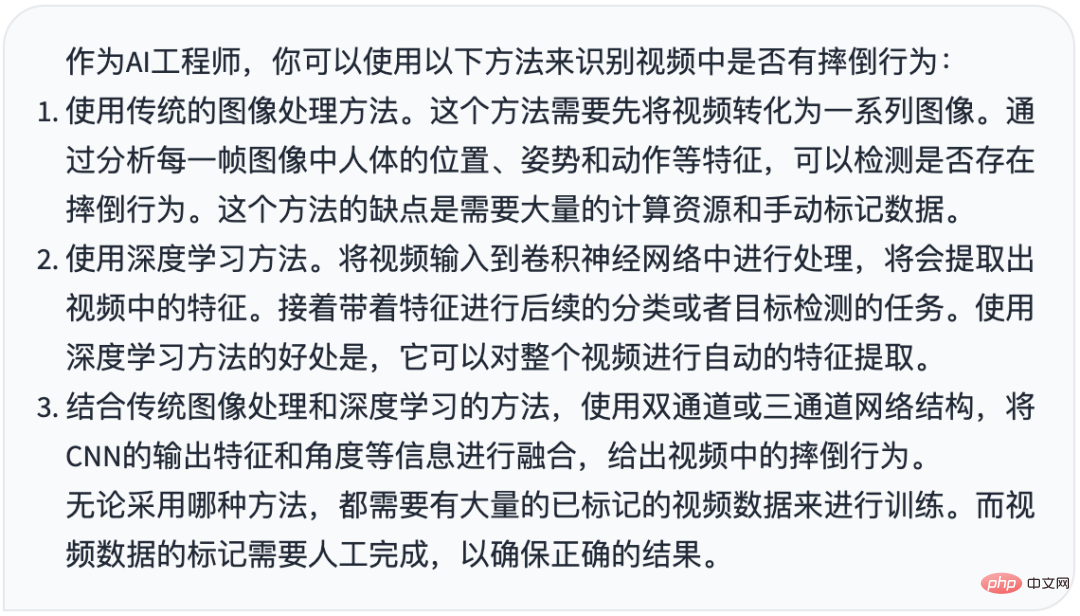 摔倒检测-完全用ChatGPT开发,分享如何正确地向ChatGPT提问Apr 07, 2023 pm 03:06 PM
哈喽,大家好。之前给大家分享过摔倒识别、打架识别,今天以摔倒识别为例,我们看看能不能完全交给ChatGPT来做。让ChatGPT来做这件事,最核心的是如何向ChatGPT提问,把问题一股脑的直接丢给ChatGPT,如:用 Python 写个摔倒检测代码 是不可取的, 而是要像挤牙膏一样,一点一点引导ChatGPT得到准确的答案,从而才能真正让ChatGPT提高我们解决问题的效率。今天分享的摔倒识别案例,与ChatGPT对话的思路清晰,代码可用度高,按照GPT返回的结果完全可以开
 17 个可以实现高效工作与在线赚钱的 AI 工具网站Apr 11, 2023 pm 04:13 PM
自 2020 年以来,内容开发领域已经感受到人工智能工具的存在。1.Jasper AI网址:https://www.jasper.ai在可用的 AI 文案写作工具中,Jasper 作为那些寻求通过内容生成赚钱的人来讲,它是经济实惠且高效的选择之一。该工具精通短格式和长格式内容均能完成。Jasper 拥有一系列功能,包括无需切换到模板即可快速生成内容的命令、用于创建文章的高效长格式编辑器,以及包含有助于创建各种类型内容的向导的内容工作流,例如,博客文章、销售文案和重写。Jasper Chat 是该
 为什么特斯拉的人形机器人长得并不像人?一文了解恐怖谷效应对机器人公司的影响Apr 14, 2023 pm 11:13 PM
1970年,机器人专家森政弘(MasahiroMori)首次描述了「恐怖谷」的影响,这一概念对机器人领域产生了巨大影响。「恐怖谷」效应描述了当人类看到类似人类的物体,特别是机器人时所表现出的积极和消极反应。恐怖谷效应理论认为,机器人的外观和动作越像人,我们对它的同理心就越强。然而,在某些时候,机器人或虚拟人物变得过于逼真,但又不那么像人时,我们大脑的视觉处理系统就会被混淆。最终,我们会深深地陷入一种对机器人非常消极的情绪状态里。森政弘的假设指出:由于机器人与人类在外表、动作上相似,所以人类亦会对
 如何使用Azure Bot Services创建聊天机器人的分步说明Apr 11, 2023 pm 06:34 PM
译者 | 李睿审校 | 孙淑娟信使、网络服务和其他软件都离不开机器人(bot)。而在软件开发和应用中,机器人是一种应用程序,旨在自动执行(或根据预设脚本执行)响应用户请求创建的操作。在本文中, NIX United公司的.NET开发人员Daniil Mikhov介绍了使用微软Azure Bot Services创建聊天机器人的一个例子。本文将对想要使用该服务开发聊天机器人的开发人员有所帮助。 为什么使用Azure Bot Services? 在Azure Bot Services上开发聊


Hot AI Tools

Undresser.AI Undress
AI-powered app for creating realistic nude photos

AI Clothes Remover
Online AI tool for removing clothes from photos.

Undress AI Tool
Undress images for free

Clothoff.io
AI clothes remover

AI Hentai Generator
Generate AI Hentai for free.

Hot Article

Hot Tools

Dreamweaver CS6
Visual web development tools

DVWA
Damn Vulnerable Web App (DVWA) is a PHP/MySQL web application that is very vulnerable. Its main goals are to be an aid for security professionals to test their skills and tools in a legal environment, to help web developers better understand the process of securing web applications, and to help teachers/students teach/learn in a classroom environment Web application security. The goal of DVWA is to practice some of the most common web vulnerabilities through a simple and straightforward interface, with varying degrees of difficulty. Please note that this software

WebStorm Mac version
Useful JavaScript development tools

Atom editor mac version download
The most popular open source editor

MinGW - Minimalist GNU for Windows
This project is in the process of being migrated to osdn.net/projects/mingw, you can continue to follow us there. MinGW: A native Windows port of the GNU Compiler Collection (GCC), freely distributable import libraries and header files for building native Windows applications; includes extensions to the MSVC runtime to support C99 functionality. All MinGW software can run on 64-bit Windows platforms.


