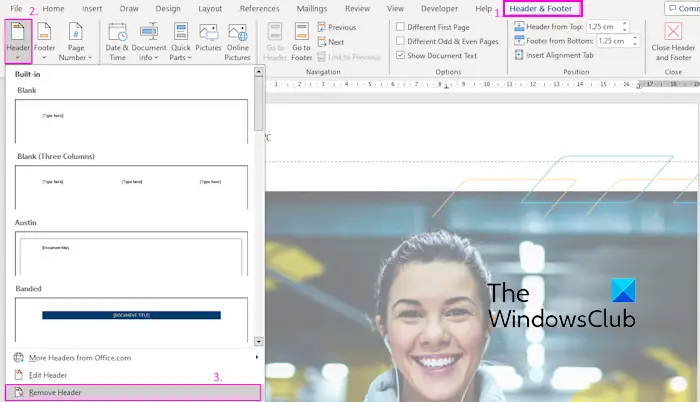
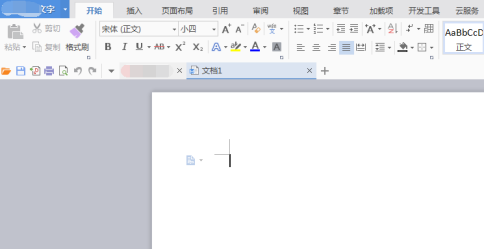
The header and footer have been changed completely because WPS changes the header by default to be consistent throughout the article, so if you want to change it separately, you must set it up separately; the setting method: 1. Open the word document, and when needed To change the end of the previous page of the header, click "Insert->Section->Next Page Section Break"; 2. Double-click the header that needs to be modified, and click "Header and Footer->Cancel Same as before Section->Edit Header"; 3. Re-edit the header.

The operating environment of this tutorial: Windows 10 system, wps office version 11.1.0.10132, Dell G3 computer.
Why did you change the header and footer?
Because WPS changes the header by default, it is consistent throughout the entire article, so if you want to change it separately, you must set it up separately.
At the end of the previous page where you want to change the header, click Insert - Page Break - Next Page Section Break. Sectioning is successful, double-click the header that needs to be modified. Click on the header and footer - cancel the same as the previous section - edit the header. The header is edited successfully, just exit the editing page.
1. Open the word document and you can see that the headers are consistent.

#2. At the end of the previous page where you want to change the header, click Insert - Page Break - Next Page Section Break.

#3. The sectioning is successful. Double-click the header that needs to be modified.

#4. Click on the header and footer - cancel the same as the previous section - edit the header.

#5. The header is successfully edited and exits the editing page.

#6. In the document, the front and rear headers are inconsistent.

Recommended study: "Word Tutorial"
The above is the detailed content of Why did I change the header and footer all at once?. For more information, please follow other related articles on the PHP Chinese website!
 如何移除 Excel 中的页眉和页脚Feb 18, 2024 pm 05:52 PM
Excel是一款功能强大的电子表格软件,经常被广泛使用于办公工作和数据处理中。在Excel中,每个工作表都可以包含页眉和页脚内容,用于在打印页面上显示一些附加信息,如公司名称、文件路径、页码等。然而,有时候我们可能需要删除或修改页眉和页脚,本文将介绍如何在Excel中删除页眉和页脚。在Excel中,删除页眉和页脚非常简单,用户只需要按照以下步骤操作:步骤一:
 如何删除Word中的页眉和页脚?Feb 26, 2024 am 10:00 AM
在这篇文章中,我们将向您展示如何在MicrosoftWord中删除文档的页眉和页脚。如何删除Word中的页眉和页脚?以下是在MicrosoftWord中从文档中删除页眉和页脚的不同方法:使用删除页眉/删除页脚功能。使用Delete键清除文档中的所有页眉和页脚。使用“检查文档”功能删除页眉和页脚。使用VBA脚本删除页眉和页脚。1]使用删除页眉/删除页脚功能要从活动文档的选定页面中删除页眉和页脚,可以利用Word提供的专用选项。这些选项包括删除页眉和删除页脚功能。使用这些功能十分简单:首先,打开源文
 实用Word技巧分享:页眉横线的设置、删除、加长缩短Aug 16, 2022 am 10:15 AM
在之前的文章《实用Word技巧分享:怎么设置页面、版心和页眉页脚的大小》中,我们学习了页面大小、版心大小、页眉页脚的设置。而今天我们来聊聊Word页眉页脚设置技巧,看看Word页眉页脚怎么设置、Word怎么删除页眉横线、Word页眉横线怎么加长缩短等等。
 WPS文档怎么删除页眉Mar 20, 2024 pm 12:25 PM
我们在日常办公中总是会用到WPSOffice,里边包含文档、表格、演示文稿3大类,经常会给文档进行字体的设置、页面大小的修改、查找和替换、删除页眉和页脚的功能等。近期呼声最高的就是WPS怎么删除页眉,这期就给各位小伙伴们分享具体的操作步骤,大家可以认真学习,快来看一看吧!1.首先,打开自己要删除页眉的文件。接着,在页面上方找到【菜单栏】,点击【插入】选项。随后,页面下方的菜单栏会切换到新页面。接着点击插入下方的【页眉和页脚】选项,如图中红色圈出的部分所示。3.接下来,又换出了新的菜单栏,继续点击
 word页眉横线怎么去掉,word页眉横线去掉的方法Mar 04, 2024 am 10:13 AM
Word是一款比较常用的办公软件。Word提供了丰富的文档编辑功能,包括文本输入、格式调整、表格制作、图表插入等。在使用word编辑文档时,很容易忽略一些细节问题,使得整个页面看起来不太美观,比如word页眉上多余的横线。为了使页面看起来更加的精美,想要把页眉的横线去掉,却不知道应该怎么操作。那么word页眉横线怎么去掉呢?接下来我们一起学习一下word页眉横线去掉的实用操作。word页眉横线怎么去掉,word页眉横线去掉的方法具体步骤如下:1、双击页眉处,然后点击“开始”。2、选中页眉中的文字
 excel页眉怎么添加Mar 20, 2024 pm 12:16 PM
excel表格也是可以像word文档一样设置页眉的,但是,很多小伙伴并没有在excel中添加过页眉,下边,我们就分享excel页眉的添加方法,让我们一起来学起来吧!1、打开电脑,新建并打开一个excel文件。2、进入软件主界面后,我们在表格输入数据,随后,点击最上方菜单中的【页面布局】,在页面布局菜单栏中的【页面设置】中,点击下方的下拉按钮,进入页面设置主界面。3、在进入页面设置主界面后,我们找到并点击上方的【页眉/页脚】选项,进入页眉/页脚设置界面。4、下边,设置页眉,点击【自定义页眉】,然后
 WPS文档页脚怎么设置Mar 20, 2024 am 11:28 AM
我们在编辑大量文章内容时,都会给文章每页进行页眉页脚的添加,而利用wps文档可以非常快捷的给文章添加页眉页脚。大部分首页是不进行页眉页脚的设置的,那么到底该怎么在任意一页设置页眉页脚呢?下面小编就给大家讲解下详细步骤:一、创建页眉页脚。1、首先启动软件,新建一个空白文档或者打开一个已有文档,这里新建一个空白文档。2、在插入菜单下,有“页眉和页脚”选项,单击该按钮,进行创建页眉和页脚。3、此时可以发现,整篇文档的所有页面,页眉都处于可编辑状态,这里对页眉输入文字“编辑页眉”,并通过文字工具对其设置
 页眉页脚为什么改一个全改了Feb 28, 2023 pm 02:34 PM
页眉页脚改一个全改了是因为WPS改页眉是默认全篇一致的,所以要单独改,必须要分开设置;其设置方法:1、打开word文档,在需要更改页眉的前一页末端,依次点击“插入->分->下一页分节符”;2、双击需要修改的页眉,依次点击“页眉页脚->取消同前节->编辑页眉”;3、重新编辑页眉即可。


Hot AI Tools

Undresser.AI Undress
AI-powered app for creating realistic nude photos

AI Clothes Remover
Online AI tool for removing clothes from photos.

Undress AI Tool
Undress images for free

Clothoff.io
AI clothes remover

AI Hentai Generator
Generate AI Hentai for free.

Hot Article

Hot Tools

SublimeText3 Linux new version
SublimeText3 Linux latest version

WebStorm Mac version
Useful JavaScript development tools

Dreamweaver CS6
Visual web development tools

SAP NetWeaver Server Adapter for Eclipse
Integrate Eclipse with SAP NetWeaver application server.

SublimeText3 Chinese version
Chinese version, very easy to use


