
Home >Development Tools >VSCode >(Super detailed) How to configure the C language environment in VScode
(Super detailed) How to configure the C language environment in VScode

- 青灯夜游forward
- 2022-12-05 19:05:1911257browse
How to configure the C language environment in
VScode? The following article will introduce to you how to configure the C language environment in VScode (super detailed). I hope it will be helpful to you!

【Recommended learning: vscode tutorial, Programming video】
##1. Download VScode (skip to step five after installation)
Official website download:https://code.visualstudio.com/
2. Install VScode
1. Open the installation package and click to agree to this agreement, next step.

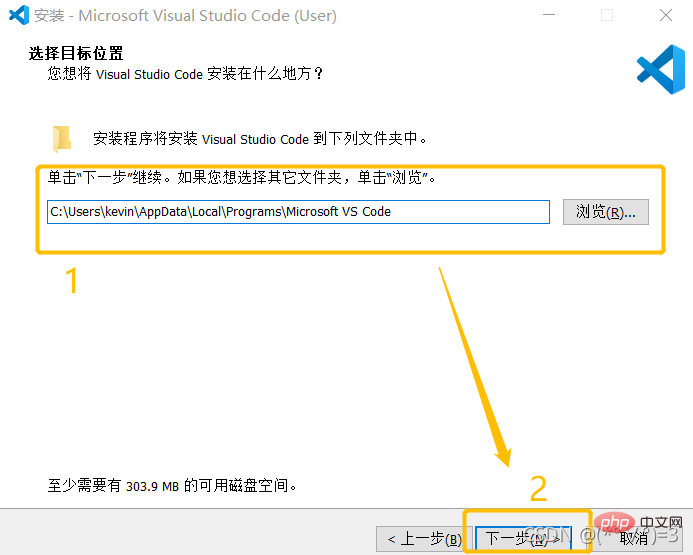
2. Select the installation location and click next.
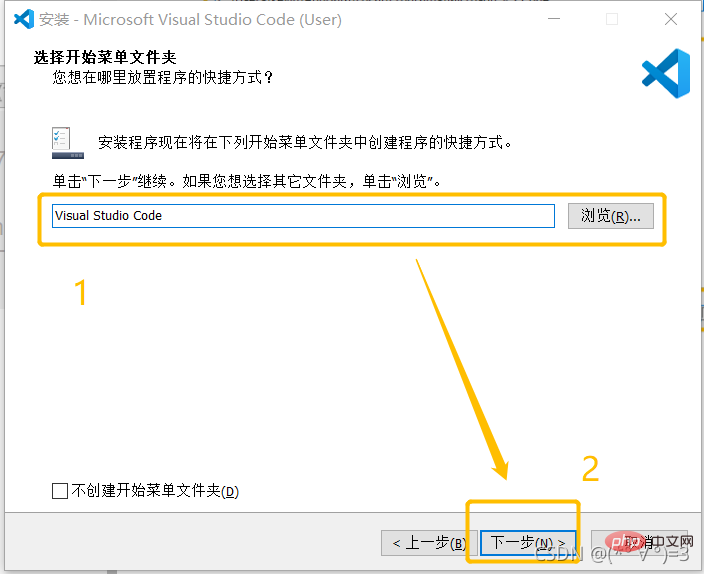
#3. Create program shortcut, default settings, next step.
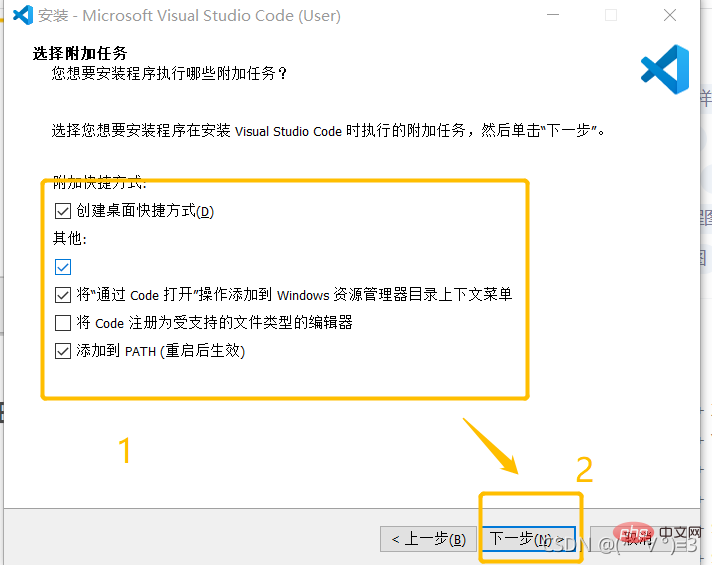
#4. Choose additional tasks according to your needs.
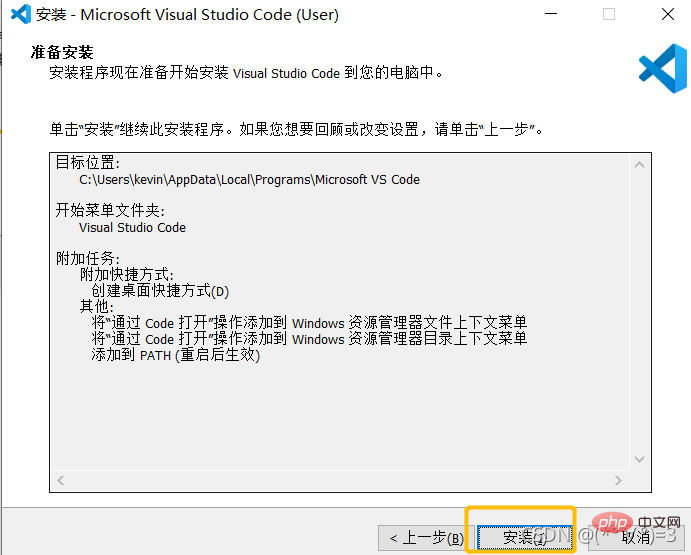
5. Start the installation
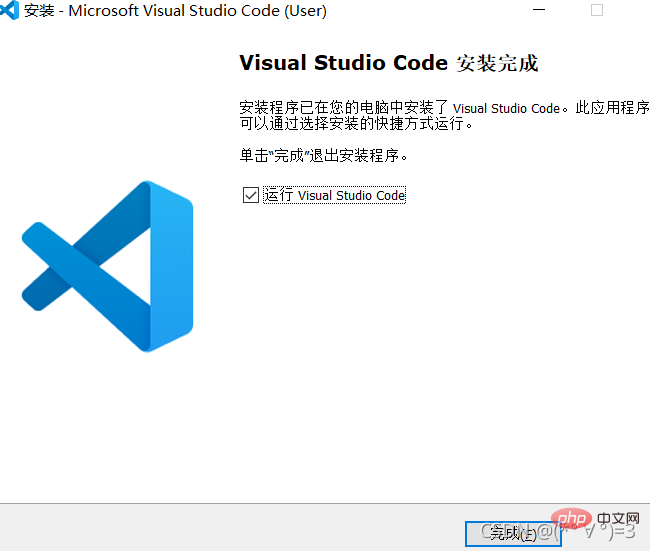
6. Complete the installation
3. Set the language of VScode to Chinese
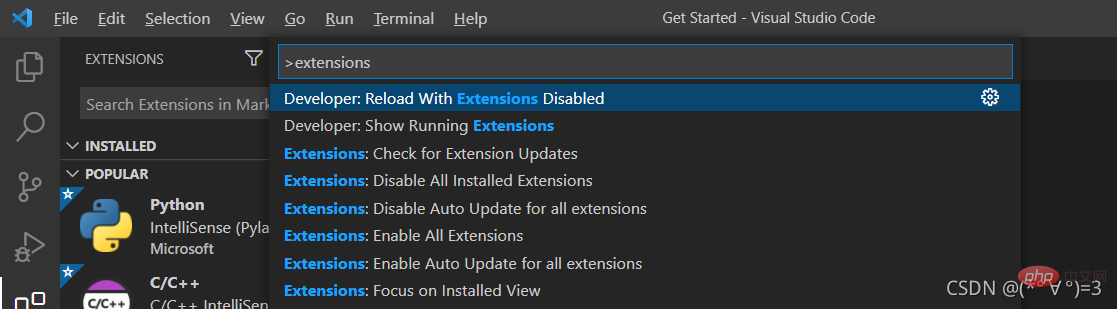
1. Press the shortcut Key Ctrl Shift P, enter extensions in the box that appears, and press Enter. (You can also click the 5th icon on the left navigation bar to enter the download)
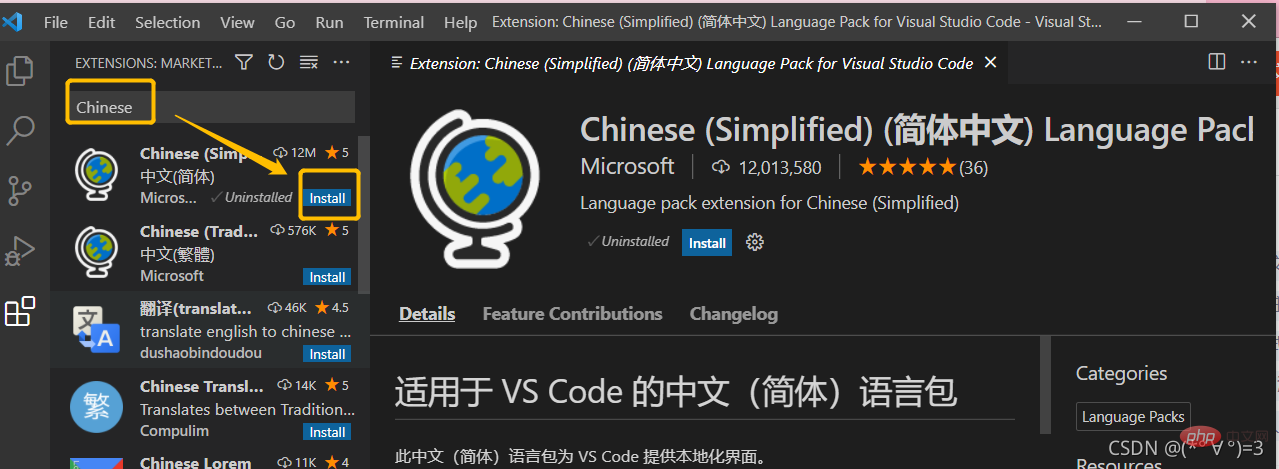
2. Enter Chinese to install Chinese Simplified (Traditional).
3. Restart the software and it will become Chinese
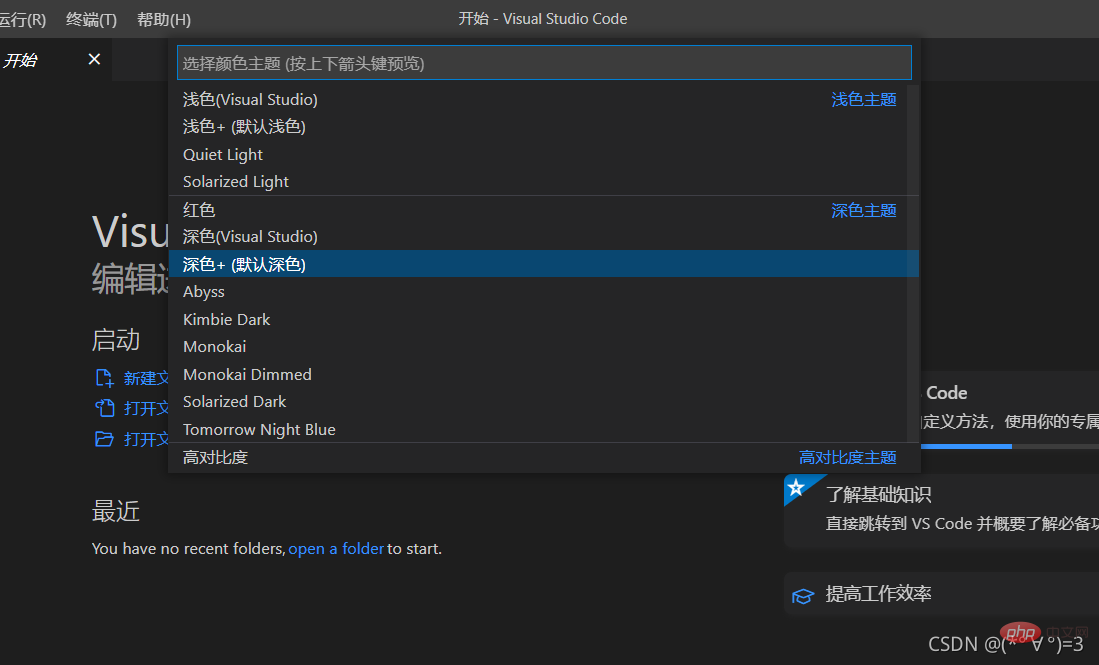
##4. VScode switching theme (personal preference) Press Ctrl K, then press Ctrl T to select your favorite theme switch.
##5. Download the C language compiler (MinGW-W64 GCC) link : https://pan.baidu.com/s/1zBO37-yEkW54vBLOsp1kgA
Extraction code: wo9n
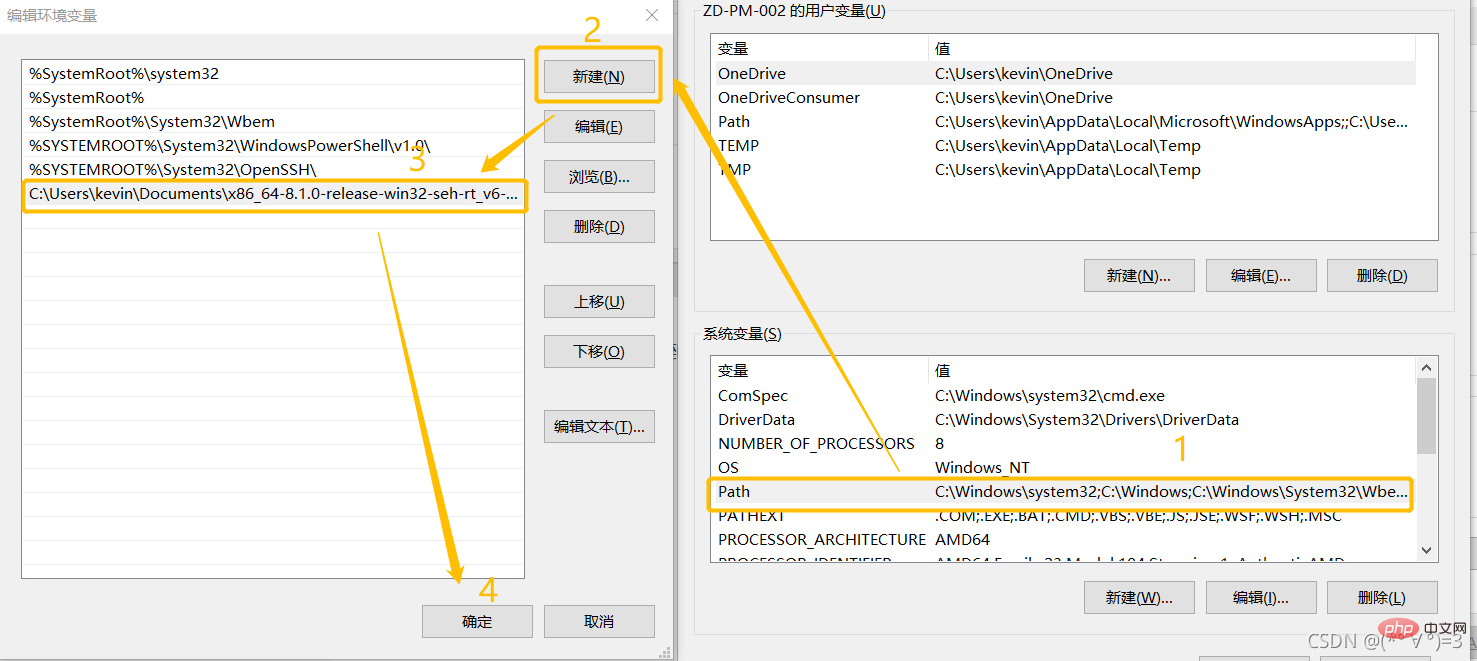
6. Configure the compiler environment Variable 1. Unzip the compressed package, find a folder called bin in the folder, and copy the folder address (right-click the folder address to find the copy address).
Right-click this computer, click Settings, enter the settings interface, find Advanced System Settings, and click to enter. 
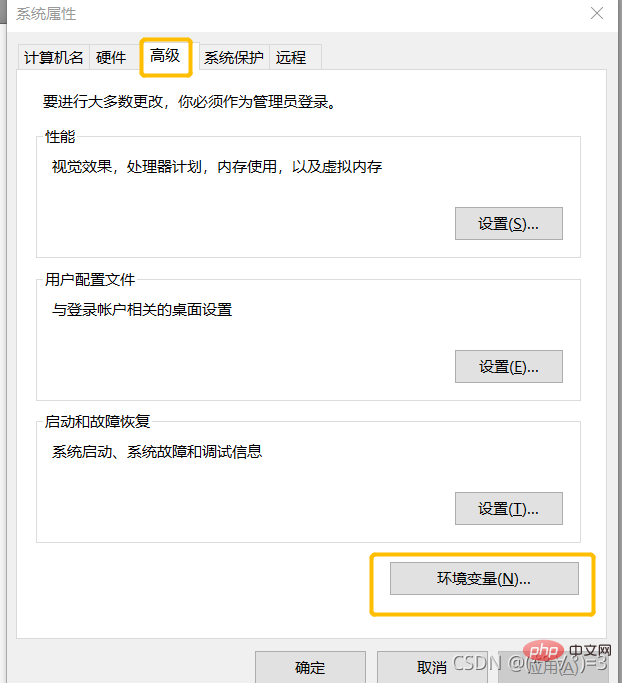
2. Enter the environment variables 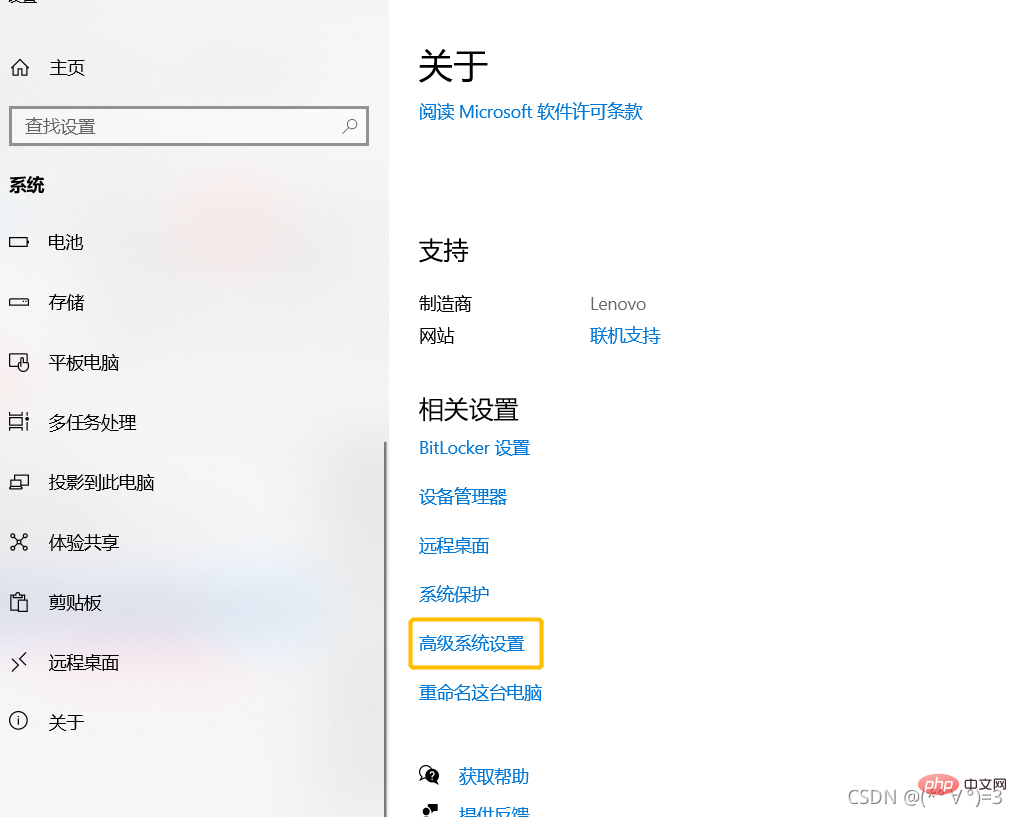
 #3. Find the Path variable in the system variables in the environment variables, Double-click to open it, add the address you just copied, and click OK.
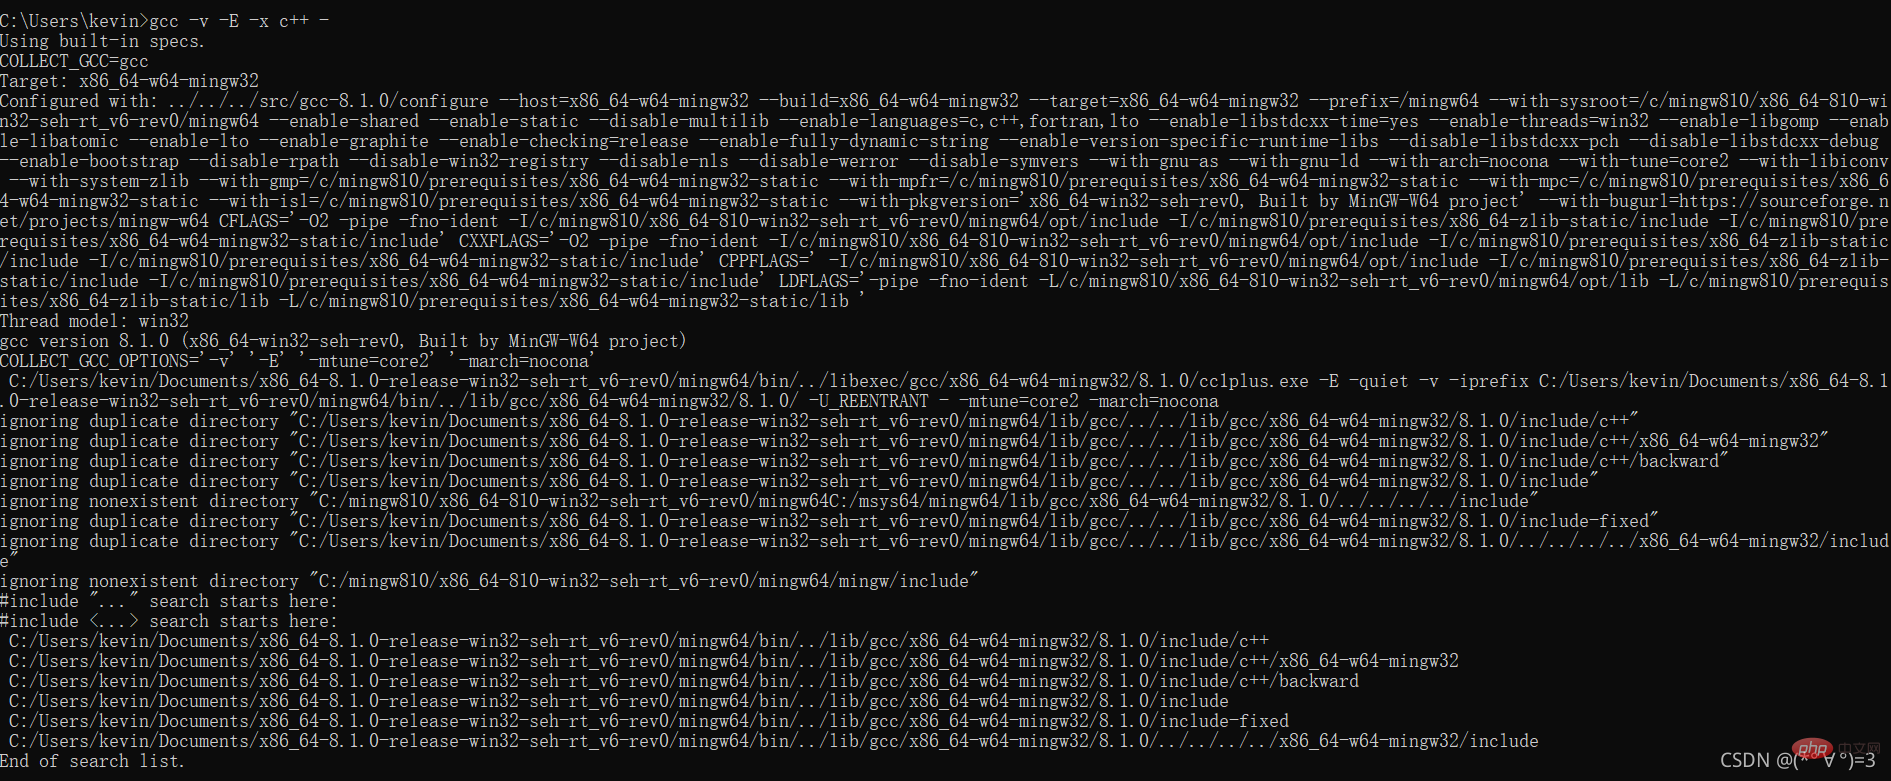
 #4. Finally, test whether the environment configuration is successful. Win key R to open the run window, enter cmd, press Enter, and enter ## in the command line window. #gcc -v -E -x c -
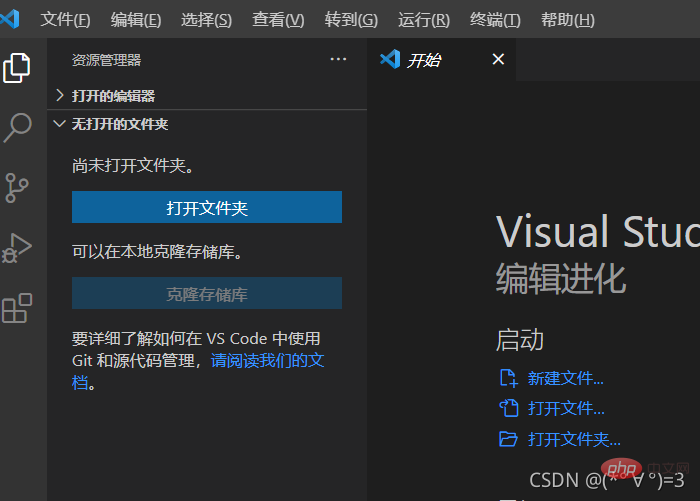
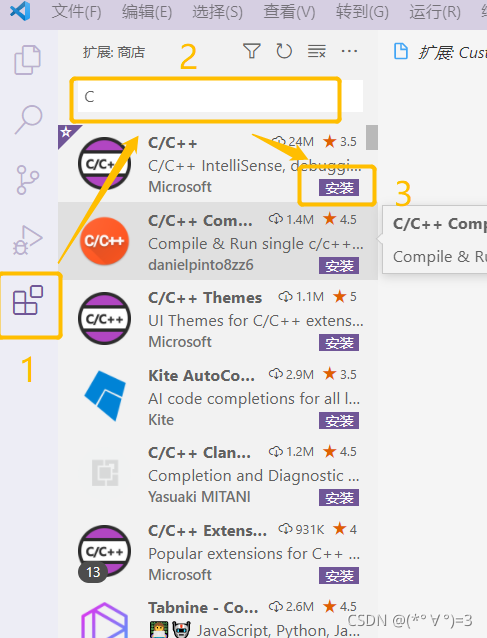
1. Click on the left navigation bar For the fifth icon, enter C to install.
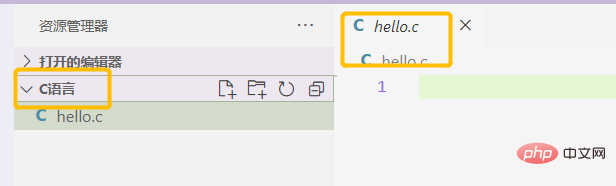
2、新建一个文件夹作为C语言项目文件,打开这个文件夹,Ctrl+N,新建一个hello.c文件(名字随便起,以.c结尾就行了)。
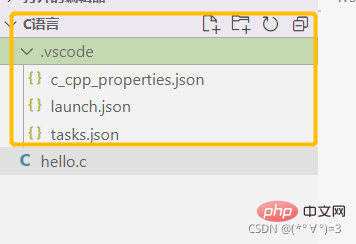
3、然后再建一个.vscode文件夹(注意前面有个点),在里面建三个文件,c_cpp_properties.json、launch.json、tasks.json。
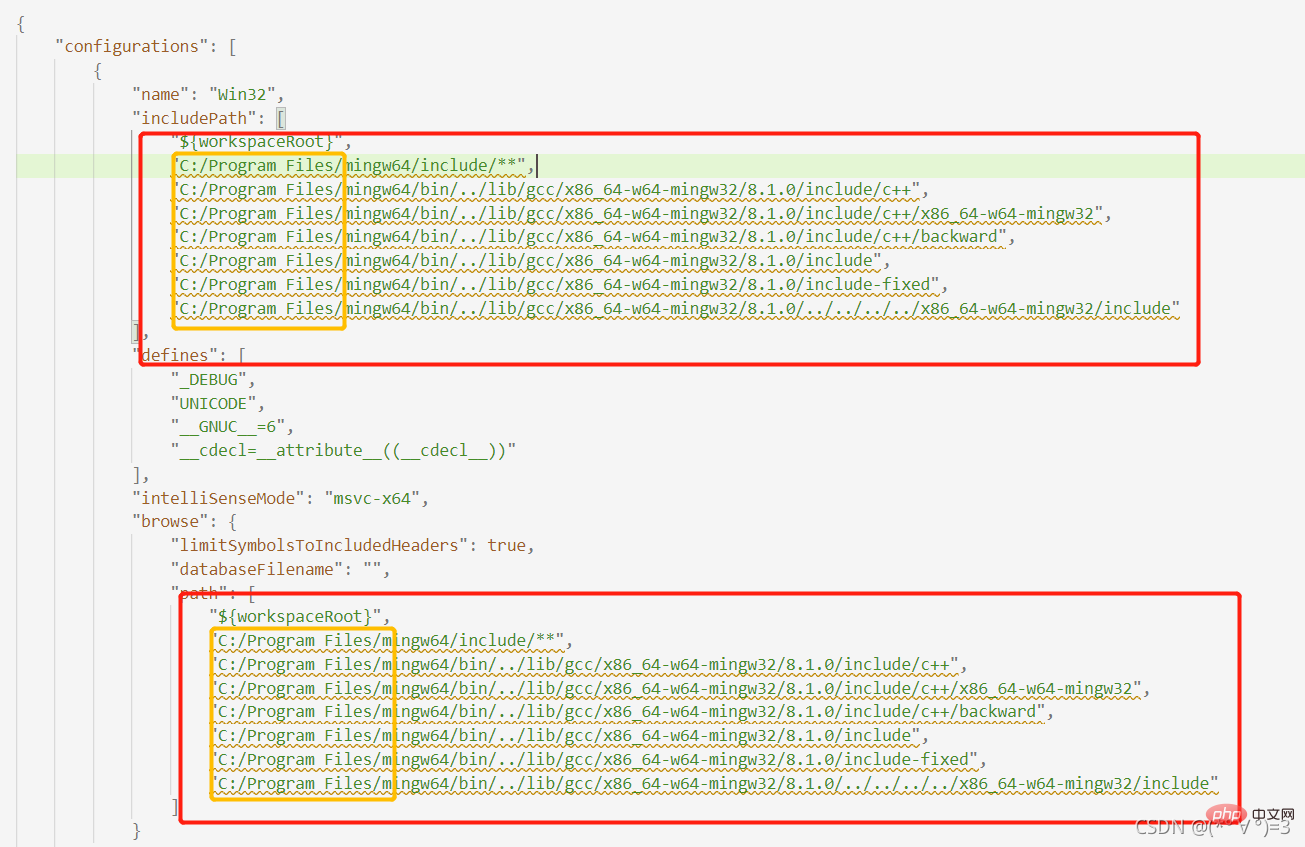
4、将下列代码复制到c_cpp_properties.json文件里。
{
    "configurations": [
        {
            "name": "Win32",
            "includePath": [
                "${workspaceRoot}",
                "C:/Program Files/mingw64/include/**",
                "C:/Program Files/mingw64/bin/../lib/gcc/x86_64-w64-mingw32/8.1.0/include/c++",
                "C:/Program Files/mingw64/bin/../lib/gcc/x86_64-w64-mingw32/8.1.0/include/c++/x86_64-w64-mingw32",
                "C:/Program Files/mingw64/bin/../lib/gcc/x86_64-w64-mingw32/8.1.0/include/c++/backward",
                "C:/Program Files/mingw64/bin/../lib/gcc/x86_64-w64-mingw32/8.1.0/include",
                "C:/Program Files/mingw64/bin/../lib/gcc/x86_64-w64-mingw32/8.1.0/include-fixed",
                "C:/Program Files/mingw64/bin/../lib/gcc/x86_64-w64-mingw32/8.1.0/../../../../x86_64-w64-mingw32/include"
            ],
            "defines": [
                "_DEBUG",
                "UNICODE",
                "__GNUC__=6",
                "__cdecl=__attribute__((__cdecl__))"
            ],
            "intelliSenseMode": "msvc-x64",
            "browse": {
                "limitSymbolsToIncludedHeaders": true,
                "databaseFilename": "",
                "path": [
                    "${workspaceRoot}",
                    "C:/Program Files/mingw64/include/**",
                    "C:/Program Files/mingw64/bin/../lib/gcc/x86_64-w64-mingw32/8.1.0/include/c++",
                    "C:/Program Files/mingw64/bin/../lib/gcc/x86_64-w64-mingw32/8.1.0/include/c++/x86_64-w64-mingw32",
                    "C:/Program Files/mingw64/bin/../lib/gcc/x86_64-w64-mingw32/8.1.0/include/c++/backward",
                    "C:/Program Files/mingw64/bin/../lib/gcc/x86_64-w64-mingw32/8.1.0/include",
                    "C:/Program Files/mingw64/bin/../lib/gcc/x86_64-w64-mingw32/8.1.0/include-fixed",
                    "C:/Program Files/mingw64/bin/../lib/gcc/x86_64-w64-mingw32/8.1.0/../../../../x86_64-w64-mingw32/include"
                ]
            }
        }
    ],
    "version": 4}
5、复制完成后将所有的 "C:/Program Files/mingw64替换为MinGW-W64 GCC解压后的mingw64文件的地址。
6、将下列代码复制到launch.json文件里。
{
    "version": "0.2.0",
    "configurations": [
        {/*这个大括号里是我们的‘调试(Debug)’配置,这里我解释下为什么写了两个,
        因为有时VSCode会有闪现的问题,也就是运行程序后窗口控制台可能会一闪而过,
        看不到结果,因此可以通过搭建configution的办法来解决,也就是搭建一个cmd的配置。*/
            "name": "(Windows) Launch",// 配置名称
            "type": "cppvsdbg",// 配置类型,cppdbg对应cpptools提供的调试功能;可以认为此处只能是cppdbg
            "request": "launch",// 请求配置类型,可以为launch(启动)或attach(附加)
            "program": "cmd",// 将要进行调试的程序的路径
            "preLaunchTask": "echo", // 调试开始前执行的任务,我们在调试前要编译构建。与tasks.json的label相对应,名字要一样
            "args": [ // 程序调试时传递给程序的命令行参数
                "/C",
                "${fileDirname}\\${fileBasenameNoExtension}.exe",
                "&",
                "echo."
            ],
            "stopAtEntry": false, // 设为true时程序将暂停在程序入口处,相当于在main上打断点
            "cwd": "${workspaceFolder}",// 调试程序时的工作目录,此处为源码文件所在目录
            "environment": [],// 环境变量,这里设为空即可
            "console": "externalTerminal",//使用单独的cmd窗口输出
        },
        {//这个大括号里是我们的‘调试(Debug)’配置
            "name": "(gdb) Launch",// 配置名称
            "type": "cppdbg",// 配置类型,cppdbg对应cpptools提供的调试功能;可以认为此处只能是cppdbg
            "request": "launch",// 请求配置类型,可以为launch(启动)或attach(附加)
            "program": "${workspaceFolder}/${fileBasenameNoExtension}.exe",// 将要进行调试的程序的路径
            "args": [], // 程序调试时传递给程序的命令行参数,
            "stopAtEntry": false, // 设为true时程序将暂停在程序入口处,相当于在main上打断点
            "cwd": "${workspaceFolder}",// 调试程序时的工作目录,此处为源码文件所在目录
            "environment": [],// 环境变量,这里设为空即可
            "console": "externalTerminal",// 使用单独的cmd窗口输出
            "MIMode": "gdb", //指定连接的调试器,gdb是minGW中的调试程序
            "miDebuggerPath": "C:\\Program Files\\mingw64\\bin\\gdb.exe",//指定调试器所在路径,如果你的minGW装在别的地方,则要改成你自己的路径,注意间隔是\\
            "preLaunchTask": "echo",//调试开始前执行的任务,这里和task.json的label相对应
        }
    ]}
7、将launch.json文件里miDebuggerPath属性里的内容也要改成自己的路径。
8、将下列代码复制到tasks.json文件里。
{
    // See https://go.microsoft.com/fwlink/?LinkId=733558
    // for the documentation about the tasks.json format
    "version": "2.0.0",
    "tasks": [
        {//这个大括号里是‘构建’任务
            "label": "echo",//这个大括号里是‘构建’任务
            "type": "shell",//任务类型,process是vsc把预定义变量和转义解析后直接全部传给command;shell相当于先打开shell再输入命令,所以args还会经过shell再解析一遍
            "command": "gcc", //编译命令
            "args": [ //传给gcc命令的一系列参数
                "-g", //生成和调试有关的信息
                "${file}", //指定要编译的是当前文件
                "-o", //指定输出文件的路径和名称
                "${fileBasenameNoExtension}.exe",//让可执行文件输出到源码文件所在的文件夹下的bin文件夹内,并且让它的名字和源码文件相同
                "-fexec-charset=GBK"//解决中文乱码
            ]
        }
    ],
    "presentation": {//执行这个任务时的一些其他设定
        "echo": true,//表示在执行任务时在终端要有输出
        "reveal": "always",//执行任务时是否跳转到终端面板,可以为always,silent,never
        "focus": false,//设为true后可以使执行task时焦点聚集在终端,但对编译来说,设为true没有意义,因为运行的时候才涉及到输入
        "panel": "new", //每次执行这个task时都新建一个终端面板
        "showReuseMessage": true,//控制是否显示“终端将被任务重用, 按任意键关闭”提示.
        "clear": false    }}
八、编写C语言程序
1、在之前建的hello.c文件里面输入程序测试。
#include<stdio.h>int main(){
    printf("hello world\n");
    return 0;}</stdio.h>
2、启动程序(可以直接按F5)

九、几个好用的VScode插件
所有插件都可点击左侧导航栏第5个图标(拓展)安装
| 名称 | 作用 |
|---|---|
| Path Intellisence | 路径自动补齐 |
| Bracket Pair Colorizer 2 | 用不同颜色高亮显示匹配的括号 |
| vscode-fileheader | 顶部注释模板,可自定义信息,自动更新最后修改时间 |
| markdownlint | 语法纠错 |
| Beautify | 格式化代码 |
| Code Spell Checker | 识别单词拼写错误 |
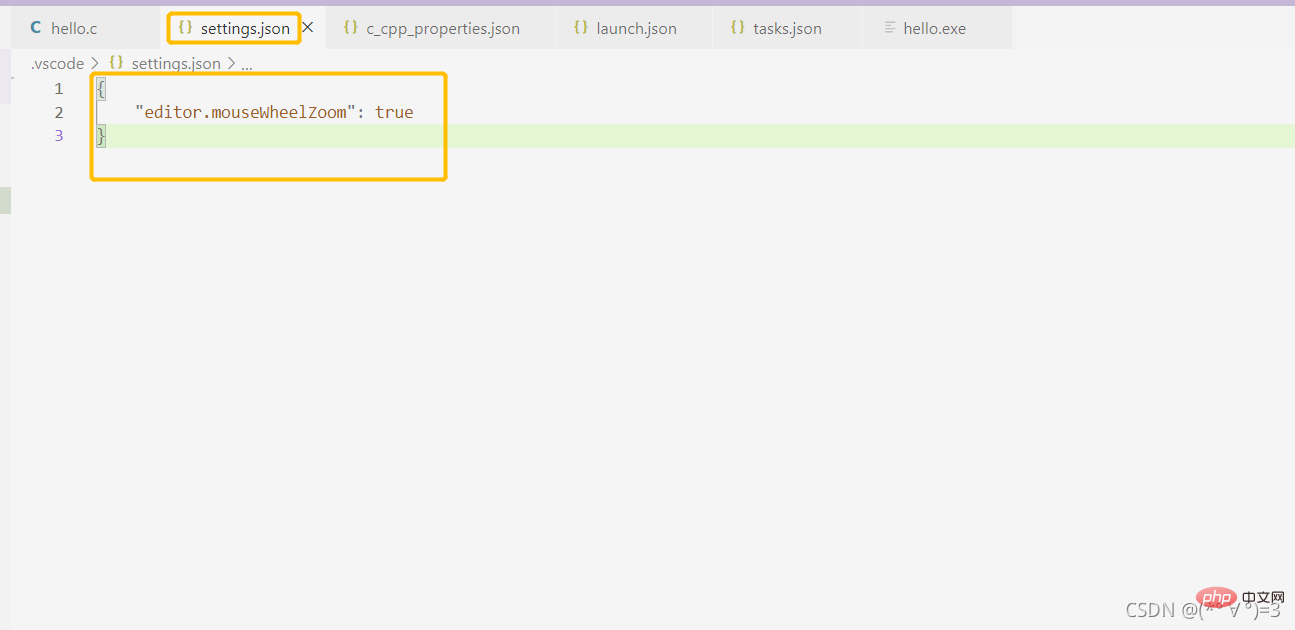
10. VSCode sets mouse scrolling to change font size
If you open it for the first time, you need Ctrl Shift P to open the search box, enter settings.json, and press Enter to open it. Just add "editor.mouseWheelZoom": true. (After opening it once, Ctrl P can search)
## 11. Solve some minor problems in the configuration
1. "launch: program ... does not exist" appears or preLaunchTask has been terminated, and the exit code is 1** (1) First check that the file name of the configuration file should be tasks .json, not task.json
(2) Check whether the path in
launch.json"miDebuggerPath": is correct. Be sure to follow the previous steps and copy the address in the folder. 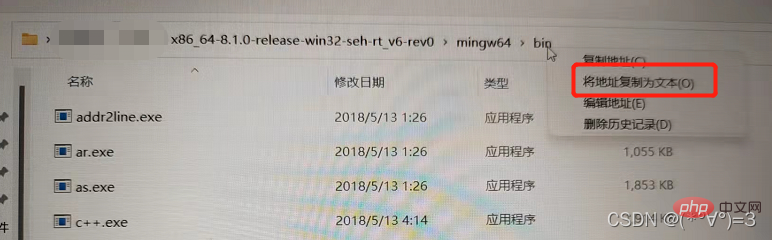 (3) Make sure that the label contents in
tasks.json and launch.json are the same, if both are "echo", tasks. The label field in json is consistent with the preLaunchTask field in launch.json. (4) The most important thing is that the file name cannot contain Chinese names.
(5) Finally, check whether you are running a .c file, do not run it as an environment file, whether your program is written incorrectly, and whether the header file is missing.
(6) If the above is not resolved, change
"program":"${workspaceFolder}/${fileBasenameNoExtension}.exe" in launch.json to "program:"${fileDirname}/${fileBasenameNoExtension}.exe"
2. In the configuration file, the error "Invalid escape character in string" is prompted Path Error, change the error path in the configuration file to an address transpose character. For example, if it was originally
C:/Program Files/mingw64/, then change it to C:\Program Files\mingw64\ or C:\\Program Files\\mingw64\\,
3. Prompt error "Unable to start debugging Be careful not to have Chinese characters in the code path Name
vscode Basic Tutorial!
The above is the detailed content of (Super detailed) How to configure the C language environment in VScode. For more information, please follow other related articles on the PHP Chinese website!
Related articles
See more- How does vscode connect to a remote server? (Picture and text tutorial)
- vscode plug-in sharing: 5 working plug-ins + 5 fishing plug-ins
- Take you to understand [Space Control] in vscode
- Practical combat: Develop a plug-in in vscode that supports vue files to jump to definitions
- Detailed analysis of dependency injection in VSCode