Home >Backend Development >PHP Problem >How to set up a php7.2 server
How to set up a php7.2 server
- 藏色散人Original
- 2021-11-29 10:22:353520browse
php7.2 server building method: 1. Download the offline packages of PHP7.2.9, Apache2.4 and MYSQL5.7; 2. Unzip and rename the downloaded ZIP compressed file of php7.2.9; 3. Configuration Environment variables; 4. Restart the Apache service.

The operating environment of this article: Windows7 system, PHP7.2.9, Dell G3.
How to set up a php7.2 server?
PHP7.2.9 Apache2.4 MYSQL5.7 Build the server
First we need to download three offline packages, PHP7.2.9 Apache2.4 MYSQL5.7 ;
##
PHP7.2.9:http://www.php.net/ Apache2.4:http://httpd.apache.org/
MYSQL5 .7: https: //dev.mysql.com/downloads/windows/installer/ http://cdn.mysql.com/Downloads/MySQL-5.7/mysql-5.7.23-winx64.msi ,这个地址直接下在安装包
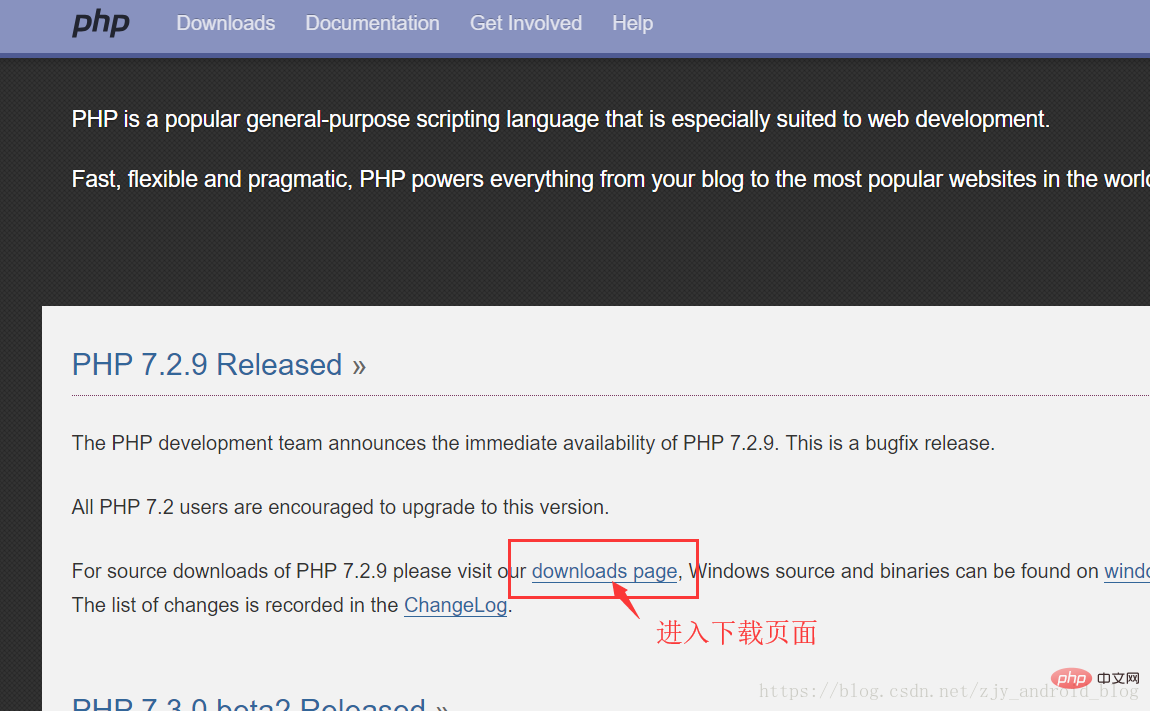
Let me first talk about how to find the correct and available supporting installation package. I am based on wampserver to find the corresponding matching installation package. The above is a matching installation package. Enter http://www.php.net/php official website, find the version I want, php7.2.9, as shown below, click to enter the download page, select the win-win version to download
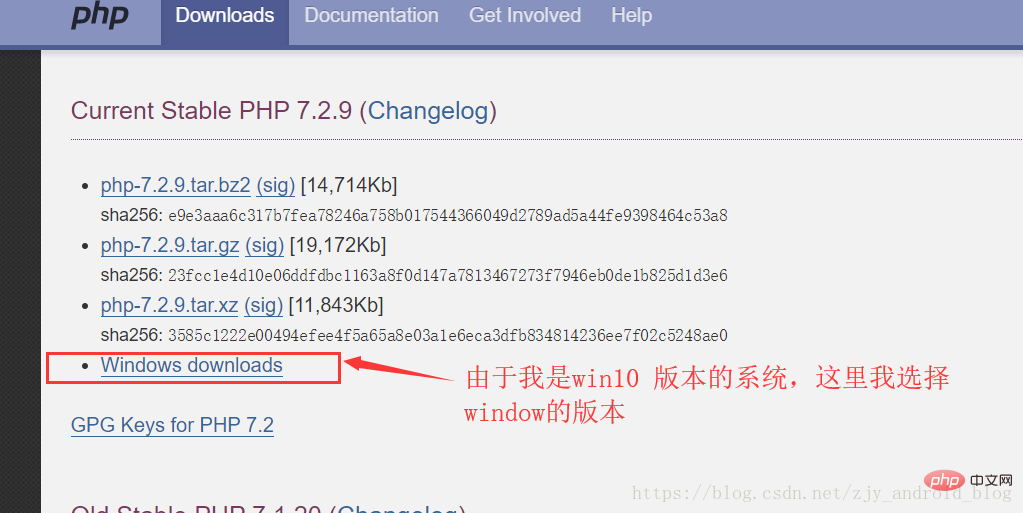
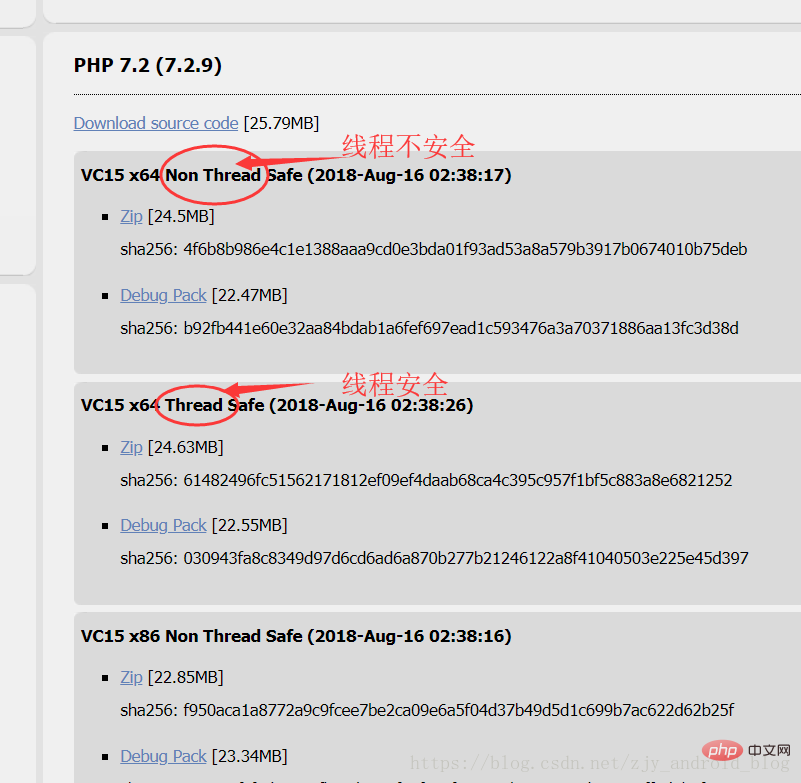
The next point is what we need to pay special attention to. I need to choose a 64-bit version that is compatible with the system and can be associated with Apache2.4 (the thread-safe version in the picture below 64-bit installation package), click Zip to download. The reason for choosing the thread-safe version here is because the thread-safe version has the files we need to connect to Apache php7apache2_4.dll File
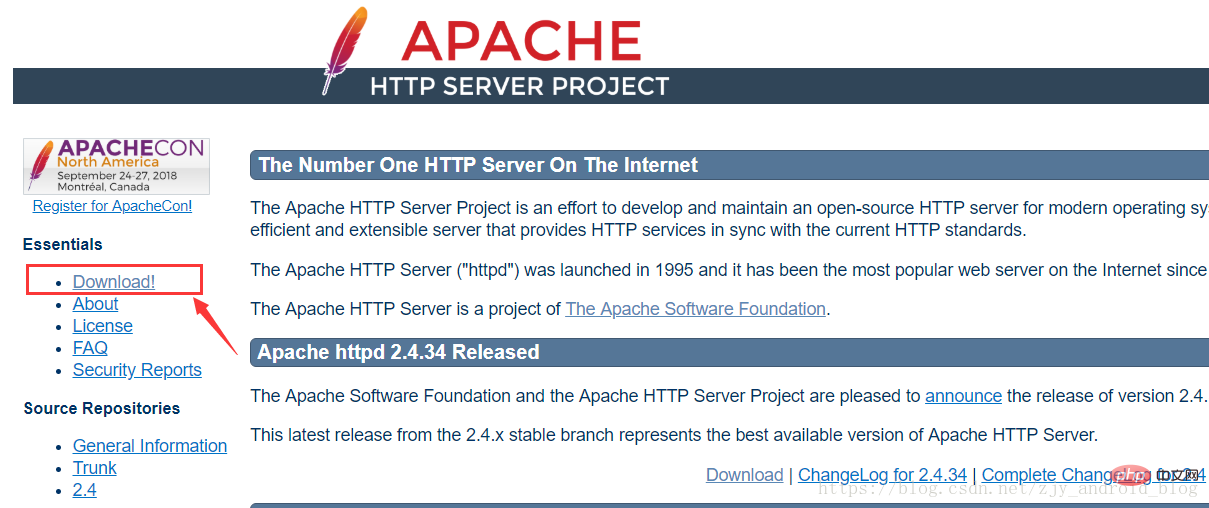
http://httpd.apache.org/, as shown below
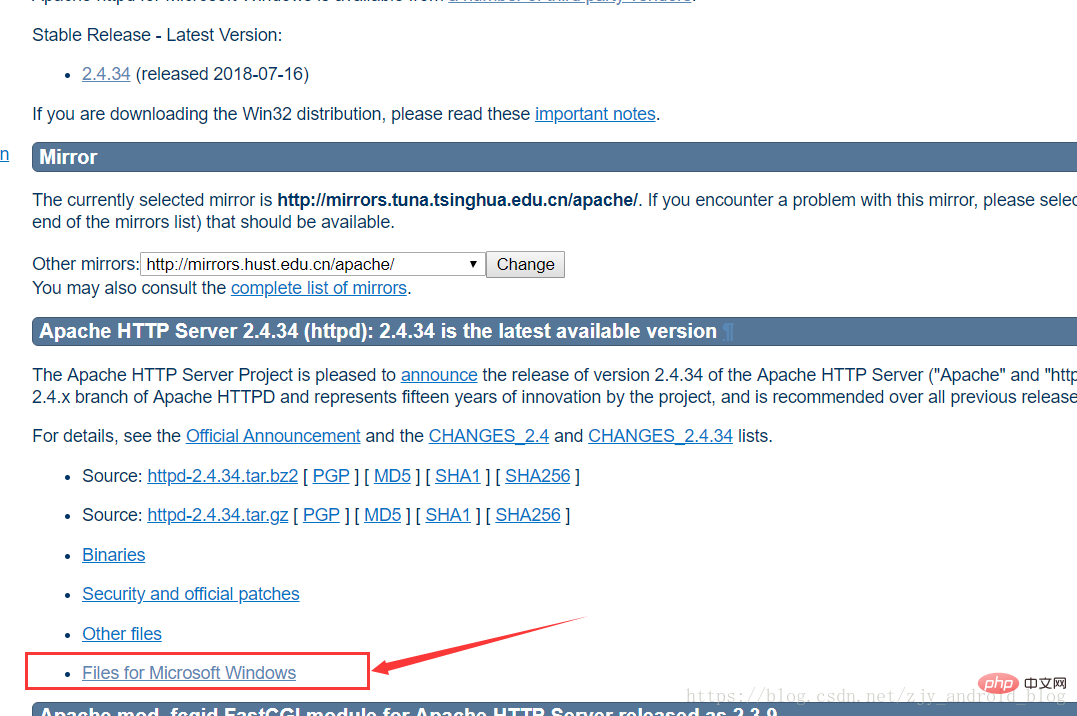
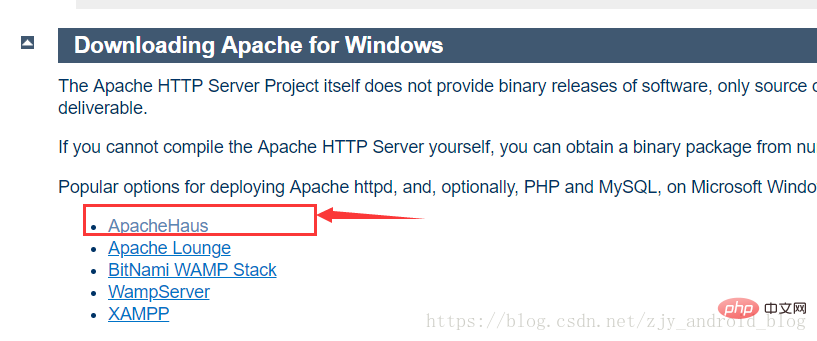
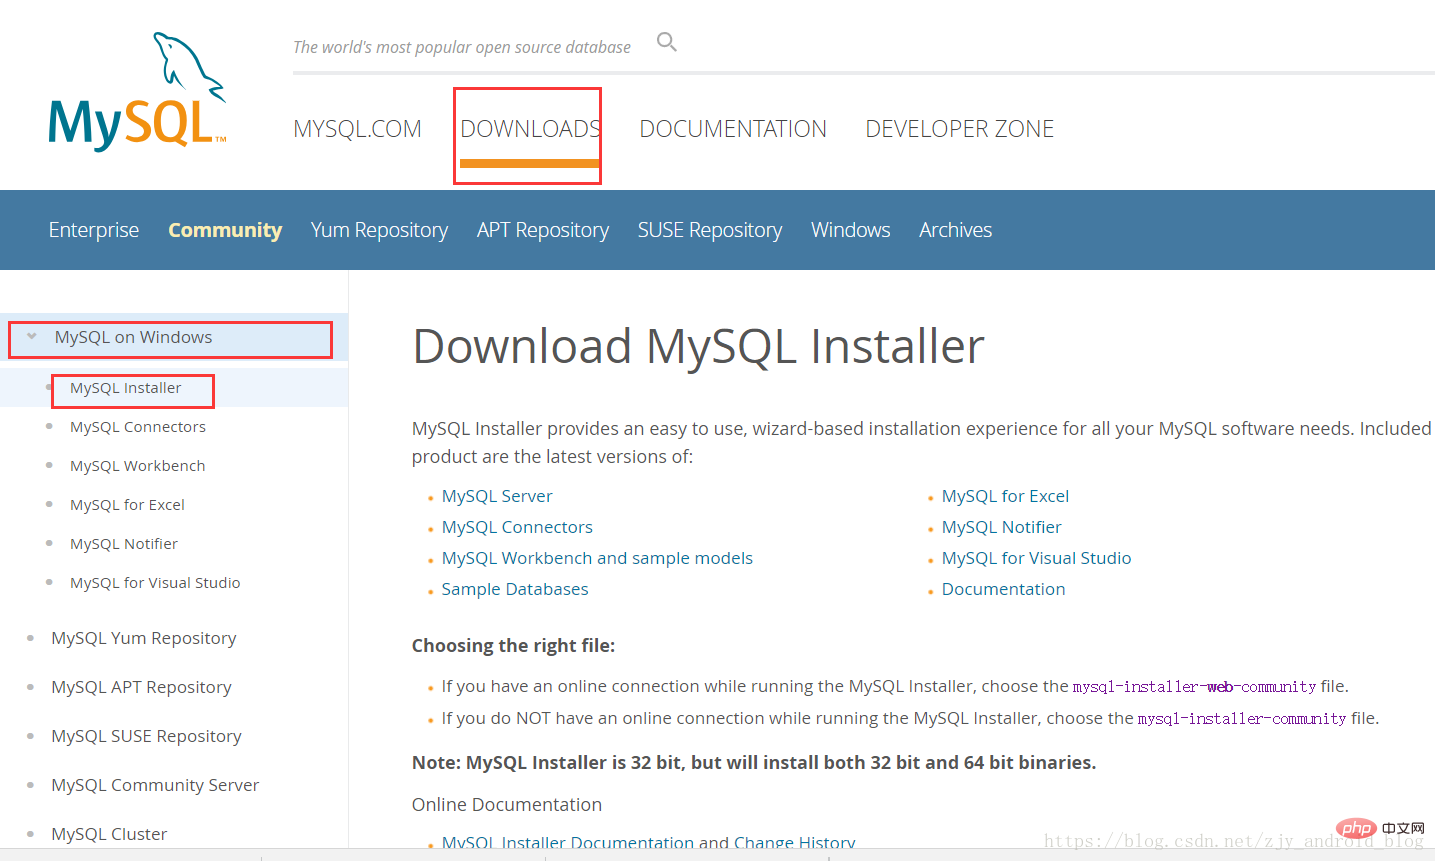
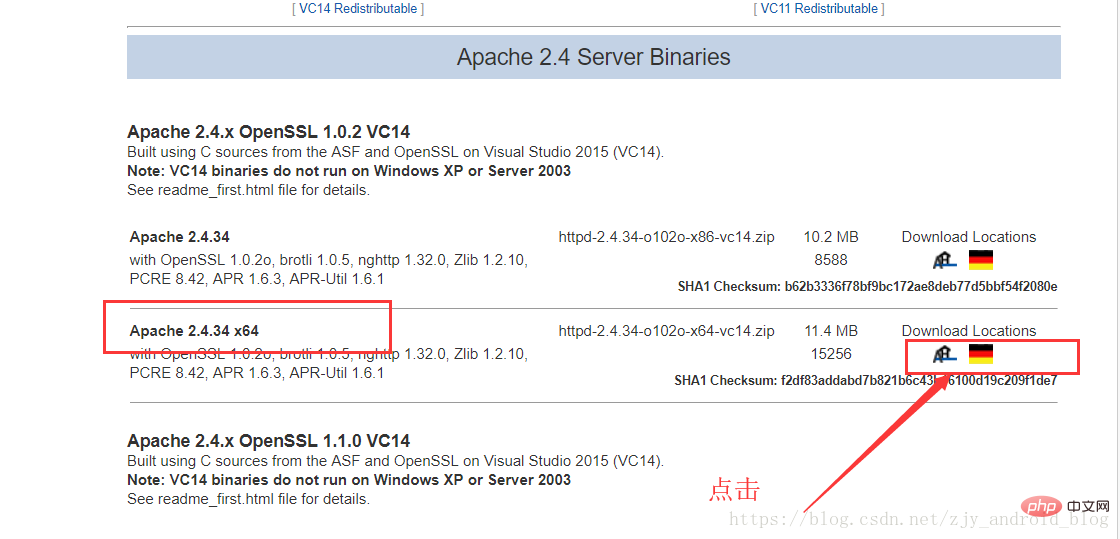 ##Find the last mysql5.7 version installation package and enter
https://dev.mysql.com/downloads/windows/installer/
##After downloading and installing, run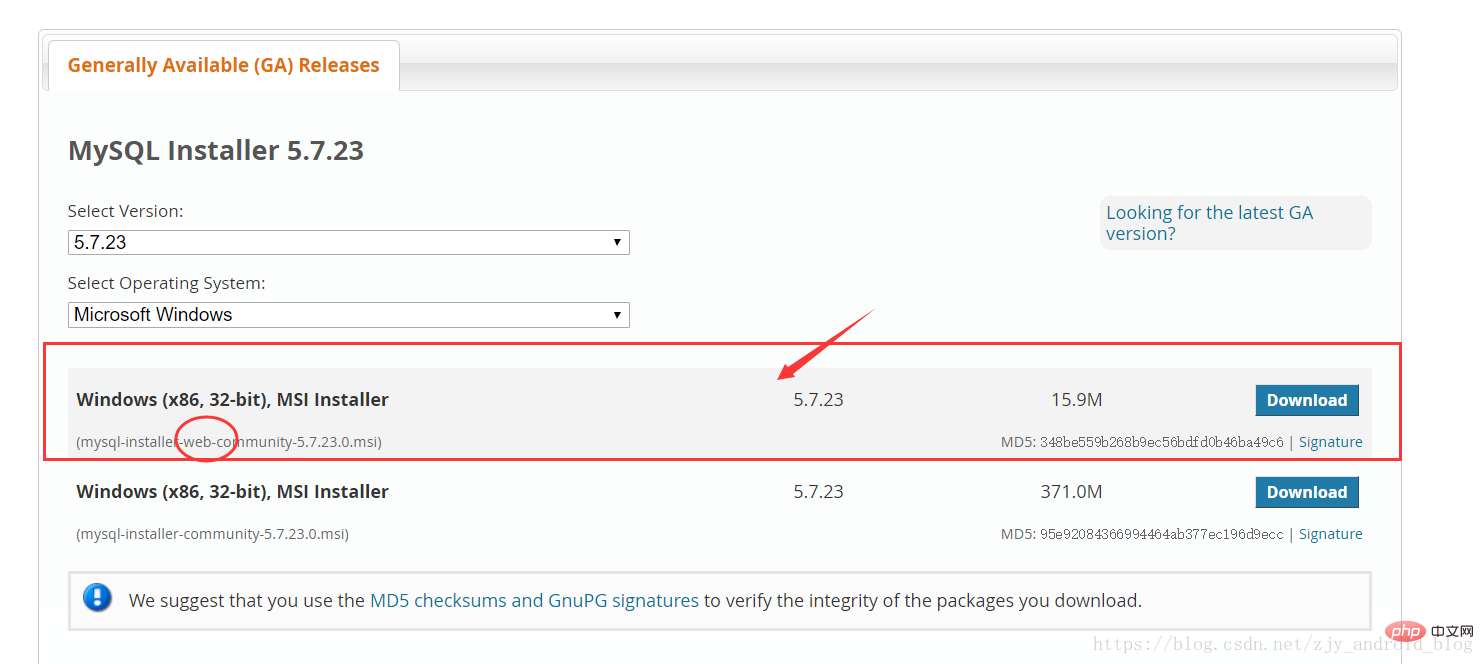
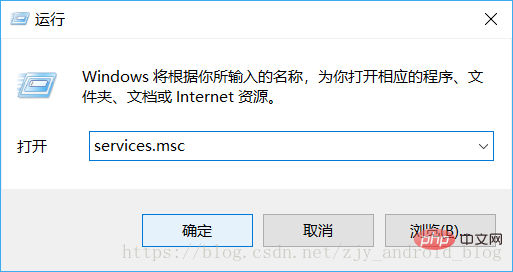
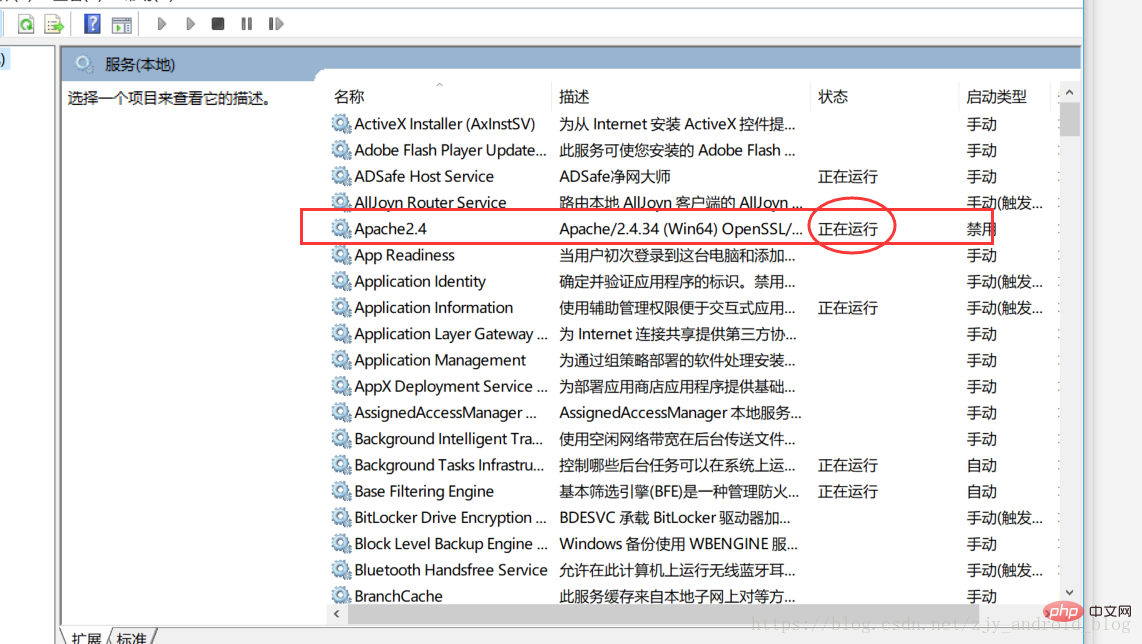
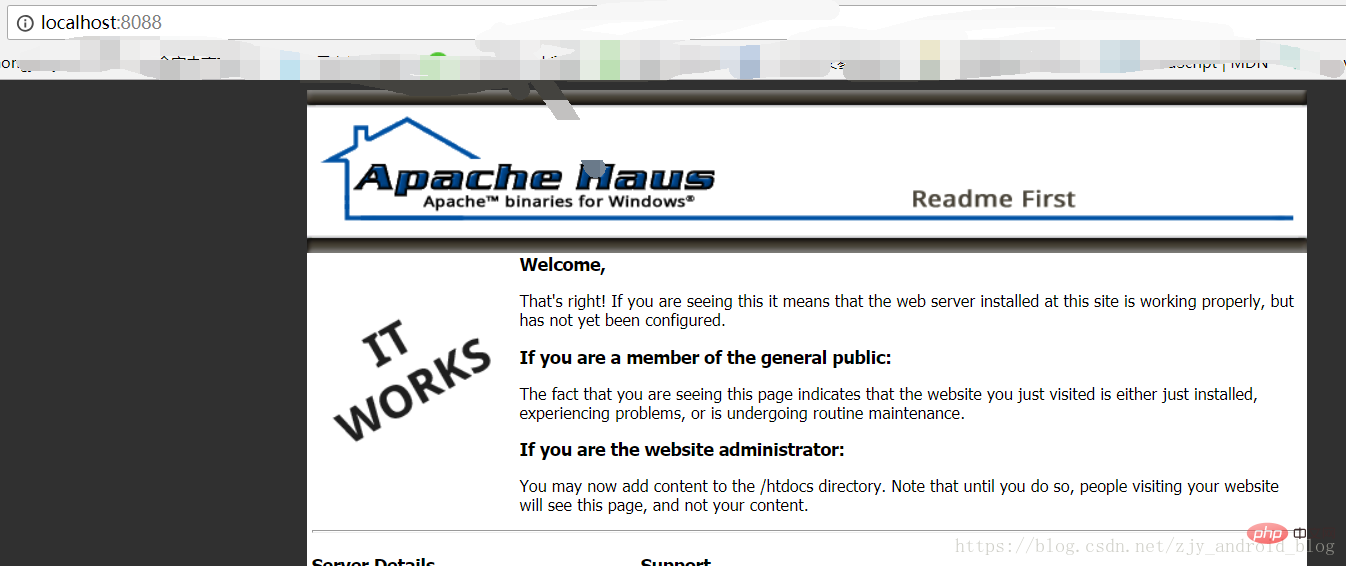
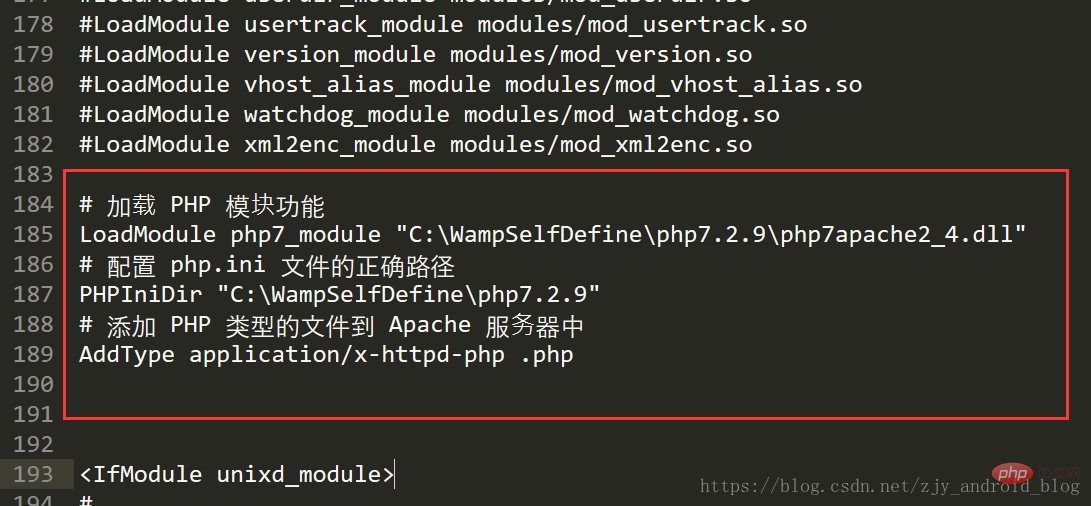
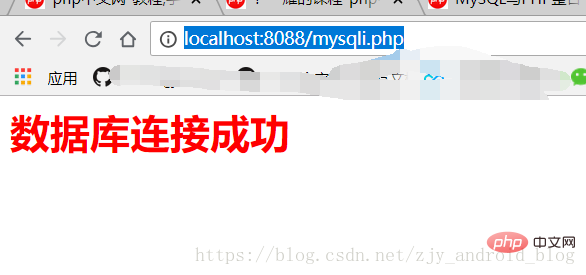
之后一直下,中间有个输入数据库密码的界面,建议输入个简单的(123456),后期再改,接着下一个就可以了,安装完成之后的数据库密码就是123456;当然,你可以看到上面显示的记录,从直接http://cdn.mysql.com/Downloads/MySQL-5.7/mysql-5.7.23-winx64.msi 下载版本,也可以。 好了,三个文件的下载和数据库的安装都讲完了,就是接下来重点\重点\重点! 将下载的php7.2.9的ZIP压缩文件解压重命名 解压后的内容如下图: 我们需要关注2个文件,php.ini-development(用于配置php的设置)和php7apache2_4.dll(用于Apache载入模块的配置); 将下载的Apache 2.4的压缩文件解压重命名Apache24 解压好之后,将Apache24和php7.2.9两个文件夹复制到我们自己创建在C盘的文件夹WampSelfDefine,并创建一个新的文件夹www,用过wampserver的朋友都知道这个是用来存放项目的目录 现在可以开始配置Apache了,进入Apache24,可以在C:\ WampSelfDefine \ Apache24 \ conf下找到httpd.conf文件 编辑它,我使用的subline text作为编辑工具,你可以使用记事本 记住修改这个文件最好以管理员身份运行你用来编辑的工具,这样会避免没有权限,更改无法保存的情况 需要修改的主要有4点: 1.修改的ServerRoot的路径: 这个是Apache24的存放路径,Apache24中使用了变量SRVROOT,所以,只需要修改SRVROOT的值为我们的Apache24目录的路径即可,定义SRVROOT“C:\ WampSelfDefine \ Apache24” 2.修改Apache的服务监听的端口: 因为默认的80宽口很可能被电脑的其他程序占用,如IIS占用80端口;所以这里改成8088端口,有使用到80端口的位置也替换成8088端口,你可以使用Ctrl + F键查找80,替换成8088;我的情况是只有服务器名使用到了80%,所以替换为8088 接下来可以测试一下以上配置是否成功,进入C:\ WampSelfDefine \ Apache24 \ bin,复制改路径,在开始菜单中右击鼠标搜索,输入cmd,以管理员身份运行cmd命令提示符 出现命令行窗口,输入cd C:\ WampSelfDefine \ Apache24 \ bin,输入键 输入。\ httpd -k install安装服务 你可以用快捷键WIN + R,输入service.msc,进入回车 可以看到Apache24正在运行 在浏览器中输入http:// localhost:8088,可以看到以下画面 这说明前2点配置成功,Apache的配置没有出错 3.载入php7.2.9模块功能: 为了Apache可以解析php文件我们需要在配置文件中配置php的相关信息,将以下配置信息复制到加载httpd.conf的LoadModule下方: 位置如图 接着需要修改DirctoryIndex: 4.将访问的主页目录地址更改为新创建的WWW文件夹 保存修改,接下来测试是否设置成功。 我们需要在www目录下创建文件index.html和index.php index.html内容如下: index.php内容如下: 保存之后重启Apache服务,右击下面这个图标,选择打开监视器,重启服务 在浏览器中输入的http://本地主机:8088 / 结果分别如下图 在浏览器中输入http:// localhost:8088 / index.php ,结果如下: 说明配置是成功的。 MySQL是作为PHP的扩展来安装和使用的,我们需要修改 php.ini 扩展类的路径: 启用:mysqli和pdo_mysql 创建 mysqli.php 保存在www下,内容如下: 重启Apache ,在浏览器中输入 http://localhost:8088/mysqli.php 整合成功,配置结束。 本文章旨在供他人学习交流,如果你有更好的建议,或者因版本更新,本文章不再适用,请给我留言,本人会抽时间更新内容。 推荐学习:《PHP视频教程》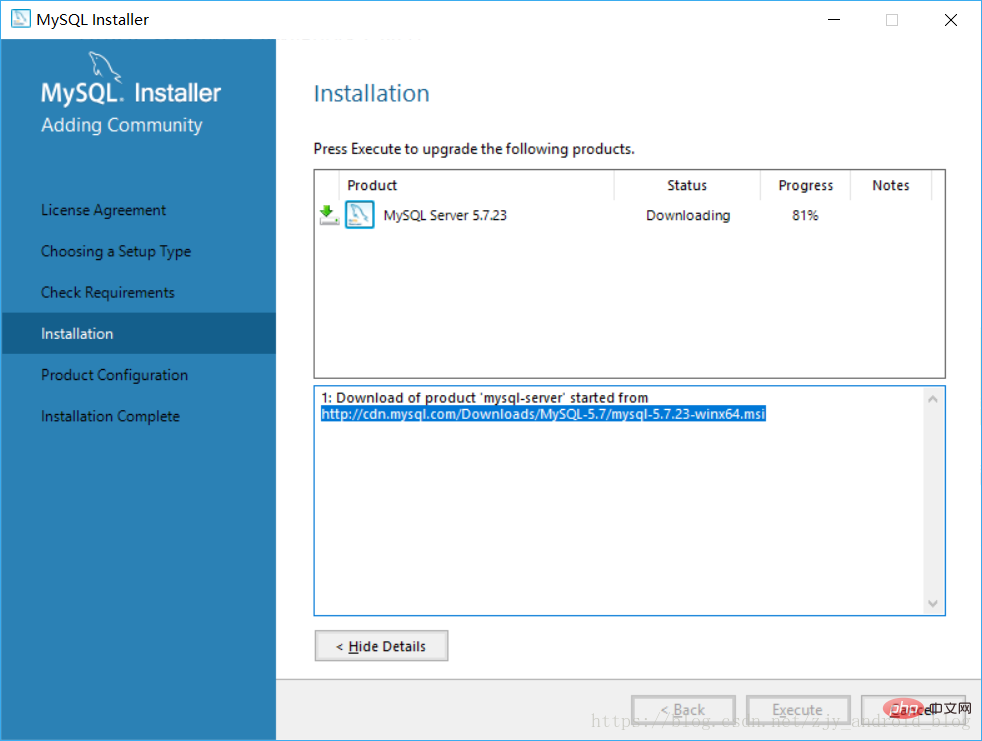
然后配置一下环境变量,让我们不在安装目录下亦可以运行mysql命令,默认安装路径:C:\ Program Files \ MySQL \ MySQL Server 5.7,将配置到环境变量中,(图片中的MYSQL Server 8.0环境变量是错的,应该改为MYSQL Server 5.7,请不要抄下面这张图的环境变量)安装完成之后你可以去控制台试着查看你的数据库是否安装成功,快捷键WIN + R输入cmd,回车,输入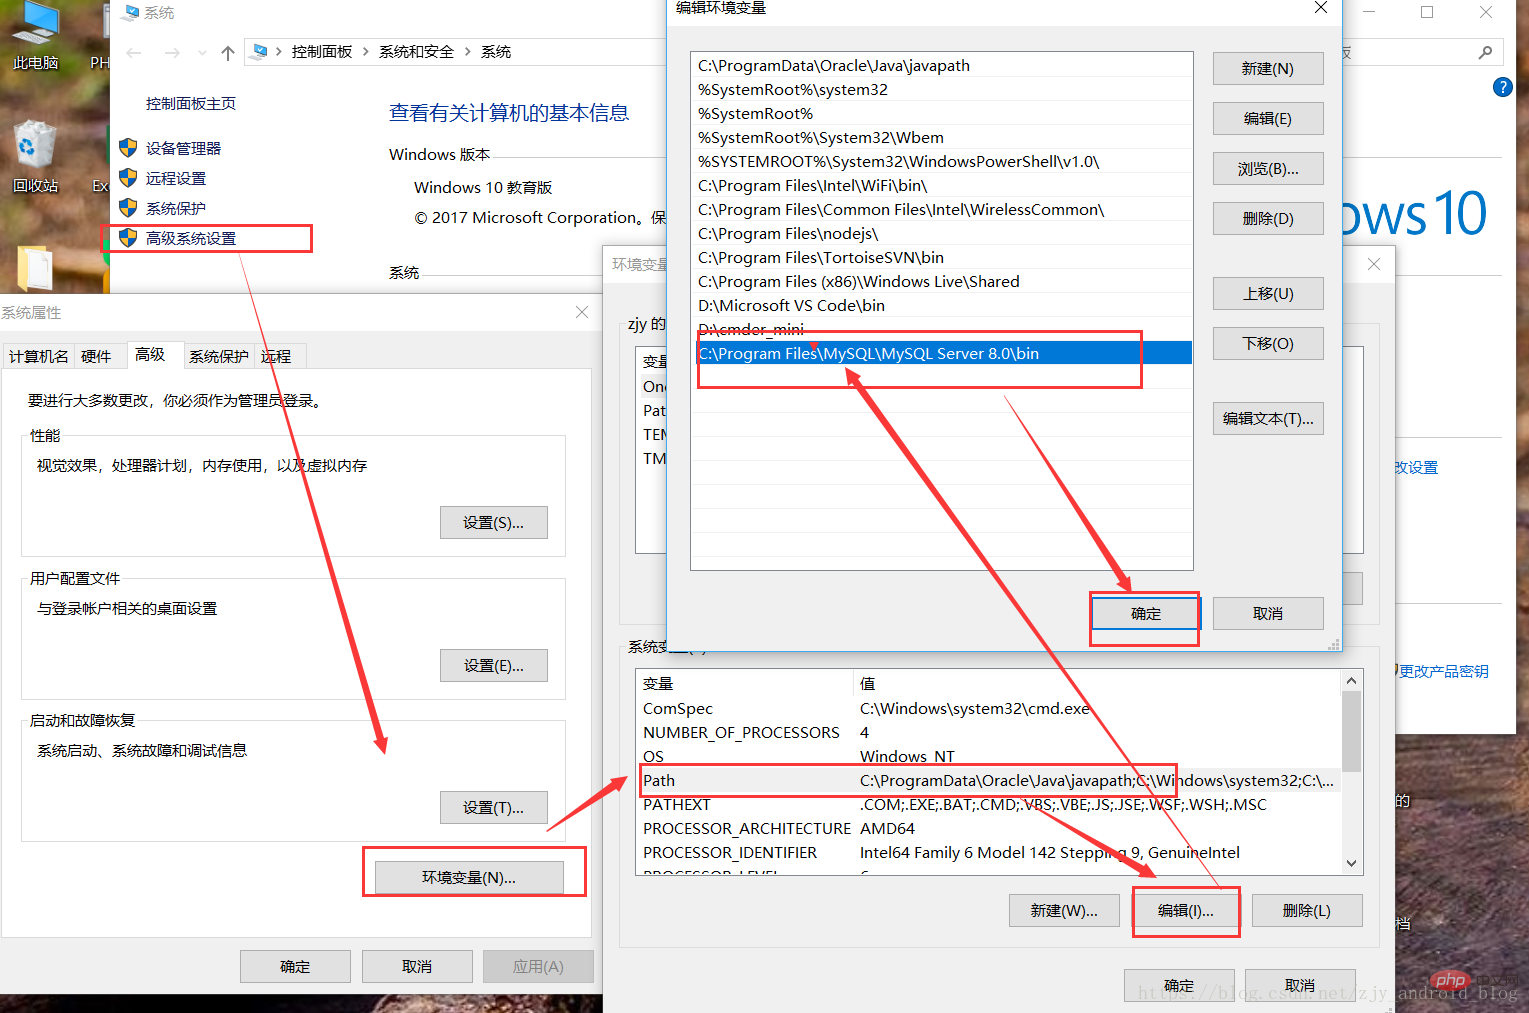
# 密码是你设置的:123456
C:\Users\zjy $>mysql -uroot -p
Enter password: ******
Welcome to the MySQL monitor.  Commands end with ; or \g.
Your MySQL connection id is 12
Server version: 5.7.23-log MySQL Community Server (GPL)

Copyright (c) 2000, 2018, Oracle and/or its affiliates. All rights reserved.

Oracle is a registered trademark of Oracle Corporation and/or its
affiliates. Other names may be trademarks of their respective
owners.

Type 'help;' or '\h' for help. Type '\c' to clear the current input statement.
一、配置php7.2.9(整合mysql5.7 使得php可以使用mysql)
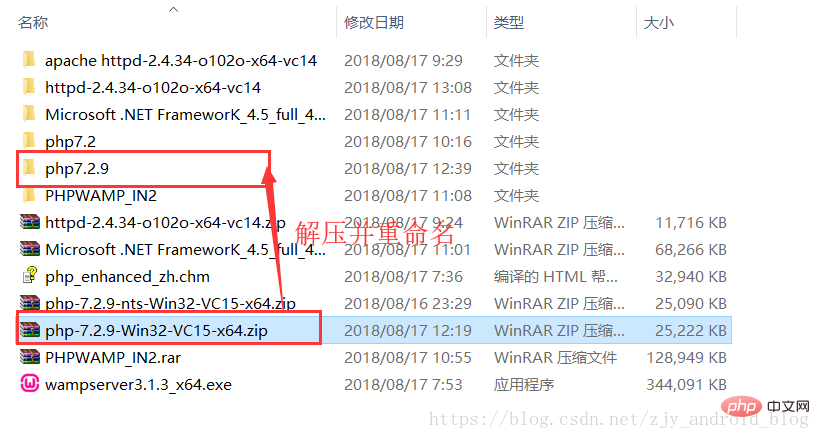
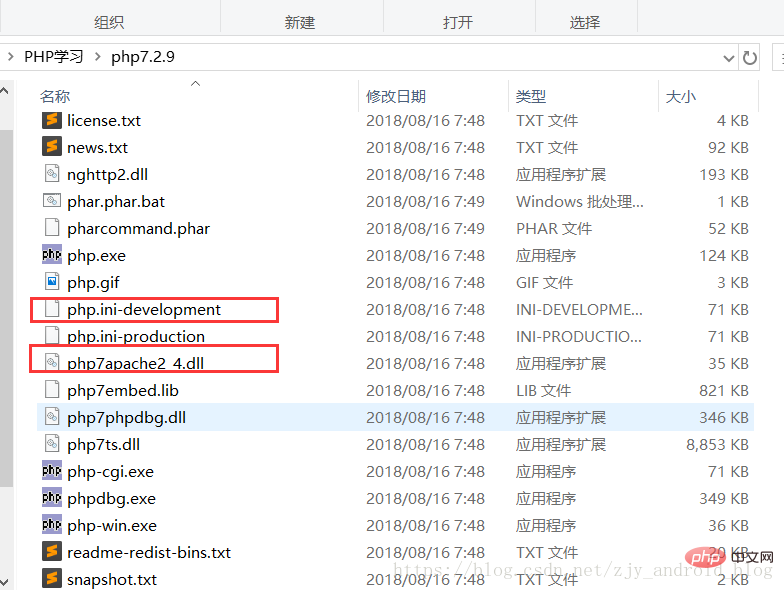
这里我们只需要先更改php.ini-development的文件名为php.ini以便于php运行时识别;二、配置Apache2.4
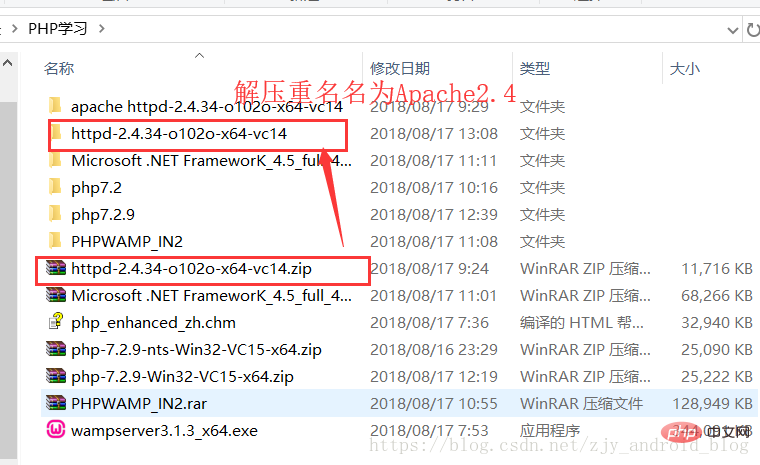


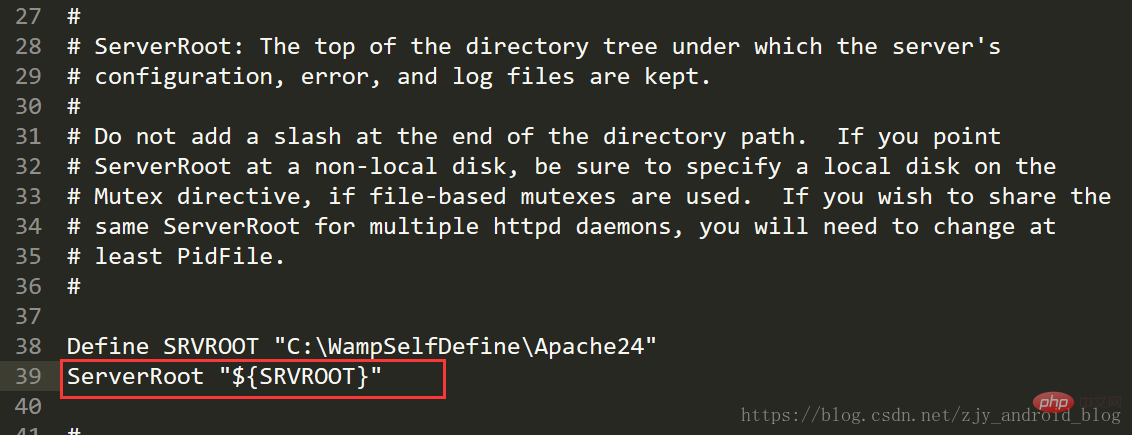


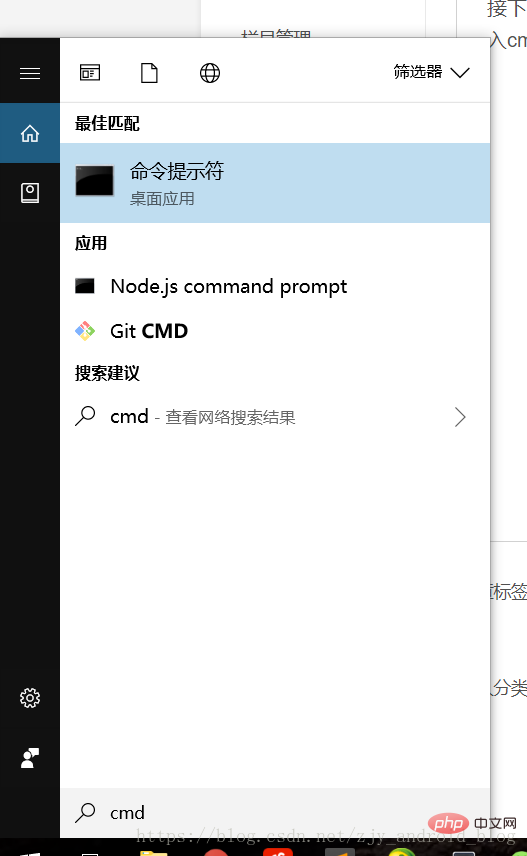


# 加载 PHP 模块功能
LoadModule php7_module "C:\WampSelfDefine\php7.2.9\php7apache2_4.dll"
# 配置 php.ini 文件的正确路径
PHPIniDir "C:\WampSelfDefine\php7.2.9"
# 添加 PHP 类型的文件到 Apache 服务器中
AddType application/x-httpd-php .php

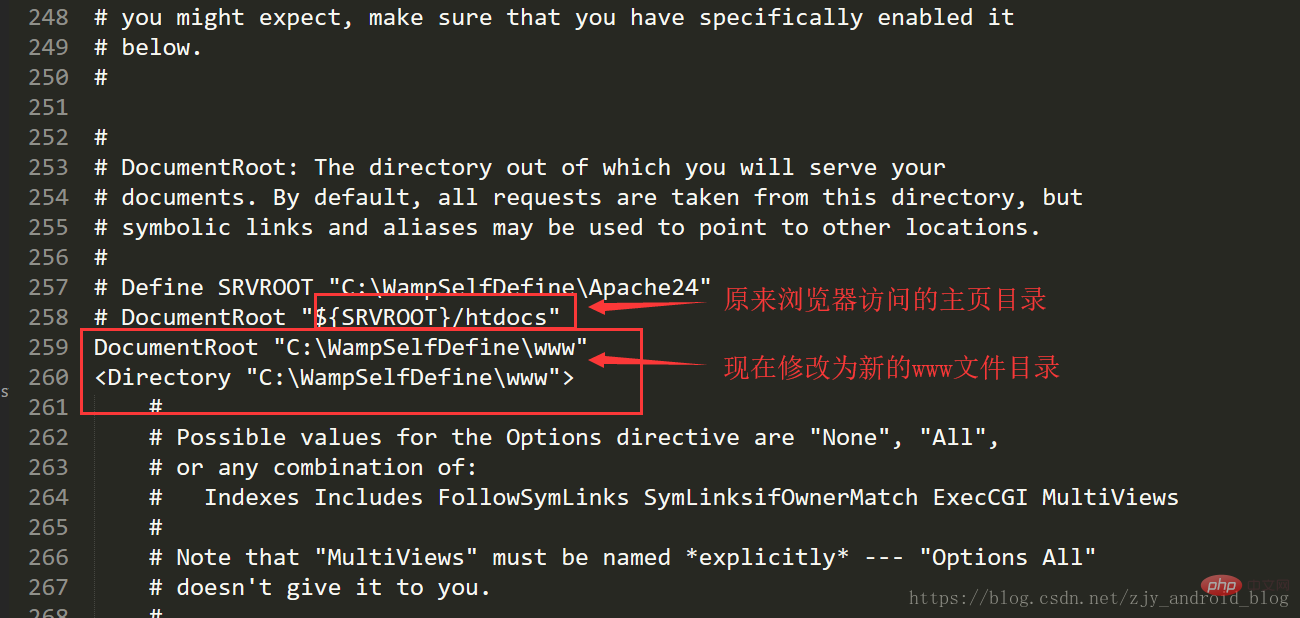
<!DOCTYPE html>
<html lang="en">
<head>
	<meta charset="UTF-8">
	<title>这是一个自定义的php+apache服务</title>
</head>
<body>
	这是我的apache页面
</body>
</html>
<?php
    phpinfo();
?>
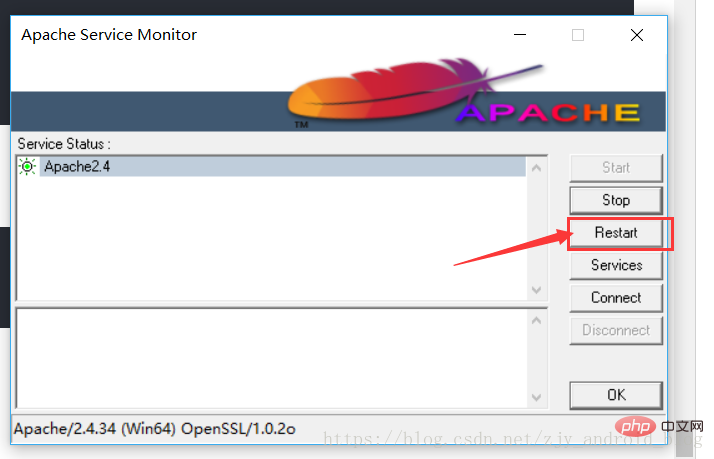

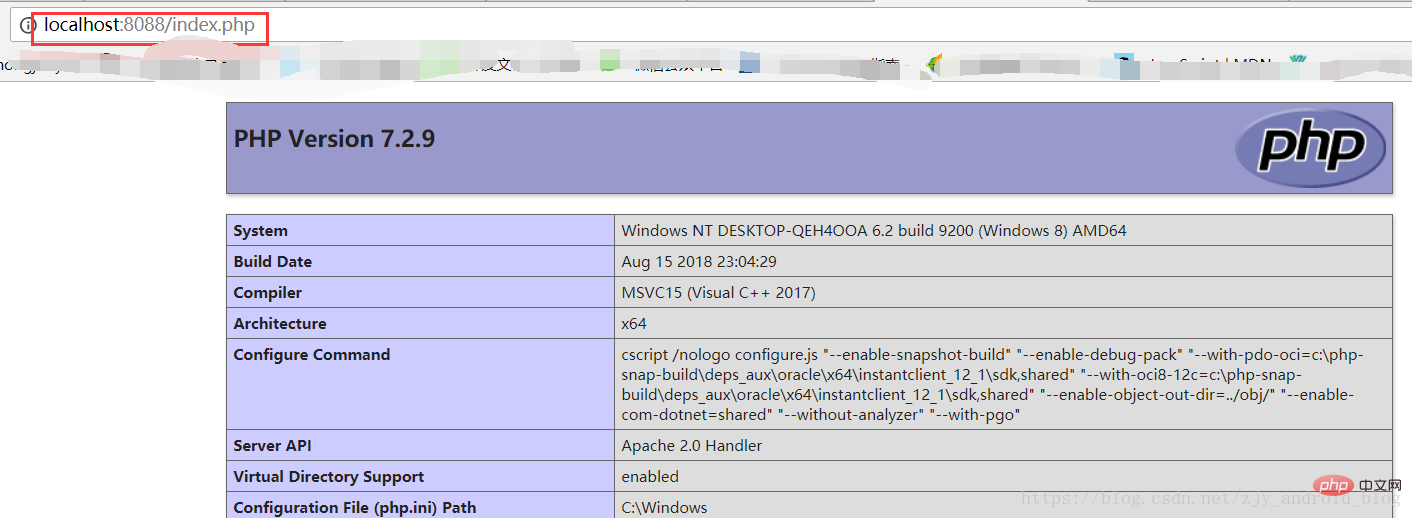
三、MySQL与PHP的整合
extension_dir = "C:\WampSelfDefine\php7.2.9\ext"

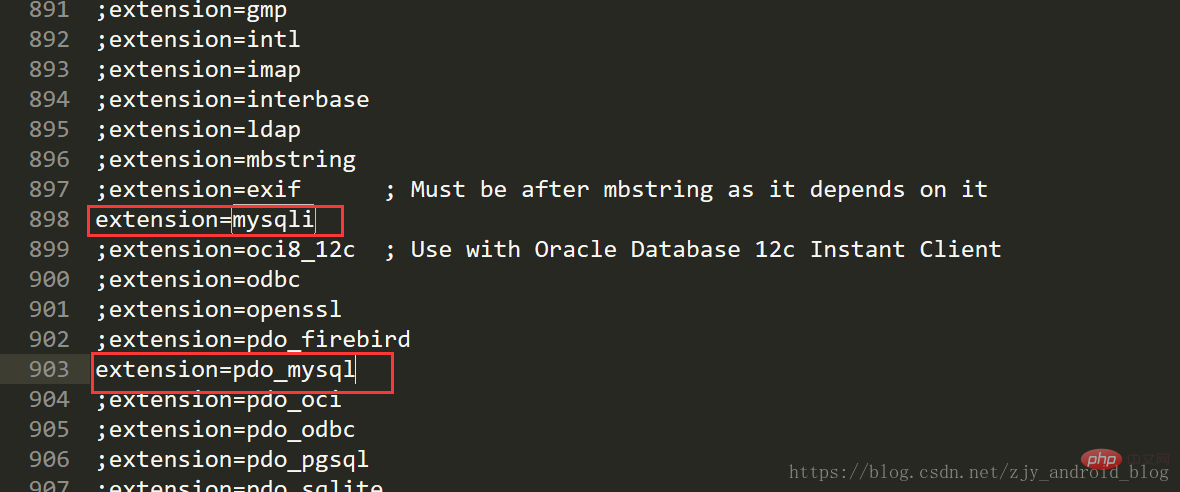
<?php
header("content-type=text/html;charset=utf-8");
$mysqli = new mysqli('localhost','root','123456','mysql');
if($mysqli -> connect_errno){
die("数据库连接失败".$mysqli -> connect_error);
}
echo '<h1 style="color:#f00">数据库连接成功</h1>';
?>
The above is the detailed content of How to set up a php7.2 server. For more information, please follow other related articles on the PHP Chinese website!

