


How to build php5.6 on centos7: 1. Obtain the PHP download address; 2. Configure the installation directory to /usr/local/php/; 3. Configure the php.ini file; 4. Copy php- Just modify the fpm configuration file and start it.

The operating environment of this article: centos7 system, PHP5.6 version, DELL G3 computer
How to build php5.6 on centos7?
Detailed tutorial on installing PHP5.6.30 service under CentOS7.0
About php-fpm
nginx itself It cannot handle PHP. It is just a web server. When a request is received, if it is a PHP request, it will be sent to the PHP interpreter for processing and the result will be returned to the client.
nginx generally sends the request to the fastcgi management process for processing. The fascgi management process selects the cgi sub-process processing result and returns it to nginx.
PHP-FPM is a PHP FastCGI manager, only for PHP.
PHP has written php-fpm into the PHP source code core after 5.3.3. So there is no need to download it separately.
Get the PHP download address
Why choose version 5.6.30? Because it is learning, not research. It is true that 7.0 has added many new features of PHP, and the performance has also been improved. If you are doing research, you can do some research. I will talk about the 7.0 version and how to switch between various PHP versions later.
Open the official website of php: http://php.net/, view the version list of php

Right-click, copy the link address, and run it on the remote host Log in and download the software (I chose Australia’s host mirror to download)
# wget http://au1.php.net/get/php-5.6.30.tar.gz/from/this/mirror
What is downloaded is a mirror file, change it to the file name we need
#mv mirror php-5.6.30.tar.gz#tar zxvf php-5.6.30.tar.gz#cd php-5.6.30
Configure installation
Enter the directory, we need to configure the installation directory to /usr/local/php/ during installation
#./configure
--prefix=/usr/local/php
--with-curl
--with-freetype-dir
--with-gd
--with-gettext
--with-iconv-dir
--with-kerberos
--with-libdir=lib64
--with-libxml-dir
--with-MySQL
--with-mysqli
--with-openssl
--with-pcre-regex
--with-pdo-mysql
--with-pdo-sqlite
--with-pear
 --with-png-dir
--with-xmlrpc
--with-xsl
--with-zlib
--enable-fpm
--enable-bcmath
--enable-libxml
--enable-inline-optimization
--enable-gd-native-ttf
--enable-mbregex
--enable-mbstring
--enable-opcache
--enable-pcntl
--enable-shmop
--enable-soap
--enable-sockets
--enable-sysvsem
--enable-xml
--enable-zip
During the configuration process The following error may be reported
Error 1:
xml2-config not found.
Please check your libxml2 installation.
Solution
Install libxml2 related components
#yum install libxml2#yum install libxml2-devel -y
Error 2:
Please reinstall the libcurl
distribution -
easy.h
should be in
 <curl-dir>/include/curl/
Install curl related components
#yum install curl curl-devel
Error 3:
configure: error: png.h not found.
Install libpng related components
#yum install libpng#yum install libpng-devel
Error 4:
freetype-config not found.
Install freetype related components
#yum install freetype-devel
Error 5:
xslt-config not found. Please reinstall the libxslt >= 1.1.0 distribution
Install libxslt related components
#yum install libxslt-devel
Okay, when we see the following sentence, it means that your php has been configured!

Next we only need to compile and install to complete the installation of php
#make && make install
Seeing this sentence indicates that the installation is complete!

To be on the safe side, let’s make a test to see if it is really successful.
Configure related php.ini configuration
First we need to configure the php.ini file
The installation directory has 2 files: php.ini-development and php.ini-production
php.ini-production Use the online version
php.ini-development Use the development version
We choose development for configuration
# cp php.ini-development /usr/local/php/lib/php.ini
php-fpm configuration
Copy the php-fpm configuration file
#cp -R ./sapi/fpm/php-fpm.conf /usr/local/php/etc/php-fpm.conf
Copy the enable file
#cp -R ./sapi/fpm/php-fpm /etc/init.d/php-fpm(已弃用,详细的见注1)
Start
#/etc/init.d/php-fpm
Check whether php is started successfully
#ps aux | grep php

Seeing these indicates that your php It has been started successfully!
Restart and shut down
#kill -9 进程号
#/etc/init.d/php-fpm
Configure Nginx to support PHP
Enter the nginx main directory, /usr/local/nginx;
#cd /usr/local/nginx
Enter the configuration directory
#cd conf
Nginx supports PHP. You need to modify nginx.conf
#vim nginx.conf
and open the following code to let Nginx support PHP in the server code segment.

After modification, this code changes to the red part indicating that our host directory is /usr/www. You need to modify fastcgi_param SCRIPT_FILENAME to point to the corresponding directory:

Set the home directory to /usr/www.

Comment out the root line and add a new line: root /usr/www;
Save and exit.
According to the explanation in the Nginx chapter, we restart the Nginx service.
#/etc/init.d/nginx restart
If you have not configured it according to our method in Nginx, you can restart the Nginx service as follows
# /usr/local/nginx/sbin/nginx -s reload
Restart successfully! Next we add a new file in the /usr/www directory.
#vim /usr/www/phpinfo.php
Insert the following content
<?php phpinfo(); ?>
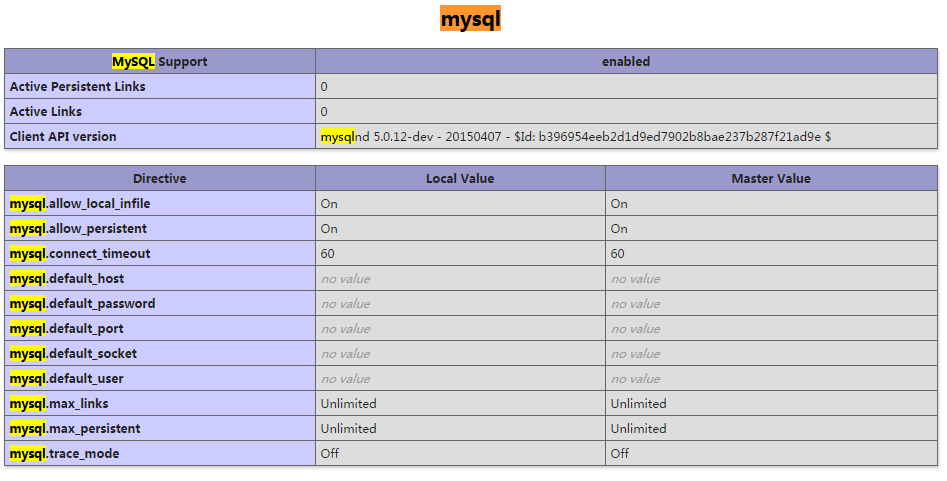
Open http://remoteip/phpinfo.php

看到这个页面,恭喜你,你的PHP已经安装配置完成。你可以在这个页面看到所有php依赖的组件,下一节我将和大家详细讲解一下这个页面,如果对本节有什么疑问的,欢迎在评论区和我交流讨论,有留言必回。^_^
注
设置php开机自启动与开启php服务便捷方式
上面的方法中,我在拷贝php-fpm的服务时出了问题,不应该直接将php-fpm的可执行文件拷贝到/etc/init.d/目录下去,应该将php给我们准备好的init.d.php-fpm。
#cp ./sapi/fpm/init.d.php-fpm /etc/init.d/php-fpm
将php-fpm服务添加到chkconfig列表
#chkconfig --add php-fpm
设置开机自启动
#chkconfig php-fpm on
以后重启和停止php的方式为
#service php-fpm start
#service php-fpm stop
#service php-fpm restart
#service php-fpm reload
上面是我的问题,请大家及时更正。
推荐学习:《PHP视频教程》
The above is the detailed content of How to build php5.6 on centos7. For more information, please follow other related articles on the PHP Chinese website!

 CentOS7怎么安装Mysql并设置开机自启动Jun 02, 2023 pm 08:36 PM
centos7不带mysql数据库了,默认的数据库是mariadb(mysql的一个分支)。可以按照以下步骤手动安装mysql数据库。1.下载rpm安装文件wgethttp://repo.mysql.com/mysql-community-release-el7.rpm2.执行rpm安装rpm-ivhmysql-community-release-el7.rpm依赖解析完成后,出现下列选项:dependenciesresolved=================================
 centos7怎么查看php安装目录?三种方法分享Mar 22, 2023 am 10:38 AM
如果你正在使用 CentOS 7 操作系统,需要查看 PHP 安装目录以便定位配置文件、扩展等相关信息,那么就需要了解一些相关命令和技巧。下面,我们将为您介绍一些方法来查看 CentOS 7 上的 PHP 安装目录。
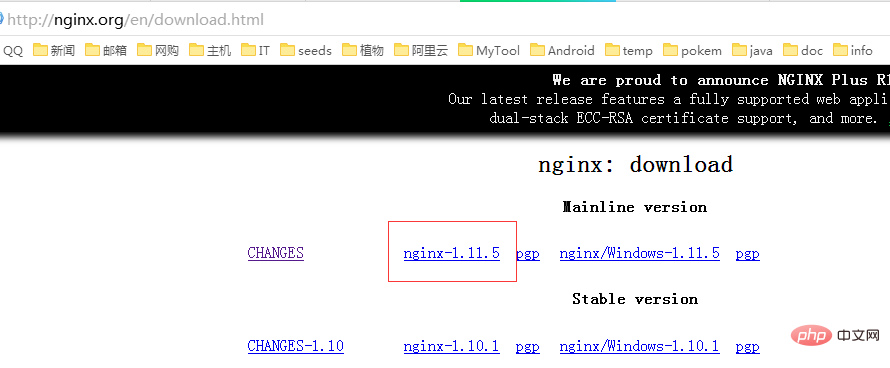 CentOS7如何安装Nginx并配置自动启动May 14, 2023 pm 03:01 PM
1、官网下载安装包选择适合linux的版本,这里选择最新的版本,下载到本地后上传到服务器或者centos下直接wget命令下载。切换到/usr/local目录,下载软件包#cd/usr/local#wgethttp://nginx.org/download/nginx-1.11.5.tar.gz2、安装nginx先执行以下命令,安装nginx依赖库,如果缺少依赖库,可能会安装失败,具体可以参考文章后面的错误提示信息。#yuminstallgcc-c++#yuminstallpcre#yumins
 怎么在CentOS7中使用Nginx和PHP7-FPM安装NextcloudMay 24, 2023 pm 08:13 PM
先决条件64位的centos7服务器的root权限步骤1-在centos7中安装nginx和php7-fpm在开始安装nginx和php7-fpm之前,我们还学要先添加epel包的仓库源。使用如下命令:yum-yinstallepel-release现在开始从epel仓库来安装nginx:yum-yinstallnginx然后我们还需要为php7-fpm添加另外一个仓库。互联网中有很个远程仓库提供了php7系列包,我在这里使用的是webtatic。添加php7-fpmwebtatic仓库:rpm
 如何在 CentOS 7 中安装并配置 Java 环境变量?Apr 22, 2023 pm 04:28 PM
安装环境:Centos764位Jdk1.864位Xshell免费版win10*64位一、先进来,你需要检查自己的openjdk是否卸载(或者判断是否存在,因为一般centos都会预装openjdk):在xshell或rpm-qa|grepjdk中输入rpm-qa|grepjavarpm-qa|grepjava第二,如果有一个对应的openjdk,并且显示了一个响应列表,那么就需要卸载它。在xshell中输入rpm-e-nodepstzdata-文件名(这个文件名是你查看的openjdk文件列表中
 CentOS7下怎么部署php7.1和开启MySQL扩展May 28, 2023 pm 03:01 PM
简单安装(yum方式)安装软件源添加epel源[root@opstrip.comopt]#rpm--import/etc/pki/rpm-gpg/rpm-gpg-key*[root@opstrip.comopt]#rpm-uvhhttp://mirrors.rit.edu/fedora/epel//7/x86_64/e/epel-release-7-9.noarch.rpm添加remi源[root@opstrip.comopt]#rpm-uvhhttp://rpms.remirepo.net/e
 Centos7改系统时区方法有哪些Mar 03, 2023 am 10:47 AM
Centos7修改系统时区的两种方法:1、使用timedatectl命令,可设定和修改时区信息,语法“timedatectl set-timezone 时区标识”;2、修改用户目录下的“.bash_profile”文件,在文件末尾追加“TZ='时区标识'; export TZ”即可。
 centos7使用rpm安装mysql5.7的方法May 27, 2023 am 08:05 AM
1.下载4个rpm包mysql-community-client-5.7.26-1.el7.x86_64.rpmmysql-community-common-5.7.26-1.el7.x86_64.rpmmysql-community-libs-5.7.26-1.el7.x86_64.rpmmysql-community-server-5.7.26-1.el7.x86_64.rpm想要用迅雷进行下载得先找到对应的rpm下载路径首先浏览器打开mysql官网:在打开的界面,按键盘f12打开开发者工具


Hot AI Tools

Undresser.AI Undress
AI-powered app for creating realistic nude photos

AI Clothes Remover
Online AI tool for removing clothes from photos.

Undress AI Tool
Undress images for free

Clothoff.io
AI clothes remover

AI Hentai Generator
Generate AI Hentai for free.

Hot Article
Hot Tools

SublimeText3 Chinese version
Chinese version, very easy to use

PhpStorm Mac version
The latest (2018.2.1) professional PHP integrated development tool

EditPlus Chinese cracked version
Small size, syntax highlighting, does not support code prompt function

MantisBT
Mantis is an easy-to-deploy web-based defect tracking tool designed to aid in product defect tracking. It requires PHP, MySQL and a web server. Check out our demo and hosting services.

SAP NetWeaver Server Adapter for Eclipse
Integrate Eclipse with SAP NetWeaver application server.

