


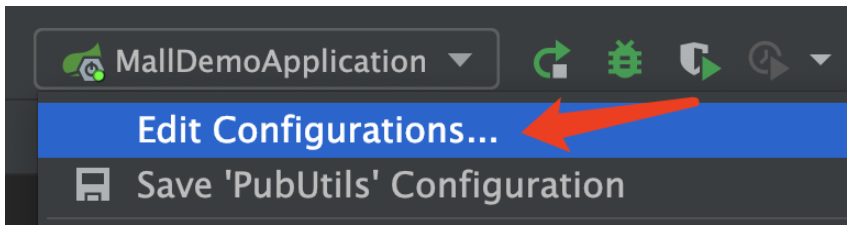
Idea's php plug-in installation method: 1. Select Settings in the menu bar and select Plugins again; 2. Click on the bottom side to browse the plug-in library; 3. Enter the keyword php and search for php in the plug-in library Plug-in; 4. Click on the right side to install.

The operating environment of this article: Windows 7 system, IntelliJ IDEA 2019.2, Dell G3 computer.
IDEA’s PHP plug-in installation tutorial
First of all, let’s take a look at the display status of the PHP code imported by default before the plug-in is installed. The icons and syntax cannot be recognized, just like The same as a normal text editor

Select Settings in the menu bar (shortcut key Ctrl Alt S), and select Plugins again

The plug-in list page on the right is a list of installed plug-ins. Click Browse repositories on the bottom side

Enter the keyword php and search for the php plug-in in the plug-in repository. After selecting, click Install on the right side. After the installation is completed, Restart Intellij IDEA will be displayed

After the restart is completed, in the php menu option of the settings page again, Associate the PHP installation directory

#After the association is completed, go back and check the previous PHP code. At this time, the PHP file icon is displayed normally, and the code statement highlighting and prompts are normal. shown. This means that the installation of the php plug-in has been completed and the development of the php project can be carried out.

Recommended study: "PHP Video Tutorial"
The above is the detailed content of idea php plug-in installation tutorial. For more information, please follow other related articles on the PHP Chinese website!

 idea社区版和专业版的区别Nov 07, 2023 pm 05:23 PM
idea社区版和专业版的区别在授权方式、功能、支持与更新、插件支持、云服务与团队协作、移动开发支持、教育与学习、集成与扩展性、错误处理与调试、安全性与隐私保护等方面。详细介绍:1、授权方式,社区版是免费的,适用于所有开发人员,无论使用什么操作系统,社区版支持开源项目和商业项目,专业版是付费的,适用于商业开发,专业版有30天的试用期,之后需要购买许可证才能继续使用等等。
 Idea如何启动多个SpringBoot项目May 28, 2023 pm 06:46 PM
一、准备工作使用Idea构建一个helloworld的SpringBoot项目。开发环境说明:(1)SpringBoot2.7.0(2)Idea:IntelliJIDEA2022.2.2(3)OS:MacOS环境不太一样,有些操作是有些微区别的,但是整体的思路是一样的。二、启动多个SpringBoot2.1方案一:修改配置文件的端口在SpringBoot项目中,端口号可以在配置文件进行配置,所以最简单可以想到的方案是修改配置文件application.(properties/yml)的端口配置s
 五个IntelliJ IDEA插件,高效编写代码Jul 16, 2023 am 08:03 AM
人工智能AI是当前广受认可的未来趋势和发展方向。虽然有些人担心AI可能会取代所有的工作,但实际上只会取代那些重复性高、产出低的工作。因此,我们应该学会更加聪明地工作,而不是使劲努力地工作。本文介绍5个由AI驱动的Intellij插件,这些插件可以帮助你提高生产力,减少繁琐的重复性工作,让你的工作更加高效、便捷。1GithubCopilotGithubCopilot是由OpenAI和GitHub联合开发的一款人工智能代码辅助工具。它使用了OpenAI的GPT模型来分析代码上下文,预测并生成新的代码
 idea springBoot项目自动注入mapper为空报错如何解决May 17, 2023 pm 06:49 PM
在SpringBoot项目中,如果使用了MyBatis作为持久层框架,使用自动注入时可能会遇到mapper报空指针异常的问题。这是因为在自动注入时,SpringBoot无法正确识别MyBatis的Mapper接口,需要进行一些额外的配置。解决这个问题的方法有两种:1.在Mapper接口上添加注解在Mapper接口上添加@Mapper注解,告诉SpringBoot这个接口是一个Mapper接口,需要进行代理。示例如下:@MapperpublicinterfaceUserMapper{//...}2
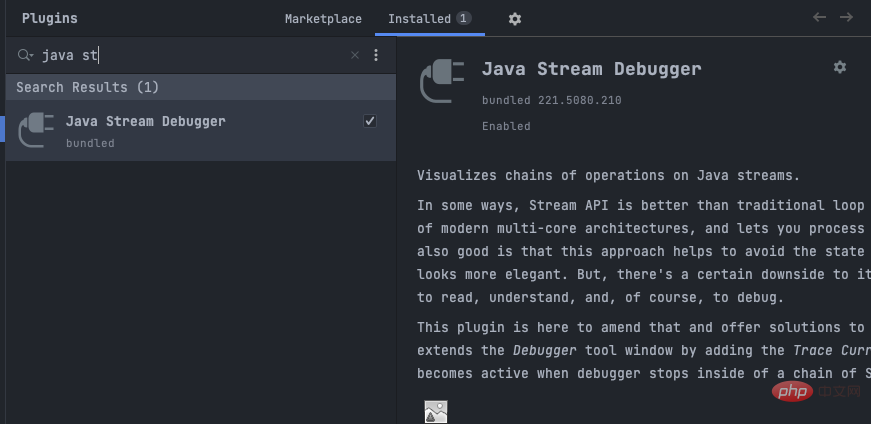 IntelliJ IDEA中如何调试Java Stream操作May 09, 2023 am 11:25 AM
Stream操作是Java8推出的一大亮点!虽然java.util.stream很强大,但依然还是有很多开发者在实际工作中很少使用,其中吐槽最多的一个原因就是不好调试,一开始确实是这样,因为stream这样的流式操作在DEBUG的时候,是一行代码,直接下一步的时候,其实一下就过去了好多操作,这样我们就很难判断到底是里面的哪一行出了问题。插件:JavaStreamDebugger如果你用的IDEA版本比较新的话,这个插件已经是自带的了,就不需要安装了。如果还没安装的话,就手工安装一下,然后继续下面
 idea是什么软件Sep 02, 2022 pm 05:05 PM
idea是一种Java集成开发环境工具软件,由JetBrains软件公司开发。IDEA提倡智能编码,特殊功能有:智能选取、编码辅助、灵活的排版、动态语法检测、代码检查、对JSP的完全支持、预置模板、版本控制完美支持、智能代码等。
 idea如何配置tomcatJan 09, 2024 pm 05:08 PM
配置步骤:1、打开IntelliJ IDEA并进入项目;2、点击顶部菜单中 “Run”;3、选择左上角的加号并选择 “Tomcat Server” > “Local”;4、在 “Server” 选项中,点击 “Configure” 并选择Tomcat的安装目录;5、在 “Deployment” 选项中,点击加号添加你的项目;6、在 “Before launch” 中操作保存即可
 Idea中Springboot热部署无效怎么解决May 18, 2023 pm 06:01 PM
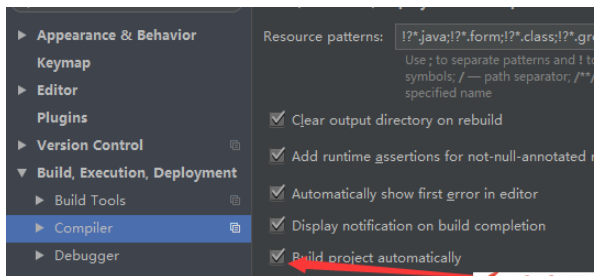
一、开启idea自动make功能1-EnableAutomakefromthecompilerPRESS:CTRL+SHIFT+ATYPE:makeprojectautomaticallyPRESS:EnterEnableMakeProjectautomaticallyfeature2-EnableAutomakewhentheapplicationisrunningPRESS:CTRL+SHIFT+ATYPE:RegistryFindthekeycompiler.automake.allow.


Hot AI Tools

Undresser.AI Undress
AI-powered app for creating realistic nude photos

AI Clothes Remover
Online AI tool for removing clothes from photos.

Undress AI Tool
Undress images for free

Clothoff.io
AI clothes remover

AI Hentai Generator
Generate AI Hentai for free.

Hot Article
Hot Tools

SAP NetWeaver Server Adapter for Eclipse
Integrate Eclipse with SAP NetWeaver application server.

EditPlus Chinese cracked version
Small size, syntax highlighting, does not support code prompt function

Dreamweaver Mac version
Visual web development tools

Notepad++7.3.1
Easy-to-use and free code editor

VSCode Windows 64-bit Download
A free and powerful IDE editor launched by Microsoft

