 Web Front-end
 PS Tutorial
 10 PS skills worth knowing for beginners to help you improve work efficiency!
In the previous article "Teach me how to use PS to add partial magnification effect to pictures (collection)", I introduced you to a way to quickly create a partial magnification effect to highlight the key points of the picture. The following article will introduce to you the top ten PS skills used by experts. Let’s take a look at PS tips and tricks. It has certain reference value. Friends in need can refer to it.

# Now almost anyone with computer access can master this tool as easily as creating a no-code website. Anyone can learn the basics of Photoshop. Here are some of our favorite simple tips and tricks for Photoshop beginners.
psTop Ten Tips and Tricks
1. Transform
Press Ctrl T on the keyboard, then the image will be surrounded by A bounding box appears, indicating the transformation. This means you can now resize images. The best way to do this is to place your cursor over one of the rectangular corners of the box and then hold down the Shift key while dragging the corner. Just press Enter when you're done.
To flip the image vertically or horizontally, press Ctrl T and then right-click the mouse. A pop-up window will appear with some options for rotating and flipping the image. Select the action you want and press Enter when finished.
To distort or tilt the image, press Ctrl T, then place the cursor over any corner you want to distort. Hold down the Ctrl key on any corner of the image you want to warp, then drag it down to the desired point and finally press Enter to activate.

2. Change the measurement unit
in the measurement unit you are using A short and quick way to switch between is to place your cursor over one of the rulers on the grid (press Ctrl R to show or hide the rulers), right-click, and select A new unit in the context menu. There you will find a wide variety of units, from centimeters to pixels, millimeters, points and even percentages.
3. Magnetic Lasso Tool
This is simple The selection tool helps you trace and outline the exact part of the image you want to edit. Click and hold the mouse button on the Lasso tool until a pop-up menu appears.
The Magnetic Lasso is the last lasso with a small magnet on the icon. Select it, then go to the image and place your mouse on the edge of the part you want to change. Click once and release over the edge of the object you want to select.
 4. Magic Wand Tool
The Magic Wand is another selection tool that's great for working with more monotonous and consistent backgrounds (like solid colors or clear skies). The Magic Wand tool is most commonly used to switch backgrounds or large blocks of color. To use it, select the Magic Wand Tool from the Tools Panel and click on the part of the image you want to select. Make sure the "Add to Selection" option on the top bar (the two square icon) is toggled so that you can continue to toggle the colors and tints of your selection.
5. Custom shape tools
In addition to photo editing , you can easily add shapes and design elements to your PS creations. The tool palette features all basic shapes such as square, line, circle, oval, etc. plus a large number of extension options. The custom shape tool is easy to find in the options bar, represented by an icon that looks like a puzzle piece.
Access more shapes by clicking again on the small arrow on the right side of the panel. If you are looking for a variety of banners, speech bubbles or arrows, this is the tool for you.
 6. Adjustment layer
There is often more to an image than meets the eye. This is why the adjustment layer tool is so important. The Adjustment Layer tool lets you adjust the color and tone of an image by adding a top layer to it. The best part about this feature is that by adding additional layers, you can completely reverse your changes while keeping the rest of the image intact. You'll find adjustment layers at the bottom of the Layers panel (a black and white circle icon).

7. Layer style
This is a way to add A simple and easy way to get some energy. Layer styles are special effects that can be quickly applied to individual layers of an image. All you have to do is double-click on the layer and select your preferred effect.
With just a click of your mouse, you can choose from a variety of features, add a stroke or glow, add a shadow, and more. Be careful not to overdo it. These effects look cheap when overused.

8. Spot repair brush
is probably the most famous of PS Tool, this tool was created to eliminate the little imperfections in life. The spot brush is the magic tool we wish we had in our awkward teenage years to make pimples disappear from every photo. Simply place the brush over the area you want to "fix," making sure the brush is a little larger than the blemish, and click. PS will automatically sample from around the retouched area to match your image's colors to perfection.

9. Brush Tool
No matter where you use Dodge tool, will brighten pixels. So, in other words, it’s the perfect Photoshop tool to get rid of “eyestrain”. Set the Dodge Tool to a Soft Brush, go to Range Settings in the menu bar drop-down menu and select Highlights, setting the Exposure to around 20%. Then brush carefully across the eye area. Remember not to overdo it or your model will start to look alien. A few simple strokes should do the job.

10. Blur Tool
Remove some fine lines from PS . This is where the blur tool comes in. This simple tool can smooth out small wrinkles by blurring them slightly. Use the Blur tool to remove small imperfections like wrinkles around the eyes or mouth and blur them into the background. Again, be gentle and remember not to overdo it or improve your image or you'll end up ruining it.
Recommended learning: PS video tutorial
The above is the detailed content of 10 PS skills worth knowing for beginners to help you improve work efficiency!. For more information, please follow other related articles on the PHP Chinese website!
 ps序列号cs5永久免费2020Jul 13, 2023 am 10:06 AM
ps序列号cs5永久免费2020有:1、1330-1384-7388-4265-2355-8589(中文);2、1330-1409-7892-5799-0412-7680(中文);3、1330-1616-1993-8375-9492-6951(中文);4、1330-1971-2669-5043-0398-7801(中文)等。
 ps如何删除选中区域Aug 07, 2023 pm 01:46 PM
ps删除选中区域的步骤:1、打开想要编辑的图片;2、使用合适的工具创建选区;3、可以使用多种方法删除选区中的内容,使用“删除”键、使用“修复画笔工具”、使用“内容感知填充”、使用“图章工具”等;4、使用工具来修复任何明显的痕迹或缺陷,使图片看起来更自然;5、完成编辑后,点击菜单栏中的“文件”>“保存”来保存编辑结果。
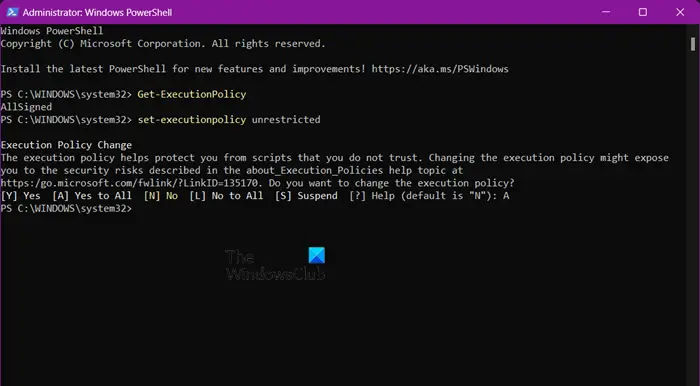
 如何使用PowerShell自动执行任务Feb 20, 2024 pm 01:51 PM
如果您是IT管理员或技术专家,您一定意识到自动化的重要性。尤其对于Windows用户来说,MicrosoftPowerShell是最佳的自动化工具之一。微软为满足您的自动化需求提供了各种工具,无需安装第三方应用程序。本指南将详细介绍如何利用PowerShell自动化执行任务。什么是PowerShell脚本?如果您有使用PowerShell的经验,您可能已经使用过命令来配置您的操作系统。脚本是.ps1文件中这些命令的集合。.ps1文件包含由PowerShell执行的脚本,例如基本的Get-Help
 PS的界面字体太小怎么办Dec 01, 2022 am 11:31 AM
PS的界面字体太小的修改方法:1、打开ps,点击ps顶部菜单栏上的“编辑”按钮展开编辑菜单;2、在展开的编辑菜单中点击“首选项”按钮,然后点击“界面...”按钮;3、在界面设置中将用户界面字体大小设置为“大”,将UI缩放设置为“200%”并保存设置,然后将ps重启即可生效。
 ps安装无法写入注册表值错误160怎么办Mar 22, 2023 pm 02:33 PM
ps安装无法写入注册表值错误160的解决办法:1、查看电脑中是否有2345的软件,若有则卸载该软件;2、按“Win+R”输入“Regedit”打开系统注册表,然后找到“Photoshop.exe”并将Photoshop项删除即可。
 无法使用PS快捷键进行填充Feb 19, 2024 am 09:18 AM
随着数字时代的发展,图像处理软件成为我们生活和工作中不可或缺的一部分。其中,Adobe公司开发的Photoshop(简称PS)是最著名的图像处理软件之一,其功能强大,操作灵活,深受用户的喜爱。然而,使用PS时,有些用户反映快捷键“填充”(Fill)无法正常使用的问题,给用户的使用体验带来了困扰。快捷键是软件中提供的一种快速操作的方式,避免繁琐的鼠标点击操作,
 ps曲线快捷键是什么Aug 22, 2023 am 10:44 AM
ps曲线快捷键是Ctrl+M,其他曲线快捷键:1、转换为点控制曲线,Alt+Shift+Ctrl+T;2、自动对齐曲线,Alt+Shift+Ctrl+O;3、恢复默认曲线,Ctrl+Alt+Shift+R;4、复制曲线,Ctrl+Alt+Shift+C;5、粘贴曲线,Ctrl+Alt+Shift+V;6、调整曲线斜率,Shift+上下箭头;7、调整曲线亮度,Shift+左右箭头
 PS复制图层快捷键Feb 23, 2024 pm 02:34 PM
在PS复制图层快捷键中,我们可以知道使用PS的时候如果想要进行复制图层的操作,可以使用到快捷键【Ctrl+J】进行快速复制。这篇复制图层快捷键的介绍就能够告诉大家具体的操作方法,下面就是详细的内容,赶紧看看吧。PS复制图层快捷键答:【Ctrl+J】具体方法:1、在ps中打开图像,选中需要复制的图层。2、键盘同时按下【Ctrl+J】,即可完成对图层的复制。其他复制方式:1、打开图像后,按住图层,向下放【新建图层】图标移动。2、移动到该图标上后,松手。3、即可完成图层复制。


Hot AI Tools

Undresser.AI Undress
AI-powered app for creating realistic nude photos

AI Clothes Remover
Online AI tool for removing clothes from photos.

Undress AI Tool
Undress images for free

Clothoff.io
AI clothes remover

AI Hentai Generator
Generate AI Hentai for free.

Hot Article

Hot Tools

Zend Studio 13.0.1
Powerful PHP integrated development environment

Atom editor mac version download
The most popular open source editor

ZendStudio 13.5.1 Mac
Powerful PHP integrated development environment

SublimeText3 Mac version
God-level code editing software (SublimeText3)

Dreamweaver Mac version
Visual web development tools


