Home >Web Front-end >Front-end Q&A >How to make a mask layer
How to make a mask layer
- 藏色散人Original
- 2021-06-30 15:09:305998browse
How to implement the mask layer: first create an html sample file; then define "position: relative;" in the "img_container" style; then set the absolute positioning of absolute; finally add the mouse to move up to display the mask Layer script code is enough.
The operating environment of this article: windows7 system, Dell G3 computer, HTML5&&CSS3.
How to make a mask layer?
css example of making a mask layer:
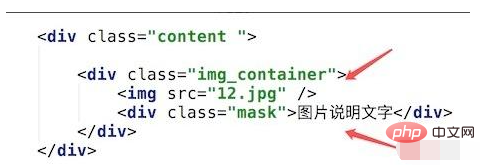
Let’s take a look at our HTML first. It’s very simple, an img picture control, and a div with a mask style, with text inside. This It's the mask layer.
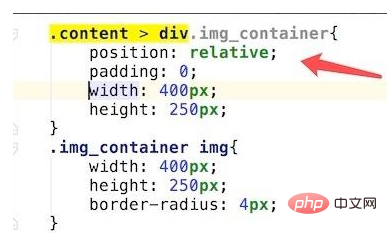
Then look at the style definition. First look at the image container and the image style, as shown in the figure. What should be noted is that the position: relative; is defined in the img_container style. This is to prepare our mask layer for absolute positioning.
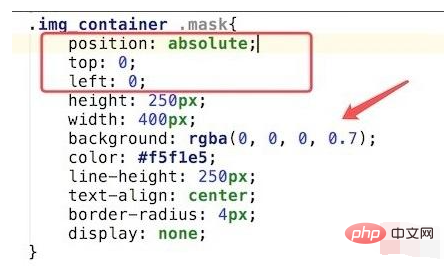
Let’s look at the style definition of the mask layer again. The code is as shown in the figure. What needs to be noted is its positioning style. We have set the absolute positioning of absolute. In addition, there are Translucent background style setting:
background: rgba(0, 0, 0, 0.7);
You can change the transparency by modifying the number 0.7 at the end. 1 is completely opaque, 0 is completely transparent.
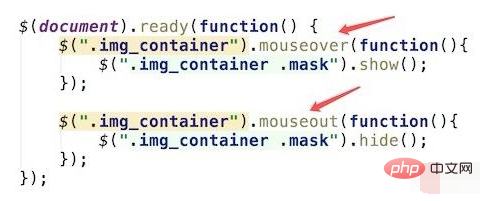
Then add the script code to move the mouse up to display the mask layer. This js code is written in jquery, which is convenient and simple, so we first introduce the jquery script library.

Add mouseover and mouseout events, mainly when the mouse moves to the image container, the mask layer is displayed, and when the mouse is moved out, the mask layer is hidden. The code is shown in the figure
Recommended study: "css video tutorial"
The above is the detailed content of How to make a mask layer. For more information, please follow other related articles on the PHP Chinese website!

