Home >Web Front-end >JS Tutorial >Detailed explanation of how to perform speech recognition in JS applications
Detailed explanation of how to perform speech recognition in JS applications
- 青灯夜游forward
- 2021-05-21 10:14:353364browse
This article will introduce you to how to perform speech recognition in Javascript applications. It has certain reference value. Friends in need can refer to it. I hope it will be helpful to everyone.

Speech recognition is an interdisciplinary subfield of computer science and computational linguistics. It recognizes spoken language and translates it into text, it is also known as automatic speech recognition (ASR), computer speech recognition or speech-to-text (STT).
Machine learning (ML) is an application of artificial intelligence (AI) that enables systems to automatically learn and improve from experience without explicit programming. Machine learning has provided most speech recognition breakthroughs this century. Voice recognition technology is everywhere these days, such as Apple Siri, Amazon Echo, and Google Nest.
Speech recognition and speech response (also known as speech synthesis or text-to-speech (TTS)) are powered by the Web Speech API.
In this article, we focus on speech recognition in JavaScript applications. Another article covers speech synthesis.
Speech recognition interface
SpeechRecognition is the controller interface of the recognition service, which is called webkitSpeechRecognition in Chrome. SpeechRecognition Handles the SpeechRecognitionEvent sent from the recognition service. SpeechRecognitionEvent.results Returns a SpeechRecognitionResultList object that represents all speech recognition results of the current session.
You can use the following lines of code to initialize SpeechRecognition:
// 创建一个SpeechRecognition对象
const recognition = new webkitSpeechRecognition();

// 配置设置以使每次识别都返回连续结果
recognition.continuous = true;

// 配置应返回临时结果的设置
recognition.interimResults = true;

// 正确识别单词或短语时的事件处理程序
recognition.onresult = function (event) {
  console.log(event.results);
};
ognition.start() starts speech recognition, and ognition. stop() Stops speech recognition, it can also be aborted (recognition.abort).
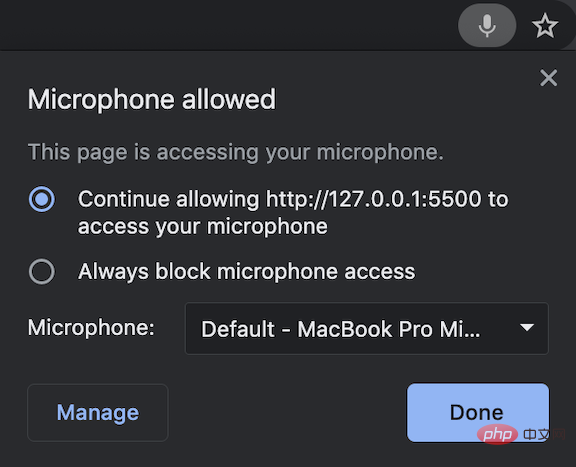
When a page is accessing your microphone, a microphone icon will appear in the address bar to show that the microphone is on and running.

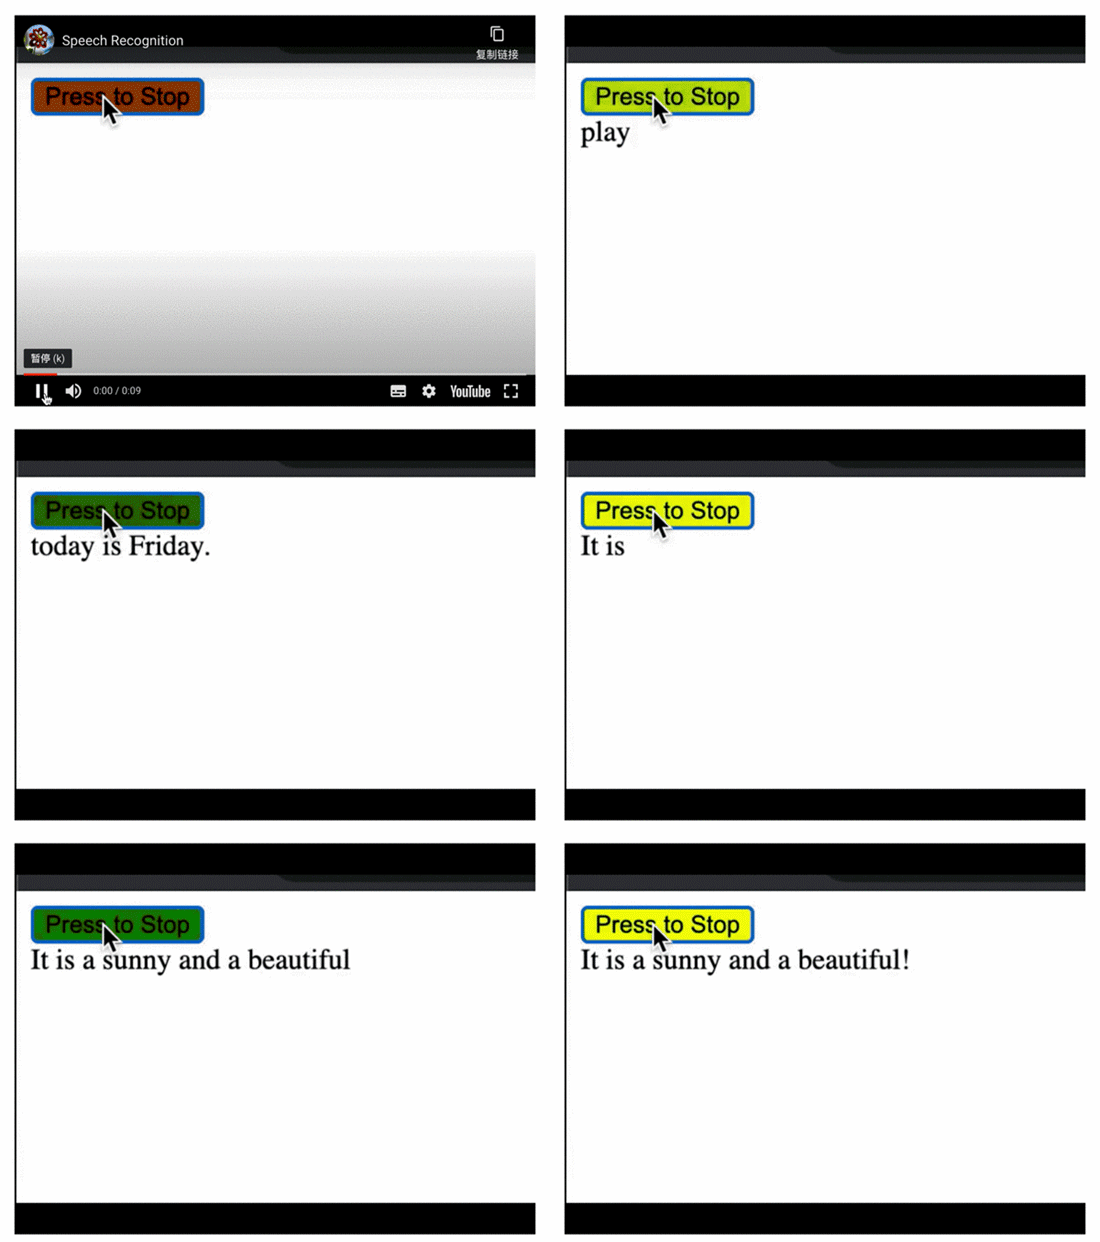
We speak to the page in sentences. "hello comma I'm talking period." onresult Show all temporary results while we speak.

This is the HTML code for this example:
<!DOCTYPE html>
<html>
<head>
<meta charset="UTF-8" />
<meta name="viewport" content="width=device-width, initial-scale=1.0" />
<title>Speech Recognition</title>
<script>
window.onload = () => {
const button = document.getElementById('button');
button.addEventListener('click', () => {
if (button.style['animation-name'] === 'flash') {
recognition.stop();
button.style['animation-name'] = 'none';
button.innerText = 'Press to Start';
content.innerText = '';
} else {
button.style['animation-name'] = 'flash';
button.innerText = 'Press to Stop';
recognition.start();
}
});
const content = document.getElementById('content');
const recognition = new webkitSpeechRecognition();
recognition.continuous = true;
recognition.interimResults = true;
recognition.onresult = function (event) {
let result = '';
for (let i = event.resultIndex; i < event.results.length; i++) {
result += event.results[i][0].transcript;
}
content.innerText = result;
};
};
</script>
<style>
button {
background: yellow;
animation-name: none;
animation-duration: 3s;
animation-iteration-count: infinite;
}
@keyframes flash {
0% {
background: red;
}
50% {
background: green;
}
}
</style>
</head>
<body>
<button id="button">Press to Start</button>
<div id="content"></div>
</body>
</html> Line 25 creates the SpeechRecognition object, lines 26 and 27 configure it The SpeechRecognition object.
Lines 28-34 set an event handler when a word or phrase is correctly recognized.
Start speech recognition on line 19 and stop speech recognition on line 12.
On line 12, after clicking the button, it may still print out some messages. This is because Recognition.stop() attempts to return the SpeechRecognitionResult captured so far. If you want it to stop completely, use ognition.abort() instead.
You will see that the code for the animated button (lines 38-51) is longer than the speech recognition code. Here is a video clip of the example: https://youtu.be/5V3bb5YOnj0

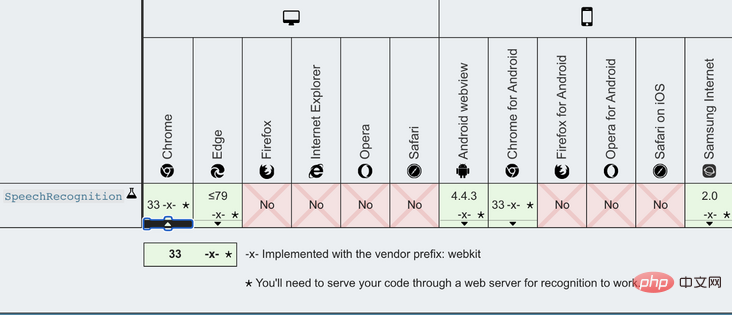
Here is the browser compatibility table:

Network speech recognition relies on the browser's own speech recognition engine. In Chrome, this engine performs recognition in the cloud. Therefore, it only works online.
Speech Recognition Libraries
There are some open source speech recognition libraries, here is a list of these libraries based on npm trends:
1. Annyang
Annyang is a JavaScript speech recognition library for controlling websites via voice commands. It is built on top of the SpeechRecognition Web API. In the next section, we will give an example of how annyang works.
2. artyom.js
artyom.js is a JavaScript speech recognition and speech synthesis library. It is built on the Web Speech API and provides voice responses in addition to voice commands.
3. Mumble
Mumble is a JavaScript speech recognition library for controlling websites via voice commands. It is built on top of the SpeechRecognition Web API, which is similar to how annyang works.
4. julius.js
Julius is high-performance, small-footprint Large Vocabulary Continuous Speech Recognition (LVCSR) for speech-related researchers and developers Decoder software. It can perform real-time decoding on a variety of computers and devices, from microcomputers to cloud servers. Julis is built in C, and julius.js is a port of what Julius thinks of as JavaScript.
5.voice-commands.js
voice-commands.js is a JavaScript speech recognition library for controlling websites through voice commands. It is built on top of the SpeechRecognition Web API, which is similar to how annyang works.
Annyang
Annyang初始化一个 SpeechRecognition 对象,该对象定义如下:
var SpeechRecognition = root.SpeechRecognition ||
                        root.webkitSpeechRecognition ||
                        root.mozSpeechRecognition ||
                        root.msSpeechRecognition ||
                        root.oSpeechRecognition;
有一些API可以启动或停止annyang:
-
annyang.start:使用选项(自动重启,连续或暂停)开始监听,例如annyang.start({autoRestart:true,Continuous:false})。 -
annyang.abort:停止收听(停止SpeechRecognition引擎或关闭麦克风)。 -
annyang.pause:停止收听(无需停止SpeechRecognition引擎或关闭麦克风)。 -
annyang.resume:开始收听时不带任何选项。
这是此示例的HTML代码:
<!DOCTYPE html>
<html>
<head>
<meta charset="UTF-8" />
<meta name="viewport" content="width=device-width, initial-scale=1.0" />
<title>Annyang</title>
<script src="//cdnjs.cloudflare.com/ajax/libs/annyang/2.6.1/annyang.min.js"></script>
<script>
window.onload = () => {
const button = document.getElementById('button');
button.addEventListener('click', () => {
if (button.style['animation-name'] === 'flash') {
annyang.pause();
button.style['animation-name'] = 'none';
button.innerText = 'Press to Start';
content.innerText = '';
} else {
button.style['animation-name'] = 'flash';
button.innerText = 'Press to Stop';
annyang.start();
}
});
const content = document.getElementById('content');
const commands = {
hello: () => {
content.innerText = 'You said hello.';
},
'hi *splats': (name) => {
content.innerText = `You greeted to ${name}.`;
},
'Today is :day': (day) => {
content.innerText = `You said ${day}.`;
},
'(red) (green) (blue)': () => {
content.innerText = 'You said a primary color name.';
},
};
annyang.addCommands(commands);
};
</script>
<style>
button {
background: yellow;
animation-name: none;
animation-duration: 3s;
animation-iteration-count: infinite;
}
@keyframes flash {
0% {
background: red;
}
50% {
background: green;
}
}
</style>
</head>
<body>
<button id="button">Press to Start</button>
<div id="content"></div>
</body>
</html>第7行添加了annyang源代码。
第20行启动annyang,第13行暂停annyang。
Annyang提供语音命令来控制网页(第26-42行)。
第27行是一个简单的命令。如果用户打招呼,页面将回复“您说‘你好’。”
第30行是带有 splats 的命令,该命令会贪婪地捕获命令末尾的多词文本。如果您说“hi,爱丽丝e”,它的回答是“您向爱丽丝致意。”如果您说“嗨,爱丽丝和约翰”,它的回答是“您向爱丽丝和约翰打招呼。”
第33行是一个带有命名变量的命令。一周的日期被捕获为 day,在响应中被呼出。
第36行是带有可选单词的命令。如果您说“黄色”,则将其忽略。如果您提到任何一种原色,则会以“您说的是原色名称”作为响应。
从第26行到第39行定义的所有命令都在第41行添加到annyang中。
... ...
结束
我们已经了解了JavaScript应用程序中的语音识别,Chrome对Web语音API提供了最好的支持。我们所有的示例都是在Chrome浏览器上实现和测试的。
在探索Web语音API时,这里有一些提示:如果您不想在日常生活中倾听,请记住关闭语音识别应用程序。
更多编程相关知识,请访问:编程视频!!
The above is the detailed content of Detailed explanation of how to perform speech recognition in JS applications. For more information, please follow other related articles on the PHP Chinese website!
Related articles
See more- What are the methods of javascript object encapsulation?
- How to convert time string to time in javascript
- Detailed explanation of dynamically merging the properties of two objects in JavaScript
- Learn these 20+ JavaScript one-liners to help you code like a pro
- Weird behavior of parsing parseInt() in JavaScript

