


Method: First open the software and draw the specified shape; then click the "ctrl enter" key on the keyboard to convert the path into a selection and fill it with color; then import the photo to be cropped into PS and place the mouse Between the photo and shape layers; finally hold down the "alt" key and click the left mouse button when the down arrow appears.

The operating environment of this tutorial: Windows 7 system, Adobe Photoshop CS6 version, Dell G3 computer.
Open ps and create a new size that you are satisfied with, as shown in the picture
Use the pen tool to outline the shape you want. Here I select the shape in the shape layer, as shown in the picture

Select the shape you want, move and change the mouse, and draw the shape layer, as shown in the picture

Click on the keyboard Ctrl enter to create, convert the path into a selection, create a new layer, select the color to be filled, (you can also directly rasterize the smart object without creating a new layer)

Alt delte, fill the selection with the foreground color

Pull the photo to be cropped into ps

Place the photo to be cropped on the top layer of the layer, place the mouse in the red area, hold down Alt, and when the downward arrow appears, left-click

to select it. For cropped graphics, select the move tool to edit the content in the cropped graphics

For more computer-related knowledge, please visit the FAQ column !
The above is the detailed content of How to change pictures into specific shapes in PS. For more information, please follow other related articles on the PHP Chinese website!

 ps序列号cs5永久免费2020Jul 13, 2023 am 10:06 AM
ps序列号cs5永久免费2020有:1、1330-1384-7388-4265-2355-8589(中文);2、1330-1409-7892-5799-0412-7680(中文);3、1330-1616-1993-8375-9492-6951(中文);4、1330-1971-2669-5043-0398-7801(中文)等。
 ps如何删除选中区域Aug 07, 2023 pm 01:46 PM
ps删除选中区域的步骤:1、打开想要编辑的图片;2、使用合适的工具创建选区;3、可以使用多种方法删除选区中的内容,使用“删除”键、使用“修复画笔工具”、使用“内容感知填充”、使用“图章工具”等;4、使用工具来修复任何明显的痕迹或缺陷,使图片看起来更自然;5、完成编辑后,点击菜单栏中的“文件”>“保存”来保存编辑结果。
 ps安装无法写入注册表值错误160怎么办Mar 22, 2023 pm 02:33 PM
ps安装无法写入注册表值错误160的解决办法:1、查看电脑中是否有2345的软件,若有则卸载该软件;2、按“Win+R”输入“Regedit”打开系统注册表,然后找到“Photoshop.exe”并将Photoshop项删除即可。
 如何使用PowerShell自动执行任务Feb 20, 2024 pm 01:51 PM
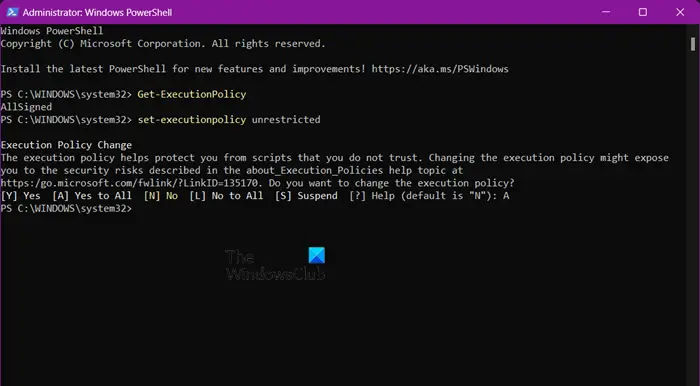
如果您是IT管理员或技术专家,您一定意识到自动化的重要性。尤其对于Windows用户来说,MicrosoftPowerShell是最佳的自动化工具之一。微软为满足您的自动化需求提供了各种工具,无需安装第三方应用程序。本指南将详细介绍如何利用PowerShell自动化执行任务。什么是PowerShell脚本?如果您有使用PowerShell的经验,您可能已经使用过命令来配置您的操作系统。脚本是.ps1文件中这些命令的集合。.ps1文件包含由PowerShell执行的脚本,例如基本的Get-Help
 PS的界面字体太小怎么办Dec 01, 2022 am 11:31 AM
PS的界面字体太小的修改方法:1、打开ps,点击ps顶部菜单栏上的“编辑”按钮展开编辑菜单;2、在展开的编辑菜单中点击“首选项”按钮,然后点击“界面...”按钮;3、在界面设置中将用户界面字体大小设置为“大”,将UI缩放设置为“200%”并保存设置,然后将ps重启即可生效。
 无法使用PS快捷键进行填充Feb 19, 2024 am 09:18 AM
随着数字时代的发展,图像处理软件成为我们生活和工作中不可或缺的一部分。其中,Adobe公司开发的Photoshop(简称PS)是最著名的图像处理软件之一,其功能强大,操作灵活,深受用户的喜爱。然而,使用PS时,有些用户反映快捷键“填充”(Fill)无法正常使用的问题,给用户的使用体验带来了困扰。快捷键是软件中提供的一种快速操作的方式,避免繁琐的鼠标点击操作,
 ps曲线快捷键是什么Aug 22, 2023 am 10:44 AM
ps曲线快捷键是Ctrl+M,其他曲线快捷键:1、转换为点控制曲线,Alt+Shift+Ctrl+T;2、自动对齐曲线,Alt+Shift+Ctrl+O;3、恢复默认曲线,Ctrl+Alt+Shift+R;4、复制曲线,Ctrl+Alt+Shift+C;5、粘贴曲线,Ctrl+Alt+Shift+V;6、调整曲线斜率,Shift+上下箭头;7、调整曲线亮度,Shift+左右箭头
 ps蓝色荧光效果怎么做Feb 27, 2024 pm 12:55 PM
本站小编为大家带来本教程将带你走进Photoshop的奇妙世界,学习如何制作迷人的蓝色荧光效果。不论你是Photoshop新手,还是资深用户,都可以从这篇教程中找到灵感和实用技巧。那么ps蓝色荧光效果究竟该如何制作呢,这篇教程攻略就将为大家带来详细的介绍,希望能帮助到大家。ps蓝色荧光效果制作方法步骤最终效果:1、调整图片亮度。2、添加曲线,调整图片整体明暗关系对比。3、用钢笔把鞋子的“边条”钩出来。4、抠好后创建选区,填充白色。5、选择模糊工具,对钩好的白色部分进行模糊处理。5、用钢笔对鞋带部

Hot AI Tools

Undresser.AI Undress
AI-powered app for creating realistic nude photos

AI Clothes Remover
Online AI tool for removing clothes from photos.

Undress AI Tool
Undress images for free

Clothoff.io
AI clothes remover

AI Hentai Generator
Generate AI Hentai for free.

Hot Article
Hot Tools

SublimeText3 Linux new version
SublimeText3 Linux latest version

Notepad++7.3.1
Easy-to-use and free code editor

Atom editor mac version download
The most popular open source editor

WebStorm Mac version
Useful JavaScript development tools

ZendStudio 13.5.1 Mac
Powerful PHP integrated development environment

