Home >Web Front-end >JS Tutorial >How to implement a gesture library in JavaScript
How to implement a gesture library in JavaScript
- 醉折花枝作酒筹forward
- 2021-05-07 09:25:322760browse
This article will introduce to you how to implement date comparison in JS. It has certain reference value. Friends in need can refer to it. I hope it will be helpful to everyone.
Start event
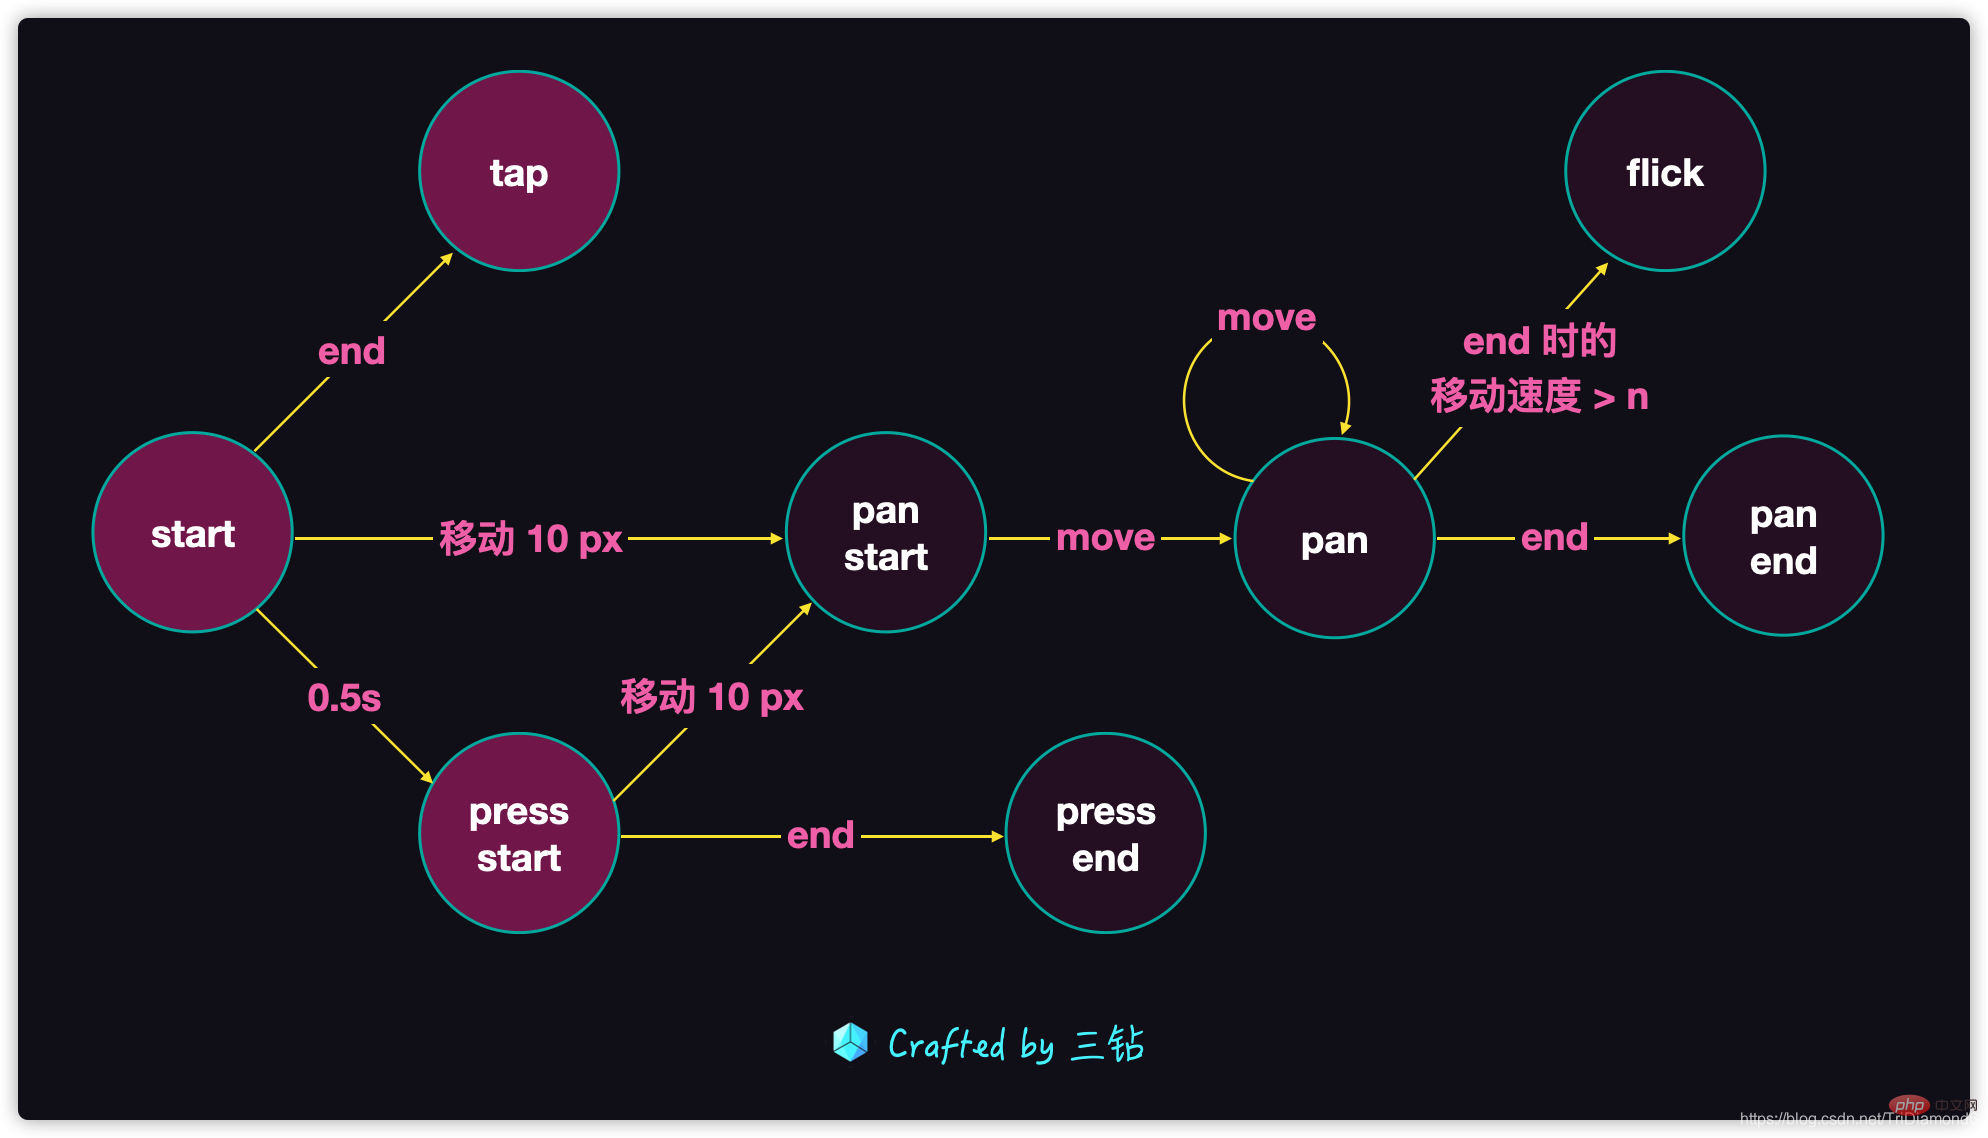
First we will trigger a start event, that is, when our finger touches the screen, A triggered event. There will be three situations at this time:
-
Release your finger
- The end event will be triggered, which constitutes a
tapclick behavior - It can be realized by listening to the end event
- The end event will be triggered, which constitutes a
-
Finger drag over 10 px
- This is the behavior of
pan startDragging - We can judge the distance between the current and the previous contact point in the move event
- This is the behavior of
-
The finger stays at the current position for more than 0.5s
- This is the behavior of
press start - We can add a setTimeout to implement the
- This is the behavior of
Press event
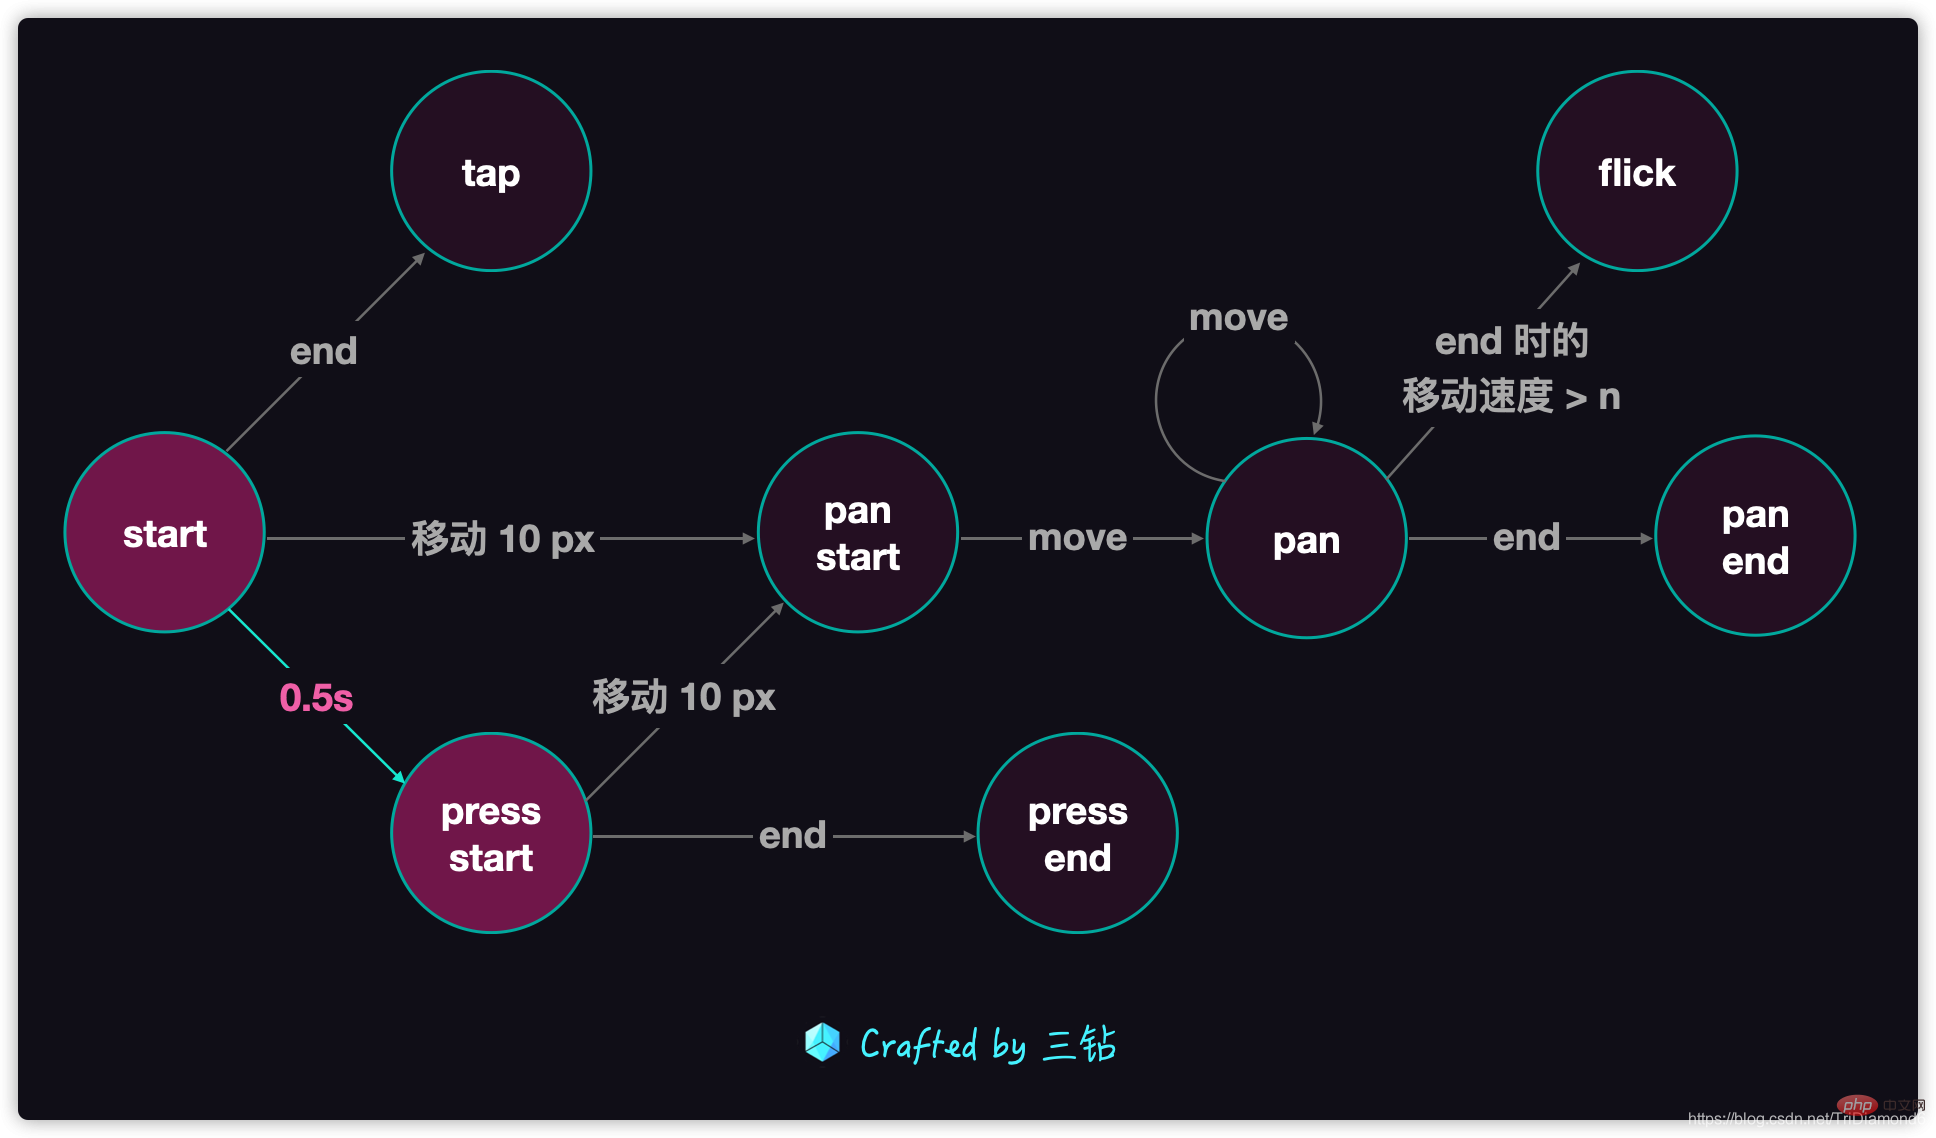
So our first step is to add a setTimout handler handler to the start function.
let handler;let start = point => {
  handler = setTimeout(() => {
    console.log('presss ');
  }, 500);};
Generally speaking press is a common behavior for us. But actually this is a press start event, followed by a press end event. We can also collectively call this event press, and then users of this gesture library only need to listen to this press event. In rare cases, they need to listen to press end Event.
What we need to note here is that when we trigger other events, the 500 millisecond setTimout may be canceled. So we need to give this logic a handler and put it in the global scope so that other events can obtain this variable and use it to cancel this processing logic.
Pan event
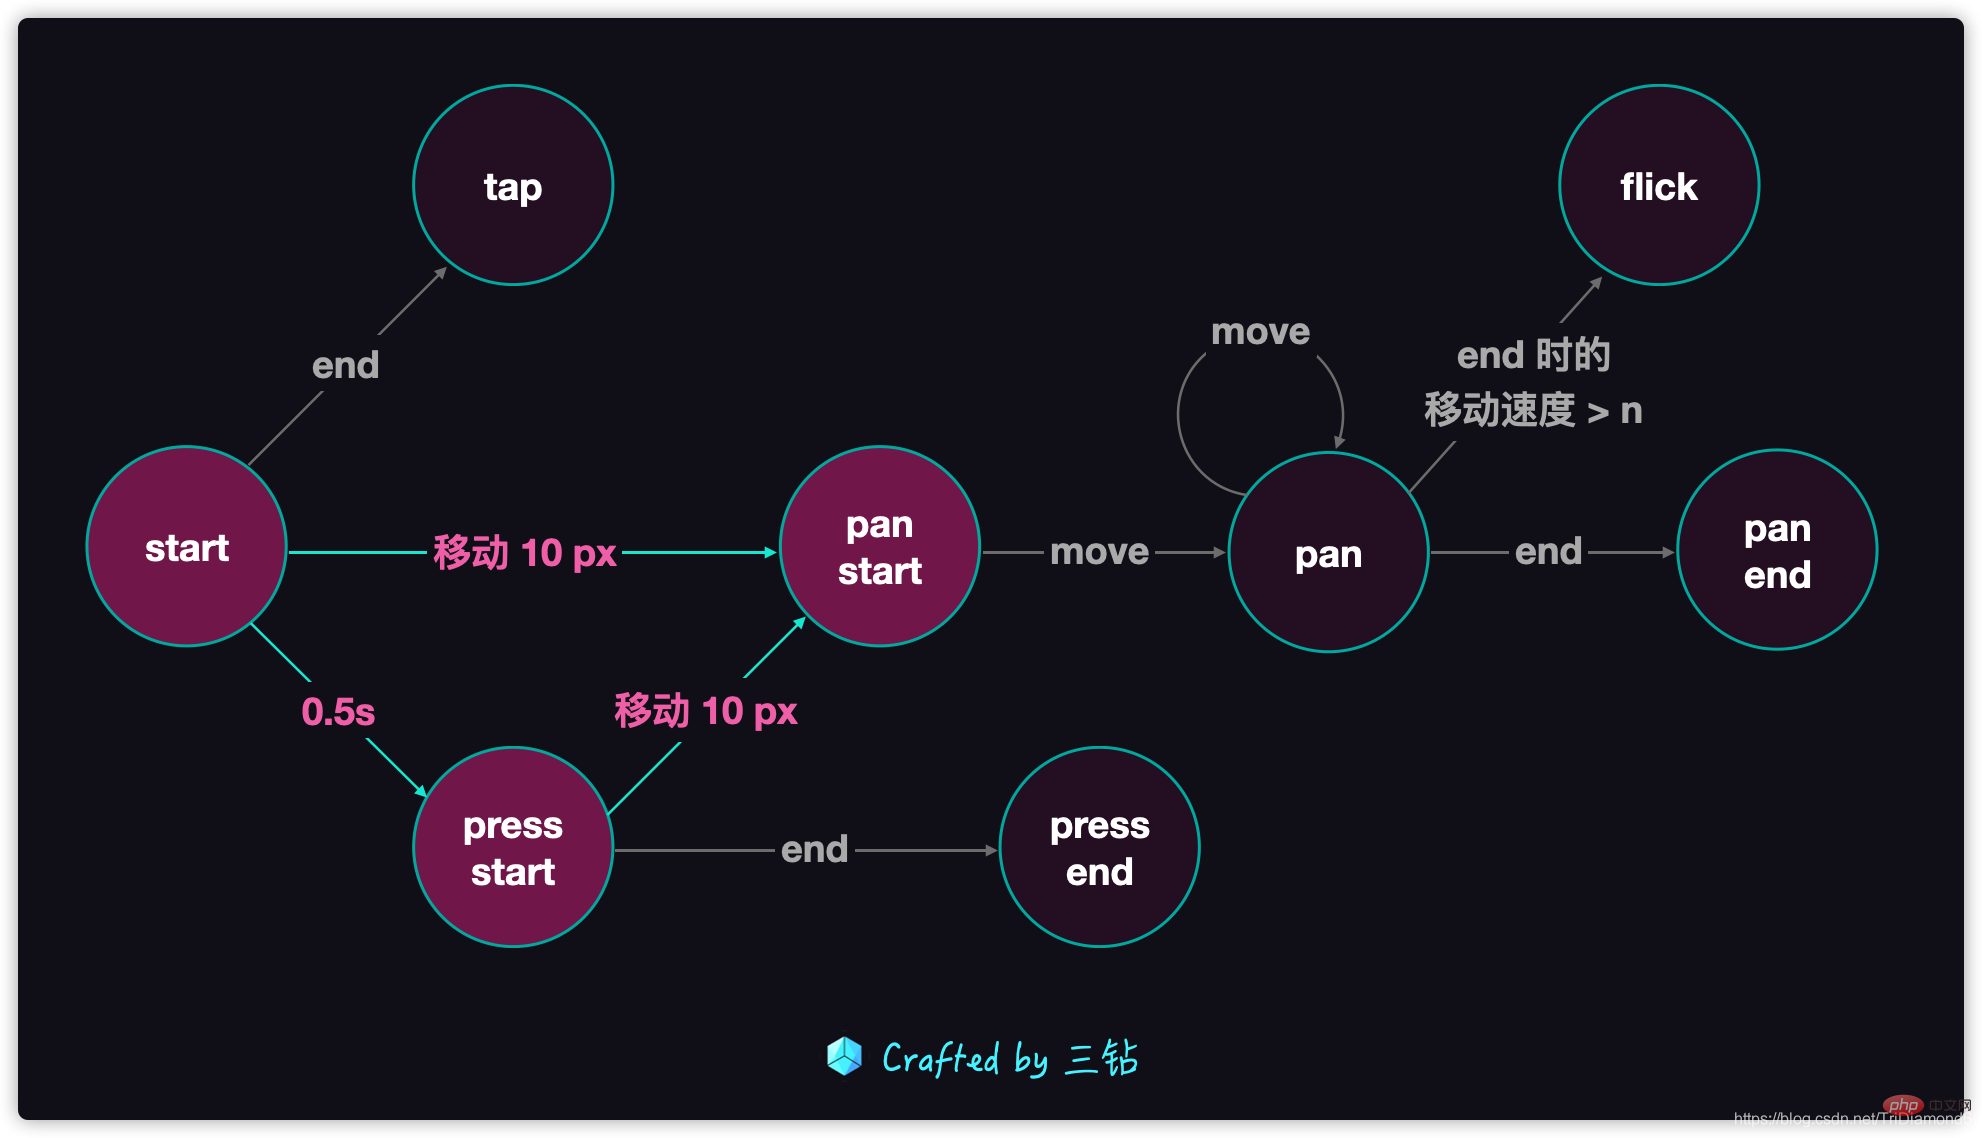
Next we will listen to the pan event that moves 10px. Here we need to record the initial user touch The x and y coordinates of the screen, when the user moves the finger, continue to calculate the distance between the newly moved position and the initial position. If this distance exceeds 10px, our pan start event can be triggered.
So first we need to add the coordinate records of startX and startY to the start function. What should be noted here is that because these two values will be in multiple It is used in several places, so it also needs to be declared in the global scope.
Then calculate the diameter distance between the current contact point and the starting point in the move function. Here we need to use the diameter calculation formula in mathematics z 2 x^2 y^2 = z^2x 2 y 2 =z 2 , and x here is the x-axis distance between the x-coordinate of the current contact point - the x-coordinate of the starting point, and y is the y-axis distance calculated from the y-coordinate of the current outgoing point - the y-coordinate of the starting point. The final sum of the two distances raised to the power of two is the diameter distance raised to the power of two.
In the code, we generally try to avoid using the radical operation, because the radical operation will have a certain impact on performance. We know that the final judgment is whether the diameter distance is greater than a fixed 10px. That is to say, z = 10, and the second power of z is 100, so we can directly determine whether the diameter distance is greater than 100.
Another thing to note here is that when our finger moves more than 10px, if our finger does not leave the screen but moves back, then we are no longer 10px away from the starting point. But this is actually a pan event, because we did move more than 10px distance, and all movements after this distance are pan events.
So we need a state of isPan. When the first movement exceeds 10px, the pan-start event will be triggered and isPan Set to true, and all subsequent movements will trigger the pan event.
According to the press event we mentioned above, if there is movement within 0.5 seconds after we press our finger, then the press event will be cancelled. So here we need clearTimeout to clear the handler of pressstart.
let handler;let startX, startY;let isPan = false;let start = point => {
  (startX = point.clientX), (startY = point.clientY);

  isPan = false;

  handler = setTimeout(() => {
    console.log('pressstart');
  }, 500);};let move = point => {
  let dx = point.clientX - startX,
    dy = point.clientY - startY;

  let d = dx ** 2 + dy ** 2;

  if (!isPan && d > 100) {
    isPan = true;
    console.log('pan-start');
    clearTimeout(handler);
  }

  if (isPan) {
    console.log(dx, dy);
    console.log('pan');
  }};
Tap Event
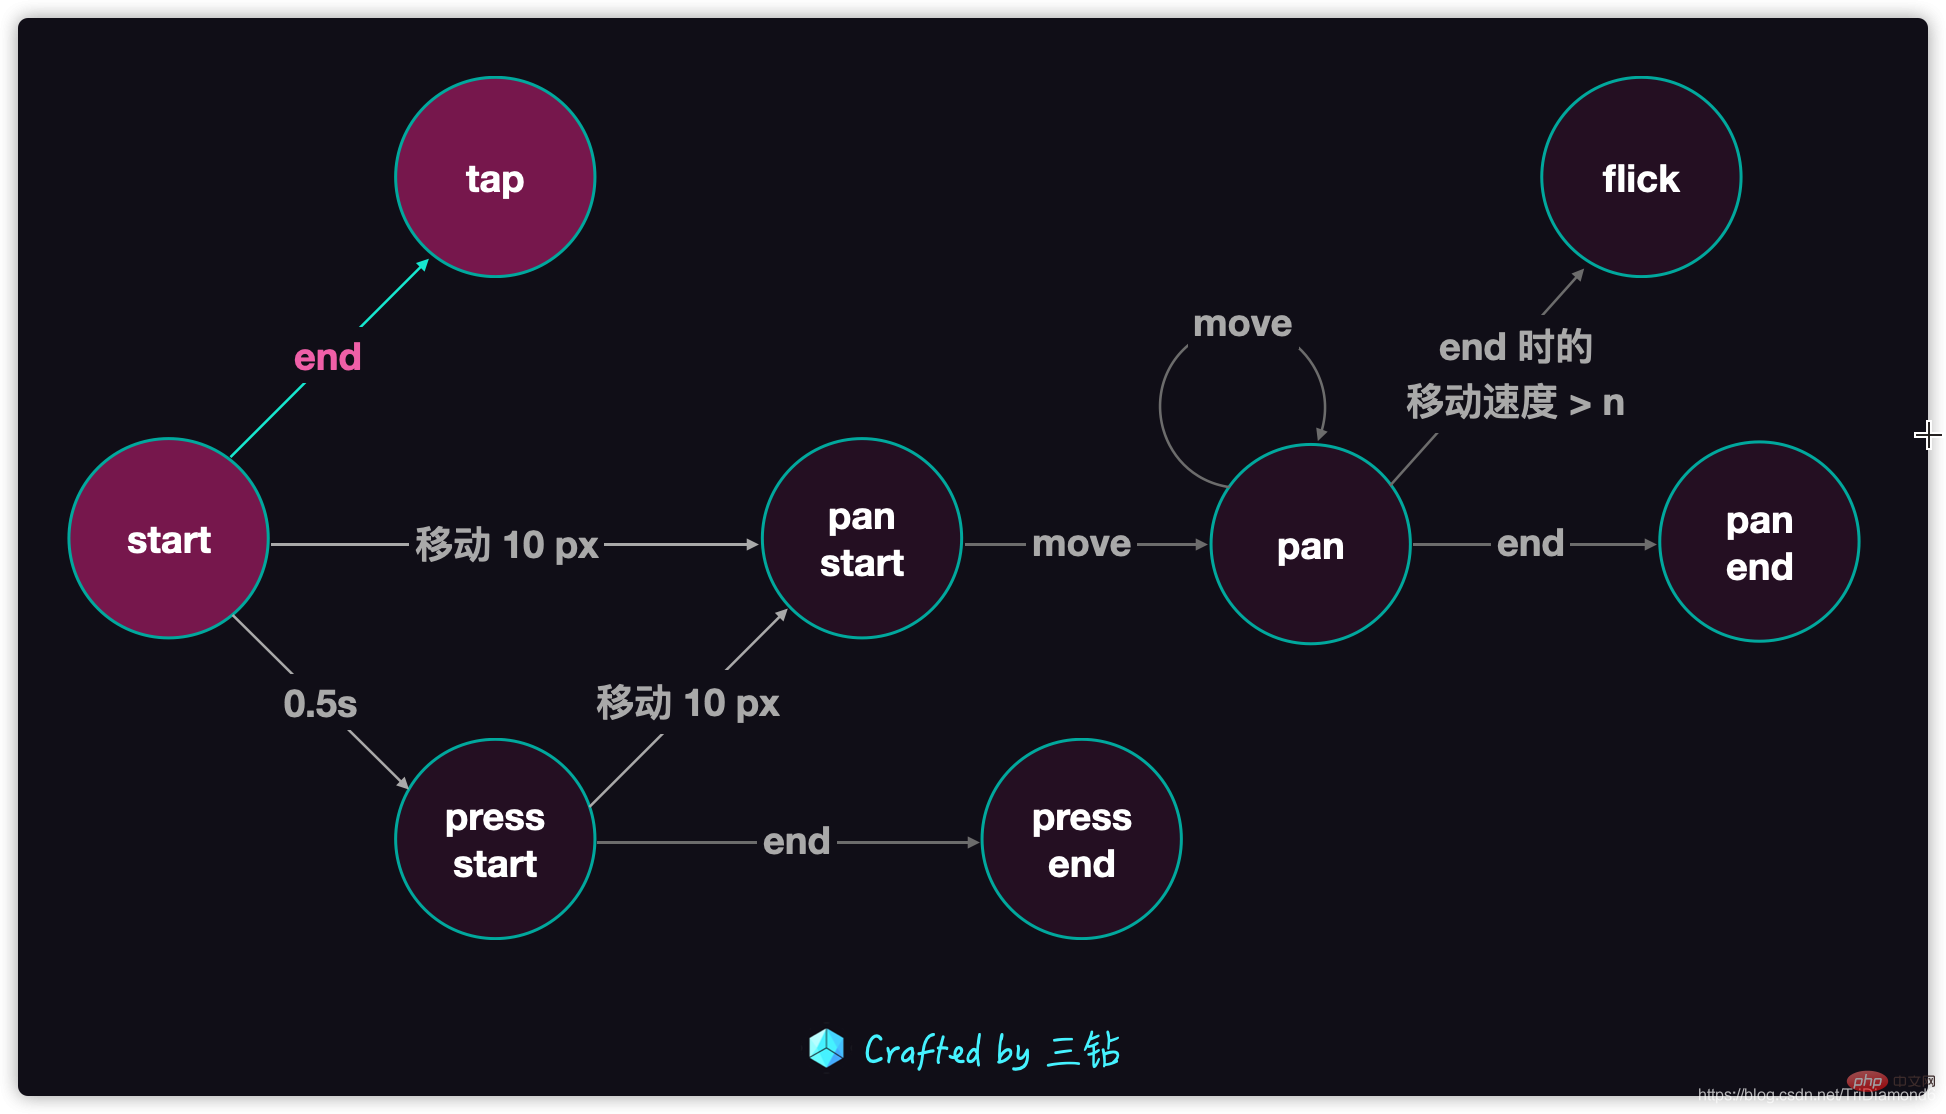
Tap 的这个逻辑我们可以在 end 事件里面去检查。首先我们默认有一个 isTap 等于 true 的状态,如果我们触发了 pan 事件的话,那就不会去触发 tap 的逻辑了,所以 tap 和 pan 是互斥的关系。但是为了不让它们变得很耦合,所以我们不使用原有的 isPan 作为判断状态,而是另外声明一个 isTap 的状态来记录。
这里我们 tap 和 pan 都有单独的状态,那么我们 press 也不例外,所以也给 press 加上一个 isPress 的状态,它的默认值是 false。如果我们 0.5 秒的定时器被触发了,isPress 也就会变成 true。
既然我们给每个事件都加入了状态,那么这里我们就给每一个事件触发的时候设置好这些状态的值。
-
press 时
- isTap = false
- isPan = false
- isPress = true
-
pan 时
- isTap = false
- isPan = true
- isPress = false
-
tap 时
- isTap = true
- isPan = false
- isPress = false
如果我们发现用户没有移动,也没有按住触屏超过 0.5 秒,当用户离开屏幕时就会调用 end 函数,这个时候我们就可以认定用户的操作就是 tap。这里我们要注意的是,我们 press 的 0.5 秒定时器是没有被关闭的,所以我们在 isTap 的逻辑中需要 clearTimeout(handler)。
说到取消 press 定时器,其实我们 handler 的回调函数中,也需要做一个保护代码逻辑,在触发了 press-start 之后,我们需要保证每次点击屏幕只会触发一次,所以在 setTimout 的回调函数中的最后,我们需要加上 handler = null。这样只要 press-start 触发了,就不会再被触发。
let handler;let startX, startY;let isPan = false,
  isPress = false,
  isTap = false;let start = point => {
  (startX = point.clientX), (startY = point.clientY);

  isPan = false;
  isTap = true;
  isPress = false;

  handler = setTimeout(() => {
    isPan = false;
    isTap = false;
    isPress = true;
    console.log('press-start');
    handler = null;
  }, 500);};let move = point => {
  let dx = point.clientX - startX,
    dy = point.clientY - startY;

  let d = dx ** 2 + dy ** 2;

  if (!isPan && d > 100) {
    isPan = true;
    isTap = false;
    isPress = false;
    console.log('pan-start');
    clearTimeout(handler);
  }

  if (isPan) {
    console.log(dx, dy);
    console.log('pan');
  }};let end = point => {
  if (isTap) {
    console.log('tap');
    clearTimeout(handler);
  }};
End 事件
到了最后这里我们要处理的就是所有的结束时间,包括 press-end 和 pan-end。
这两个 end 事件都会在 end 函数中判断所得,如果在用户操作的过程中触发了 pan-start 或者 press-start 事件,到了 end 函数这里,对应的状态就会是 true。
所以我们对 end 函数做了以下改造:
let end = point => {
  if (isTap) {
    console.log('tap');
    clearTimeout(handler);
  }

  if (isPan) {
    console.log('pan-end');
  }

  if (isPress) {
    console.log('press-end');
  }};
最后我们需要在 cancel 事件触发的时候,清楚掉 press 事件的 setTimeout。既然我们的操作被打断了,那也不可能会触发我们的长按事件了。
// 加入 cancellet cancel = point => {
  clearTimeout(handler);
  console.log('cancel');};
我们除了 flick 的逻辑,我们已经完成所有手势库里面的事件了。并且也能正确的区分这几种手势操作了。
【推荐学习:javascript高级教程】
The above is the detailed content of How to implement a gesture library in JavaScript. For more information, please follow other related articles on the PHP Chinese website!

