The method to enable DHCP is: first open Computer Management and find the DHCP client service; then set the startup type of the service to automatic; then open the [Network and Internet] option and find the local connection; finally check [Automatic Just select the Get IP Address option.

#The operating environment of this article: windows10 system, thinkpad t480 computer.
The specific method is as follows:
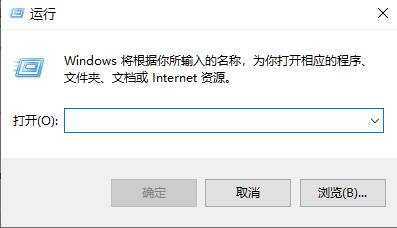
First press win #Check whether the DHCP service is started, the startup type is selected as automatic, and the service status is: running. If not, click below to start. Confirm to exit after setting.

Restart the local link to see if the problem is solved. If you still have problems, it may be that the local IP has been set manually and you can change it to automatically obtain the IP.

In Local Area Connection--Properties, double-click the Internet Protocol Version (TCP/IPv4)

In General Options In the card, select Obtain an IP address automatically. Confirm to exit

#Free learning video sharing:
php tutorial
The above is the detailed content of How to enable DHCP. For more information, please follow other related articles on the PHP Chinese website!
 win10以太网启用DHCP修复方法指南Dec 30, 2023 pm 02:23 PM
windows10以太网提示未启用dhcp是什么情况呢?近来一些用户在使用电脑过程中都遇到了这样的问题。为了帮助大家更好地使用网络,下面就由小编就分享一下windows10以太网提示未启用dhcp问题的解决方法。win10以太网未启用dhcp怎么修复:1、首先按下快捷键“win+r”,然后点击运行。2、然后去输入services.msc并回车。3、之后可以找到“DHCPClient”服务并双击将其打开。4、最后将其启用类型改为自动,服务状态改为已启动,然后按确定保存设置,重启本地连接即可。
 如何在 RHEL 9 上配置 DHCP 服务器Jun 08, 2023 pm 07:02 PM
DHCP是“动态主机配置协议DynamicHostConfigurationProtocol”的首字母缩写词,它是一种网络协议,可自动为计算机网络中的客户端系统分配IP地址。它从DHCP池或在其配置中指定的IP地址范围分配客户端。虽然你可以手动为客户端系统分配静态IP,但DHCP服务器简化了这一过程,并为网络上的客户端系统动态分配IP地址。在本文中,我们将演示如何在RHEL9/RockyLinux9上安装和配置DHCP服务器。先决条件预装RHEL9或RockyLinux9具有sudo管理权限的普
 dhcp服务没有响应是什么意思Mar 15, 2023 pm 03:16 PM
dhcp服务没有响应是自动获取ip地址服务出错,重新配置该服务。没响应的原因:1、未开启“自动获取IP地址”功能,只需要将IP设置为“DHCP”即可;2、网络出现波动导致的,设备联网、路由器分配IP地址、设备获取IP地址,这需要一个过程,如果在此过程中网络出现波动,就会导致设备无法获取IP地址;3、设备问题,如果路由器的缓存被占满、出现死机的情况,就无法为联网设备分配IP地址。
 本地连接未启用dhcp怎么解决 推荐电脑出现无法上网提示未启用DHCP服务的解决方法Mar 13, 2024 pm 12:07 PM
很多用户使用电脑连接以太网时,会出现“未启用DHCP”的提示,不知道该怎么办,这是因为路由器未开启DHCP功能导致,本篇文章教大家如何解决此类问题。一、查看登录信息要解决“以太网未启用DHCP”的问题,需要先登录路由器。登录路由器时,通常需要获取路由器的网关、用户名和密码信息,这些信息一般会标注在路由器的背面。路由器的IP就是所谓的网关地址,部分路由器的默认网关地址是192.168.1.1或192.168.0.1,而登录帐号一般默认为admin,密码是admin或123456。二、登录路由器管理
 如何将Dnsmasq配置为DHCP中继服务器Mar 21, 2024 am 08:50 AM
DHCP中继的作用是将接收到的DHCP数据包转发到网络上的另一个DHCP服务器,即使这两个服务器位于不同的子网中。通过使用DHCP中继,您可以实现在网络中心部署一个集中式的DHCP服务器,并利用它为所有网络子网/VLAN动态分配IP地址。Dnsmasq是一种常用的DNS和DHCP协议服务器,可以配置为DHCP中继服务器,以帮助管理网络中的动态主机配置。在本文中,我们将向您展示如何将dnsmasq配置为DHCP中继服务器。内容主题:网络拓扑在DHCP中继上配置静态IP地址集中式DHCP服务器上的D
 路由器dhcp关闭有什么影响Dec 01, 2023 pm 04:01 PM
路由器dhcp关闭的影响:1、客户端无法自动获取IP地址;2、需要手动配置IP地址;3、可能导致网络连接问题;4、影响网络设备的通信;5、IP地址冲突;6、无法进行动态地址分配;7、无法进行网络隔离;8、无法进行流量控制;9、无法进行访问控制。建议在关闭DHCP服务之前,仔细考虑是否真的需要关闭,或者保留DHCP服务以确保客户端可以自动获取正确的IP地址。
 未启用dhcp什么意思Jan 30, 2023 pm 02:04 PM
未启用dhcp的意思是指电脑未设置IP地址自动获取,造成上网错误,其解决办法:1、按组合键“win+r”打开运行窗口,输入“services.msc”并回车;2、在调出服务窗口后,找到“DHCP Client”服务并双击将其打开;3、打开dhcp服务后,将其启用类型改为自动,服务状态改为已启动,然后按确定保存设置即可。
 dhcp端口号是什么Mar 06, 2023 pm 02:48 PM
DHCP服务的端口号是68和67。dhcp是一个局域网的网络协议,它通常被应用在大型的局域网络环境中,主要作用是集中的管理、分配IP地址,提升地址的使用率。DHCP协议采用UDP作为传输协议,主机发送请求消息到DHCP服务器的68号端口,DHCP服务器回应应答消息给主机的67号端口;这两个端口是正常的DHCP服务端口,可以理解为一个发送,一个接收。

Hot AI Tools

Undresser.AI Undress
AI-powered app for creating realistic nude photos

AI Clothes Remover
Online AI tool for removing clothes from photos.

Undress AI Tool
Undress images for free

Clothoff.io
AI clothes remover

AI Hentai Generator
Generate AI Hentai for free.

Hot Article

Hot Tools

SublimeText3 Chinese version
Chinese version, very easy to use

Dreamweaver Mac version
Visual web development tools

WebStorm Mac version
Useful JavaScript development tools

Notepad++7.3.1
Easy-to-use and free code editor

SecLists
SecLists is the ultimate security tester's companion. It is a collection of various types of lists that are frequently used during security assessments, all in one place. SecLists helps make security testing more efficient and productive by conveniently providing all the lists a security tester might need. List types include usernames, passwords, URLs, fuzzing payloads, sensitive data patterns, web shells, and more. The tester can simply pull this repository onto a new test machine and he will have access to every type of list he needs.


