1、HTML
<!-- 调用PHP 的一个方法-->
<iframe frameborder="0" height="90px" width="560px"
src="<?=base_url();?>common/show_mul_img" name="imgiframe" id="imgiframe" ></iframe>
<p class='case_list'>
<p id="show_img"></p><!--图片就在这个p里面显示-->
</p>
2、CSS
/**多图片显示区**/
.case_list{margin:15px 20px;_margin:15px;}
.case_list ul{background:#fff;width:190px;height:170px;float:left;padding:10px;margin:12px;border:1px solid #dddddd;}
.case_list li {color:#f55205;font-size:12px;font-weight:bold;}
.case_list li.t{background: url(../images/t.jpg) left center no-repeat;padding:5px;padding-left:10px;}
.case_list li a{color:#f55205;line-height:16px;}
.case_list .li img{width:190px;height:135px;}
3、common.php 控制类
// 跳转到上传页面
public function show_mul_img(){
$datas["imgName"]="";
$this->_img_mul_view($datas);
}
function _img_mul_view($datas=array()){
$this->load->view("comm_page/mul_upImg",$datas);
}
//多图片上传,保存操作
public function do_mulupImg(){
$datas["img_lst"]=$this->mytool->update_mul_obj(mymsg::DIR_MULIMG);
$this->_img_mul_view($datas);
}
4、mytool.php工具类
//2012-9-6,多图片上传时触发
function update_mul_obj($filename,$name="userfile"){
$CI = &get_instance();
$CI->load->library('upload');
return $CI->upload->do_mul_upload($filename,$name);
}
# 在这里扩展了CI自带的upload方法,做了一个多图片上传工能
5、MY_upload.php 扩展实现 upload类
class MY_Upload extends CI_Upload{
public function __construct(){
parent::__construct();
}
function do_mul_upload($filename,$field = 'userfile'){
$CI = &get_instance();
$count=count($_FILES["$field"]["name"]);//页面取的默认名称
$this->upload_path= $CI->mytool->get_obj_path($filename);//保存的路径
$this->set_allowed_types("gif|jpg|png");//支持的图片格式
$bh = $CI->session->userdata("bh");//登录的当前用户
$file_arr=array();
for($i=0;$i<$count;$i++){
// Give it a name not likely to already exist!
$pseudo_field_name = '_psuedo_' . $field . '_' . $i;
$_FILES[$pseudo_field_name] = array('name' => $_FILES[$field]['name'][$i],
'size' => $_FILES[$field]['size'][$i],
'type' => $_FILES[$field]['type'][$i],
'tmp_name' => $_FILES[$field]['tmp_name'][$i],
'error' => $_FILES[$field]['error'][$i]
);
if ($CI->upload->do_upload($pseudo_field_name)) { //默认名是:userfile
$data = $CI->upload->data();
$in_data=array();
$in_data["name"]= $data['file_name'];//文件名
$in_data["path"]="$filename/$bh";//保存的路径
$file_arr[]=$in_data;
}
}
return$file_arr;
}
}
6、上传页面 mul_upImg.php
<!DOCTYPE html>
<html>
<head>
<meta http-equiv="Content-Type" content="text/html; charset=UTF-8" />
<script type="text/javascript" src="<?=base_url()?>js/jquery.js?1.1.6" ></script>
</head>
<body>
<?=form_open("common/do_mulupImg",array('enctype'=>"multipart/form-data"))?>
<table>
<tr>
<td><input type="file" name="userfile[]" id="userfile" onchange="this.form.submit();" multiple="multiple" /></td>
<!--multiple:IE娘的不支持,支持此属性的可以多图片上传-->
<td></td>
</tr>
</table>
</form>
<script type="text/javascript">
<?php if(!empty($img_lst)){?>
var h_t="";
<?php for($i=0;$i<count($img_lst);$i++){?>
h_t=h_t+"<ul><li class='li'><img alt='<?=$img_lst[$i]['name']?>' width='120px' height='60px' src='<?=base_url()?>/import/<?=$img_lst[$i]['path']?>/<?=$img_lst[$i]['name']?>'/></li>"
+"<li class='t'>"
+"<input type='hidden' name='name[]' value='<?=$img_lst[$i]['name']?>'/>"
+"<input type='hidden' name='path[]' value='<?=$img_lst[$i]['path']?>'/>"
+"<input type='radio' name='mrz[]' value='<?=$img_lst[$i]['name']?>'/>默认首图"
+"</ul></li>"
<?}?>
//h_t=h_t+"";
$obj=$("#show_img",window.parent.document);
$obj.html($obj.html()+h_t);
<?php }?>
</script>
</body>
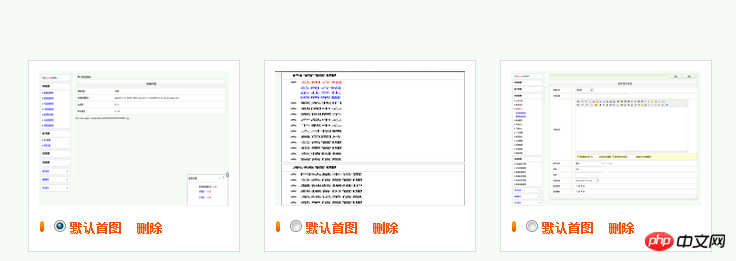
</html>2. [图片] google.png

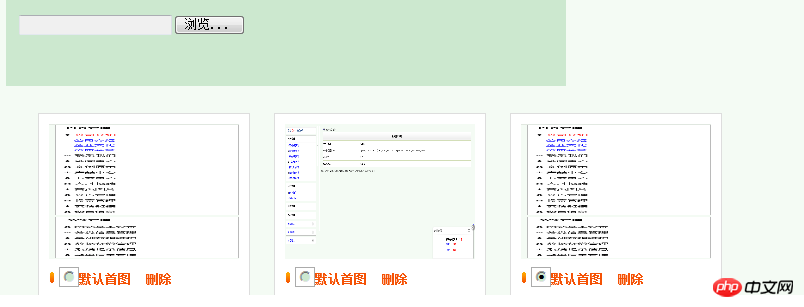
3. [图片] IE.png

以上就是Codeigniter PHP 多图片上传 的内容,更多相关内容请关注PHP中文网(www.php.cn)!
 如何在CodeIgniter中实现自定义中间件Jul 29, 2023 am 10:53 AM
如何在CodeIgniter中实现自定义中间件引言:在现代的Web开发中,中间件在应用程序中起着至关重要的作用。它们可以用来执行在请求到达控制器之前或之后执行一些共享的处理逻辑。CodeIgniter作为一个流行的PHP框架,也支持中间件的使用。本文将介绍如何在CodeIgniter中实现自定义中间件,并提供一个简单的代码示例。中间件概述:中间件是一种在请求
 CodeIgniter中间件:加速应用程序的响应速度和页面渲染Jul 28, 2023 pm 06:51 PM
CodeIgniter中间件:加速应用程序的响应速度和页面渲染概述:随着网络应用程序的复杂性和交互性不断增长,开发人员需要使用更加高效和可扩展的解决方案来提高应用程序的性能和响应速度。CodeIgniter(CI)是一种基于PHP的轻量级框架,提供了许多有用的功能,其中之一就是中间件。中间件是在请求到达控制器之前或之后执行的一系列任务。这篇文章将介绍如何使用
 在CodeIgniter框架中使用数据库查询构建器(Query Builder)的方法Jul 28, 2023 pm 11:13 PM
在CodeIgniter框架中使用数据库查询构建器(QueryBuilder)的方法引言:CodeIgniter是一个轻量级的PHP框架,它提供了许多功能强大的工具和库,方便开发人员进行Web应用程序开发。其中一个令人印象深刻的功能是数据库查询构建器(QueryBuilder),它提供了一种简洁而强大的方法来构建和执行数据库查询语句。本文将介绍如何在Co
 PHP开发:使用 CodeIgniter 实现 MVC 模式和 RESTful APIJun 16, 2023 am 08:09 AM
随着Web应用程序的不断发展,更加快速和高效地开发应用程序变得非常重要。并且,随着RESTfulAPI在Web应用程序中的广泛应用,对于开发人员来说,必须理解如何创建和实现RESTfulAPI。在本文中,我们将讨论如何使用CodeIgniter框架实现MVC模式和RESTfulAPI。MVC模式简介MVC(Model-Vie
 php如何使用CodeIgniter5框架?Jun 01, 2023 am 11:21 AM
CodeIgniter是一个轻量级的PHP框架,采用MVC架构,支持快速开发和简化常见任务。CodeIgniter5是该框架的最新版本,提供了许多新的特性和改进。本文将介绍如何使用CodeIgniter5框架来构建一个简单的Web应用程序。步骤1:安装CodeIgniter5下载和安装CodeIgniter5非常简单,只需要遵循以下步骤:下载最新版本
 如何使用PHP框架CodeIgniter快速搭建一个后台管理系统Jun 27, 2023 am 09:46 AM
现今互联网时代,一款深受用户喜爱的网站必须具备简洁明了的前端界面和功能强大的后台管理系统,而PHP框架CodeIgniter则是一款能够让开发者快速搭建后台管理系统的优秀框架。CodeIgniter拥有轻量级、高效率、易扩展等特点,本文将针对初学者,详细说明如何通过该框架快速搭建一个后台管理系统。一、安装配置安装PHPCodeIgniter是一个基于PHP的
 使用PHP框架CodeIgniter开发一个实时聊天应用,提供便捷的通讯服务Jun 27, 2023 pm 02:49 PM
随着移动互联网的发展,即时通信变得越来越重要,越来越普及。对于很多企业而言,实时聊天更像是一种通信服务,提供便捷的沟通方式,可以快速有效地解决业务方面的问题。基于此,本文将介绍如何使用PHP框架CodeIgniter开发一个实时聊天应用。了解CodeIgniter框架CodeIgniter是一个轻量级的PHP框架,提供了一系列的简便的工具和库,帮助开发者快速
 PHP实现框架:CodeIgniter入门教程Jun 18, 2023 pm 10:43 PM
近年来,Web开发技术的进步和全球互联网应用的不断扩大,使得PHP技术应用面越来越广泛。作为一种快速开发的技术,其生态系统也在不断发展壮大。其中,CodeIgniter作为PHP开发领域中著名的框架之一,备受众多开发者的欢迎。本篇文章将介绍CodeIgniter框架的相关知识,以此为初学者提供一个入门的指引。一、什么是CodeIgniter框架?CodeIg


Hot AI Tools

Undresser.AI Undress
AI-powered app for creating realistic nude photos

AI Clothes Remover
Online AI tool for removing clothes from photos.

Undress AI Tool
Undress images for free

Clothoff.io
AI clothes remover

AI Hentai Generator
Generate AI Hentai for free.

Hot Article

Hot Tools

Dreamweaver CS6
Visual web development tools

SecLists
SecLists is the ultimate security tester's companion. It is a collection of various types of lists that are frequently used during security assessments, all in one place. SecLists helps make security testing more efficient and productive by conveniently providing all the lists a security tester might need. List types include usernames, passwords, URLs, fuzzing payloads, sensitive data patterns, web shells, and more. The tester can simply pull this repository onto a new test machine and he will have access to every type of list he needs.

MantisBT
Mantis is an easy-to-deploy web-based defect tracking tool designed to aid in product defect tracking. It requires PHP, MySQL and a web server. Check out our demo and hosting services.

mPDF
mPDF is a PHP library that can generate PDF files from UTF-8 encoded HTML. The original author, Ian Back, wrote mPDF to output PDF files "on the fly" from his website and handle different languages. It is slower than original scripts like HTML2FPDF and produces larger files when using Unicode fonts, but supports CSS styles etc. and has a lot of enhancements. Supports almost all languages, including RTL (Arabic and Hebrew) and CJK (Chinese, Japanese and Korean). Supports nested block-level elements (such as P, DIV),

ZendStudio 13.5.1 Mac
Powerful PHP integrated development environment


