
Home >Development Tools >git >Introducing the three working methods of Git and Git workflow demonstration
Introducing the three working methods of Git and Git workflow demonstration

- coldplay.xixiforward
- 2021-02-25 10:28:473313browse
Recommended (free): Git Tutorial
##Article Directory
- Centralized workflow (not commonly used)
- Forking workflow (occasionally used)
- GitFlow workflow (most popular)
- Git workflow demonstration
There are three ways to use
Git during project development, namely centralized workflow and Git Flow workflow , Forking Workflow. The following mainly explains the Git workflow.
Centralized workflow (not commonly used)
Centralized workflow, likeSVN, uses the central warehouse as the single point for all modifications to the project entity. All changes are submitted to the Master branch. The main difference between this method and SVN is that developers have local libraries, but many features of Git are not used. 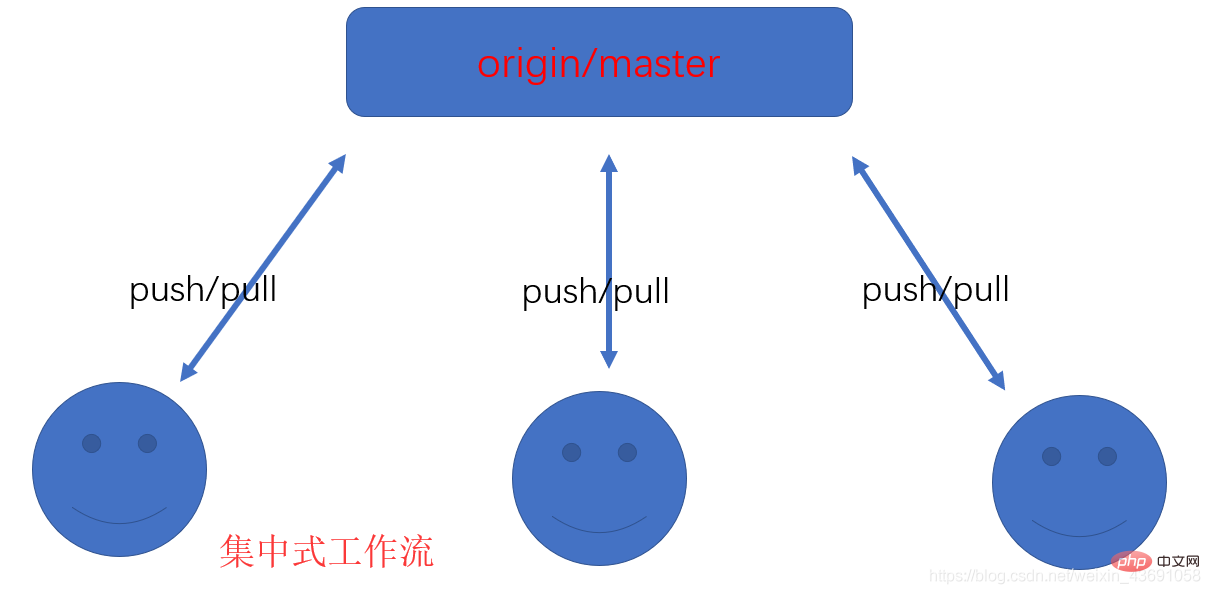
Forking workflow (occasionally used)
Forking workflow is based on GitFlow and makes full use of Git'sFork and pull request functions to achieve the purpose of code review. It is more suitable for developers who can manage large teams safely and reliably, and can accept submissions from untrusted contributors. (It is mainly used to review the code of members outside the team, and Linux virtual teams use it more).

GitFlow workflow (most popular)
Gitflow Workflows are established for feature development, release preparation, and maintenance Independent branches are created to make the release iteration process smoother and make full use of the characteristics of branches. The strict branching model also provides some much needed structure for large projects. The following picture is a complete development method diagram, but the actual development may be more streamlined: 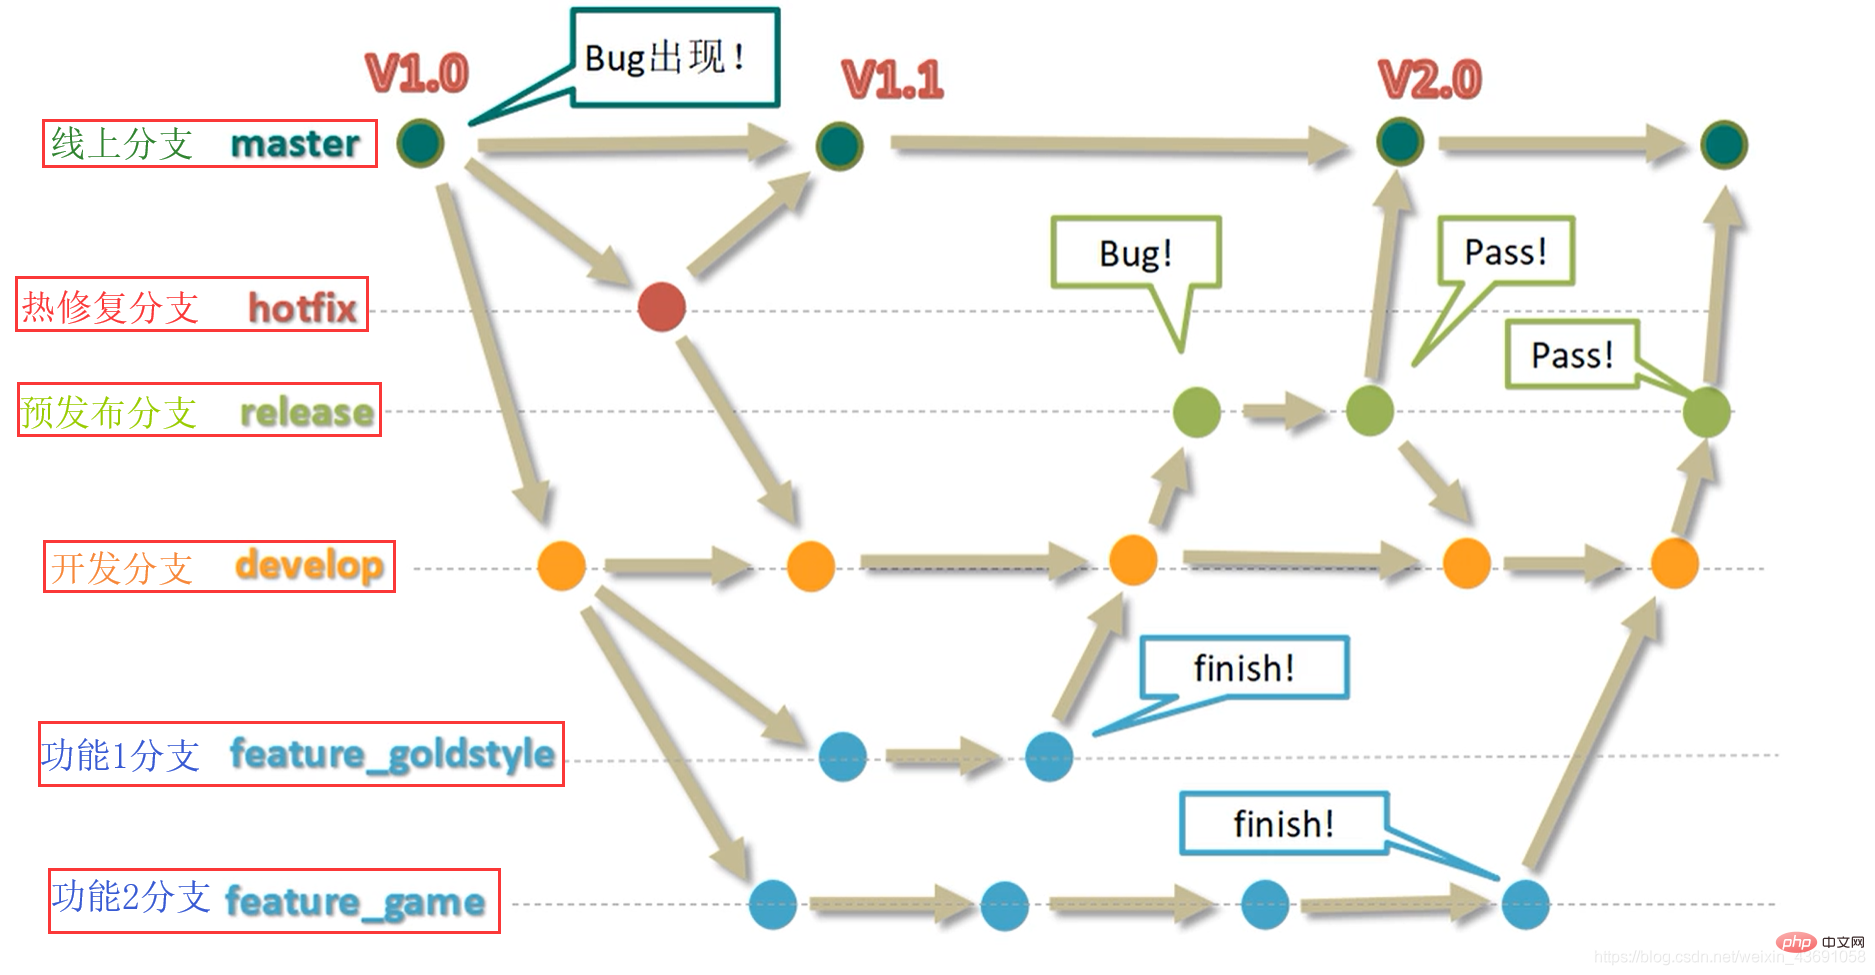
Git workflow demonstration
Demonstration instructions: 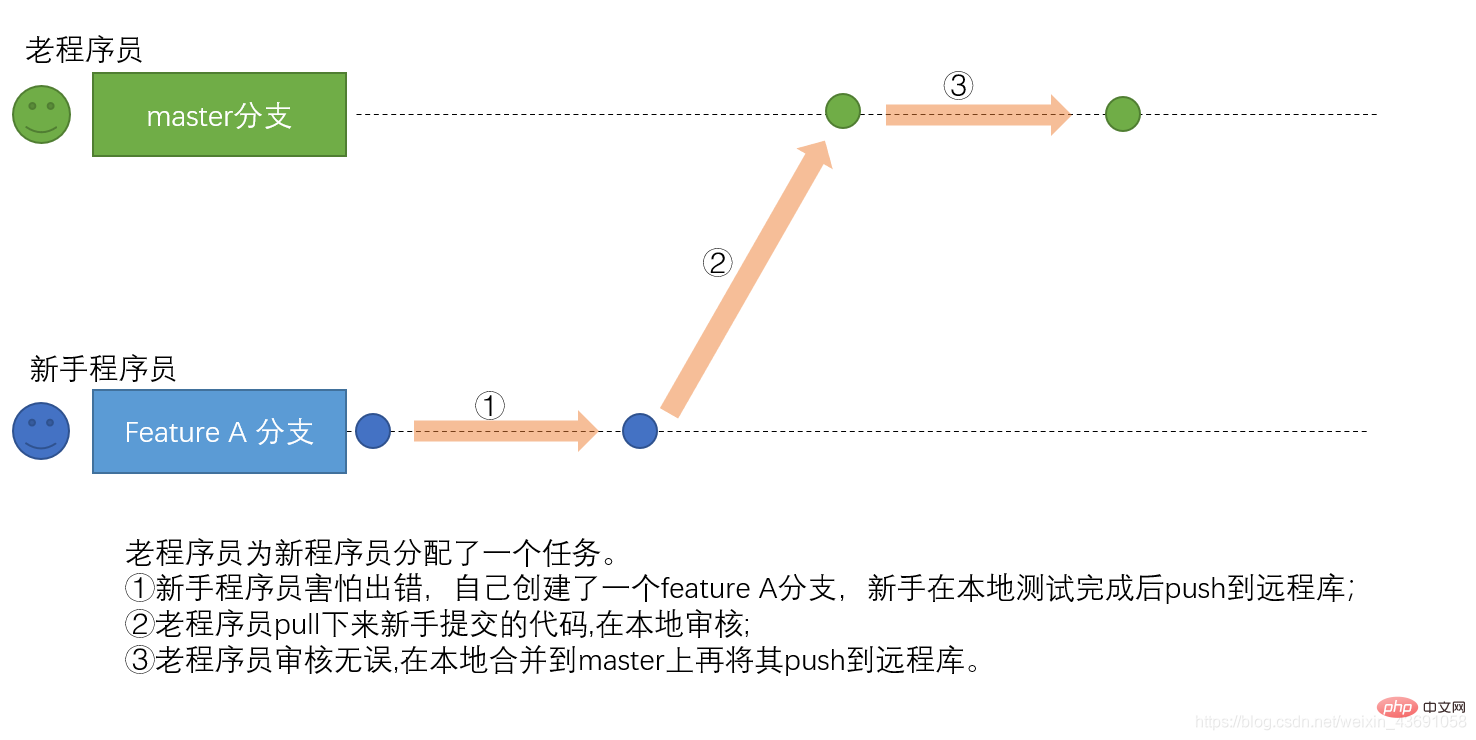
Create a branch in Eclipse and name it
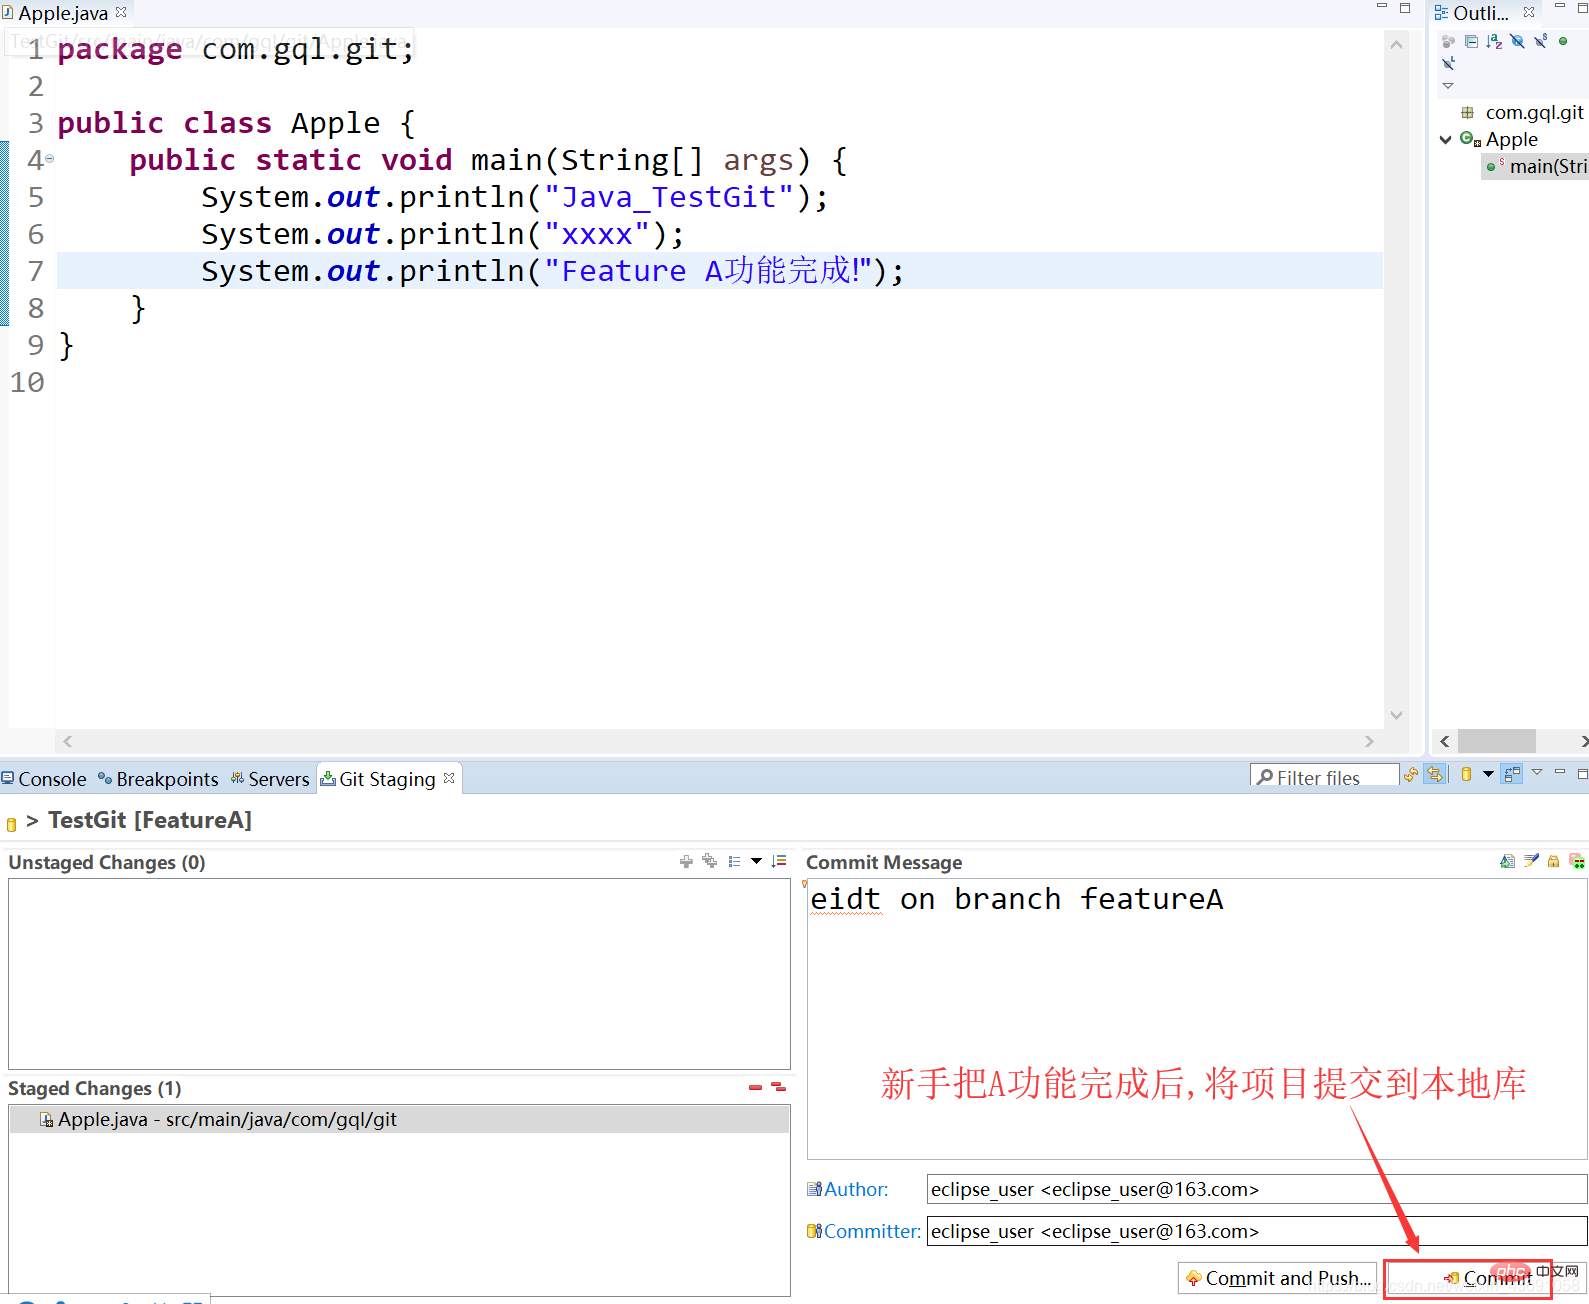
featureA branch: 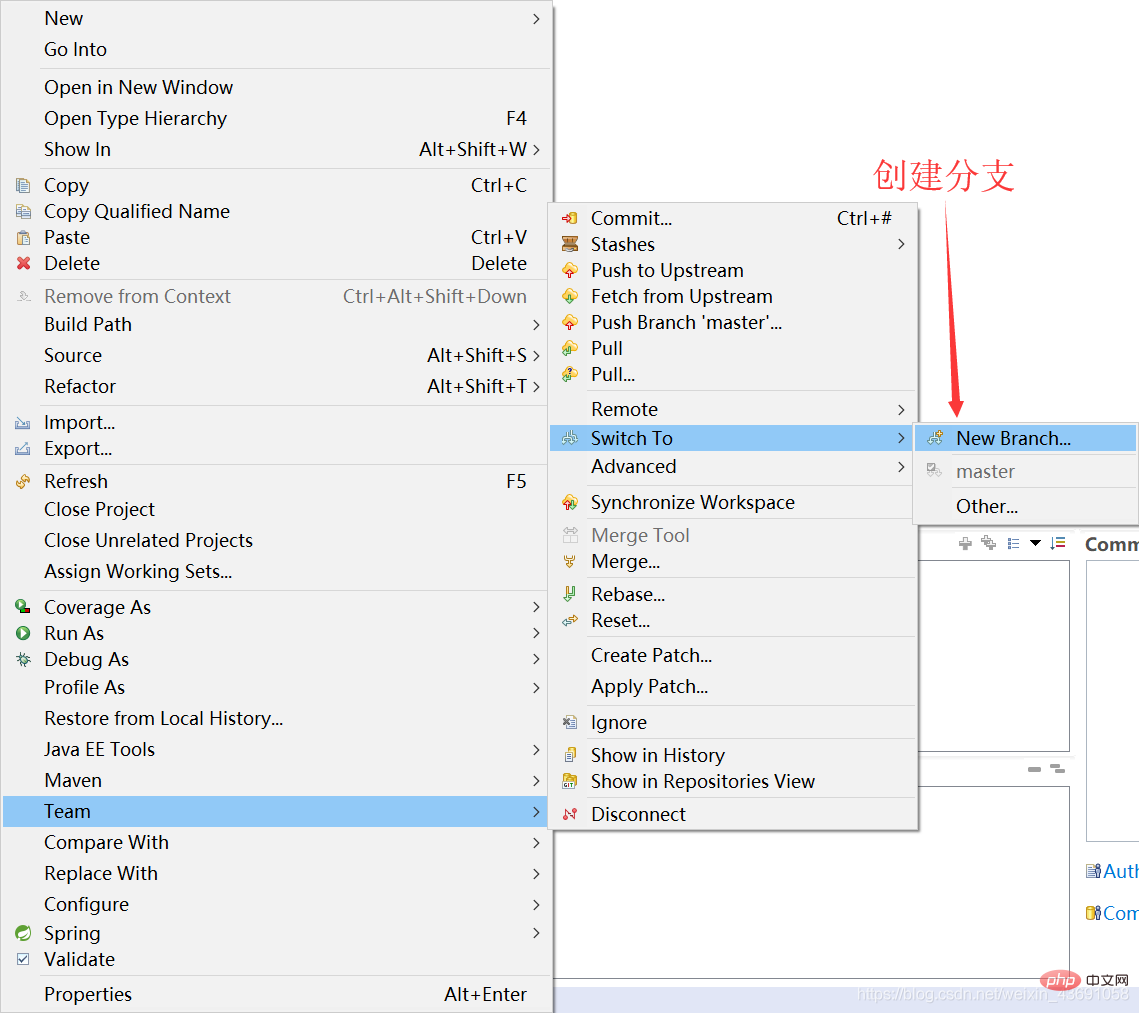 Newbies in featureA branch After completing function A, submit it to the local library:
 and then push to the remote library:
 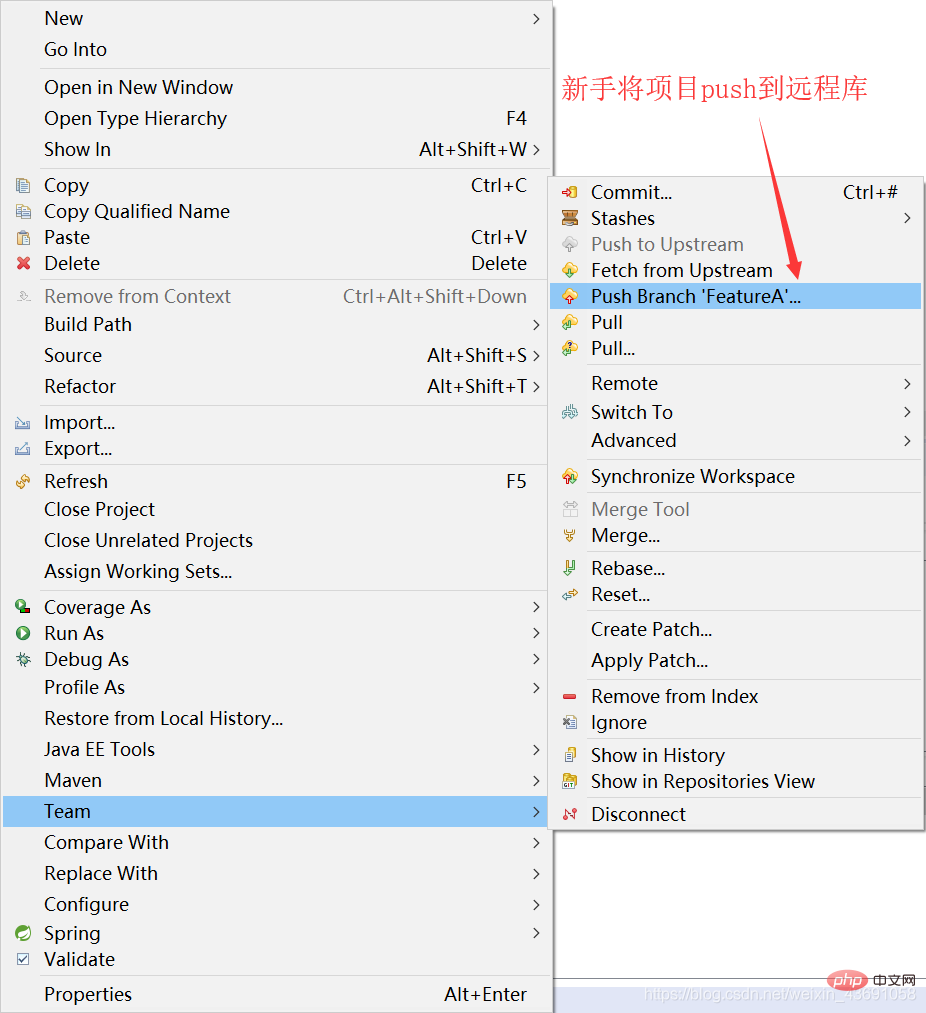 Next, the veteran programmer pulls the project:
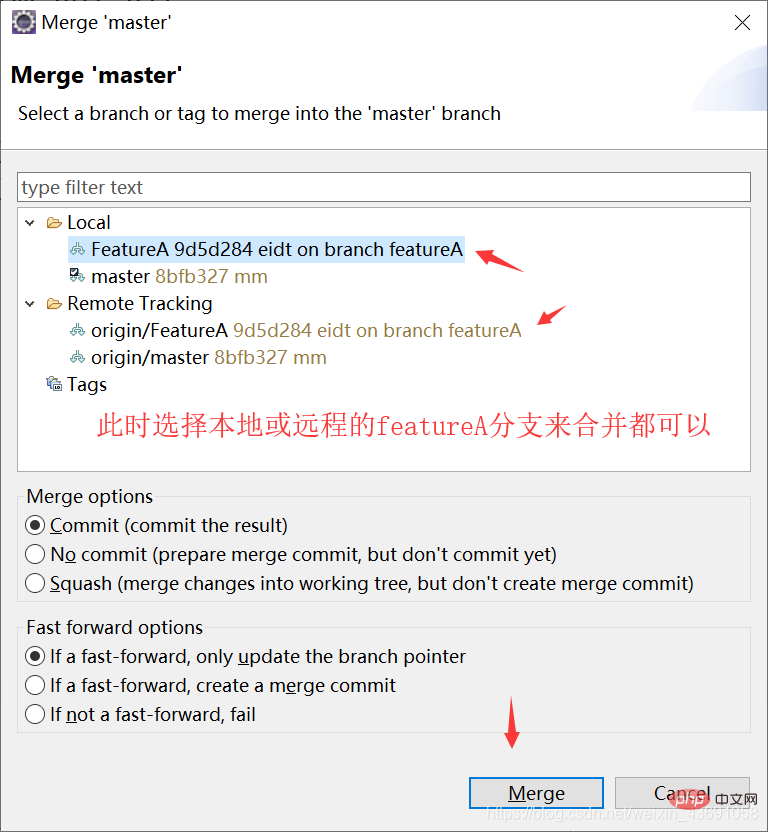
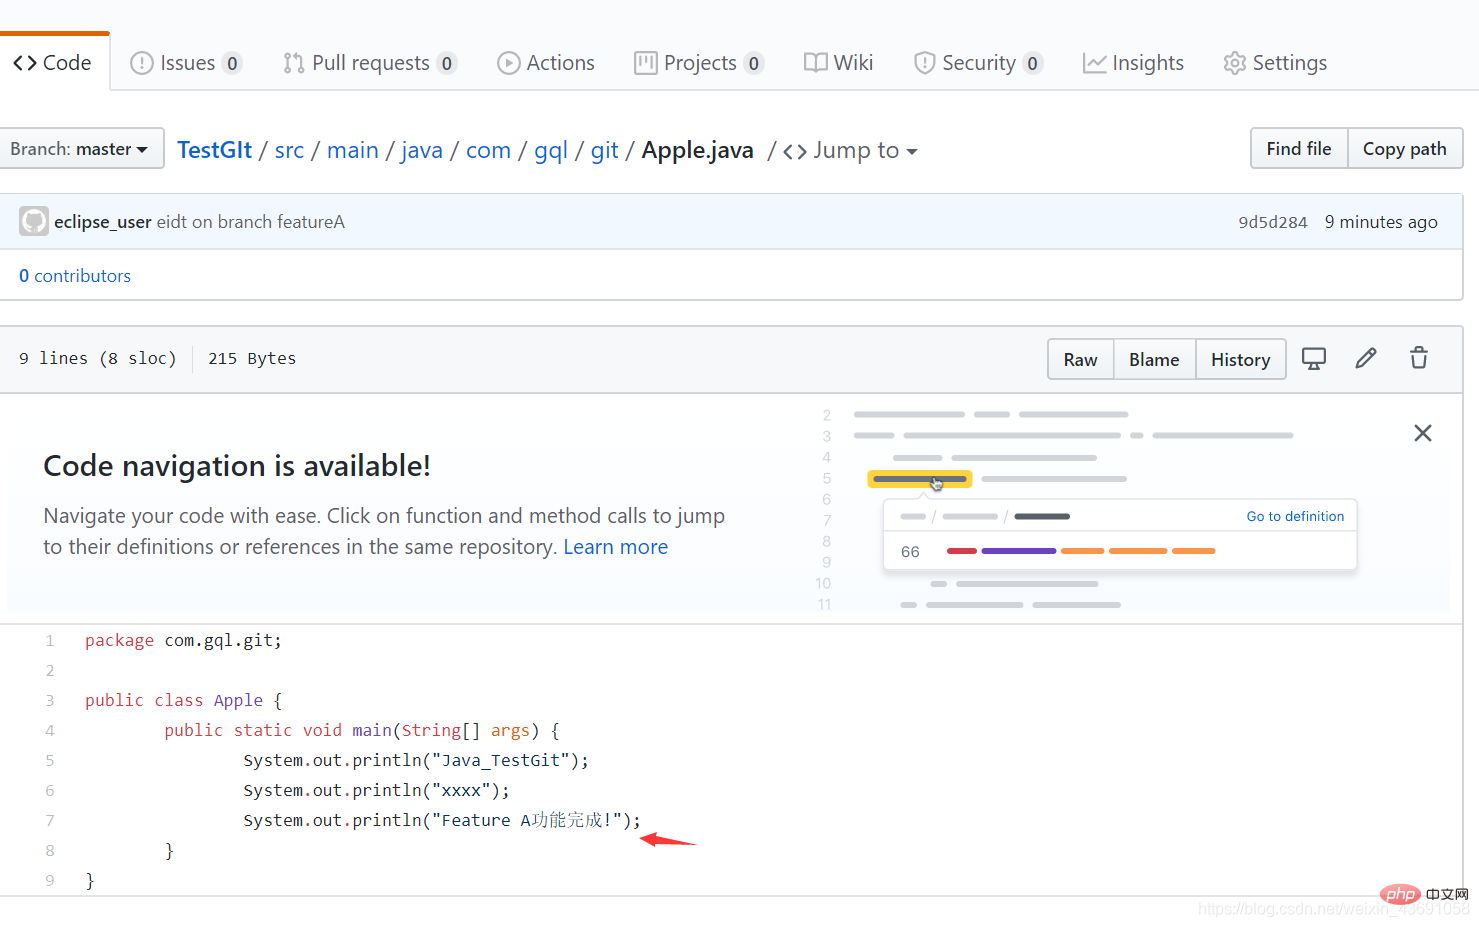
  After pulling, switch from the master branch to the FeatureA branch. At this time, you can see the novice’s modifications:

The above is the detailed content of Introducing the three working methods of Git and Git workflow demonstration. For more information, please follow other related articles on the PHP Chinese website!