Home >WeChat Applet >Mini Program Development >How to implement the multi-image upload function of the mini program
How to implement the multi-image upload function of the mini program
- 王林forward
- 2021-01-28 10:02:142984browse

Foreword:
We know that the mini program can only upload one picture at a time, so what should we do if we want to upload multiple pictures at once?
(Learning video sharing: Introduction to Programming)
Recursion is used here. After uploading a picture, re-execute this function until all pictures have been uploaded. , the function will no longer be called.
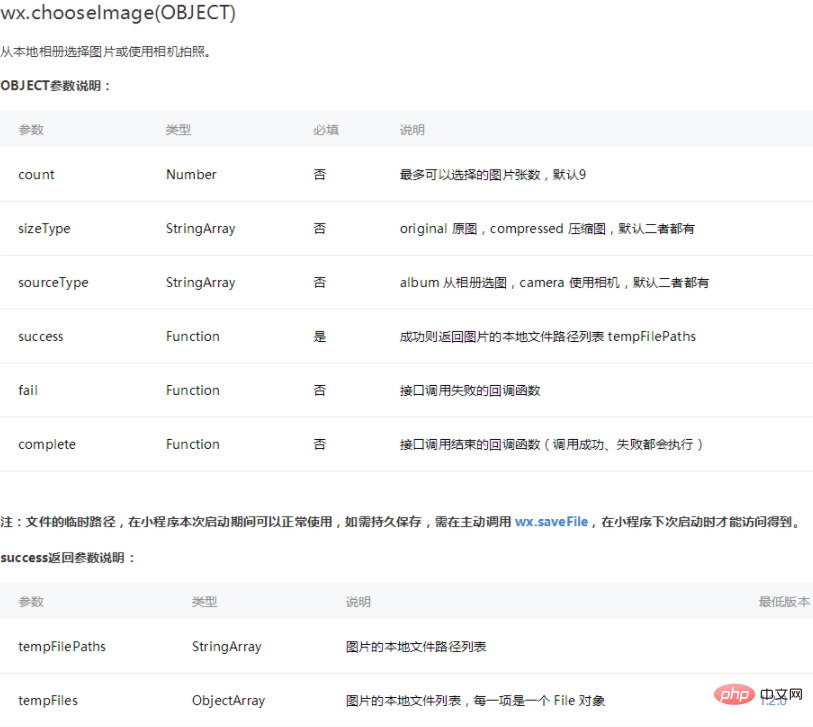
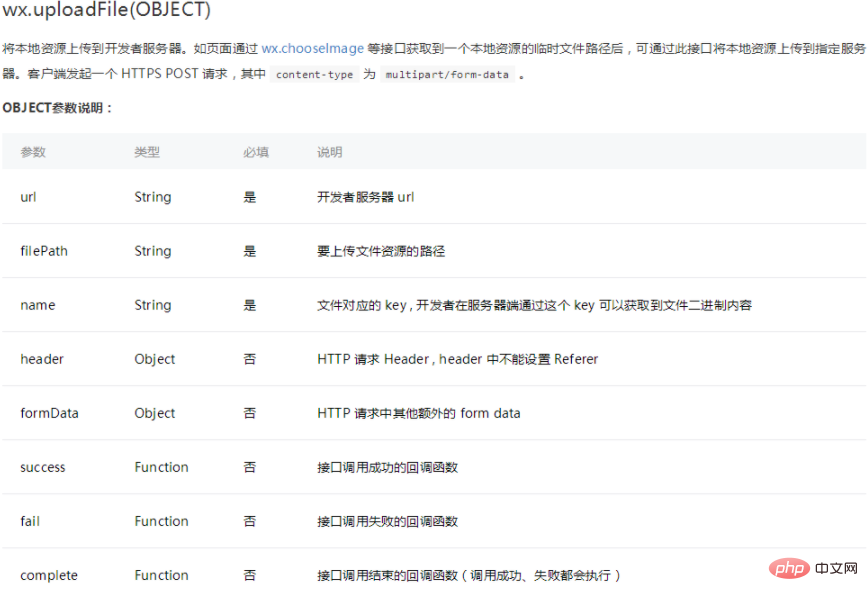
First, let’s take a look at the two APIs wx.chooseImage(object) and wx.uploadFile(OBJECT)


The sample code is like this:
wx.chooseImage({
  success: function(res) {
    var tempFilePaths = res.tempFilePaths
    wx.uploadFile({
      url: 'http://example.weixin.qq.com/upload', //仅为示例,非真实的接口地址
      filePath: tempFilePaths[0],
      name: 'file',
      formData:{
        'user': 'test'
      },
      success: function(res){
        var data = res.data
        //do something
      }
    })
  }
})
The sample code here is to select a picture and then upload the first picture among the selected pictures;
Now start writing multiple pictures Upload example
First of all, we still have to select the picture
wx.chooseImage({
  success: function(res) {    var tempFilePaths = res.tempFilePaths;//这里是选好的图片的地址,是一个数组
  }
})
Then write a method to upload multiple pictures in app.js, which will be introduced later. You can also write it in a JS file , introduced later:
//多张图片上传
    function uploadimg(data){
     var that=this,
         i=data.i?data.i:0,//当前上传的哪张图片
         success=data.success?data.success:0,//上传成功的个数
         fail=data.fail?data.fail:0;//上传失败的个数
      wx.uploadFile({
            url: data.url,
            filePath: data.path[i],
            name: 'file',//这里根据自己的实际情况改
            formData:null,//这里是上传图片时一起上传的数据
            success: (resp) => {
               success++;//图片上传成功,图片上传成功的变量+1
               console.log(resp)
                console.log(i);
                //这里可能有BUG,失败也会执行这里,所以这里应该是后台返回过来的状态码为成功时,这里的success才+1
            },
            fail: (res) => {
                fail++;//图片上传失败,图片上传失败的变量+1
                console.log('fail:'+i+"fail:"+fail);
            },
            complete: () => {
                console.log(i);
                i++;//这个图片执行完上传后,开始上传下一张
            if(i==data.path.length){   //当图片传完时,停止调用
                console.log('执行完毕');
                console.log('成功:'+success+" 失败:"+fail);
            }else{//若图片还没有传完,则继续调用函数
                console.log(i);
                data.i=i;
                data.success=success;
                data.fail=fail;
                that.uploadimg(data);
            }

            }
        });
    }
The method of uploading multiple pictures has been written, and the following is the quote:
var app=getApp();
Page({
   data:{
      pics:[]
   },
   choose:function(){//这里是选取图片的方法
      var that=this,      pics=this.data.pics;
      wx.chooseImage({
           count: 9-pics.length, // 最多可以选择的图片张数,默认9
           sizeType: ['original', 'compressed'], // original 原图,compressed 压缩图,默认二者都有
           sourceType: ['album', 'camera'], // album 从相册选图,camera 使用相机,默认二者都有
           success: function(res){
           var imgsrc=res.tempFilePaths;          pics=pics.concat(imgsrc);
            that.setData({
                pics:pics
            });
      },
      fail: function() {
        // fail
      },
      complete: function() {
        // complete
      }
    })

   },
   uploadimg:function(){//这里触发图片上传的方法
       var pics=this.data.pics;
       app.uploadimg({
           url:'https://........',//这里是你图片上传的接口
           path:pics//这里是选取的图片的地址数组
        });
  },
   onLoad:function(options){

  }

})
I just wrote a node code to upload pictures, and I can use it for personal testing,
or
A simple PHP receiving code:
<?php
$imgname = $_FILES['file']['name'];
$tmp = $_FILES['file']['tmp_name'];
$filepath = 'now/';//记得要自己创建这个文件夹
if(move_uploaded_file($tmp,$filepath.$imgname.".png")){
echo "上传成功";
}else{
echo "上传失败";
}
?> Related recommendations: Small program development tutorial
The above is the detailed content of How to implement the multi-image upload function of the mini program. For more information, please follow other related articles on the PHP Chinese website!

