
Recommended (free): redis tutorial
Today, Sun and Moon are here to teach How do you use springBoot to integrate redis? To be honest, it is relatively simple, and there are a lot of tutorials on the Internet. Let’s first apply the introduction on the Internet.
Definition
REmote DIctionary Server (Redis) is a key-value storage system written by Salvatore Sanfilippo.
Redis is an open source log-type Key-Value database written in ANSI C language, abides by the BSD protocol, supports the network, can be memory-based and persistent, and provides APIs in multiple languages.
It is often called a data structure server because values can be of types such as String, Hash (Map), List, Sets and Sorted Sets. .
Advantages of reids
The following are some advantages of Redis.
Exceptionally fast - Redis is very fast and can perform approximately 110,000 set (SET) operations per second and approximately 81,000 read/get (GET) operations per second.
Support rich data types - Redis supports most data types commonly used by developers, such as lists, sets, sorted sets, hashes, etc. This makes Redis easy to use to solve various problems, because we know which problems can be better solved using which data types.
Operations are atomic - all Redis operations are atomic, which ensures that the Redis server can receive updated values if two clients access it concurrently.
Multi-utility - Redis is a multi-utility and can be used for multiple use cases such as: caching, message queues (Redis supports publish/subscribe natively), any short-term data in an application, e.g. in a web application Sessions, page hit counts, etc.
Redis installation
Installation under Window
Download address: https://github.com/MSOpenTech/redis/releases.
Redis supports 32-bit and 64-bit. This needs to be selected according to the actual situation of your system platform. Here we download the Redis-x64-xxx.zip compressed package to the C drive. After decompression, rename the folder to redis.
Open a cmd window and use the cd command to switch directories to C:\redis
Run redis-server.exe redis.windows.conf
If you want to be more convenient, you can put The path of redis is added to the system environment variable, so that you don't have to enter the path again. The following redis.windows.conf can be omitted. If omitted, the default one will be enabled. After input, the following interface will be displayed: 
Integrated redis
We still continue to use the project in the previous chapter: Springboot integrated springcloud-config implementation dataSource hot deployment
1. Add dependencies
<!--集成redis-->
<dependency>
    <groupid>org.springframework.boot</groupid>
    <artifactid>spring-boot-starter-redis</artifactid>
    <version>1.4.1.RELEASE</version>
</dependency>
<dependency>
    <groupid>com.alibaba</groupid>
    <artifactid>fastjson</artifactid>
    <version>1.2.3</version>
</dependency>
<dependency>
    <groupid>com.fasterxml.jackson.core</groupid>
    <artifactid>jackson-databind</artifactid>
</dependency>
2. Add redis configuration in the configuration center
spring.redis.host=127.0.0.1
#Redis服务器连接端口
spring.redis.port=6379
#Redis服务器连接密码(默认为空)
spring.redis.password=
#连接池最大连接数(使用负值表示没有限制)
spring.redis.pool.max-active=8
#连接池最大阻塞等待时间(使用负值表示没有限制)
spring.redis.pool.max-wait=-1
#连接池中的最大空闲连接
spring.redis.pool.max-idle=8
#连接池中的最小空闲连接
spring.redis.pool.min-idle=0
#连接超时时间(毫秒)
spring.redis.timeout=30000
3. Configuration class RedisConfig
import java.lang.reflect.Method;
import org.springframework.beans.factory.annotation.Value;
import org.springframework.cache.CacheManager;
import org.springframework.cache.annotation.CachingConfigurerSupport;
import org.springframework.cache.annotation.EnableCaching;
import org.springframework.cache.interceptor.KeyGenerator;
import org.springframework.cloud.context.config.annotation.RefreshScope;
import org.springframework.context.annotation.Bean;
import org.springframework.context.annotation.Configuration;
import org.springframework.data.redis.cache.RedisCacheManager;
import org.springframework.data.redis.connection.RedisConnectionFactory;
import org.springframework.data.redis.connection.jedis.JedisConnectionFactory;
import org.springframework.data.redis.core.RedisTemplate;
import org.springframework.data.redis.core.StringRedisTemplate;
import org.springframework.data.redis.serializer.Jackson2JsonRedisSerializer;
import com.fasterxml.jackson.annotation.PropertyAccessor;
import com.fasterxml.jackson.annotation.JsonAutoDetect;
import com.fasterxml.jackson.databind.ObjectMapper;
@Configuration
@EnableCaching
@RefreshScope
public class RedisConfig extends CachingConfigurerSupport{
    @Value("${spring.redis.host}")
    private String host;
    @Value("${spring.redis.port}")
    private int port;
    @Value("${spring.redis.timeout}")
    private int timeout;
    @Value("${spring.redis.password}")
    private String password;
    @Value("${spring.redis.pool.max-active}")
    private int maxActive;
    @Value("${spring.redis.pool.max-wait}")
    private int maxWait;
    @Value("${spring.redis.pool.max-idle}")
    private int maxIdle;
    @Value("${spring.redis.pool.min-idle}")
    private int minIdle;

    @RefreshScope
    @Bean
    public KeyGenerator wiselyKeyGenerator(){
        return new KeyGenerator() {
            @Override
            public Object generate(Object target, Method method, Object... params) {
                StringBuilder sb = new StringBuilder();
                sb.append(target.getClass().getName());
                sb.append(method.getName());
                for (Object obj : params) {
                    sb.append(obj.toString());
                }
                return sb.toString();
            }
        };
    }

    @RefreshScope
    @Bean
    public JedisConnectionFactory redisConnectionFactory() {
        JedisConnectionFactory factory = new JedisConnectionFactory();
        factory.setHostName(host);
        factory.setPort(port);
        factory.setTimeout(timeout); //设置连接超时时间
        factory.setPassword(password);
        factory.getPoolConfig().setMaxIdle(maxIdle);
        factory.getPoolConfig().setMinIdle(minIdle);
        factory.getPoolConfig().setMaxTotal(maxActive);
        factory.getPoolConfig().setMaxWaitMillis(maxWait);
        return factory;
    }

    @RefreshScope
    @Bean
    public CacheManager cacheManager(RedisTemplate redisTemplate) {
        RedisCacheManager cacheManager = new RedisCacheManager(redisTemplate);
        // Number of seconds before expiration. Defaults to unlimited (0)
        cacheManager.setDefaultExpiration(10); //设置key-value超时时间
        return cacheManager;
    }

    @RefreshScope
    @Bean
    public RedisTemplate<string> redisTemplate(RedisConnectionFactory factory) {
        StringRedisTemplate template = new StringRedisTemplate(factory);
        setSerializer(template); //设置序列化工具,这样ReportBean不需要实现Serializable接口
        template.afterPropertiesSet();
        return template;
    }

    @RefreshScope
    private void setSerializer(StringRedisTemplate template) {
        Jackson2JsonRedisSerializer jackson2JsonRedisSerializer = new Jackson2JsonRedisSerializer(Object.class);
        ObjectMapper om = new ObjectMapper();
        om.setVisibility(PropertyAccessor.ALL, JsonAutoDetect.Visibility.ANY);
        om.enableDefaultTyping(ObjectMapper.DefaultTyping.NON_FINAL);
        jackson2JsonRedisSerializer.setObjectMapper(om);
        template.setValueSerializer(jackson2JsonRedisSerializer);
    }
}</string>
4. RedisUtils class
import java.io.Serializable;
import java.util.List;
import java.util.Set;
import java.util.concurrent.TimeUnit;
import org.springframework.beans.factory.annotation.Autowired;
import org.springframework.data.redis.core.HashOperations;
import org.springframework.data.redis.core.ListOperations;
import org.springframework.data.redis.core.RedisTemplate;
import org.springframework.data.redis.core.SetOperations;
import org.springframework.data.redis.core.ValueOperations;
import org.springframework.data.redis.core.ZSetOperations;
import org.springframework.stereotype.Service;
@Service
public class RedisUtils {
    @Autowired
    private RedisTemplate redisTemplate;
    /**
     * 写入缓存
     * @param key
     * @param value
     * @return
     */
    public boolean set(final String key, Object value) {
        boolean result = false;
        try {
            ValueOperations<serializable> operations = redisTemplate.opsForValue();
            operations.set(key, value);
            result = true;
        } catch (Exception e) {
            e.printStackTrace();
        }
        return result;
    }
    /**
     * 写入缓存设置时效时间
     * @param key
     * @param value
     * @return
     */
    public boolean set(final String key, Object value, Long expireTime ,TimeUnit timeUnit) {
        boolean result = false;
        try {
            ValueOperations<serializable> operations = redisTemplate.opsForValue();
            operations.set(key, value);
            redisTemplate.expire(key, expireTime, timeUnit);
            result = true;
        } catch (Exception e) {
            e.printStackTrace();
        }
        return result;
    }
    /**
     * 批量删除对应的value
     * @param keys
     */
    public void remove(final String... keys) {
        for (String key : keys) {
            remove(key);
        }
    }
    /**
     * 批量删除key
     * @param pattern
     */
    public void removePattern(final String pattern) {
        Set<serializable> keys = redisTemplate.keys(pattern);
        if (keys.size() > 0){
            redisTemplate.delete(keys);
        }
    }
    /**
     * 删除对应的value
     * @param key
     */
    public void remove(final String key) {
        if (exists(key)) {
            redisTemplate.delete(key);
        }
    }
    /**
     * 判断缓存中是否有对应的value
     * @param key
     * @return
     */
    public boolean exists(final String key) {
        return redisTemplate.hasKey(key);
    }
    /**
     * 读取缓存
     * @param key
     * @return
     */
    public Object get(final String key) {
        Object result = null;
        ValueOperations<serializable> operations = redisTemplate.opsForValue();
        result = operations.get(key);
        return result;
    }
    /**
     * 哈希 添加
     * @param key
     * @param hashKey
     * @param value
     */
    public void hmSet(String key, Object hashKey, Object value){
        HashOperations<string> hash = redisTemplate.opsForHash();
        hash.put(key,hashKey,value);
    }
    /**
     * 哈希获取数据
     * @param key
     * @param hashKey
     * @return
     */
    public Object hmGet(String key, Object hashKey){
        HashOperations<string>  hash = redisTemplate.opsForHash();
        return hash.get(key,hashKey);
    }
    /**
     * 列表添加
     * @param k
     * @param v
     */
    public void lPush(String k,Object v){
        ListOperations<string> list = redisTemplate.opsForList();
        list.rightPush(k,v);
    }
    /**
     * 列表获取
     * @param k
     * @param l
     * @param l1
     * @return
     */
    public List<object> lRange(String k, long l, long l1){
        ListOperations<string> list = redisTemplate.opsForList();
        return list.range(k,l,l1);
    }
    /**
     * 集合添加
     * @param key
     * @param value
     */
    public void add(String key,Object value){
        SetOperations<string> set = redisTemplate.opsForSet();
        set.add(key,value);
    }
    /**
     * 集合获取
     * @param key
     * @return
     */
    public Set<object> setMembers(String key){
        SetOperations<string> set = redisTemplate.opsForSet();
        return set.members(key);
    }
    /**
     * 有序集合添加
     * @param key
     * @param value
     * @param scoure
     */
    public void zAdd(String key,Object value,double scoure){
        ZSetOperations<string> zset = redisTemplate.opsForZSet();
        zset.add(key,value,scoure);
    }
    /**
     * 有序集合获取
     * @param key
     * @param scoure
     * @param scoure1
     * @return
     */
    public Set<object> rangeByScore(String key,double scoure,double scoure1){
        ZSetOperations<string> zset = redisTemplate.opsForZSet();
        return zset.rangeByScore(key, scoure, scoure1);
    }</string></object></string></string></object></string></string></object></string></string></string></serializable></serializable></serializable></serializable>
5. Test and modify controller
import java.util.concurrent.TimeUnit;
import org.slf4j.Logger;
import org.slf4j.LoggerFactory;
import org.springframework.beans.factory.annotation.Autowired;
import org.springframework.web.bind.annotation.PathVariable;
import org.springframework.web.bind.annotation.RequestMapping;
import org.springframework.web.bind.annotation.RestController;
import com.chenqi.springboot.redis.RedisUtils;
import com.chenqi.springboot.service.TestService;
@RestController
public class SpringBootController {

    public static final Logger log = LoggerFactory.getLogger(SpringBootController.class);

    @Autowired
    TestService testService;

    @Autowired
    private RedisUtils redisUtils;
    @RequestMapping(value = "/hello/{id}")
    public String hello(@PathVariable(value = "id") String id){
        //查询缓存中是否存在
        boolean hasKey = redisUtils.exists(id);
        String str = "";
        if(hasKey){
            //获取缓存
            Object object =  redisUtils.get(id);
            log.info("从缓存获取的数据"+ object);
            str = object.toString();
        }else{
            //从数据库中获取信息
            log.info("从数据库中获取数据");
            str = testService.test();
            //数据插入缓存(set中的参数含义:key值,user对象,缓存存在时间10(long类型),时间单位)
            redisUtils.set(id,str,10L,TimeUnit.MINUTES);
            log.info("数据插入缓存" + str);
        }
        return str;
    }
}
Start the project, visit for the first time: http://localhost:8002/hello/111

Through the console output, we can see that it is obtained from the database The data is stored in the redis cache.
Let’s refresh the browser again
You can see that the second time it is read from the cache, let’s try to refresh the browser continuously
As you can see, everything is obtained from the cache afterwards.
Now our redis is configured.
SpringBoot integrated Redis-demo download
If you are in urgent need of demo, please download it yourself. If you are not in a hurry, you can leave a message in your email address. It will usually be sent within 48 hours.
For more related learning, please pay attention to the redis column!
The above is the detailed content of How SpringBoot integrates redis. For more information, please follow other related articles on the PHP Chinese website!
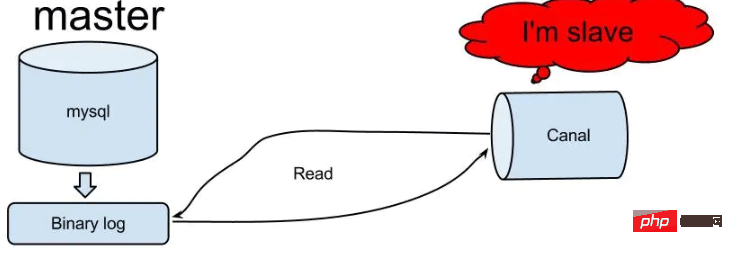 怎么使用SpringBoot+Canal实现数据库实时监控May 10, 2023 pm 06:25 PM
Canal工作原理Canal模拟MySQLslave的交互协议,伪装自己为MySQLslave,向MySQLmaster发送dump协议MySQLmaster收到dump请求,开始推送binarylog给slave(也就是Canal)Canal解析binarylog对象(原始为byte流)MySQL打开binlog模式在MySQL配置文件my.cnf设置如下信息:[mysqld]#打开binloglog-bin=mysql-bin#选择ROW(行)模式binlog-format=ROW#配置My
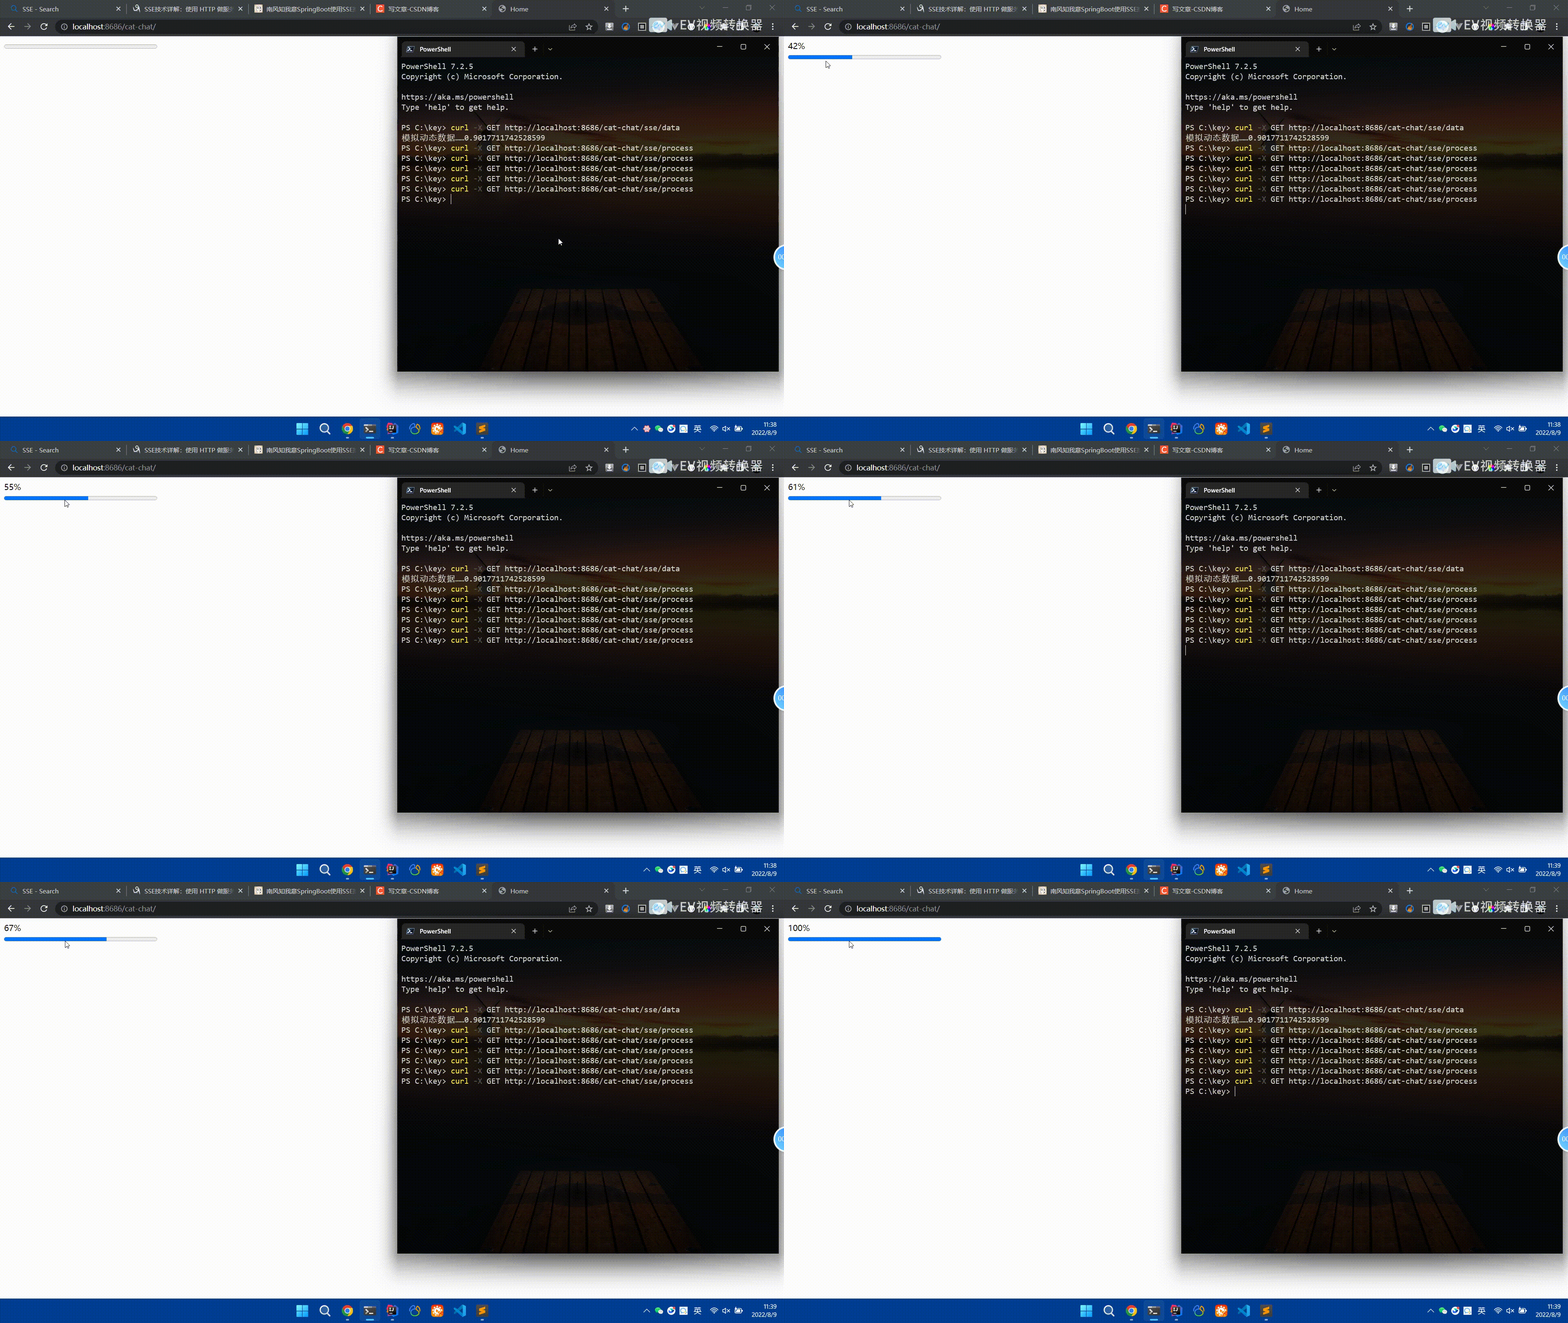 Spring Boot怎么使用SSE方式向前端推送数据May 10, 2023 pm 05:31 PM
前言SSE简单的来说就是服务器主动向前端推送数据的一种技术,它是单向的,也就是说前端是不能向服务器发送数据的。SSE适用于消息推送,监控等只需要服务器推送数据的场景中,下面是使用SpringBoot来实现一个简单的模拟向前端推动进度数据,前端页面接受后展示进度条。服务端在SpringBoot中使用时需要注意,最好使用SpringWeb提供的SseEmitter这个类来进行操作,我在刚开始时使用网上说的将Content-Type设置为text-stream这种方式发现每次前端每次都会重新创建接。最
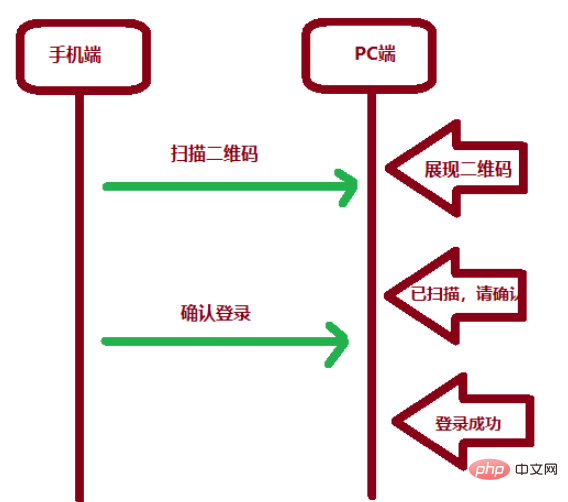 SpringBoot怎么实现二维码扫码登录May 10, 2023 pm 08:25 PM
一、手机扫二维码登录的原理二维码扫码登录是一种基于OAuth3.0协议的授权登录方式。在这种方式下,应用程序不需要获取用户的用户名和密码,只需要获取用户的授权即可。二维码扫码登录主要有以下几个步骤:应用程序生成一个二维码,并将该二维码展示给用户。用户使用扫码工具扫描该二维码,并在授权页面中授权。用户授权后,应用程序会获取一个授权码。应用程序使用该授权码向授权服务器请求访问令牌。授权服务器返回一个访问令牌给应用程序。应用程序使用该访问令牌访问资源服务器。通过以上步骤,二维码扫码登录可以实现用户的快
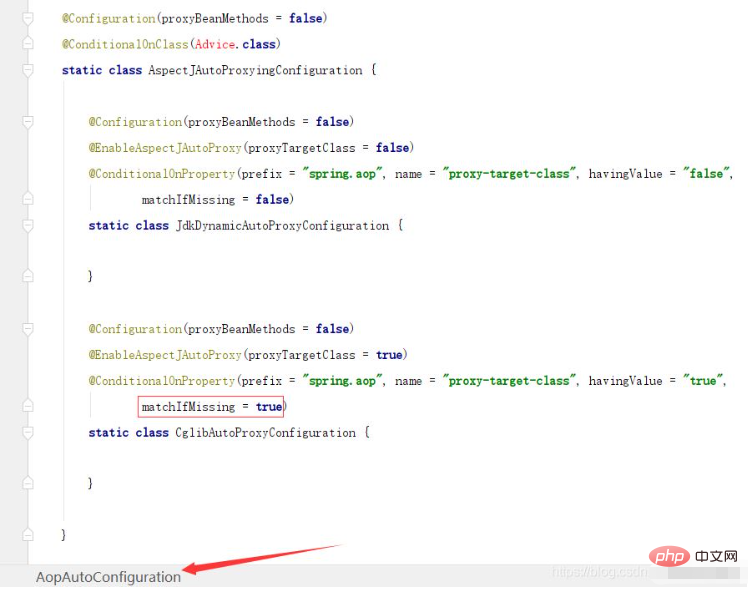 SpringBoot/Spring AOP默认动态代理方式是什么May 10, 2023 pm 03:52 PM
1.springboot2.x及以上版本在SpringBoot2.xAOP中会默认使用Cglib来实现,但是Spring5中默认还是使用jdk动态代理。SpringAOP默认使用JDK动态代理,如果对象没有实现接口,则使用CGLIB代理。当然,也可以强制使用CGLIB代理。在SpringBoot中,通过AopAutoConfiguration来自动装配AOP.2.Springboot1.xSpringboot1.xAOP默认还是使用JDK动态代理的3.SpringBoot2.x为何默认使用Cgl
 spring boot怎么对敏感信息进行加解密May 10, 2023 pm 02:46 PM
我们使用jasypt最新版本对敏感信息进行加解密。1.在项目pom文件中加入如下依赖:com.github.ulisesbocchiojasypt-spring-boot-starter3.0.32.创建加解密公用类:packagecom.myproject.common.utils;importorg.jasypt.encryption.pbe.PooledPBEStringEncryptor;importorg.jasypt.encryption.pbe.config.SimpleStrin
 使用Java SpringBoot集成POI实现Word文档导出Apr 21, 2023 pm 12:19 PM
知识准备需要理解ApachePOI遵循的标准(OfficeOpenXML(OOXML)标准和微软的OLE2复合文档格式(OLE2)),这将对应着API的依赖包。什么是POIApachePOI是用Java编写的免费开源的跨平台的JavaAPI,ApachePOI提供API给Java程序对MicrosoftOffice格式档案读和写的功能。POI为“PoorObfuscationImplementation”的首字母缩写,意为“简洁版的模糊实现”。ApachePOI是创建和维护操作各种符合Offic
 springboot怎么整合shiro实现多验证登录功能May 10, 2023 pm 04:19 PM
1.首先新建一个shiroConfigshiro的配置类,代码如下:@ConfigurationpublicclassSpringShiroConfig{/***@paramrealms这儿使用接口集合是为了实现多验证登录时使用的*@return*/@BeanpublicSecurityManagersecurityManager(Collectionrealms){DefaultWebSecurityManagersManager=newDefaultWebSecurityManager();
 SpringBoot项目打包发布到外部tomcat遇到的问题怎么解决May 10, 2023 pm 05:49 PM
先说遇到问题的情景:初次尝试使用springboot框架写了个小web项目,在IntellijIDEA中能正常启动运行。使用maven运行install,生成war包,发布到本机的tomcat下,出现异常,主要的异常信息是.......LifeCycleException。经各种搜索,找到答案。springboot因为内嵌tomcat容器,所以可以通过打包为jar包的方法将项目发布,但是如何将springboot项目打包成可发布到tomcat中的war包项目呢?1.既然需要打包成war包项目,首


Hot AI Tools

Undresser.AI Undress
AI-powered app for creating realistic nude photos

AI Clothes Remover
Online AI tool for removing clothes from photos.

Undress AI Tool
Undress images for free

Clothoff.io
AI clothes remover

AI Hentai Generator
Generate AI Hentai for free.

Hot Article

Hot Tools

Dreamweaver Mac version
Visual web development tools

SAP NetWeaver Server Adapter for Eclipse
Integrate Eclipse with SAP NetWeaver application server.

Atom editor mac version download
The most popular open source editor

VSCode Windows 64-bit Download
A free and powerful IDE editor launched by Microsoft

SublimeText3 Chinese version
Chinese version, very easy to use


