
Home >Web Front-end >Vue.js >How to create a project with vue.js
How to create a project with vue.js

- 青灯夜游Original
- 2020-12-16 10:25:502566browse
Creation method: 1. Install the node environment; 2. Use the "npm install --global vue-cli" command to globally install vue-cli; 3. Use the "vue init webpack project name" command to create the project; 4. , enter the project and use the "cnpm i" command to install the dependencies.

The operating environment of this tutorial: windows7 system, vue2.9 version, this method is suitable for all brands of computers.
Related recommendations: "vue.js Tutorial"
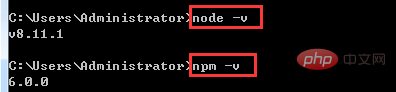
1. Install the node environment
1. The download address is: https://nodejs.org/en/
2. Check whether the installation is successful: If the version number is output, it means we installed the node environment successfully
3. In order to improve our efficiency, we can use Taobao’s mirror: http://npm.taobao.org/
Enter: npm install -g cnpm –registry=https://registry.npm.taobao.org, you can install the npm image. If you use npm in the future, just use cnpm instead.

Check whether the installation is successful:

2. Create a project and build a vue project environment
1. Install vue-cli globally
npm install --global vue-cli

## 2. Enter your project directory, Create a new project based on the webpack template: vue init webpack project name
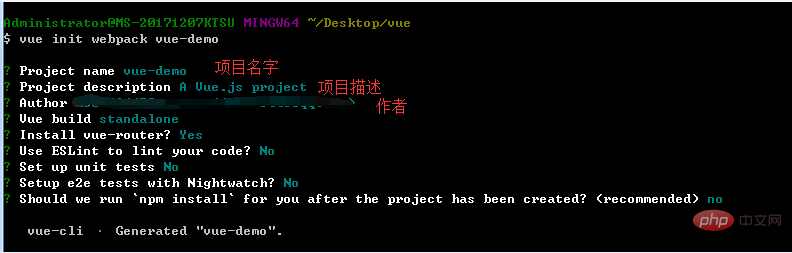
## Set up unit tests ==> Whether to install unit testing tools currently we do not need so n Enter;
Setup e2e tests with Nightwatch ==> Whether we need end-to-end testing tools currently We don’t need to press Enter;
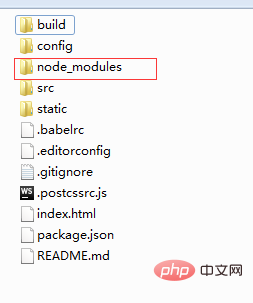
3. Enter the project: cd vue-demo, install dependencies
After the installation is successful, the project folder will One more directory: node_modules

 The project started successfully:
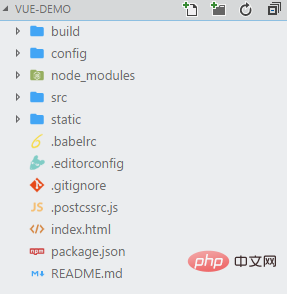
 3. Explanation of vue project directory
##
 <br>
<br>
1. build: Build script directory 1) build.js ==> ; Production environment build script;
## 2) check-versions.js ==> Check npm, node.js version; <br>
4) vue-loader.conf.js ==> Configured css Loader and automatically add prefix after compiling css;
5) webpack.base.conf.js ==> Webpack basic configuration;
6) webpack.dev.conf.js ==> webpack development environment configuration;
7) webpack.prod.conf.js ==> webpack production environment configuration;
2. config: project configuration
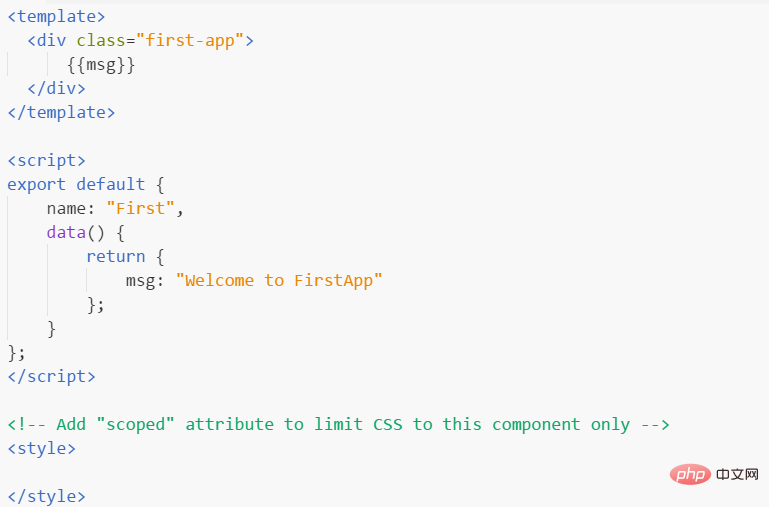
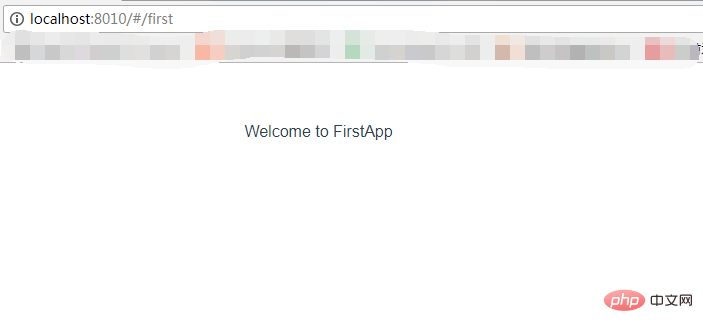
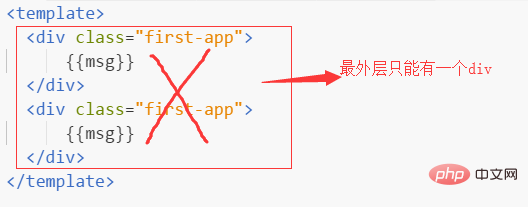
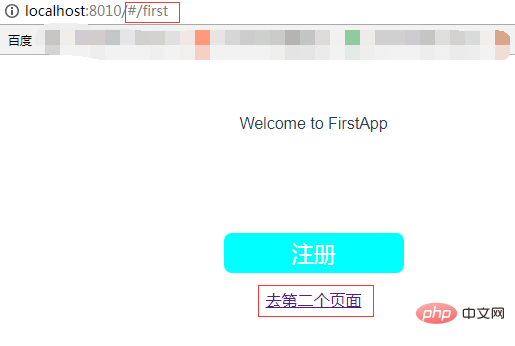
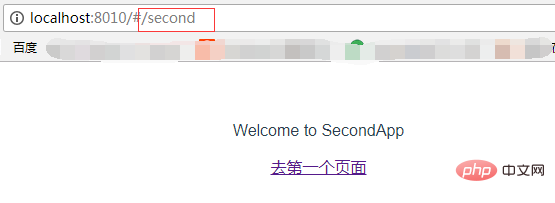
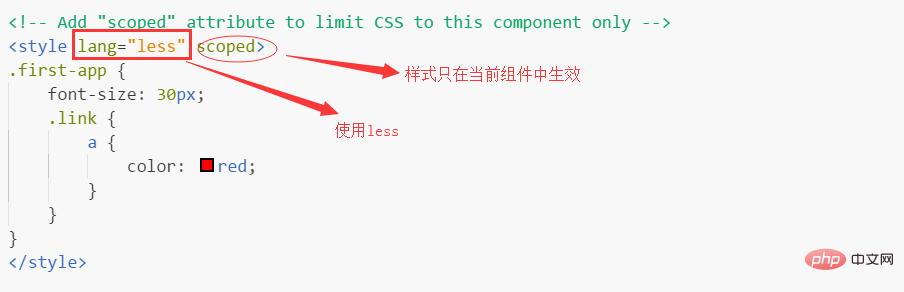
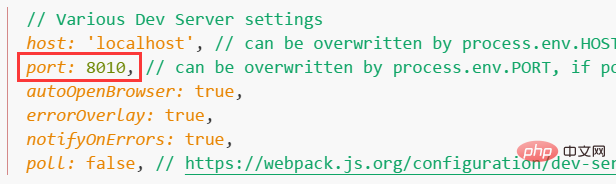
1) dev.env.js ==> Development environment variables; 2) index.js ==> Project configuration file; 3 ) prod.env.js ==> Production environment variables; 3. node_modules: Project dependent modules loaded by npm 4. src: This is the directory we want to develop, basically Everything you need to do is in this directory. It contains several directories and files: 1) assets: resource directory, where some pictures or public js and public css are placed. The resources here will be built by webpack; 2) components: component directory, the components we write are placed in this directory; 3) router: front-end routing, the routing we need to configure The path is written in index.js; 4) App.vue: root component; 5) main.js: entry js file; 5. static: static Resource directory, such as pictures, fonts, etc. Will not be built by webpack 6. index.html: Home page entry file, you can add some meta information, etc. 7. package.json: npm package configuration file, defines the npm script of the project , dependency packages and other information 8. README.md: Project description document, markdown format 9. .xxxx files: These are some configuration files , including syntax configuration, git configuration, etc. 4. Start our first vue project 1. In the components directory Create a new views directory and write our vue component in it. 1) Start our first component: a: In views Create a new First.vue in the directory b: Configure the routing path in index.js in the router directory Generation in in html , Script can be written as js , and style can be written as style d : Enter ip: http://localhost:8010/#/first, check the page effect ## Note : There can only be one parallel div under a component. The following writing is wrong: The data should be written in the return, not like the document. The following writing is wrong: 3) Introduce the sub-component <script></script> Complete code: Parent component: 3. Use routing to build Single-page application After the routing jump, pay attention to the path changes: 1. Solve the problem that vue cannot automatically open the browser: When we enter npm run dev, run the project , the command line prompts us that the operation is successful, but the browser does not open automatically, so we can only enter it manually. ## 1) Open config ==> index.js ## 2) Find autoOpenBrowser in the module.exports configuration. The default setting is false Finally attach the demo address: https://github.com/yanxulan/vue-demo.gitFor more programming-related knowledge, please visit: ! ! <br>
 ## 2. Talk about parent-child components
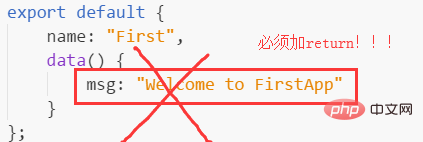 Introduction: import Confirm from '../sub/Confirm'
 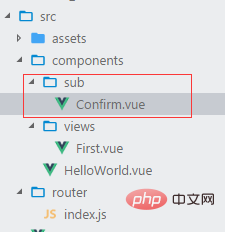 Add
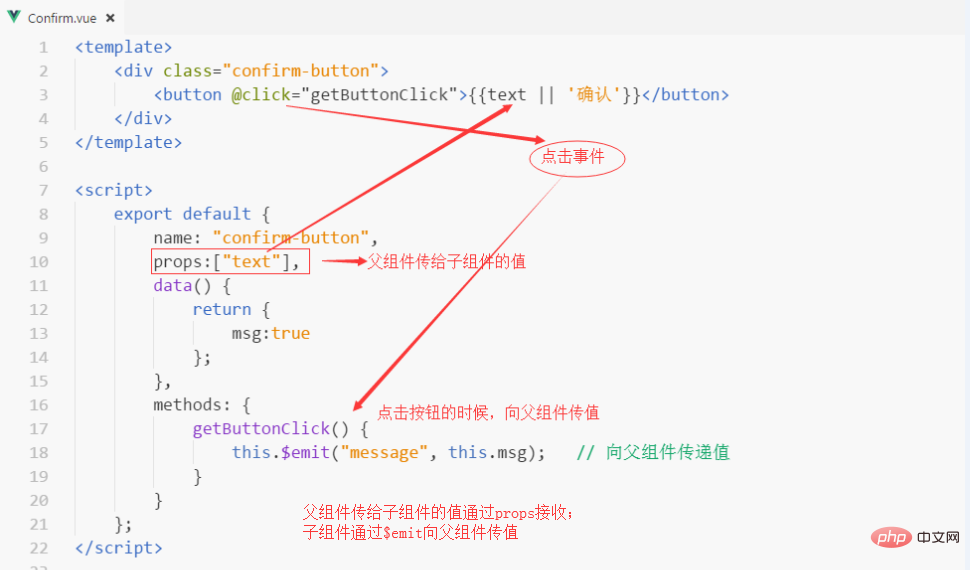
Add 2) Parent-child component communication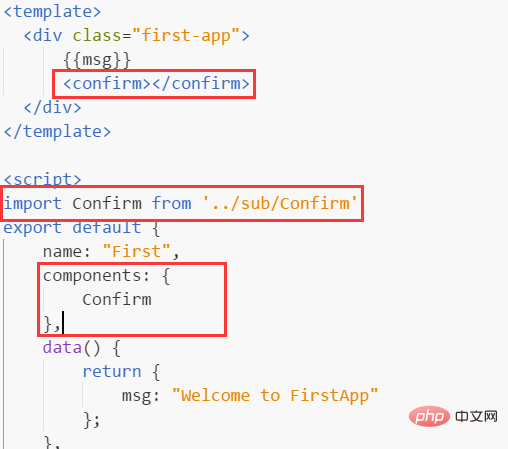
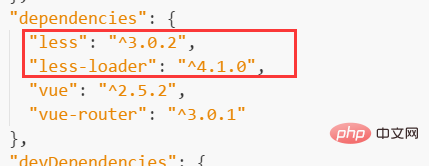
 1) Install less dependencies: npm install less less-loader --save
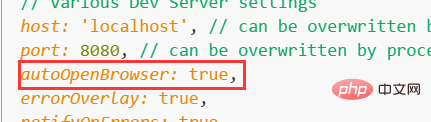
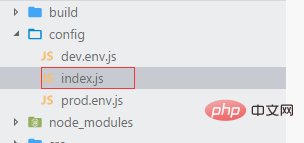 3) Change autoOpenBrowser to true
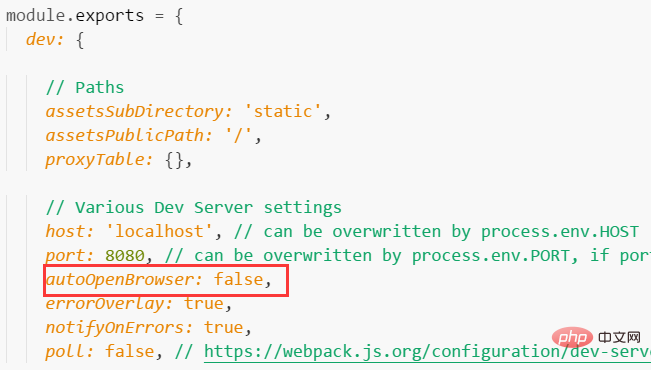
The above is the detailed content of How to create a project with vue.js. For more information, please follow other related articles on the PHP Chinese website!