Home >Database >Mysql Tutorial >How to remotely install mysql under linux
How to remotely install mysql under linux
- 藏色散人Original
- 2020-11-13 09:38:273117browse
How to remotely install mysql under Linux: first connect to the remote server locally; then download mysql remotely; then install mysql remotely through rpm; finally log in to mysql, change the password and set up remote authorization.

Recommended: "mysql video tutorial"
Steps:
1. Connect to the remote server locally
2. Check whether mysql has been installed on the server and learn to uninstall it
3. Remote download mysql
4. Remote installation of mysql (including server, client and dependent packages)
5. Log in to mysql, change the password and set up remote authorization
------------------------ -------------------------------------------------- ---
1. Connect to the remote server locally
I downloaded SecureCRT
sessions -->右击 --> new sessions --> SSH2 -->continue --> HostName:远程地址/Port:远程端口号(一般22)/firewell:none/username:用户名 --> ok双击新建的Session-->弹出密码框 -->输入密码 --> ok
At this point, connect to the remote server
2. Check whether mysql has been installed on the server and learn to uninstall it
a) Check whether mysql
is installed in the system as an rpm package
[root@host-15ec49514ce ~]# rpm -qa | grep -i mysqlMySQL-server-5.1.49-1.glibc23 MySQL-client-5.1.49-1.glibc23
Uninstall MySQL-server-5.1.49-1.glibc23 and MySQL-client-5.1. 49-1.glibc23
##
[root@host-15ec49514ce ~]#rpm -e MySQL-client-5.1.49-1.glibc23[root@host-15ec49514ce ~]#rpm -e MySQL-server-5.1.49-1.glibc23
b) Check if there is a mysql service
[root@host-15ec49514ce ~]#chkconfig --list | grep -I mysql 0:off 1:off 2:on 3:on 4:on 5:on 6:offmysql
c) Delete the scattered mysql folder
[root@host-15ec49514ce ~]# whereis mysqlmysql: /usr/lib/mysql /usr/share/mysql
Delete respectively
[root@host-15ec49514ce ~]# rm -rf /usr/lib/mysql/ [root@host-15ec49514ce ~]# rm -rf /usr/share/mysqlNote: ⚠️The data in /var/lib/mysql and /etc/my.cnf will not be deleted after uninstallation. After confirming that it is of no use Manual deletion
rm -rf /var/lib/mysql rm /etc/my.cnf
Through the above steps, mysql has been completely uninstalled
3. Remote download mysql
[root@host-15ec49514ce ~]# cd /usr/local/mysql
(1). Download
[root@host-15ec49514ce ~]# wgethttps://cdn.mysql.com//archives/mysql-5.5/MySQL-5.5.44-1.linux2.6.x86_64.rpm-bundle.tar
(2). Unzip
tar -xvf MySQL-5.5.44-1.linux2.6.x86_64.rpm-bundle.tar
 4.Remotely install mysql (including server, client and dependent packages)
rpm -ivh MySQL-server-5.5.44-1.linux2.6.x86_64.rpm
##rpm -ivh MySQL-devel-5.5.44-1.linux2.6.x86_64.rpm
rpm -ivh MySQL-client-5.5.44-1.linux2.6.x86_64.rpm
5. Log in to mysql, change the password and set up remote authorization
(1). Execute the following command to copy the MySQL configuration file to the /etc directory.
##cp /usr/share/mysql/my-medium.cnf /etc/my.cnf
##(2). Run the following commands respectively to initialize MySQL and set the password.
/usr/bin/mysql_install_db #Initialize MySQL
service mysql start #启动MySQL ⚠️:这个地方会报错:
解决方法:
⚠️:ERROR 1062 (23000): Duplicate entry '%-root' for key 'PRIMARY' 不要予以理会
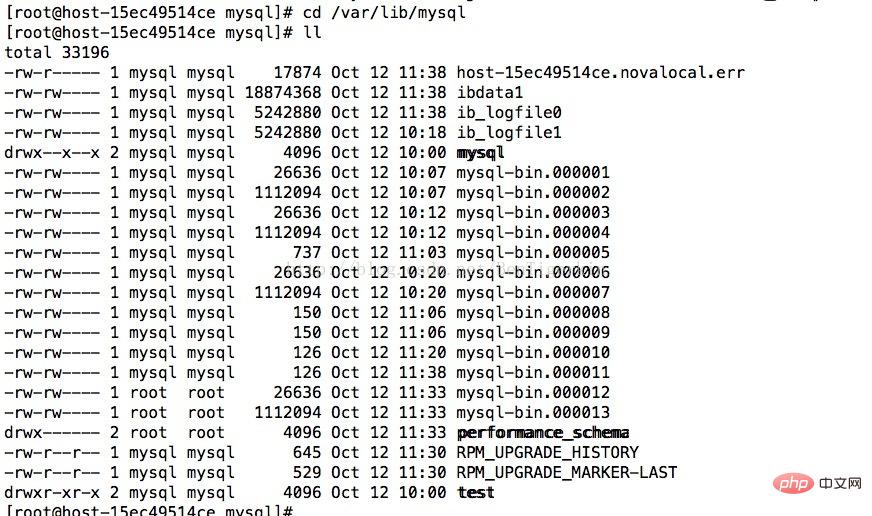
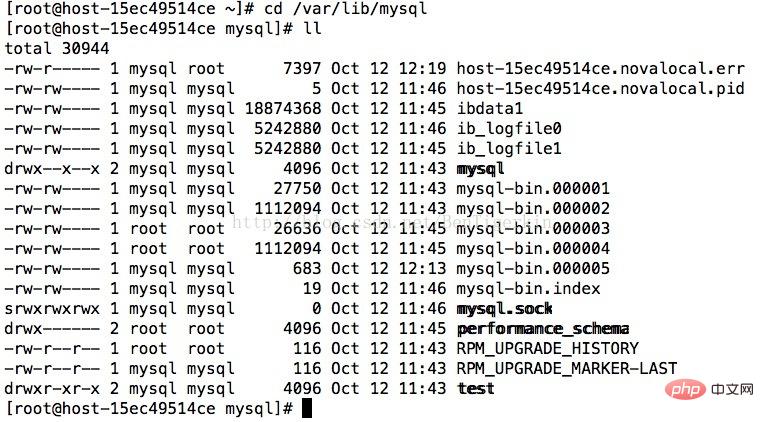
(3)授权: 出现的问题大致有以下几种:1.卸载不彻底。解决办法:按照我上面的步骤来就OK 2.步骤中出现的问题:(1)/usr/local目录下没有mysql目录,需要新建( #cd /usr/local #mkdir mysql ) /usr/share/mysql下可能没有my-default.cnf 可以直接用my-medium.cnf (2)service mysql start 出错 3.show databases;只有information_schema和test 解决办法:(出现这种情况的原因是权限问题,要是你按照我上面的卸载步骤来是不可能出现这种情况的) 删除/var/lib/mysql root root 这三行图片如下(其实mysql-bin.000001~mysql-bin.000006都是可以删除的,这个图片是我安装了两次mysql,第一次安装的没有删除干净留下来的) 4.最终安装好,配置好所有的,/var/lib/mysql目录下文件如下Staring MySQL. ERROR! The server quit without updating PID file(/var/lib/mysql/host-15ec49514ce.novalocal.pid).
[root@host-15ec49514ce ~]# find / -name  mysql-bin.index
/var/lib/mysql/mysql-bin.index[root@host-15ec49514ce ~]# rm /var/lib/mysql/mysql-bin.indexmysql -u root -p
use mysql;select 'host' from user where user='root';
update user set host = '%' where user ='root';
flush privileges;
GRANT ALL PRIVILEGES ON *.* TO 'root'@'%' IDENTIFIED BY '你的密码' WITH GRANT OPTION;
#cp /usr/share/mysql/my-medium.cnf /etc/my.cn
#rm /var/lib/mysql/mysql-bin.index


至此,所有我遇到的问题都解决了。希望对大家有所帮助
The above is the detailed content of How to remotely install mysql under linux. For more information, please follow other related articles on the PHP Chinese website!

