Home >Web Front-end >Vue.js >How to introduce jquery into vue.js
How to introduce jquery into vue.js
- coldplay.xixiOriginal
- 2020-11-10 15:55:062887browse
How to introduce jquery into vue.js: First, add [jquery] to the dependencies in [package.json], and enter the relevant code in the terminal; then enter the relevant code in [module.exports]; finally, in Enter [npm run dev] in the terminal.

The operating environment of this tutorial: windows10 system, vue2.5.2, this article is applicable to all brands of computers.
【Recommended related articles: vue.js】
How to introduce jquery into vue.js:
1. First, add "jquery" to the dependencies in package.json: "^3.2.1",
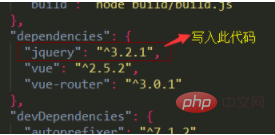
2. Enter npm install jquery – in the terminal. save-dev Of course, it is also possible to use Taobao mirror cnpm
Note: jquery must be lowercase, otherwise it will prompt Please use 'jquery' (all lowercase)

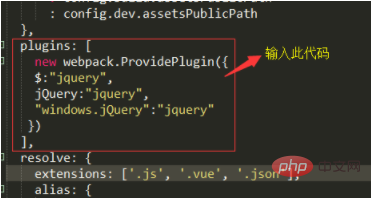
3. Find the webpack.base.conf.js file in the build folder, open it, and add:
var webpack=require(‘webpack’)

Enter in module.exports:
        plugins: [
           new webpack.ProvidePlugin({
                 $:”jquery”,
                 jQuery:”jquery”,
                “windows.jQuery”:”jquery”
        })
      ],
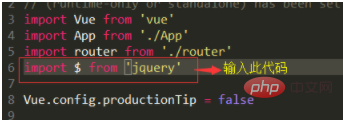
4. In the entry file main.js, enter:
import $ from ‘jquery’
5. In the terminal, enter npm run dev. Get it

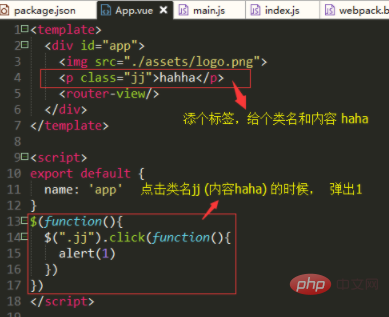
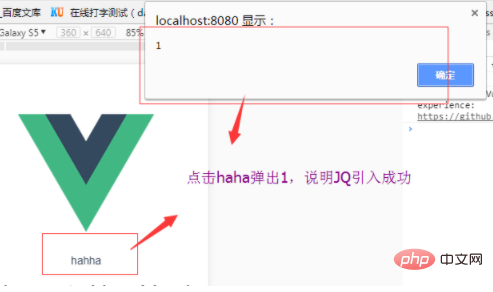
6. The verification method is verified in APP.vue. Look at the picture:
Related free learning recommendations: JavaScript(Video)
The above is the detailed content of How to introduce jquery into vue.js. For more information, please follow other related articles on the PHP Chinese website!

