Home >Database >Mysql Tutorial >How to install mysql5.1 on the computer
How to install mysql5.1 on the computer
- 藏色散人Original
- 2020-10-26 09:30:482258browse
How to install mysql5.1 on your computer: first download mysql5.1; then enter the welcome interface of the installation wizard and click "Next" directly; then select components and change the folder location; finally click Install to start the installation. Can.

Recommended: "mysql tutorial"
mysql5.1 installation illustrated tutorial
In order to build a simulation platform, I learned from mainland websites to Taiwanese websites. One of the essential items was MySQL. At that time, 5.1 was commonly used, so I was very accustomed to using MySQL 5.1 version!
The following is an installation diagram based on MySQL5.1. For download details, please see the MySQL official website: http://www.mysql.com/
or http://dev.mysql.com/downloads/mysql/
The installation wizard appears. The welcome interface is the same as other windows installation programs!
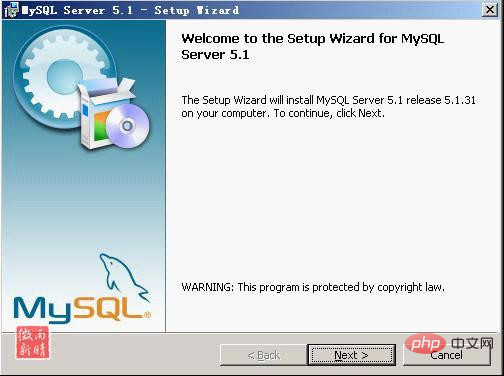
Click "Next" directly, continue, select the installation type
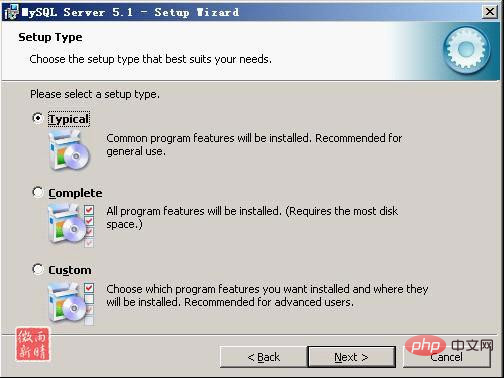
There are 3 types here: Typical ), Complete, Custom. Select "Custom" installation, (the default is Typical, it is recommended to change it to Custom, because Typical mode does not allow changing the installation path and can only be installed on the C drive.) Then click "Next" to next step, and the custom installation interface will appear.
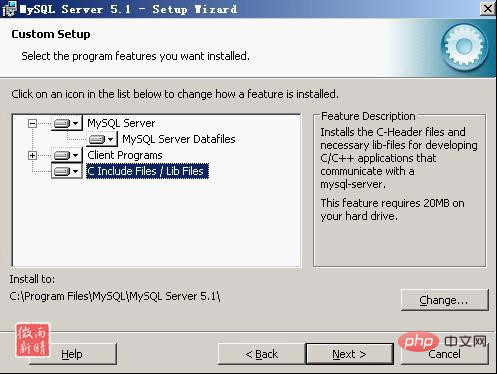
At this step, you need to select the component and change the folder location. Use the default component and select Change to change the location
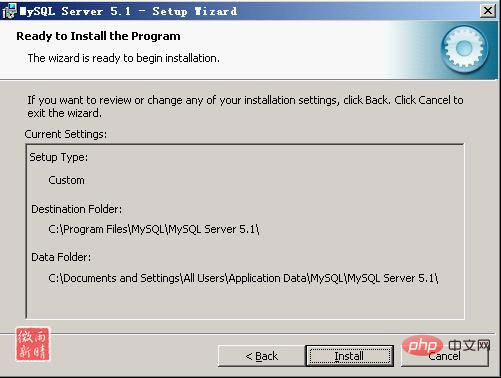
Note: The path to install mysql cannot contain Chinese characters! Everything is ready, click Install to start the installation, click "Install" to start the installation
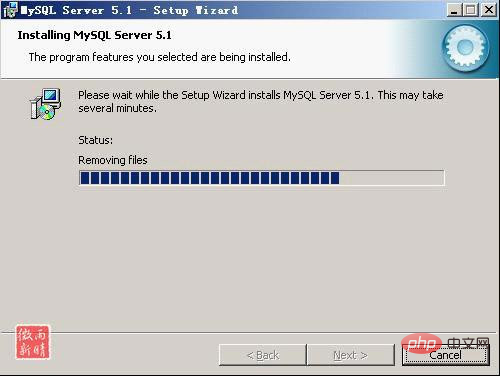
After the installation is completed, the explanation screen will appear, keep going to the next step
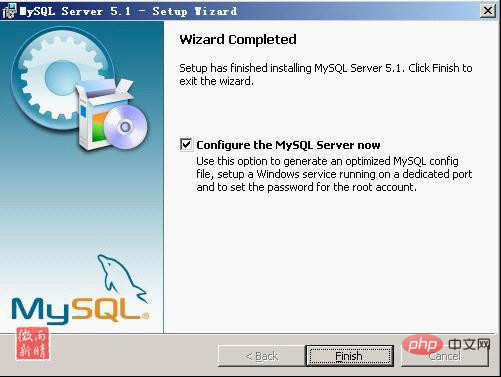
Note that there is a configuration wizard option (Configure the MySQL Server now). It is recommended to check the box to configure your MySQL immediately. Many people say that MySQL cannot be started after installing it because MySQL is not configured. Click "Finish" to complete the installation and start configuring MySQL
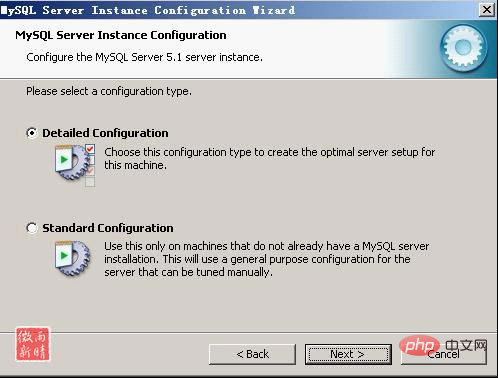
Click "Next" to enter the configuration type selection page. Select "Detailed configuration",
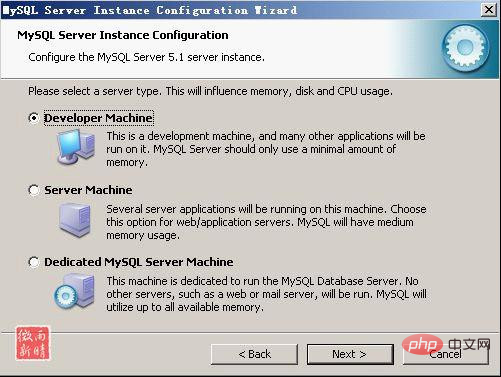
#Click "Next" to enter the service type selection page. Select "Developer Machine", which will not occupy a lot of system resources. (The first is a development server, which will use as little memory as possible, and the second is an ordinary WEB server, which will use a medium amount of memory. The last one is that this server only runs the MySQL database, which will occupy all the memory. I am just giving an example here, so I choose the development server to occupy as little memory as possible. Users can choose other options according to their own needs (Figure 11) , click Next to continue. The machine memory selects the first one)
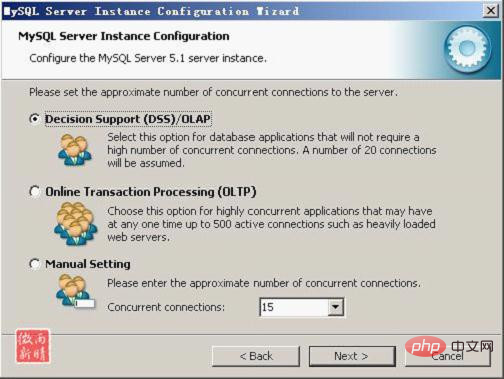
After clicking "Next", enter the database usage selection page. Select "Multifunctional Database".
The first one is multifunctional, which will optimize the database into a good innodb storage type and an efficient myisam storage type. The second one is only used for transaction processing. The best optimized innodb, but also supports myisam. The last one is a non-transaction processing type, suitable for simple applications. Only the myisam type that does not support transactions is supported. Generally choose the first multi-functional one.

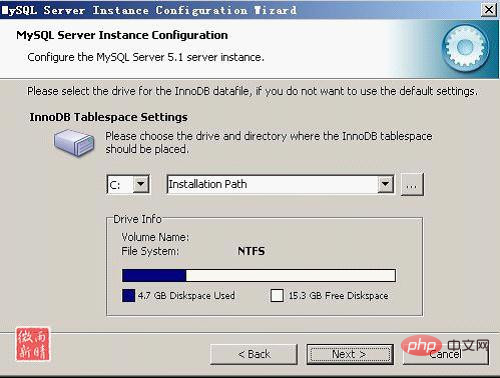
Click "Next" to enter the page for selecting the InnoDB data storage location; generally the default is fine and no need to change
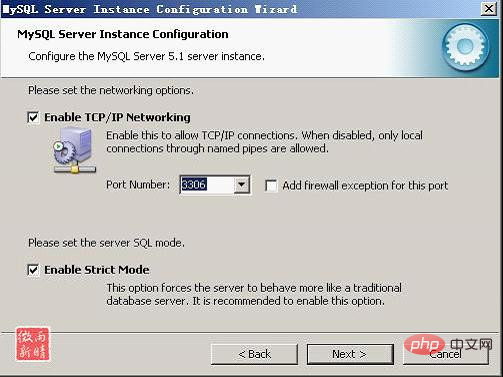
Select the default port 3306. Click "Next" and select the character settings in MySQL.
(You can also select "Enable Strict Mode" so that MySQL will not allow small syntax errors. If you are still a newbie , I recommend that you cancel the standard mode to reduce trouble. But after becoming familiar with MySQL, try to use the standard mode, because it can reduce the possibility of harmful data entering the database.)

Note , the choice here will affect whether you can use Chinese in MySQL. We choose GBK to support more character sets. Click "Next" to set Windows service options
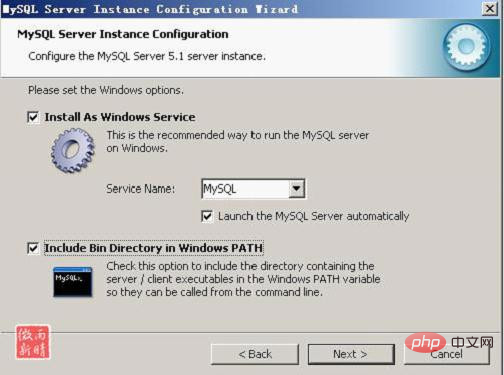
Note that the selection here is critical. "Install As Windows Service" must be checked. This is to run MySQL as a Windows service. For "Service Name", use the default "MySQL" or your favorite service name (the default "MySQL" is recommended). The "Launch the MySQL Server automatically" below must be checked, so that when Windows starts, MySQL will automatically start the service, otherwise MySQL will have to be started manually. Many people say that after installing MySQL, it cannot start, cannot connect, and a 10061 error occurs. This is the reason. Click "Next" and set the login password of the root account root
This step is whether to set mysql as a windows service. Generally, you choose to set it as a service, so that you can start and close the mysql database through the service in the future. . Recommendation: Also check the following checkbox, so that in cmd mode, you do not have to go to the bin directory of mysql to execute the command (Figure 18).
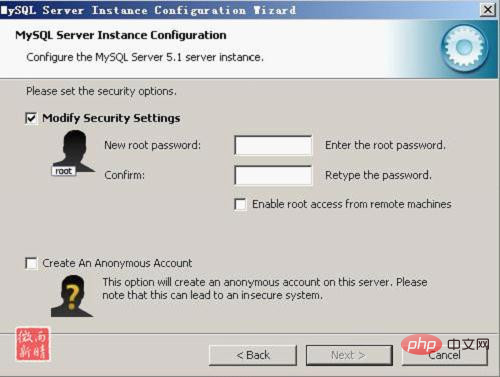
"Modify Security Settings" is to set the password for the root account. Just enter the password you set. "Create An Anonymous Account" is to create an anonymous account. This will cause unauthorized users to illegally access your database, which is a security risk. It is recommended not to check it. Click "Next", the MySQL configuration wizard will configure MySQL based on all your settings above, so that the operation of MySQL meets your needs
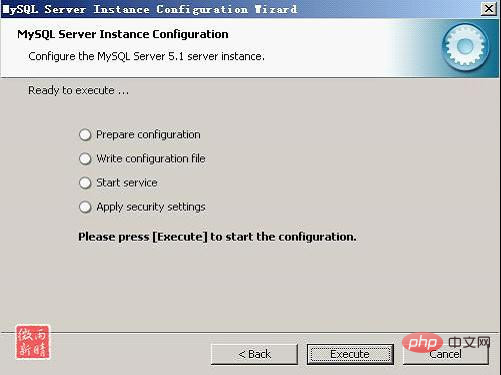
Click "Execute" to start the configuration. When "Service started successfully" appears, it means that your configuration is complete and the MySQL service is started successfully.
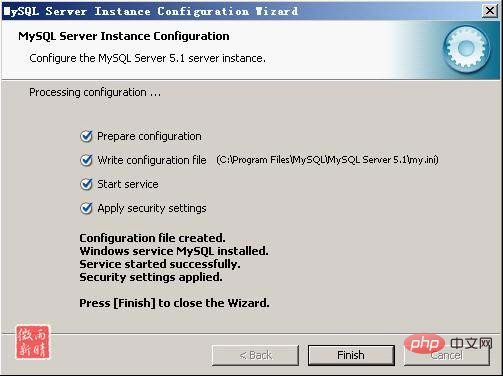
Click "Finish" to complete. The entire MySQL configuration is completed. The rest is to use The MySQL client connects to the MySQL server and then uses it.
After setting up, press "Finish" to end the installation and configuration of mysql - there is a common error here, that is, you cannot "Start service", which usually occurs on servers where mysql has been installed before. The solution , first ensure that the previously installed mysql server is completely uninstalled; if not, check whether the previous password has been modified as mentioned in the step above, and follow the above operations; if it still does not work, back up the data folder in the mysql installation directory , and then delete it. After the installation is completed, delete the data folder generated by the installation, move the backed up data folder back, and then restart the mysql service. In this case, you may need to check the database and then repair it. Prevent data errors.
Possible problems:
If in step 16, the interface you appear is like the following,
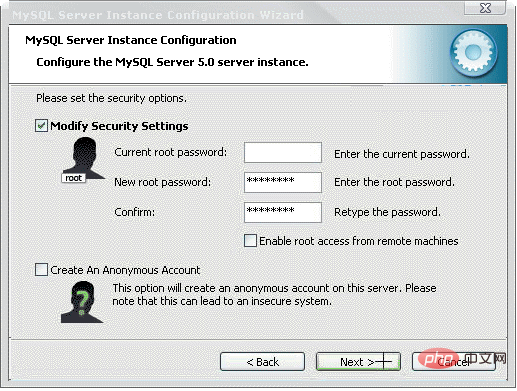
Figure 22
If there are three places to enter the password, it is possible that you installed it based on the original one. You enter the original root password in the first text box, enter the new root password in the next two text boxes, and click Next (Figure 23).
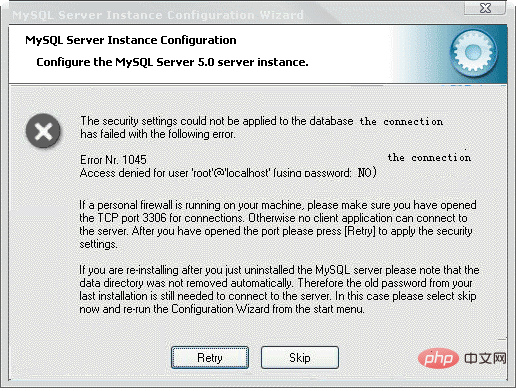
Figure 23
I recommend several solutions:
1) Click Retry and try again;
2) Run the settings again, see the option of "Remove original settings", select remove, and then reset.
3) Reinstall.
Notes on reinstallation: It is best to delete all the original files. If necessary, you can clear the registry if there are no other mysql-related programs on your machine. And be sure not to keep the original my.ini file. Another option is to delete the files in the original installation path and delete the ibdata1 file in the data directory.
Then download the Chinese version of HAP_SQLyog_Enterprise_7.14, install it and you can use it.
Reprinted from: http://blog.163.com/jiaojian_08/blog/static/13036955920101110942313/
The above is the detailed content of How to install mysql5.1 on the computer. For more information, please follow other related articles on the PHP Chinese website!

