
How to import Java files and run idea
- hzcOriginal
- 2020-06-22 17:29:2420604browse

idea How to import Java files and run them?
Usually some people in a team may use eclipse and others use intelliJ, so it is often necessary to import web projects built by others using eclipse. IntelliJ provides multiple import methods for project types, including eclipse.
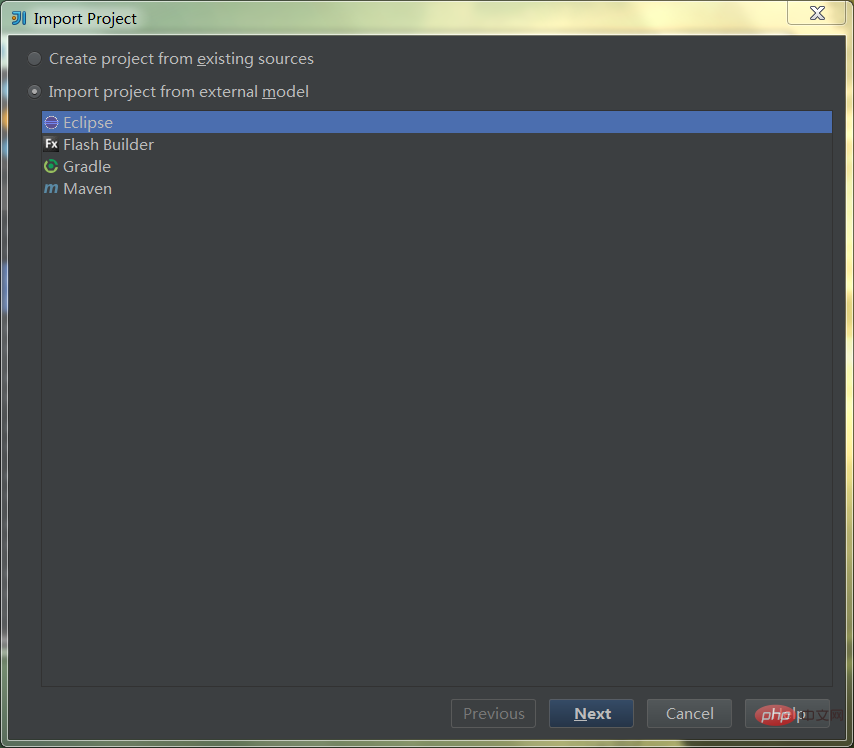
Click Import Project in the initial window, select your project in the file tree, open the import window, select the Eclipse option, click Next
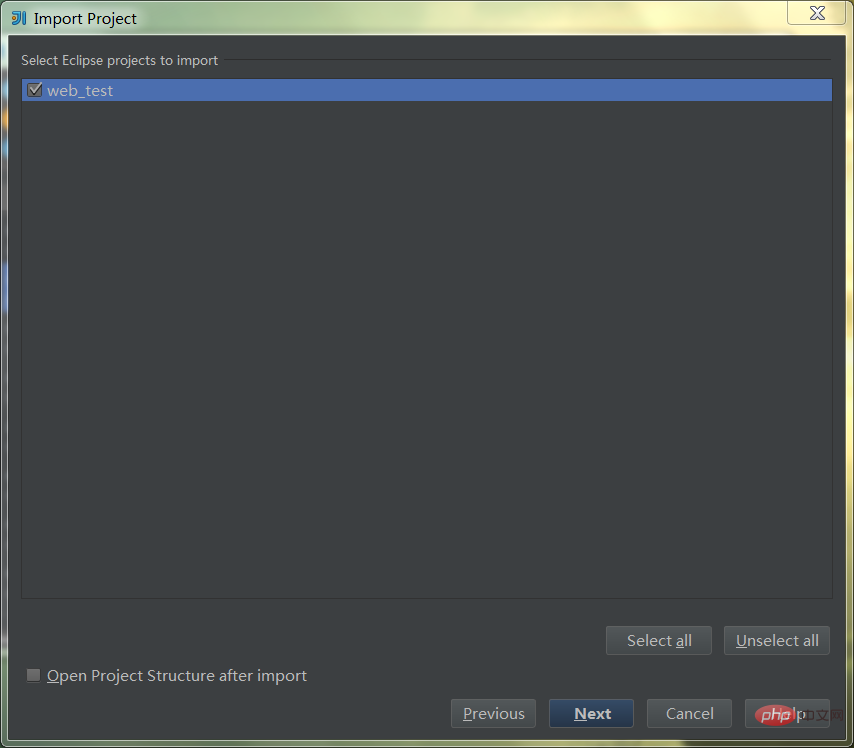
Select your project name, you can choose the one below Open Project Structure after import will open the project settings window directly after the import is completed; if not selected, it can be opened manually later, the difference is not big. Next step.
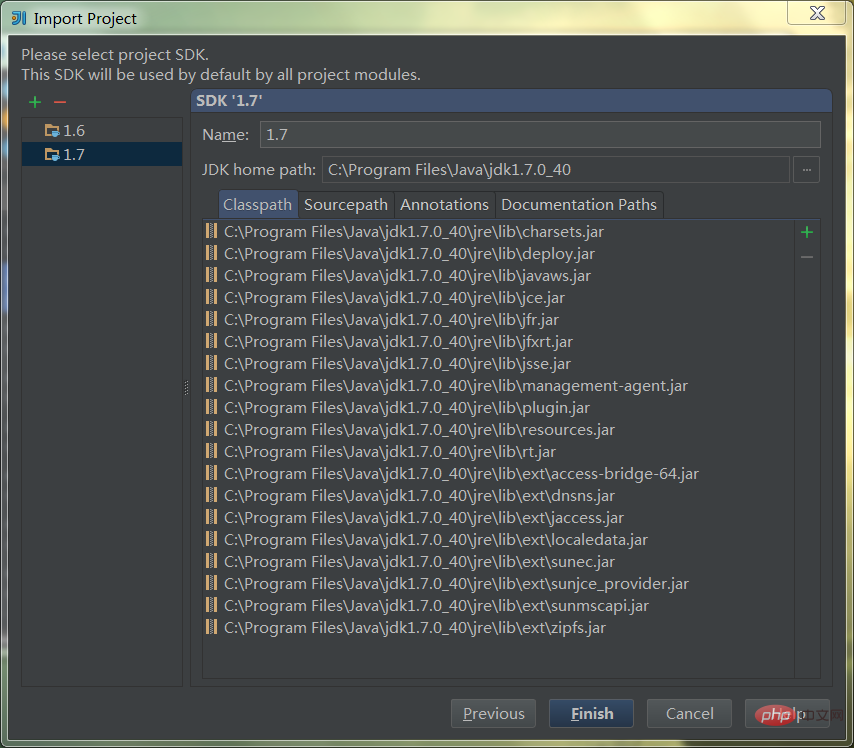
Select jdk, I have already configured it here. If not, click the number on the left to configure jdk information. Then select the jdk version you need and click Finish.
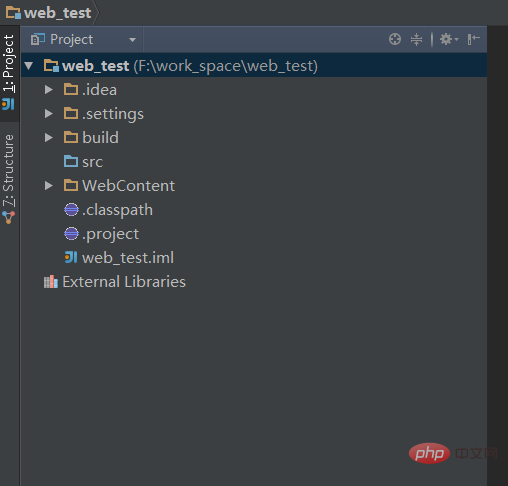
The import is complete, and the main window will open at this time, with the project directory on the left and the editing area on the right. The figure below shows the directory tree structure. It is found that the .idea directory and web_test.iml file have been generated. These are the IDE dependency files of idea.
If Open Project Structure after import were selected previously, the window below will automatically open. If there is no selection, then click on the project name and press F4 to open it. At this time we see that the highlight part is the selected jdk version. The following is the default compilation output path, but this is temporarily useless and will be overwritten later, so don't worry about it.

Select the next menu on the left side, modules, this is the concept of IDEA. Project contains modules below. Here is a sentence, many people will be confused or even despise this concept, but this concept is indeed correct. It comes from the idea of Maven. If you have seen some large open source software, the source code of open source NoSQL will know that a The project will be developed in many modules. But for regular java web, you don't have to worry about it so much. Just understand that a project is a module, and the two can be combined into one.
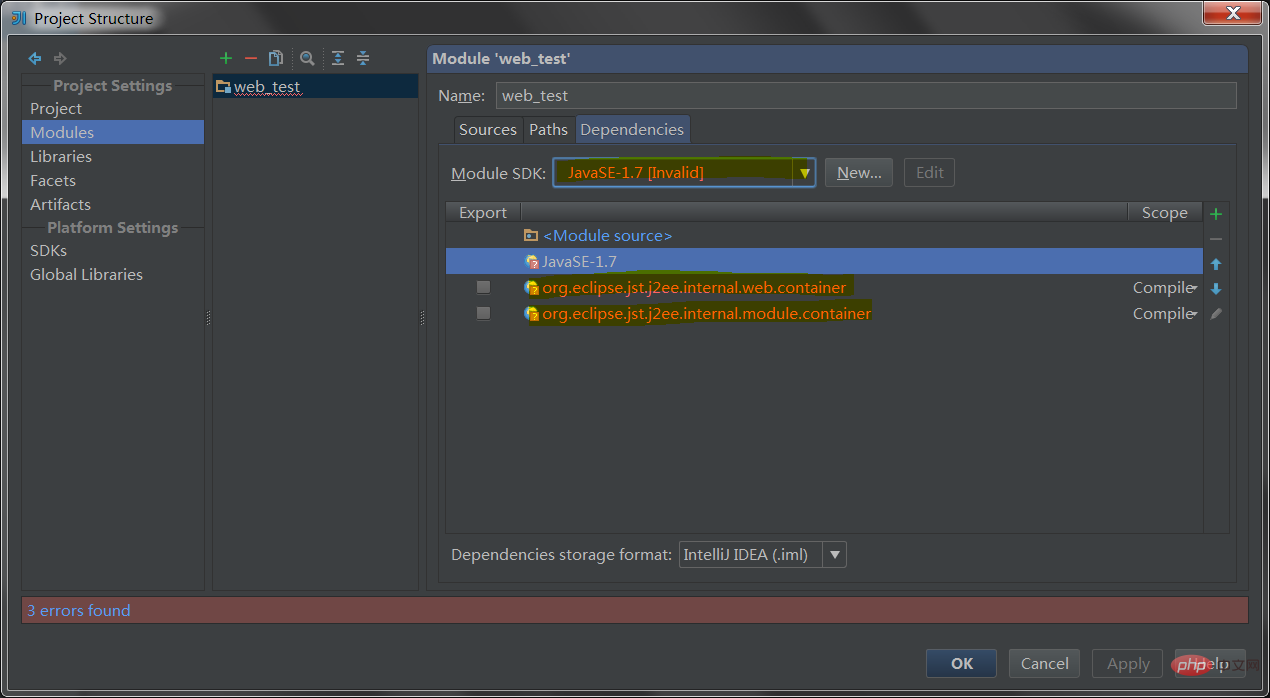
Under this menu, first click on the three horizontal tabs Dependencies on the right. Look at the picture below. 3 errors found are displayed at the bottom. In addition, I drew a few highlights with my hands. In fact, these highlights are all in red. The description does not exist in the idea. Including the SDK column and the following two jar packages, they are all read from the eclipse dependency file, so they are all deleted.
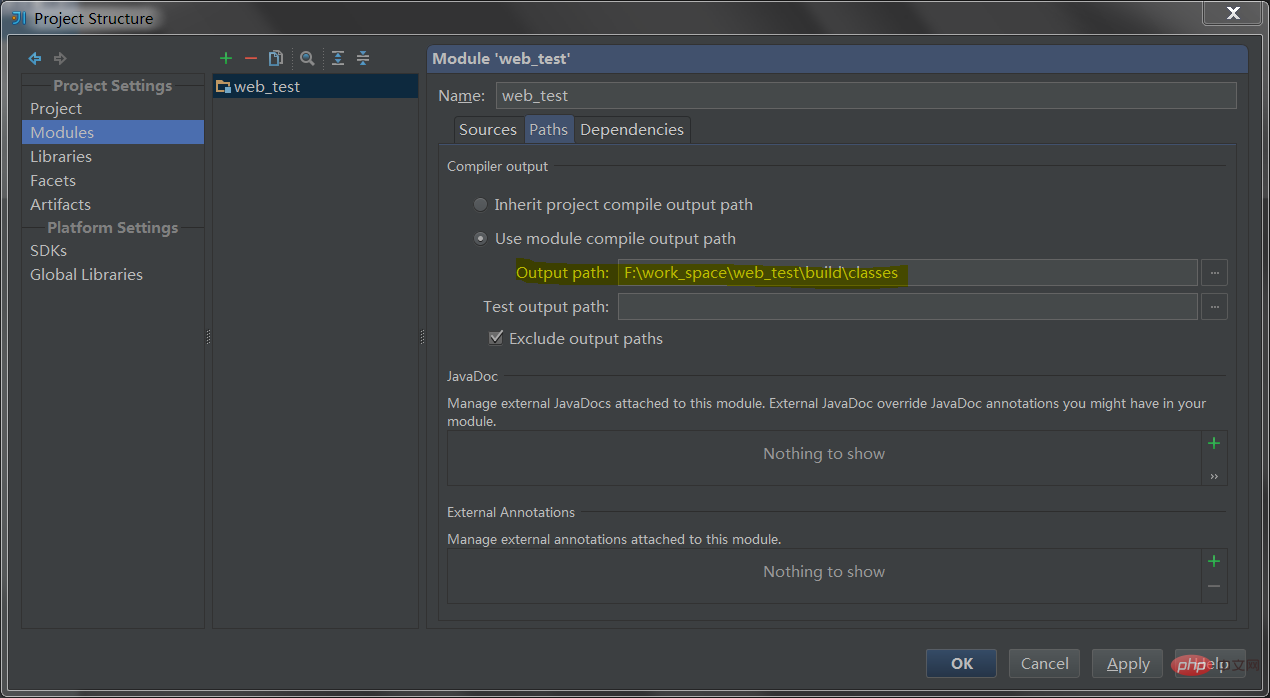
Then select the Paths of the three horizontal tabs and you will see the highlight. Here is what I said about overwriting the previous compilation output path. Of course, you can use the default and no changes are needed. The class file will be placed in the build directory at the same level as src.
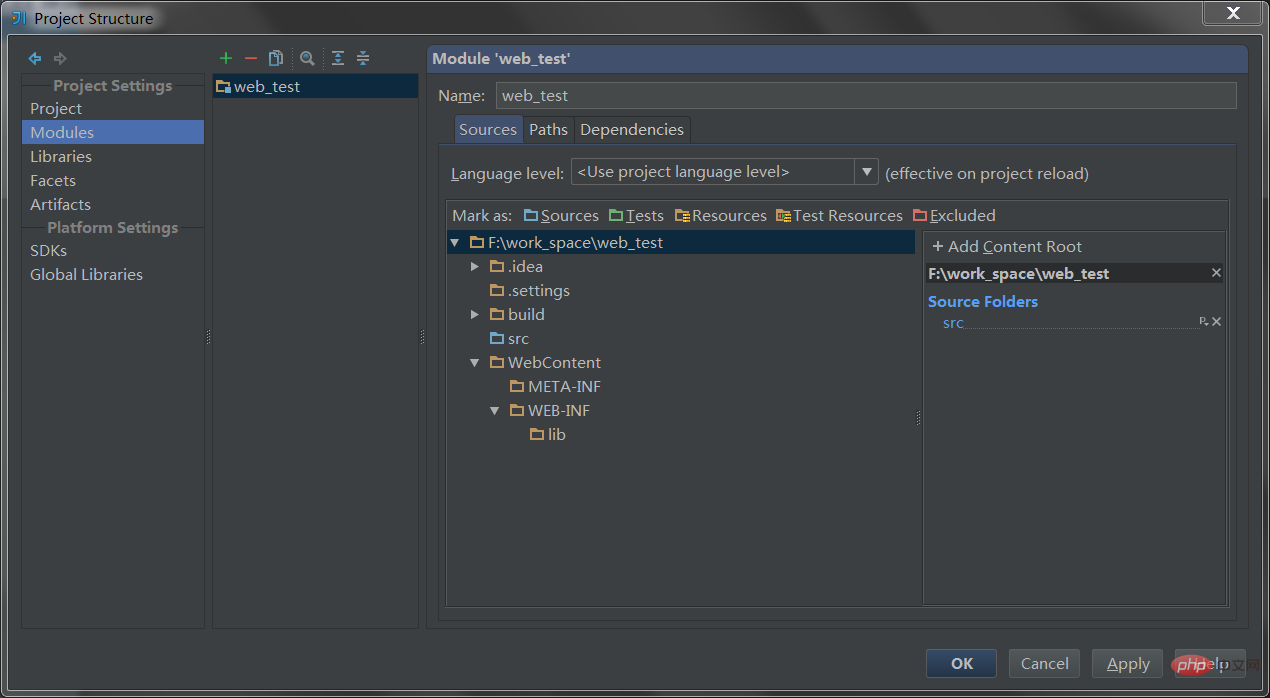
The first Sources of the three tabs is as shown below. There is no need to modify it. The roles of several directories are mainly defined here, which are identified by color. For example, src is defined as Sources by default, and the others are temporarily There are no characters. And if the project is built with maven, then Sources, Tests, Resources and Test Resources will have corresponding directories. It can be seen that idea largely relies on the idea of Maven, or that many of its underlying parts are run by Maven. Each of these different directory roles has some unique characteristics, so it doesn’t matter if you don’t figure them out. Because these directories, for eclipse, are all part of the classpath.
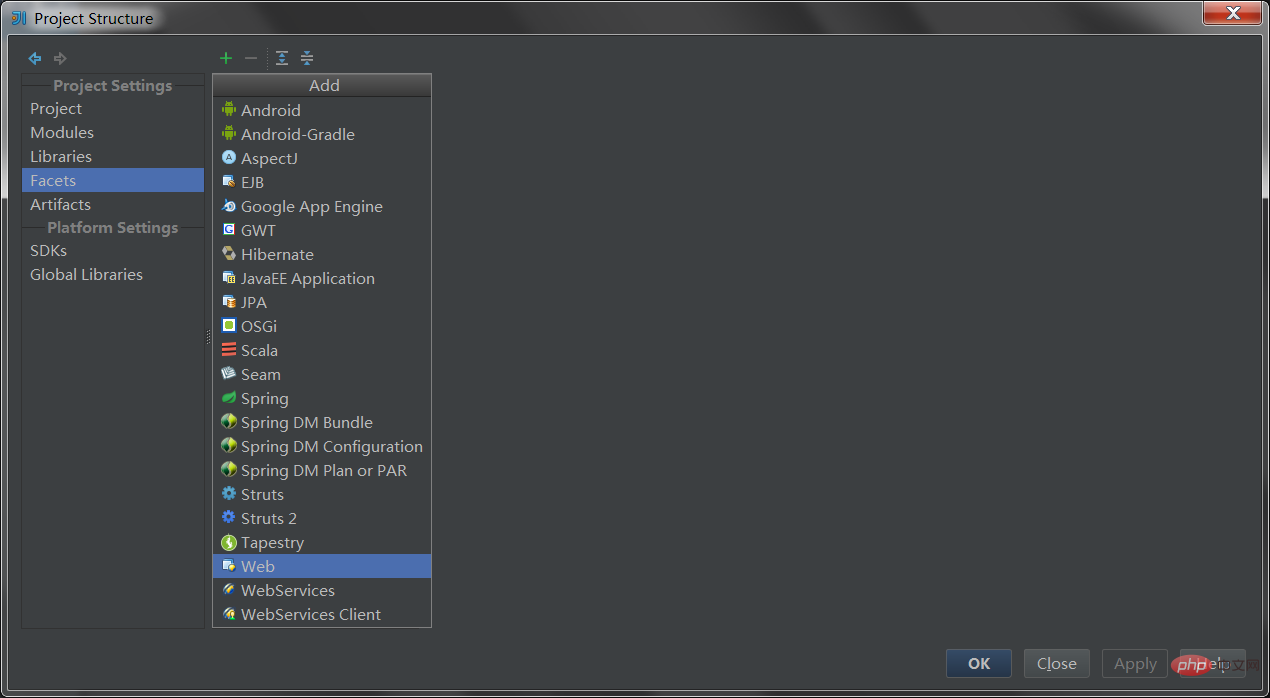
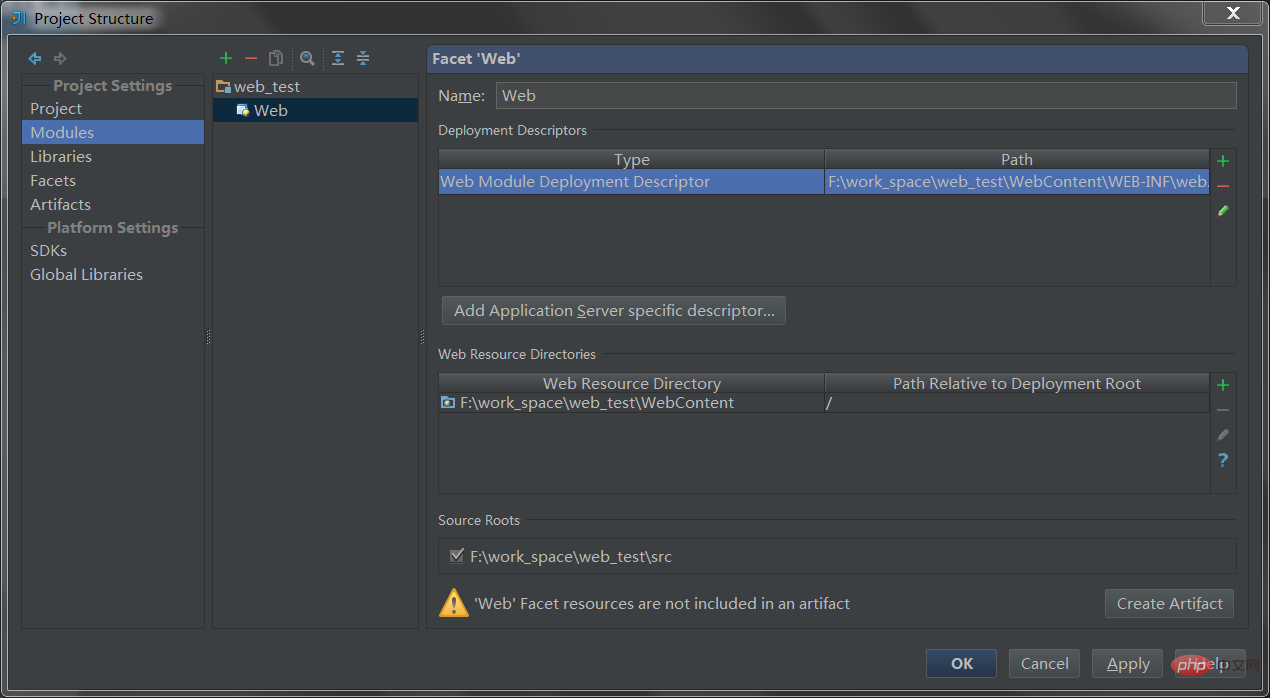
Next, select the Facets menu on the left. This concept is also available in eclipse, which is to indicate which components the project is composed of, such as web, spring, strtus, hibernate, etc. Click to make a selection, here select web.
After clicking, something interesting will happen. The menu on the left will jump to Modules, and on the right, forms related to web configuration will be displayed. Regarding the jump on the left, after configuring Facets, you will find that these configurations will exist in these two menu items, web, spring, etc. I don't quite understand why, I guess it's related to the idea of multi-modules.
In the configuration items on the right, two places are highlighted, the top is the web.xml path, and the bottom is the web root directory. This is the default path, which does not match ours and needs to be modified manually. Because idea's default web root directory name is web, not eclipse's WebContent, like MyEclipse is WebRoot.

After modification, you will see a button in the lower right corner, Create Artifact. This is another concept of maven. This Artifact refers to the directory that will be thrown into tomcat for running. It's just that it will not actually be copied to the tomcat installation directory. It just asks tomcat to find this path and run the program under the directory.
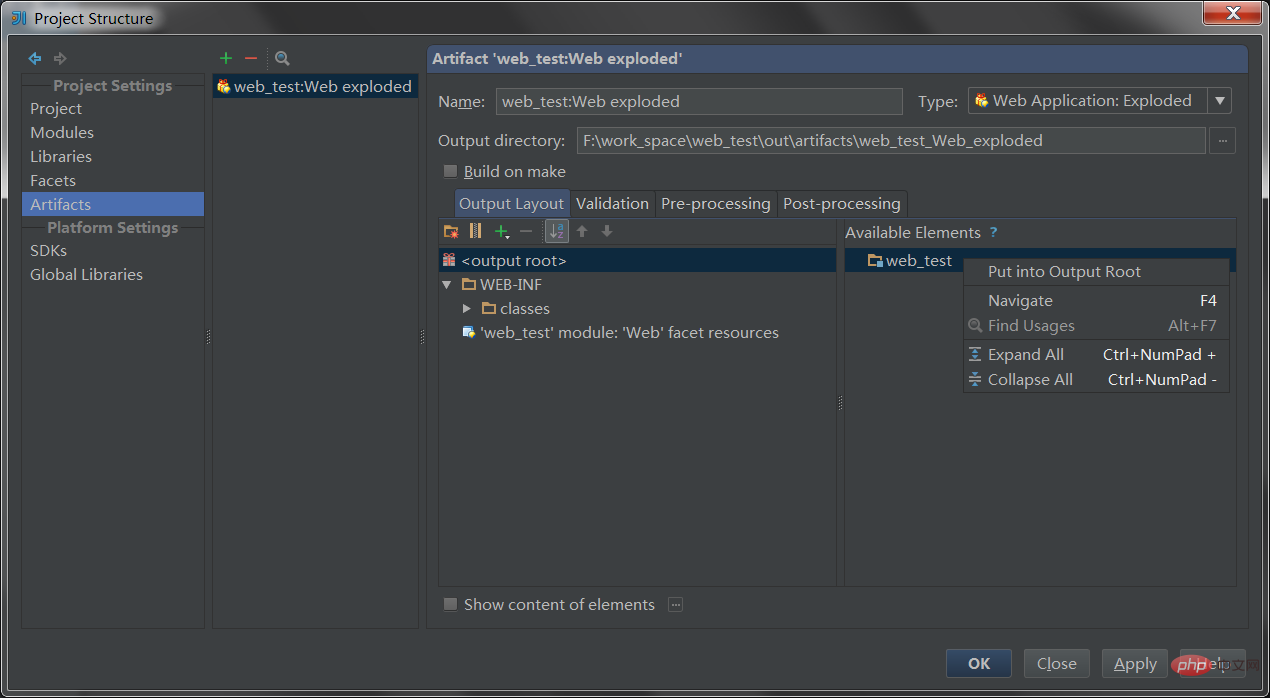
After clicking, the left side will jump to the Artifact menu, and the configuration form will be displayed on the right side. This process has the same effect as if you manually switch to the Artifact menu and then click the number to select the packaging type. The button just now is the intelligent behavior of idea.
In the form, name can be chosen casually and does not need to be modified. Type, Web Application: Exploded is a common type for web development and does not need to be modified. Output directory, the output path is the directory of this Artifact. Idea will copy all required resources, including class, lib, web directory, etc., to this directory structure in a directory structure that can be recognized by tomcat. Tomcat will directly use this directory to run the system. The default is the out directory at the same level as src. Generally there is no need to modify it.
In the area Available Elements on the right, the jar package in the lib directory is most likely to appear. I forgot to prepare the test environment here. But usually a list of jar packages will be listed. At this time, there will be a red line prompt asking you to add the jar package to the input directory structure on the left. Then select Put into Output Root in the right-click menu. This error message will disappear. but! ! I want to mention here that this step is actually invalid in the current scenario, or this error message should be ignored at all. Because you will find that even if you do not import the jar package to the left, all jar packages under lib will still be copied to the artifact directory when running. But this is not a bug in the idea. There is a reason, which I won’t go into here.
Just click OK, and the project configuration is complete. Then configure tomcat.
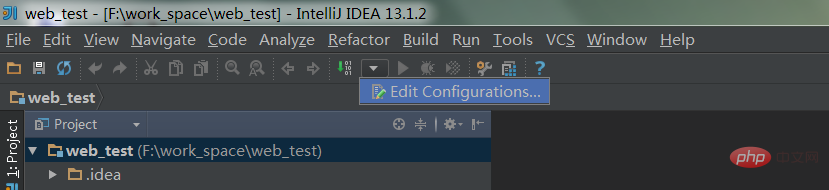
There will be a small triangle in the upper menu bar. Pull it down and select Edit Configuration
When the window pops up, press the icon to select.

After selection, open the tomcat configuration form.
Name, choose whatever you want, I usually choose tomcat5/6/7. Application Server, select a tomcat version to associate with. If it has not been associated, click Configure on the right to associate it. After launch can be checked, and the browser will be automatically opened and the specified URL will be accessed after start/restart tomcat. There is a check box related to session in the lower right corner, which can be checked. The function is that after restart, the value in the previous session can be automatically set, so you don’t need to log in again~~
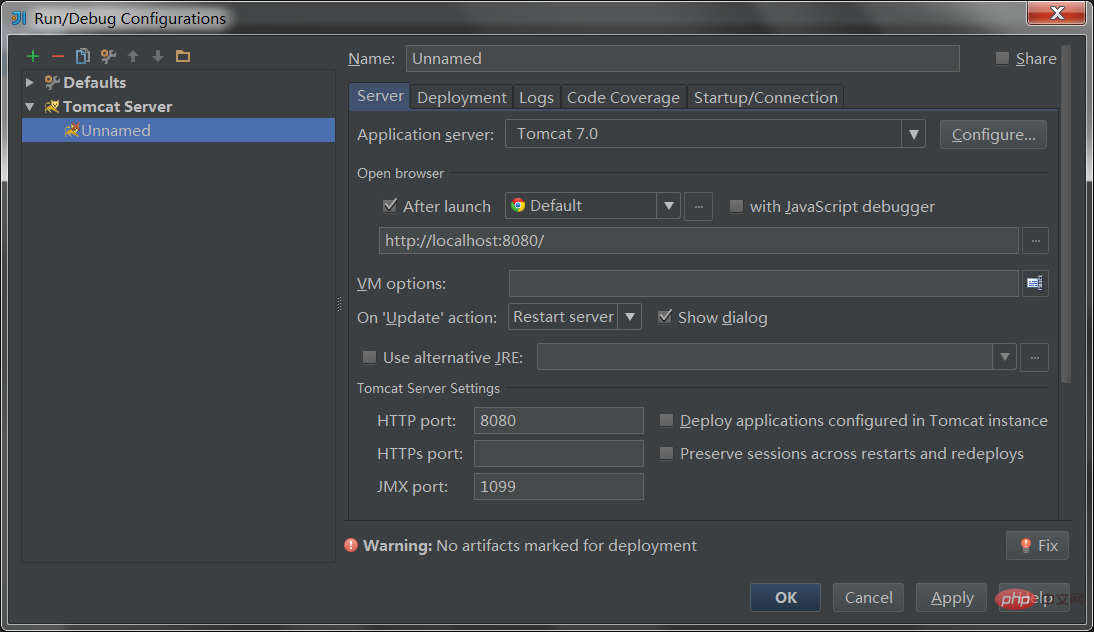
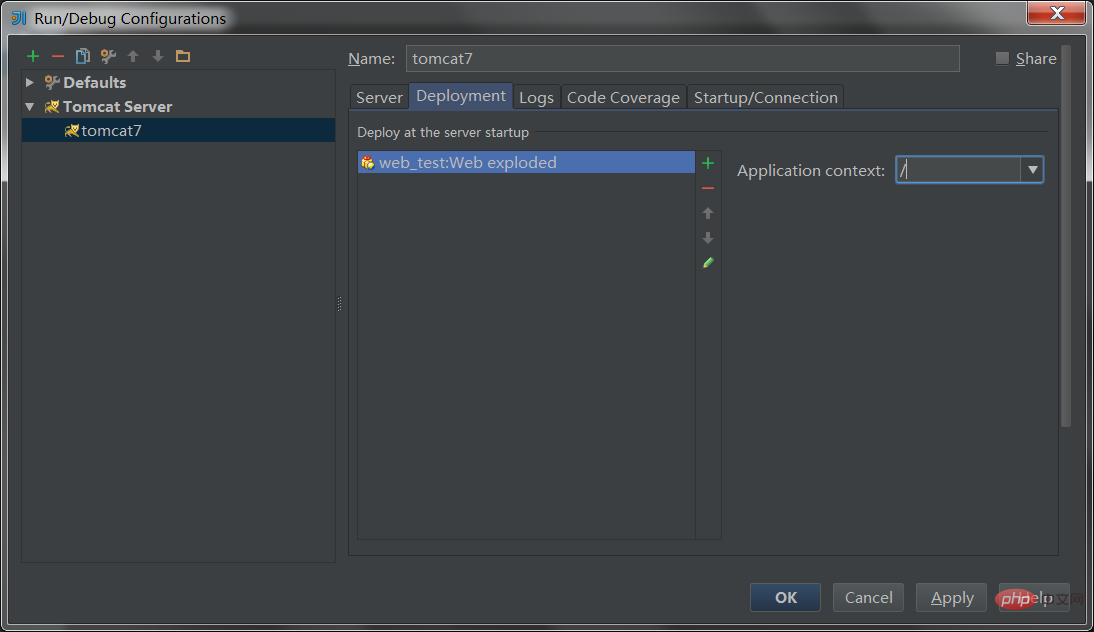
Switch to the second one Deployment tab, click the number on the right, select the first artifact, select the artifact you just created,

The Application context on the right is your url access root path, the default Yes/, which means that your URL does not contain the project name we are used to in the past. For example, if there is index.jsp under the web root, then the path is http://127.0.0.1:8080/index.jps, not http ://127.0.0.1:8080/web_test/index.jsp. Of course, out of traditional habits, you can change this item to /web_test
Click OK, and the tomcat configuration is over , and then you can start running tomcat. There will be a tomcat icon on the upper part of the interface, and run and debug icons on the right. Click to start running. Expose the run/debug Panel.
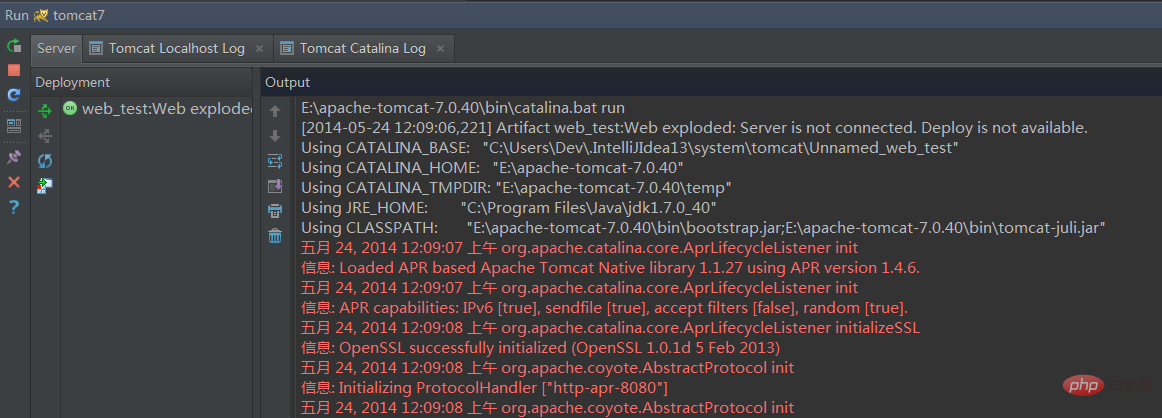
If everything in the log is normal, it means it is running. In the previous process, there are some configurations that are helpful to the development process, but they do not affect the operation, so I will not give examples one by one.
Recommended tutorial: "java tutorial"
The above is the detailed content of How to import Java files and run idea. For more information, please follow other related articles on the PHP Chinese website!