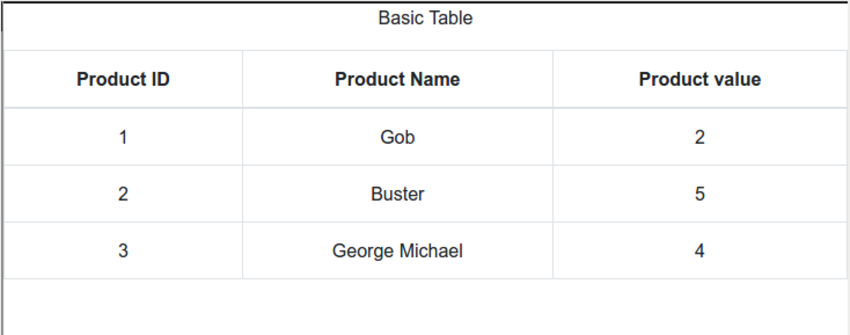
Basic operations for table layout:
Inserting tables in word is generally done through the toolbar - table. To achieve, today we will introduce another method. Quickly insert the table by entering "----- -----" and the Enter key, "----- "Press Enter to insert 1 row and 1 column, "----- ----- "Insert 1 row and 2 columns, and so on. The "-----" minus sign in the middle represents the width of the table. The longer the minus sign, the wider the table.
Press Tab after inserting a row to add rows.
The table exceeds the paper page range
When the table exceeds the paper page range, it can be automatically adjusted by right-clicking, according to the content, according to the window or fixed column width.
Sometimes the automatic adjustment cannot meet the operation requirements we need. In this case, you can adjust the table by dragging the small white square in the lower right corner of the table outside the page
Split the table
Use the Shift Ctrl Enter key combination to quickly split the table. Place the cursor in any cell where you want to split the row, and press the Shift Ctrl Enter key combination to split.

Add a fixed title row to a multi-page table
When the table in word occupies 2 or more pages, when browsing When you reach the second page, the table has no title row. To facilitate browsing, you can add a fixed title row so that each page has a fixed title row. When the table adds content later, a fixed title row will be automatically generated. Click Table Tools - Layout - Repeat Title Row.
For more Word related technical articles, please visit the Word Tutorial column to learn!
The above is the detailed content of Basic operations of table layout. For more information, please follow other related articles on the PHP Chinese website!
 如何使用 JavaScript 实现表格列宽拖拽调整功能?Oct 21, 2023 am 08:14 AM
如何使用JavaScript实现表格列宽拖拽调整功能?随着Web技术的发展,越来越多的数据以表格的形式展示在网页上。然而,有时候表格的列宽并不能满足我们的需求,可能会出现内容溢出或者宽度不足的情况。为了解决这个问题,我们可以使用JavaScript实现表格的列宽拖拽调整功能,使用户可以根据需求自由调整列宽。实现表格列宽拖拽调整功能,需要以下三个主
 css怎么去掉表格重复的边框Sep 29, 2021 pm 06:05 PM
在css中,可以使用border-collapse属性来去掉表格中重复的边框,该属性可以设置表格边框是折叠为单一边框还是分开的,只需要将值设置为collapse即可把重叠的边框合并在一起,成为一个边框,实现单线边框的效果。
 表格有一条虚线外打印不到怎么办Mar 28, 2023 am 11:38 AM
表格有一条虚线外打印不到的解决办法:1、打开excel文件,在打开的页面中点击“打印”;2、在预览页找到“无缩放”,选择调整为一页;3、选择打印机打印文档即可。
 Vue中如何实现表格数据的导出和导入Oct 15, 2023 am 08:30 AM
Vue中如何实现表格数据的导出和导入,需要具体代码示例在使用Vue开发的Web项目中,经常会遇到需要将表格数据导出为Excel或导入Excel文件的需求。本文将介绍如何使用Vue来实现表格数据的导出和导入功能,并提供具体的代码示例。一、表格数据的导出安装依赖首先,我们需要安装一些依赖,用于导出Excel文件。在Vue项目中的命令行中运行以下命令:npmin
 使用JavaScript实现表格筛选功能Aug 10, 2023 pm 09:51 PM
使用JavaScript实现表格筛选功能随着互联网技术的不断发展,表格成为了网页中常见的展示数据的方式。然而,当数据量庞大时,用户往往会面临找到特定数据的困难。因此,为表格添加筛选功能,让用户可以快速找到所需的数据,成为了很多网页设计的需求。本文将介绍如何使用JavaScript实现表格筛选功能。首先,我们需要有一份表格数据。下面是一个简单的例子:<t
 如何使用 JavaScript 实现表格分页功能?Oct 20, 2023 pm 06:19 PM
如何使用JavaScript实现表格分页功能?随着互联网的发展,越来越多的网站都会使用表格来展示数据。在一些数据量较大的情况下,需要将数据进行分页展示,以提升用户体验。本文将介绍如何使用JavaScript实现表格分页功能,并提供具体的代码示例。一、HTML结构首先,我们需要准备一个HTML结构来承载表格和分页按钮。我们可以使用<tab
 Vue文档中的表格勾选和全选函数操作方法Jun 20, 2023 pm 10:33 PM
Vue是一种流行的JavaScript框架,它可以让开发人员轻松地构建交互式、响应式的Web界面。Vue框架提供了一系列的组件和指令,用于构建常见的页面元素,如表格、表单、菜单等。在这篇文章中,我们将探讨Vue文档中的表格勾选和全选函数操作方法。在Vue中,我们可以使用v-model指令将表单元素与Vue实例中的数据进行双向绑定。这使得我们可以轻松地收集用户
 React中使用表格:第一部分Sep 04, 2023 pm 07:21 PM
用于呈现数据的最常见的用户界面元素之一是表格。事实证明,使用表格时需要控制很多方面,例如:定义列和标题各种单元格格式(文本、数字、复选框)调整大小过滤动态成长样式在这个由两部分组成的系列中,您将了解使用ReactBootstrapTable组件在React中处理表格数据的细节。您将能够轻松创建复杂且具有专业外观的表格,并且能够自定义各个方面。开始使用 首先,您应该熟悉React本身。如果您需要React入门知识,EnvatoTuts+有一个很棒的系列可以帮助您开始使用React。在本教程中,我们


Hot AI Tools

Undresser.AI Undress
AI-powered app for creating realistic nude photos

AI Clothes Remover
Online AI tool for removing clothes from photos.

Undress AI Tool
Undress images for free

Clothoff.io
AI clothes remover

AI Hentai Generator
Generate AI Hentai for free.

Hot Article

Hot Tools

MinGW - Minimalist GNU for Windows
This project is in the process of being migrated to osdn.net/projects/mingw, you can continue to follow us there. MinGW: A native Windows port of the GNU Compiler Collection (GCC), freely distributable import libraries and header files for building native Windows applications; includes extensions to the MSVC runtime to support C99 functionality. All MinGW software can run on 64-bit Windows platforms.

DVWA
Damn Vulnerable Web App (DVWA) is a PHP/MySQL web application that is very vulnerable. Its main goals are to be an aid for security professionals to test their skills and tools in a legal environment, to help web developers better understand the process of securing web applications, and to help teachers/students teach/learn in a classroom environment Web application security. The goal of DVWA is to practice some of the most common web vulnerabilities through a simple and straightforward interface, with varying degrees of difficulty. Please note that this software

SecLists
SecLists is the ultimate security tester's companion. It is a collection of various types of lists that are frequently used during security assessments, all in one place. SecLists helps make security testing more efficient and productive by conveniently providing all the lists a security tester might need. List types include usernames, passwords, URLs, fuzzing payloads, sensitive data patterns, web shells, and more. The tester can simply pull this repository onto a new test machine and he will have access to every type of list he needs.

WebStorm Mac version
Useful JavaScript development tools

SublimeText3 Linux new version
SublimeText3 Linux latest version


