


本文以Vue的创建为例,不过这个Vue是在HTML中创建的。
初学Vue,我们一般都是在.html文件中引入vue包,然后编写自己的vue代码。
因为我们创建的模板是在.html文件下,所以我们的模板也得是在html.json中来进行编写。
具体方法如下:
1、在Vscode中找到设置 -> 用户代码片段,在输入框内输入html,并点击第一个html.json:

初次输入的话,第一个html.json可能会不带.json后缀,不用管,直接点击html进入即可。
2、进入到html.json页面,这里就是我们编写自己模板的地方

接下里就是编写我们的模板了,我们的模板需要的大致有以下几项:
1、基本的HTML架构。
2、引入Vue包的script路径。
3、一些基本的Vue代码结构。
模板我已经备好了,模板如下:
"Html5-Vue": {
"prefix": "vue",
"body": [
"<!DOCTYPE html>",
"<html lang=\"zh-CN\">\n",
"<head>",
"\t<meta charset=\"UTF-8\">",
"\t<meta name=\"viewport\" content=\"width=device-width, initial-scale=1.0\">",
"\t<meta http-equiv=\"X-UA-Compatible\" content=\"ie=edge\">",
"\t<title>Document</title>",
"\t<script src=\"../lib/vue-2.5.17/vue.js\"></script>",
"</head>\n",
"<body>",
"\t<div id=\"app\">$1</div>\n",
"\t<script>",
"\t\tvar vm = new Vue({",
"\t\t\tel: '#app',",
"\t\t\tdata: {},",
"\t\t\tmethods: {}",
"\t\t});",
"\t</script>",
"</body>\n",
"</html>"
],
"description": "快速创建在html5编写的vue模板"
}4、把上面的这个模板拷贝到html.json中即可,当然路径要变成自己的本机路径,其余的地方如果看着不舒服也可以自行更改。
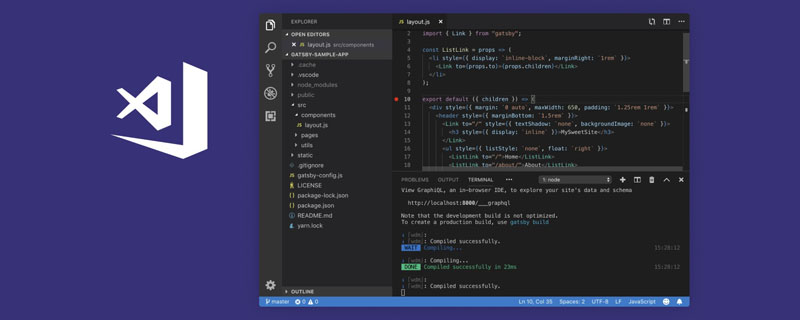
5、保存之后,我们创建一个.html文件,输入vue,回车即可自动生成我们需要的模板了。模板示例图:


必要的说明:
为了防止大家更改模板时出现不必要的错误,我给大家简单说一下模板中的东西:
不要纠结一开头写的:"Html5-Vue",这只是一个模板名字而已。
"prefix": ""这里规定的是触发模板的关键词,我这里规定触发词为vue。
我们的模板都是在"body":[]中编写的。
每一行模板代码都要用双引号""来包括。
如果双引号包括的代码中间也出现了双引号,那么需要用转义字符\转义。
\n意味着换行,\t是制表符,这两个用于生成时模板的缩进,让生成出来的模板便于阅读。
模板中出现的$1代表着光标,它的位置即光标的默认位置,可以有多个光标:$2,$3,$4等。
"description":""双引号包括的是对模板描述,同时也是你在.html页面输入触发词后,智能提示中出现的对触发词的解释。
千万别把Vscode中html.json文件自带的{}覆盖了,只需覆盖注释部分,或直接写到注释下面即可。
相关文章教程推荐:vscode教程
The above is the detailed content of How to create a custom code template in vscode. For more information, please follow other related articles on the PHP Chinese website!

 手把手带你会习VSCode debug,不信你还不会!Mar 31, 2022 pm 08:45 PM
2022年了,该学会用VSCode debug了!下面本篇文章手把手带大家会习VSCode debug,希望对大家有所帮助!

 手把手带你在VSCode中配置 Geant4 和 RootApr 25, 2022 pm 08:57 PM
本篇是VSCode配置文章,手把手教大家怎么在VSCode中配置使用 Geant4 和 Root,希望对大家有所帮助!
 扒一扒vscode Prettier选项中的16个实用属性,让代码变美!May 03, 2022 am 10:00 AM
本篇文章扒拉一下vscode Prettier的选项,总结分享16个让你的代码变漂亮的属性,希望对大家有所帮助!
 总结分享12个好玩有趣的 VSCODE 插件May 27, 2022 am 11:06 AM
“工欲善其事,必先利其器!”,vscode作为前端开发的重要工具,其插件能大幅提升战斗力,精心收集12个插件,总有几款你还未曾拥有。
 VSCode中如何开发uni-app?(教程分享)May 13, 2022 pm 08:11 PM
VSCode中如何开发uni-app?下面本篇文章给大家分享一下VSCode中开发uni-app的教程,这可能是最好、最详细的教程了。快来看看!
 手把手教你在VScode中配置C/C++环境(Win下)Oct 10, 2022 pm 06:52 PM
VScode中怎么开发置C/C++?怎么配置C/C++环境?下面本篇文章给大家分享一下Windows系统下VScode配置C/C++环境图文教程,希望对大家有所帮助!


Hot AI Tools

Undresser.AI Undress
AI-powered app for creating realistic nude photos

AI Clothes Remover
Online AI tool for removing clothes from photos.

Undress AI Tool
Undress images for free

Clothoff.io
AI clothes remover

AI Hentai Generator
Generate AI Hentai for free.

Hot Article
Hot Tools

Dreamweaver Mac version
Visual web development tools

SAP NetWeaver Server Adapter for Eclipse
Integrate Eclipse with SAP NetWeaver application server.

Atom editor mac version download
The most popular open source editor

VSCode Windows 64-bit Download
A free and powerful IDE editor launched by Microsoft

SublimeText3 Chinese version
Chinese version, very easy to use

