psHow to repair hair?
Use the surface blur filter to modify messy hair in Photoshop. The specific steps are as follows:
1. Create a new layer
Drag the layer above directly Go to the New Layer button, or press Ctrl J to create a new layer, which will preserve the previous operations. Convert the new layer to a smart object by selecting "Layer > Smart Object > Convert to Smart Object".


The above is the detailed content of How to repair hair in ps. For more information, please follow other related articles on the PHP Chinese website!
 ps序列号cs5永久免费2020Jul 13, 2023 am 10:06 AM
ps序列号cs5永久免费2020有:1、1330-1384-7388-4265-2355-8589(中文);2、1330-1409-7892-5799-0412-7680(中文);3、1330-1616-1993-8375-9492-6951(中文);4、1330-1971-2669-5043-0398-7801(中文)等。
 ps如何删除选中区域Aug 07, 2023 pm 01:46 PM
ps删除选中区域的步骤:1、打开想要编辑的图片;2、使用合适的工具创建选区;3、可以使用多种方法删除选区中的内容,使用“删除”键、使用“修复画笔工具”、使用“内容感知填充”、使用“图章工具”等;4、使用工具来修复任何明显的痕迹或缺陷,使图片看起来更自然;5、完成编辑后,点击菜单栏中的“文件”>“保存”来保存编辑结果。
 ps安装无法写入注册表值错误160怎么办Mar 22, 2023 pm 02:33 PM
ps安装无法写入注册表值错误160的解决办法:1、查看电脑中是否有2345的软件,若有则卸载该软件;2、按“Win+R”输入“Regedit”打开系统注册表,然后找到“Photoshop.exe”并将Photoshop项删除即可。
 PS的界面字体太小怎么办Dec 01, 2022 am 11:31 AM
PS的界面字体太小的修改方法:1、打开ps,点击ps顶部菜单栏上的“编辑”按钮展开编辑菜单;2、在展开的编辑菜单中点击“首选项”按钮,然后点击“界面...”按钮;3、在界面设置中将用户界面字体大小设置为“大”,将UI缩放设置为“200%”并保存设置,然后将ps重启即可生效。
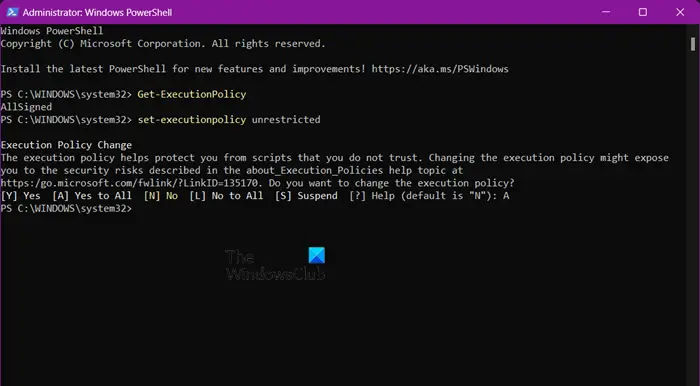
 如何使用PowerShell自动执行任务Feb 20, 2024 pm 01:51 PM
如果您是IT管理员或技术专家,您一定意识到自动化的重要性。尤其对于Windows用户来说,MicrosoftPowerShell是最佳的自动化工具之一。微软为满足您的自动化需求提供了各种工具,无需安装第三方应用程序。本指南将详细介绍如何利用PowerShell自动化执行任务。什么是PowerShell脚本?如果您有使用PowerShell的经验,您可能已经使用过命令来配置您的操作系统。脚本是.ps1文件中这些命令的集合。.ps1文件包含由PowerShell执行的脚本,例如基本的Get-Help
 无法使用PS快捷键进行填充Feb 19, 2024 am 09:18 AM
随着数字时代的发展,图像处理软件成为我们生活和工作中不可或缺的一部分。其中,Adobe公司开发的Photoshop(简称PS)是最著名的图像处理软件之一,其功能强大,操作灵活,深受用户的喜爱。然而,使用PS时,有些用户反映快捷键“填充”(Fill)无法正常使用的问题,给用户的使用体验带来了困扰。快捷键是软件中提供的一种快速操作的方式,避免繁琐的鼠标点击操作,
 ps曲线快捷键是什么Aug 22, 2023 am 10:44 AM
ps曲线快捷键是Ctrl+M,其他曲线快捷键:1、转换为点控制曲线,Alt+Shift+Ctrl+T;2、自动对齐曲线,Alt+Shift+Ctrl+O;3、恢复默认曲线,Ctrl+Alt+Shift+R;4、复制曲线,Ctrl+Alt+Shift+C;5、粘贴曲线,Ctrl+Alt+Shift+V;6、调整曲线斜率,Shift+上下箭头;7、调整曲线亮度,Shift+左右箭头
 PS复制图层快捷键Feb 23, 2024 pm 02:34 PM
在PS复制图层快捷键中,我们可以知道使用PS的时候如果想要进行复制图层的操作,可以使用到快捷键【Ctrl+J】进行快速复制。这篇复制图层快捷键的介绍就能够告诉大家具体的操作方法,下面就是详细的内容,赶紧看看吧。PS复制图层快捷键答:【Ctrl+J】具体方法:1、在ps中打开图像,选中需要复制的图层。2、键盘同时按下【Ctrl+J】,即可完成对图层的复制。其他复制方式:1、打开图像后,按住图层,向下放【新建图层】图标移动。2、移动到该图标上后,松手。3、即可完成图层复制。


Hot AI Tools

Undresser.AI Undress
AI-powered app for creating realistic nude photos

AI Clothes Remover
Online AI tool for removing clothes from photos.

Undress AI Tool
Undress images for free

Clothoff.io
AI clothes remover

AI Hentai Generator
Generate AI Hentai for free.

Hot Article

Hot Tools

EditPlus Chinese cracked version
Small size, syntax highlighting, does not support code prompt function

ZendStudio 13.5.1 Mac
Powerful PHP integrated development environment

VSCode Windows 64-bit Download
A free and powerful IDE editor launched by Microsoft

SublimeText3 Mac version
God-level code editing software (SublimeText3)

Dreamweaver Mac version
Visual web development tools


