


Concept
Split a large single application and service into several or even dozens Each supports microservices, which scales individual components rather than the entire application stack to meet service level agreements.
The traditional development model is to put all functions in one package, with basically no dependencies. The advantages of this are simple development, centralized management, functions are all local, and there is no distributed management and scheduling. consumption. But the shortcomings are also obvious: low efficiency, developers all change code in the same project, waiting for each other, and conflicts continue. Poor stability, a small problem may cause the entire application to hang up. In addition, there are obvious disadvantages in resource utilization. For example, in the e-commerce Double 11 promotion scenario, the pressure to place an order is very high and the pressure to evaluate is relatively small. So we hope to temporarily increase the allocation to cope with the large process of Double 11, and we can only increase all the resources. allocation, rather than just adding additional allocations to order services at a fixed point. Therefore, the microservice architecture has gradually become popular and applied to large website platforms.
Recommended: "Yii2.0 Framework Introduction and Practical Project Development Video Tutorial"
So introduce today’s topic, how to do microservices in Yii ? Yii can be used easily without the features included in the basic and advanced templates. In other words, Yii is already a micro-framework. The directory structure provided by the template is not required to work with Yii.
Installing Yii
Create a directory for your project and change the working directory to that path. The commands used in the examples are Unix-based, but similar commands exist in Windows.
mkdir micro-app
cd micro-app
Note: Some Composer knowledge is required to proceed. If you don't know how to use composer yet, take some time to read the Composer guide.
Use your favorite editor to create a composer.json file in the micro-app directory and add the following content:
{
    "require": {
        "yiisoft/yii2": "~2.0.0"
    },
    "repositories": [
        {
            "type": "composer",
            "url": "https://asset-packagist.org"
        }
    ]
}
Save the file and run composer install Order. This will install the framework and all its dependencies.
Create project structure
After installing the framework, you need to create an entry point for this application. The entry point is the first file that will be executed when you try to open the application. For security reasons, it is recommended to place the entry point file in a separate directory and set it to the web root.
Create a web directory and place index.php in it with the following content:
<?php // comment out the following two lines when deployed to production defined('YII_DEBUG') or define('YII_DEBUG', true); defined('YII_ENV') or define('YII_ENV', 'dev'); require(__DIR__ . '/../vendor/autoload.php'); require(__DIR__ . '/../vendor/yiisoft/yii2/Yii.php'); $config = require __DIR__ . '/../config.php'; (new yii\web\Application($config))->run();
Also create a file called config.php which will contain all application configuration:
<?php
return [
'id' => 'micro-app',
//设置`micro-app`的根目录
'basePath' => __DIR__,
// 控制器所在目录。
'controllerNamespace' => 'micro\controllers',
// 设置命名空间为 micro
'aliases' => [
'@micro' => __DIR__,
],
//默认访问地址
'defaultRoute' => 'home/index',
'components' => [
//请求配置
'request' => [
'cookieValidationKey' => 'test&123456',
'parsers' => [
'application/json' => 'yii\web\JsonParser',
]
],
//Url 美化
'urlManager' => [
'enablePrettyUrl' => true,
'showScriptName' => false,
'enableStrictParsing' => false,
'rules' => [
'<controller:\w+>/<action:\w+>/<id:\w+>' => '<controller>/<action>',
],
],
//数据库配置
'db' => [
'class' => 'yii\db\Connection',
'dsn' => 'mysql:host=localhost;dbname=micro',
'username' => 'root',
'password' => '数据库密码',
'charset' => 'utf8',
],
],
];Info: Although the configuration can be saved in the index.php file, it is recommended to use it separately. This way it can also be used in console applications as shown below.
Your project is now ready for coding. Although it's up to you to decide the project directory structure, as long as you respect namespaces.
Create the first controller
Before creating the controller, create a controllers/base directory and create a base controller BaseController.
<?php
namespace micro\controllers\base;

use yii\web\Controller;

class BaseController extends Controller
{
    //关闭 csrf 验证
    public $enableCsrfValidation = false;
}
Then create a new SiteController.php under the controller folder. This is the default controller that will handle requests without path information.
<?php
namespace micro\controllers;
use yii\web\Controller;
class HomeController extends BaseController
{
public function actionIndex()
{
return '欢迎来到 Yii2.0 微服务!';
}
}If you want to use a different name for this controller, you can configure yii\base\Application::$defaultRoute to change it. For example, for HomeController it would be 'defaultRoute' => 'home/index'.
At this point, the project structure should look like this:
micro-app/
├── composer.json
├── config.php
├── web/
    └── index.php
└── controllers/
    └── base
        └── BaseController.php
    └── HomeController.php
└── vendor
If you haven't set up a web server yet, you may want to check out the sample web server configuration file. Another option is to use the yii serve command, which will use the PHP built-in web server. You can run it from the micro-app/ directory by:
vendor/bin/yii serve --docroot=./web
Opening the application URL in a browser should now print out "Welcome to Yii2.0 Microservices!", which is already in the HomeController: Returned in :actionIndex().
Info: In our example we have changed the default application namespace app to micro to indicate that you are not limited by this name (if that is what you think) and then adjust the controllers namespace and set the correct alias.
The above is the detailed content of Create microservices using Yii2.0. For more information, please follow other related articles on the PHP Chinese website!

 如何使用PHP框架Yii开发一个高可用的云备份系统Jun 27, 2023 am 09:04 AM
随着云计算技术的不断发展,数据的备份已经成为了每个企业必须要做的事情。在这样的背景下,开发一款高可用的云备份系统尤为重要。而PHP框架Yii是一款功能强大的框架,可以帮助开发者快速构建高性能的Web应用程序。下面将介绍如何使用Yii框架开发一款高可用的云备份系统。设计数据库模型在Yii框架中,数据库模型是非常重要的一部分。因为数据备份系统需要用到很多的表和关
 Yii2 vs Phalcon:哪个框架更适合开发显卡渲染应用?Jun 19, 2023 am 08:09 AM
在当前信息时代,大数据、人工智能、云计算等技术已经成为了各大企业关注的热点。在这些技术中,显卡渲染技术作为一种高性能图形处理技术,受到了越来越多的关注。显卡渲染技术被广泛应用于游戏开发、影视特效、工程建模等领域。而对于开发者来说,选择一个适合自己项目的框架,是一个非常重要的决策。在当前的语言中,PHP是一种颇具活力的语言,一些优秀的PHP框架如Yii2、Ph
 php如何使用Yii3框架?May 31, 2023 pm 10:42 PM
随着互联网的不断发展,Web应用程序开发的需求也越来越高。对于开发人员而言,开发应用程序需要一个稳定、高效、强大的框架,这样可以提高开发效率。Yii是一款领先的高性能PHP框架,它提供了丰富的特性和良好的性能。Yii3是Yii框架的下一代版本,它在Yii2的基础上进一步优化了性能和代码质量。在这篇文章中,我们将介绍如何使用Yii3框架来开发PHP应用程序。
 Yii框架中的数据查询:高效地访问数据Jun 21, 2023 am 11:22 AM
Yii框架是一个开源的PHPWeb应用程序框架,提供了众多的工具和组件,简化了Web应用程序开发的流程,其中数据查询是其中一个重要的组件之一。在Yii框架中,我们可以使用类似SQL的语法来访问数据库,从而高效地查询和操作数据。Yii框架的查询构建器主要包括以下几种类型:ActiveRecord查询、QueryBuilder查询、命令查询和原始SQL查询
 Symfony vs Yii2:哪个框架更适合开发大型Web应用?Jun 19, 2023 am 10:57 AM
随着Web应用需求的不断增长,开发者们在选择开发框架方面也越来越有选择的余地。Symfony和Yii2是两个备受欢迎的PHP框架,它们都具有强大的功能和性能,但在面对需要开发大型Web应用时,哪个框架更适合呢?接下来我们将对Symphony和Yii2进行比较分析,以帮助你更好地进行选择。基本概述Symphony是一个由PHP编写的开源Web应用框架,它是建立
 yii如何将对象转化为数组或直接输出为json格式Jan 08, 2021 am 10:13 AM
yii框架:本文为大家介绍了yii将对象转化为数组或直接输出为json格式的方法,具有一定的参考价值,希望能够帮助到大家。
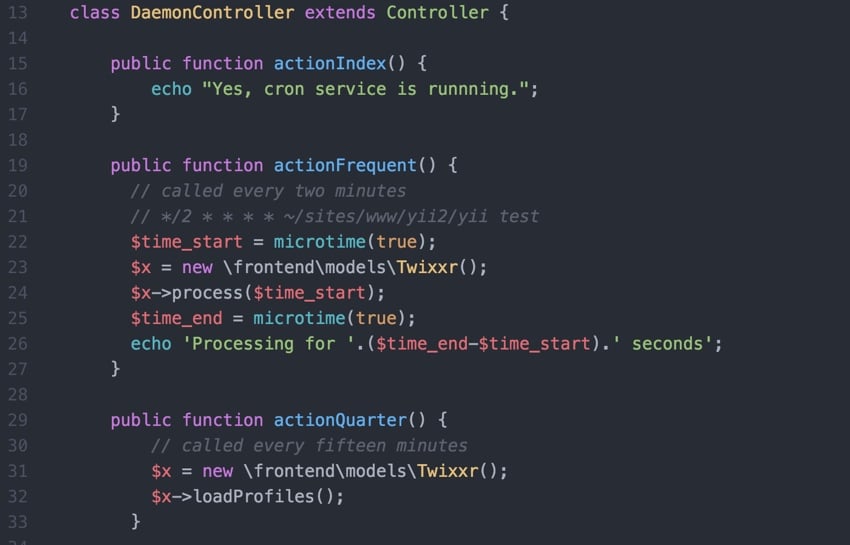 Yii2编程指南:运行Cron服务的方法Sep 01, 2023 pm 11:21 PM
如果您问“Yii是什么?”查看我之前的教程:Yii框架简介,其中回顾了Yii的优点,并概述了2014年10月发布的Yii2.0的新增功能。嗯>在这个使用Yii2编程系列中,我将指导读者使用Yii2PHP框架。在今天的教程中,我将与您分享如何利用Yii的控制台功能来运行cron作业。过去,我在cron作业中使用了wget—可通过Web访问的URL来运行我的后台任务。这引发了安全问题并存在一些性能问题。虽然我在我们的启动系列安全性专题中讨论了一些减轻风险的方法,但我曾希望过渡到控制台驱动的命令
 PHP在微服务架构中的应用与实践Mar 21, 2023 am 11:10 AM
本文将介绍PHP在微服务架构中的应用和实践,包括如何构建一个基于PHP的微服务架构、PHP微服务项目的应用实例、基于PHP的微服务框架及其使用等方面。


Hot AI Tools

Undresser.AI Undress
AI-powered app for creating realistic nude photos

AI Clothes Remover
Online AI tool for removing clothes from photos.

Undress AI Tool
Undress images for free

Clothoff.io
AI clothes remover

AI Hentai Generator
Generate AI Hentai for free.

Hot Article
Hot Tools

SublimeText3 English version
Recommended: Win version, supports code prompts!

Safe Exam Browser
Safe Exam Browser is a secure browser environment for taking online exams securely. This software turns any computer into a secure workstation. It controls access to any utility and prevents students from using unauthorized resources.

Zend Studio 13.0.1
Powerful PHP integrated development environment

DVWA
Damn Vulnerable Web App (DVWA) is a PHP/MySQL web application that is very vulnerable. Its main goals are to be an aid for security professionals to test their skills and tools in a legal environment, to help web developers better understand the process of securing web applications, and to help teachers/students teach/learn in a classroom environment Web application security. The goal of DVWA is to practice some of the most common web vulnerabilities through a simple and straightforward interface, with varying degrees of difficulty. Please note that this software

mPDF
mPDF is a PHP library that can generate PDF files from UTF-8 encoded HTML. The original author, Ian Back, wrote mPDF to output PDF files "on the fly" from his website and handle different languages. It is slower than original scripts like HTML2FPDF and produces larger files when using Unicode fonts, but supports CSS styles etc. and has a lot of enhancements. Supports almost all languages, including RTL (Arabic and Hebrew) and CJK (Chinese, Japanese and Korean). Supports nested block-level elements (such as P, DIV),

