Home >Backend Development >Python Tutorial >How to run python project
How to run python project
- 步履不停Original
- 2019-07-02 10:08:4618810browse

What I wrote before:
How to run a complete project whose backend is supported by python (flask framework)?
How to do it:
Set up the operating environment first:
See another article, Getting Started with Flask_Installation under Windows
After the environment is set up, then Then proceed to the following steps:
(1) Install the dependencies first:
Project dependencies are generally written in the requirements.txt file. Small extension: setup.py vs requirements.txt
There are two ways to install:
One is to install directly and uniformly:
pip install -r requirements.txt
The other is to install it in Unified installation in virtualenv environment. The specific method is: install the virtual environment in the project folder, and then activate it directly, as shown in the following code:
pip install virtualenv
virtualenv venv
venv\scripts\activate
Then the following will appear, with

then:
pip install -r requirements.txt
tips: A back-end programmer told me that in the future, it will be like .txt and so on It would be better to open the file with WordPad (so it will be line by line) rather than using Notepad (without branching when opening). Because of the decoding method, unknown errors may occur~
Note: I have tried both of these, but there is no way to get it right in one step. In fact, there are still many dependencies that cannot be installed, so you have to install them with pip install xxx~
The method I chose is Install in the virtual environment, and then combine it with pip install xxx Installation~ See below for details:
(2) After installing the dependencies, run it:
python manage.py
Wow, a bunch of Error, saying that a certain module does not exist. At this time, you can use pip to install it separately. You can specify the version number, or not specify it (when I specified the version, it said it could not be found, but it was installed without specifying the version number)
pip install xxxx or pip install xxxx-1.1.0 (the number is the version number~)
After installation, run Next:
python manage.py
When you find that a certain module cannot be found, continue to use pip to install it, and then run it again until you are prompted to run the runserver command, which means that the dependent module is OK~
Finally, run:
python manage.py runserver
Then it will prompt that port 5000 is being monitored~At this time, click 127.0.0.1:5000 to see your page~
However, some projects involve more complex modules. For example, if you encounter the following situation:
(3) After the dependency installation is completed, an error is reported ~ and it is still safe when using pip to install it. For example, PIL (Python Imaging Library):

This requires downloading the installation package for installation. I will give you the installation path for each version of PIL download website
It is installed by default. After that, I will go to the installation directory and copy the PIL folder to the \venv\Lib\site-packages folder of the project (the dependencies listed in requirements.txt will be downloaded to this folder)
After that, run again~
python manage.py
The command line interface will appear as follows:

At this time, enter again:
python manage.py runserver
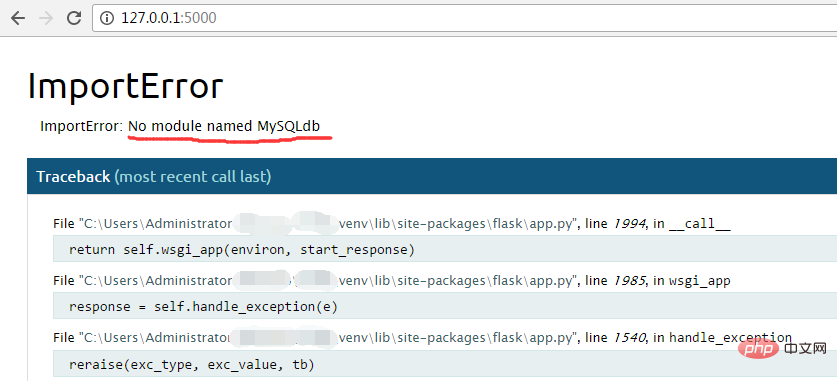
I found that it was monitoring 127.0.0.1:5000~ Open the 127.0.0.1:5000 page, and the result is an error:

The above is the detailed content of How to run python project. For more information, please follow other related articles on the PHP Chinese website!

