Home >Backend Development >Python Tutorial >How to develop web pages with python
How to develop web pages with python
- anonymityOriginal
- 2019-06-11 10:49:0120951browse
Today's websites are actually rich applications, just like full-blown desktop applications. Python provides an excellent set of tools for developing web applications. In this section, we will use Django to develop a personal record blog. In fact, in layman's terms, it is an online log system that allows us to record the knowledge we have learned about specific topics.

#We will specify the specification for this project and then define the model for the data used by the application. We'll use Django's management system to enter some initial data, and then write views and templates so that Django can create pages for our website.
Django is a web framework - a set of tools used to help develop interactive websites. Django can respond to web page requests, and also allows you to read and write databases, manage users, etc. more easily.
Building a Django project
To build a Django project, we first need to make sure that we follow Django. We open the terminal of the virtual environment in Pycharm and enter: pip install Django= =1.11 to install:
Still in the active terminal, execute the following command to create a new project:

The first line of the command allows us to create a new project A project called learning_log. The period at the end of this command tells the new project to use the appropriate directory structure so that the application can be easily deployed to the server after development is complete. (Note: Do not forget this period, otherwise you will encounter some configuration problems when deploying the application. If you forget this period, delete all the created files and folders, and then rerun this command.)
Then We ran the command ls (should be dir in Windows systems), and the results showed that Django created a new directory named learning_log. It also creates a file called manage.py, which is a simple program that takes commands and hands them over to the relevant parts of Django to run. We will use these commands to manage tasks such as working with databases and running servers.
The directory learning_log contains 4 files, the most important of which are settings.py, urls.py and wsgi.py. The file settings.py specifies how Django interacts with your system and manages the project. As we develop our project, we will modify some of these settings and add others. The file urls.py tells Django which web pages should be created in response to browser requests. The file wsgi.py helps Django serve the files it creates. The file name is an acronym for web server gateway interface.
Create database
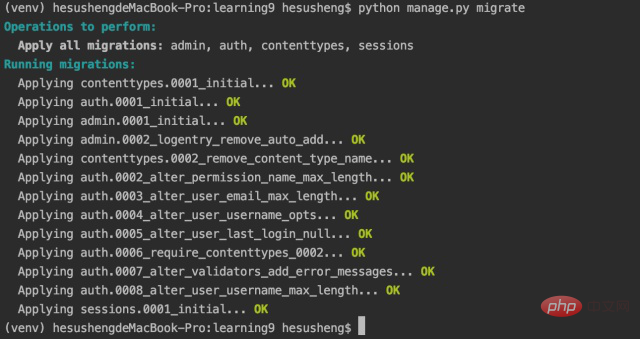
Django stores most of the project-related information in the database, so we need to create a database for Django to use. In order to create a database for our personal notes, please execute the following command while in an active virtual environment:

If the execution is not successful, an error as shown below will appear. Don't be nervous. This is due to the compatibility issue between Django and Python3. You only need to delete the last comma in the error statement. (If the error reported is: SyntaxError: Generator expression must be parenthesized, you can use the above method.)
We call modifying the database as migrating the database. The first time you execute the command migrate, it will tell Django to ensure that the database matches the current state of the project. The first time you execute this command in a new project using SQLite, Django will create a new database. Django will indicate that it will create the necessary database tables to store the information we will use in this project, and then make sure that the database structure matches the current code.
Then we ran the command ls, and the output showed that Django created another file-db.sqite3. SQLite is a database that uses a single file, which is ideal for writing simple applications because it relieves us from paying too much attention to the management of the database.
View project
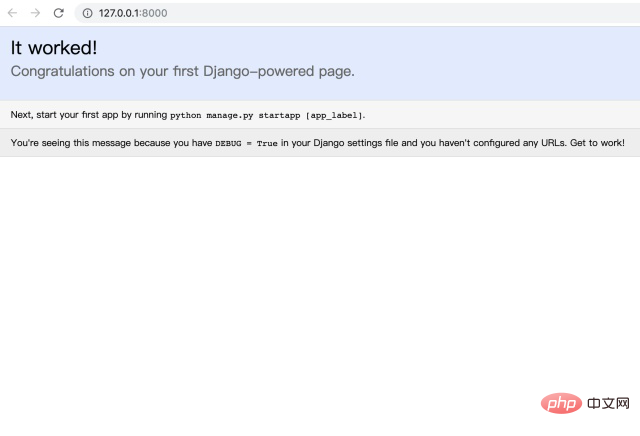
Let’s verify whether Django has created the project correctly. To do this, execute the command runserver as follows:

Django starts a server that allows you to view the projects in the system and understand how they are working. When you enter a URL into your browser to request a web page, the Django server will respond, generate the appropriate web page, and send it to the browser. Then we click on the link above. When we see the page shown below, it proves that our project can be officially launched:

The above is the detailed content of How to develop web pages with python. For more information, please follow other related articles on the PHP Chinese website!

