
windows下配置wnmp - 蜀都小一

- WBOYWBOYWBOYWBOYWBOYWBOYWBOYWBOYWBOYWBOYWBOYWBOYWBOriginal
- 2016-05-20 10:13:111469browse
最近尝试windows下配置nginx+php+mysql,在这里总结一下。
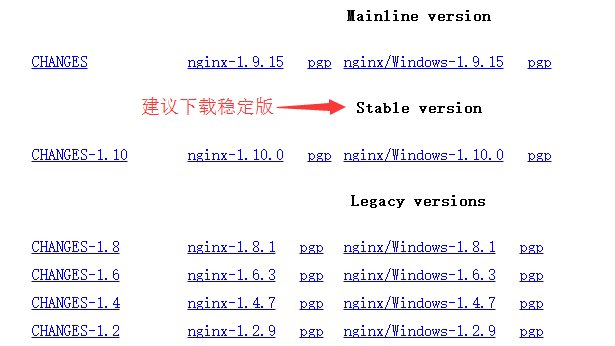
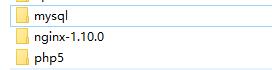
1、下载windows版本的nginx,官网下载地址:http://nginx.org/en/download.htm,下载好后解压到D:\wnmp
2、配置php
下载windows版本的php,官网下载地址:http://windows.php.net/download/,php将会以cgi的方式运行,解压下载好的php包,到D盘wnmp目录(D:\wnmp),这里把解压出来的文件夹重命名成php5。
进入文件夹修改php.ini-development文件为php.ini。

打开php.ini,找到以下代码
extension_dir =<span style="color: #800000;">"</span><span style="color: #800000;">./ext</span><span style="color: #800000;">"</span>更改为extension_dir =<span style="color: #800000;">"</span><span style="color: #800000;">D:/wnmp/php5/ext</span><span style="color: #800000;">"</span>。 <br>;extension=php_mysql.dll 去掉分号<br>;extension=php_mysqli.dll 去掉分号(打开数据库动态链接库)
然后把php5目录下的libmysql.dll文件复制到C:\Windows目录下,或者设置环境变量路径也可以,然后找到以下代码
;cgi.fix_pathinfo=0 去掉分号并改为 cgi.fix_pathinfo=<span style="color: #800080;">1</span>
3、配置nginx
解压后打开conf目录下的nginx.conf文件,找到
        location /<span style="color: #000000;"> {
            root   html;
            index  index.html index.htm;
        }
        #error_page  </span><span style="color: #800080;">404</span>              /<span style="color: #800080;">404</span><span style="color: #000000;">.html;
        # redirect server error pages to the </span><span style="color: #0000ff;">static</span> page /<span style="color: #000000;">50x.html
        #
        error_page   </span><span style="color: #800080;">500</span> <span style="color: #800080;">502</span> <span style="color: #800080;">503</span> <span style="color: #800080;">504</span>  /<span style="color: #000000;">50x.html;
        location </span>= /<span style="color: #000000;">50x.html {
            root   html;
        }
        # proxy the PHP scripts to Apache listening on </span><span style="color: #800080;">127.0</span>.<span style="color: #800080;">0.1</span>:<span style="color: #800080;">80</span><span style="color: #000000;">
        #
        #location </span>~<span style="color: #000000;"> \.php$ {
        #    proxy_pass   http:</span><span style="color: #008000;">//</span><span style="color: #008000;">127.0.0.1;</span>
<span style="color: #000000;">        #}
        # pass the PHP scripts to FastCGI server listening on </span><span style="color: #800080;">127.0</span>.<span style="color: #800080;">0.1</span>:<span style="color: #800080;">9000</span><span style="color: #000000;">
        #
        #location </span>~<span style="color: #000000;"> \.php$ {
        #    root           html;
        #    fastcgi_pass   </span><span style="color: #800080;">127.0</span>.<span style="color: #800080;">0.1</span>:<span style="color: #800080;">9000</span><span style="color: #000000;">;
        #    fastcgi_index  index.php;
        #    fastcgi_param  SCRIPT_FILENAME  </span>/<span style="color: #000000;">scripts$fastcgi_script_name;
        #    include        fastcgi_params;
        #}</span>
改为:
        location /<span style="color: #000000;"> {
            root   <span style="color: #ff0000;">d:/www</span>;  //自行设置目录
            index  index.html index.htm;
        }
        error_page  </span><span style="color: #800080;">404</span>              /<span style="color: #800080;">404</span><span style="color: #000000;">.html;
         redirect server error pages to the </span><span style="color: #0000ff;">static</span> page /<span style="color: #000000;">50x.html
        #
        error_page   </span><span style="color: #800080;">500</span> <span style="color: #800080;">502</span> <span style="color: #800080;">503</span> <span style="color: #800080;">504</span>  /<span style="color: #000000;">50x.html;
        location </span>= /<span style="color: #000000;">50x.html {
            root   <span style="color: #ff0000;">d:/www</span>;
        }
         proxy the PHP scripts to Apache listening on </span><span style="color: #800080;">127.0</span>.<span style="color: #800080;">0.1</span>:<span style="color: #800080;">80</span><span style="color: #000000;">

        location </span>~<span style="color: #000000;"> \.php$ {
            proxy_pass   http:</span><span style="color: #008000;">//</span><span style="color: #008000;">127.0.0.1;</span>
<span style="color: #000000;">        }
         pass the PHP scripts to FastCGI server listening on </span><span style="color: #800080;">127.0</span>.<span style="color: #800080;">0.1</span>:<span style="color: #800080;">9000</span><span style="color: #000000;">

        location </span>~<span style="color: #000000;"> \.php$ {
            root           <span style="color: #ff0000;">d:/www</span>;
            fastcgi_pass   </span><span style="color: #800080;">127.0</span>.<span style="color: #800080;">0.1</span>:<span style="color: #800080;">9000</span><span style="color: #000000;">;
            fastcgi_index  index.php;
            fastcgi_param  SCRIPT_FILENAME  <span style="color: #ff0000;">$document_root</span></span><span style="color: #000000;">$fastcgi_script_name;
            include        fastcgi_params;
        }</span>
保存配置文件。
4、运行nginx和php
输入命令:
D:\wnmp\php5>php-cgi.exe -b <span style="color: #800080;">127.0</span>.<span style="color: #800080;">0.1</span>:<span style="color: #800080;">9000</span> -c D:/wnmp/php5/php.ini
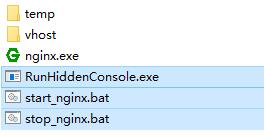
以cgi的方式运行php,监听nginx从9000端口发来的数据。双击nginx.exe运行nginx。
快捷启动设置:先下载RunHiddenConsole.exe这个文件放入nginx目录中,然后将以下代码保存为start_nginx.bat
<span style="color: #000000;">@echo off
</span><span style="color: #0000ff;">set</span> php_home=../php5/
<span style="color: #0000ff;">set</span> nginx_home=./<span style="color: #000000;">
echo Starting PHP FastCGI...
RunHiddenConsole </span>%php_home%/php-cgi.exe -b <span style="color: #800080;">127.0</span>.<span style="color: #800080;">0.1</span>:<span style="color: #800080;">9000</span> -c %php_home%/<span style="color: #000000;">php.ini
echo Starting nginx...
RunHiddenConsole </span>%nginx_home%/nginx.exe -p %nginx_home%<span style="color: #000000;">
exit</span>
将以下代码保存为stop_nginx.bat
<span style="color: #000000;">@echo off
echo Stopping nginx...
taskkill </span>/F /IM nginx.exe ><span style="color: #000000;"> nul
echo Stopping PHP FastCGI...
taskkill </span>/F /IM php-cgi.exe ><span style="color: #000000;"> nul
exit</span>
最后文件是这样的,双击start_nginx.bat就可以启动nginx和php了。
5、安装配置mysql
下载mysql:http://dev.mysql.com/downloads/mysql/,然后解压到D:/mnmp目录下
在my-default.ini中找到
basedir=D<span style="color: #000000;">:\wnmp\MySQL\ </span>去掉#<span>(mysql所在目录)<br>datadir</span>=D:\wnmp\MySQL\data 去掉#(mysql所在目录\data)
命令行进入目录:cd D:\wnmp\MySQL\bin,输入以下命令安装mysql:mysqld -install (安装后可以在服务中找到)
启动服务:net start mysql,关闭服务:net stop mysql 。也可以在服务中启动或者关闭。
添加path变量:在计算机>属性>高级系统中设置>环境变量中添加:D:\phpenv\mysql\bin
登录命令:mysql -h 主机ip -u 用户名 -p 用户密码
Statement:
The content of this article is voluntarily contributed by netizens, and the copyright belongs to the original author. This site does not assume corresponding legal responsibility. If you find any content suspected of plagiarism or infringement, please contact admin@php.cn
Previous article:html5 如何实现客户端验证上传文件的大小 - small_123Next article:OAuth协议PHP第三方登陆协议 - 韧还