
Home >Java >javaTutorial >Detailed explanation of the method and process of adding a new module in springboot (picture and text)
Detailed explanation of the method and process of adding a new module in springboot (picture and text)

- 不言forward
- 2018-11-27 17:00:393215browse
This article brings you a detailed explanation (pictures and text) of the method and process of adding a new module to springboot. It has certain reference value. Friends in need can refer to it. I hope it will be helpful to you.
In the springboot project framework, there are two major modules of a project, the main project main and the test project test. Our test projects can be further divided according to functions, such as unit tests, integration tests, and business tests. etc.
For a beginner, we need to master the way to build modules. There is not much information on the Internet, and this function is rarely mentioned. Let me popularize it here!
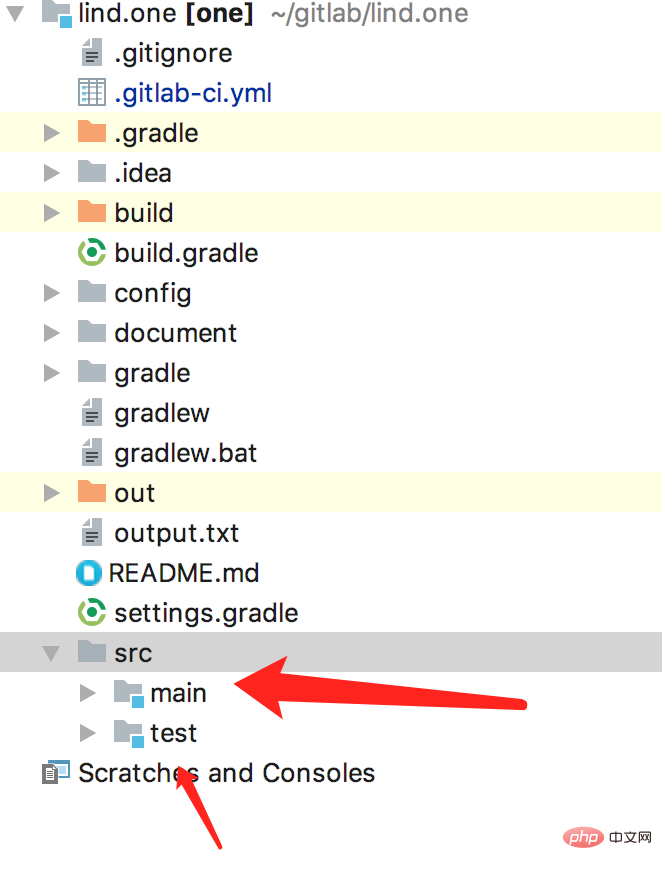
The basic structure of the springboot project is as shown below:
Let’s build an integration test module intTest. Some teams are willing to call it integTest. It’s okay, intTest. This name comes from the official gradle document, and I can also learn from it (https://docs.gradle.org/current/userguide/java_testing.html#test_reporting)
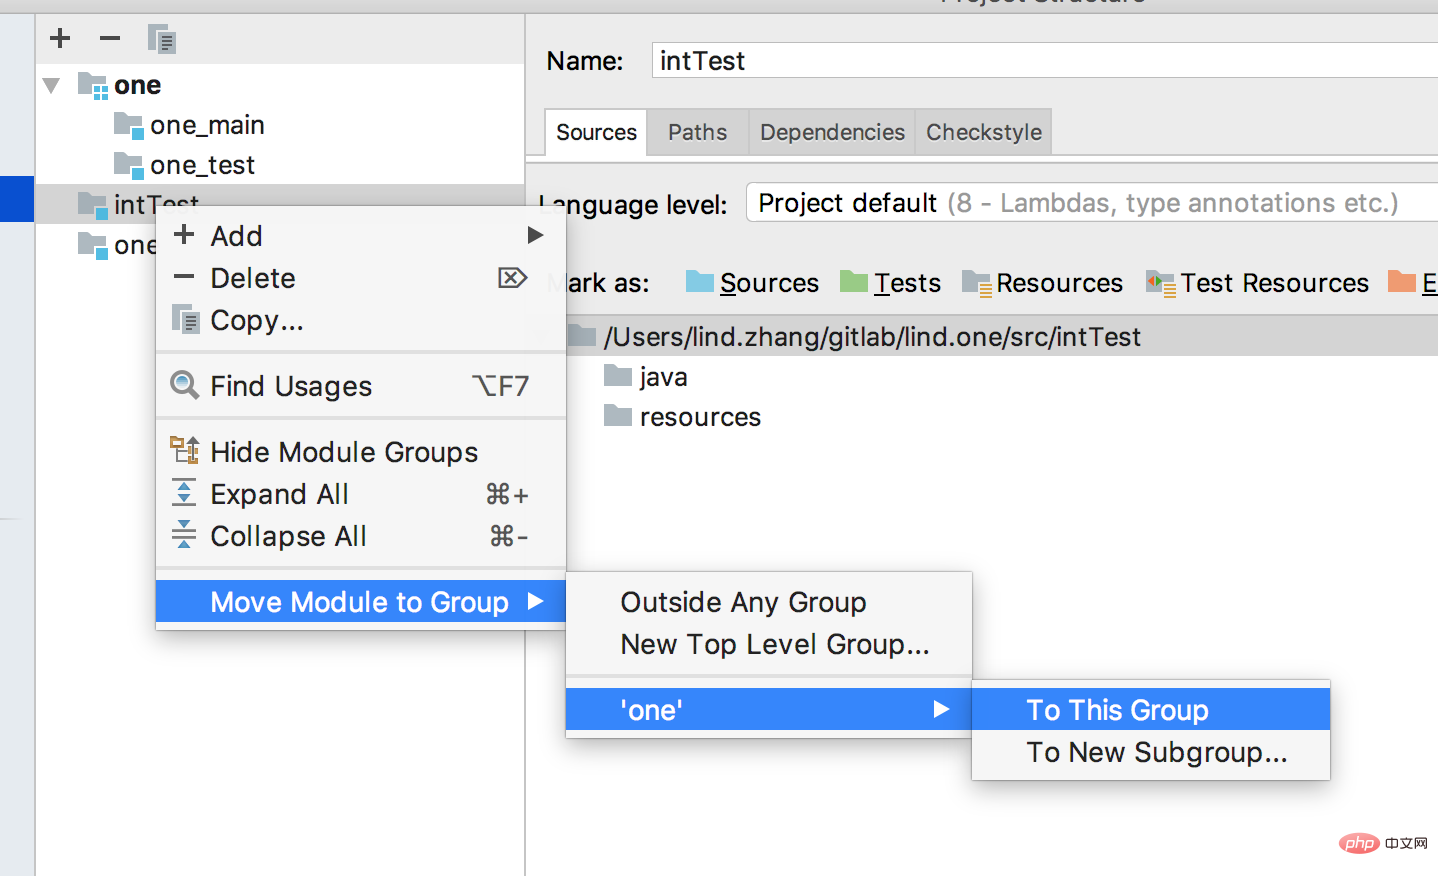
Select file->project structure file -》Project structure, we see that there are two default modules
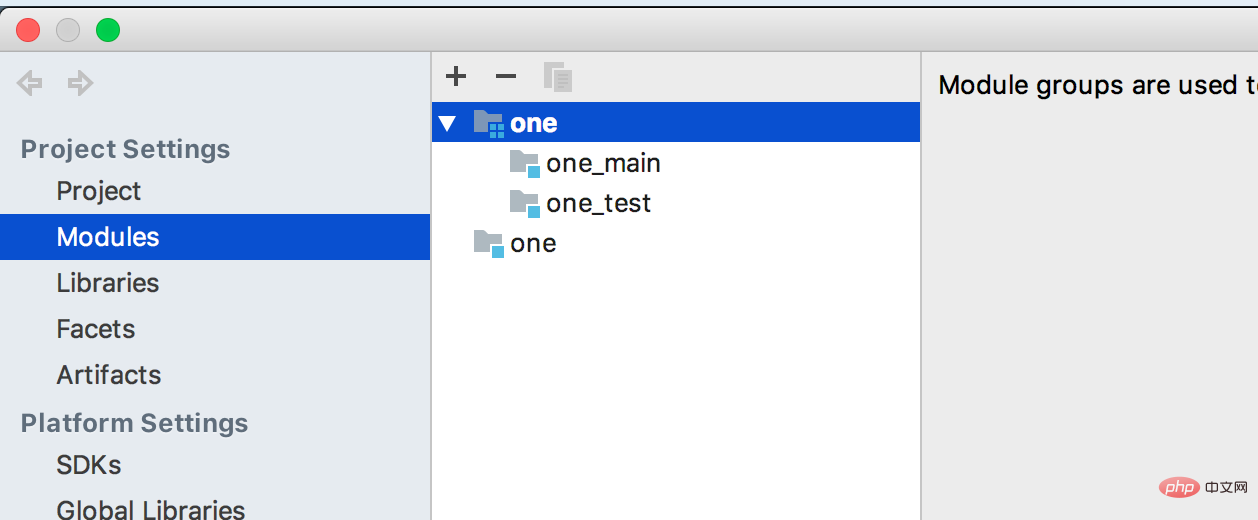
. Second, close it, then left-click on the test module and select copy, select paste on src, and enter The new module name

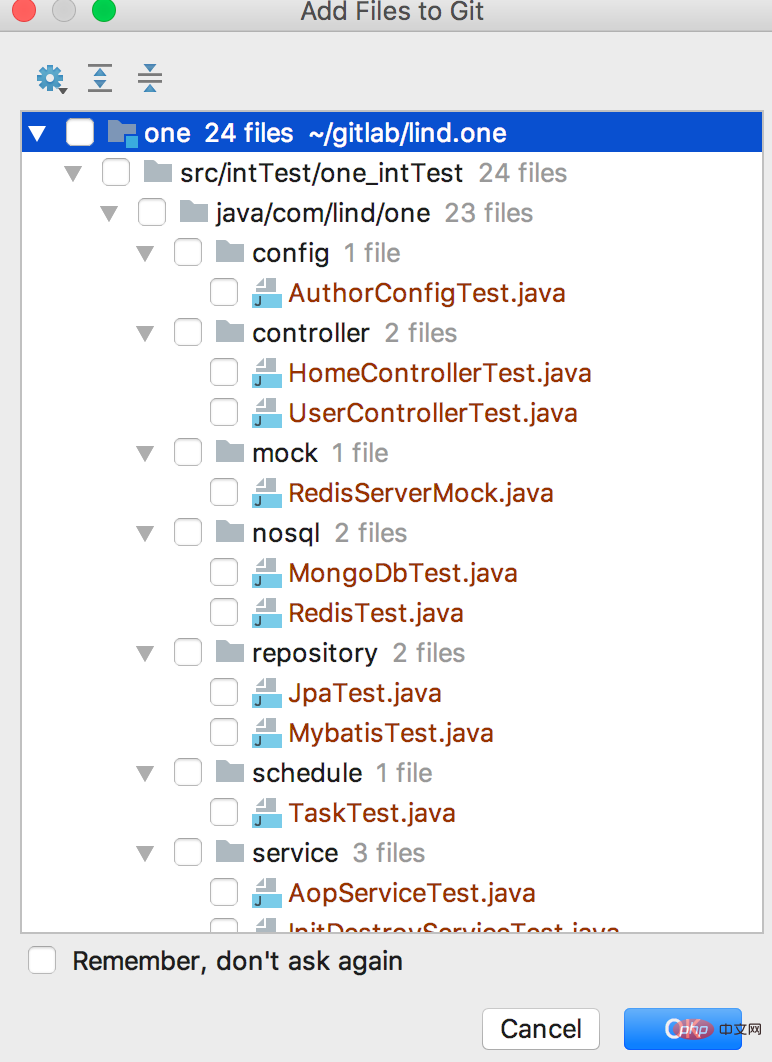
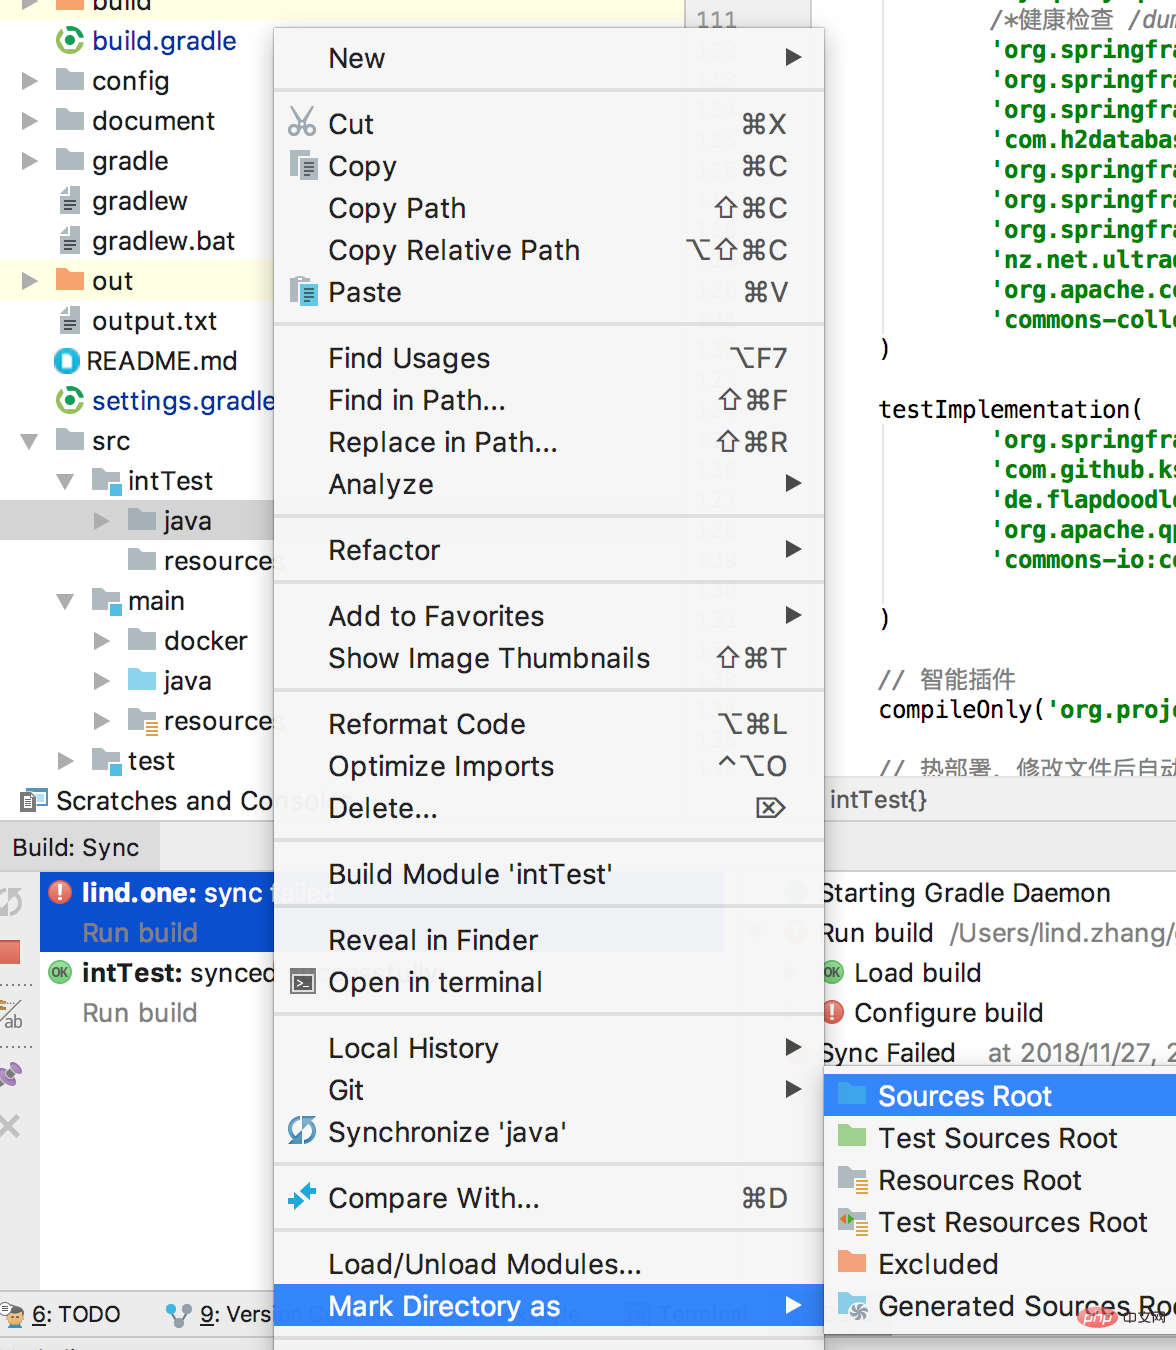
Three-select the file to be copied, and then you don’t need to select it here, just create it yourself
    integTestCompile sourceSets.main.output
    integTestCompile configurations.testCompile
    integTestCompile sourceSets.test.output
    integTestRuntime configurations.testRuntime
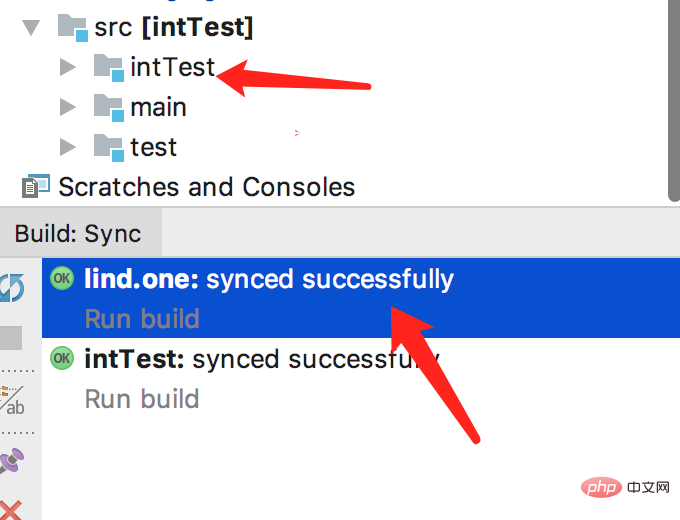
In this way, after refreshing, its dependencies will inherit the two modules main and test. The above is the detailed content of Detailed explanation of the method and process of adding a new module in springboot (picture and text). For more information, please follow other related articles on the PHP Chinese website!
Related articles
See more- Share some frequently asked questions about web-mvc projects building SpringBoot on IDEA
- In-depth analysis of how springboot configures multiple redis connections
- Detailed explanation of examples of Spring Data JPA integration implemented by SpringBoot
- Introduction to usage examples of verification code combined with springboot when logging in
- SpringBoot integrated Spring aop example introduction
- Detailed explanation of the causes of Session timeout problem in SpringBoot