Home >Operation and Maintenance >Linux Operation and Maintenance >How to use the reinitialize disk function to restore a cloud disk used as a system disk or data disk to the state when it was created
How to use the reinitialize disk function to restore a cloud disk used as a system disk or data disk to the state when it was created
- 坏嘻嘻Original
- 2018-09-18 10:57:483482browse
The content of this article is about how to use the reinitialize disk function to restore the cloud disk used as a system disk or data disk to the state when it was created. It has certain reference value and friends in need can refer to it. I hope it helps you.
Reinitialize the cloud disk
When the cloud disk is mounted on the ECS instance, you can use the reinitialize disk function to restore the cloud disk used as a system disk or data disk to the original state when it was created. state. After re-initialization:
The system disk will be restored to the state when it was first created. For example, if you create an instance using the public image Windows Server 2008 R2, then after reinitializing the system disk, the operating system will still be the original Windows Server 2008 R2, but the applications and data generated after the instance was created will be deleted.
Description
After replacing the system disk and then performing initialization, the system disk after replacement will be initialized, not the system disk before replacement.
The cloud disk used as a data disk will be restored to its initial state:
If it was originally an empty disk, it will be restored to an empty disk.
If the cloud disk is created through a snapshot, it will be restored to the state of the snapshot.
If the automatic snapshot policy is applied to the cloud disk, the settings will still be valid after re-initialization and no re-setting is required.
Reinitializing the disk will not change the IP address or cloud disk ID of the ECS instance.
Reinitializing the disk will not delete the automatic snapshot or manual snapshot of the cloud disk. You can use these snapshots to roll back the cloud disk.
Warning
You must stop the ECS instance before reinitializing the disk. This operation will interrupt your service, so please operate with caution.
After reinitializing the disk, the data on the cloud disk will be lost. Please be sure to back up the data in advance, such as creating a snapshot for the cloud disk. For detailed operations, see Creating a Snapshot.
Reinitialize the system disk
Prerequisites
When initializing the system disk of a Linux instance, If you use key pair authentication, you must have created an SSH key pair or imported an SSH key pair.
Operation steps
Follow the following steps to reinitialize the system disk:
Log in to the ECS management console.
Select a region.
In the left navigation bar, click Instances.
Find the instance that needs to initialize the system disk, click the instance ID to enter the instance details page.
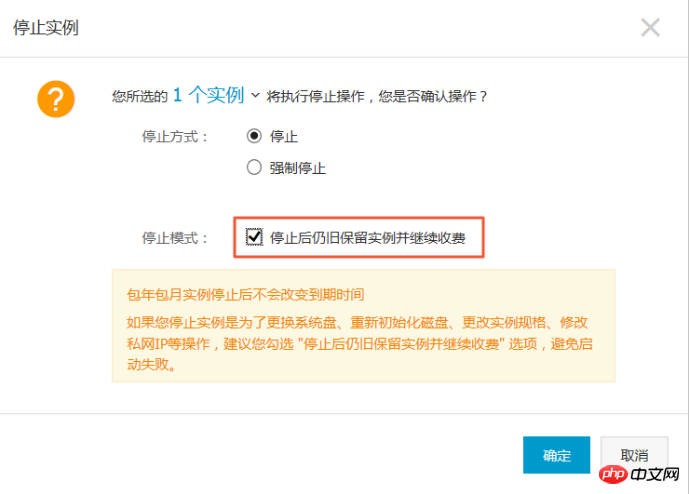
In the upper right corner of the page, click Stop to stop the instance.
Note
If it is a pay-as-you-go VPC type instance and the feature of no charge for downtime of the pay-as-you-go instance has been turned on, in the Reminder pop-up box, click OK. In the Stop Instance dialog box, select Keep the instance after stopping and continue to charge. If you use the no-charge mode, you may not be able to successfully start the instance after reinitializing the system disk.

#After the instance enters the stopped state, click the instance disk in the left navigation bar.
Find the system disk, and in the Operation column, click Reinitialize the disk.
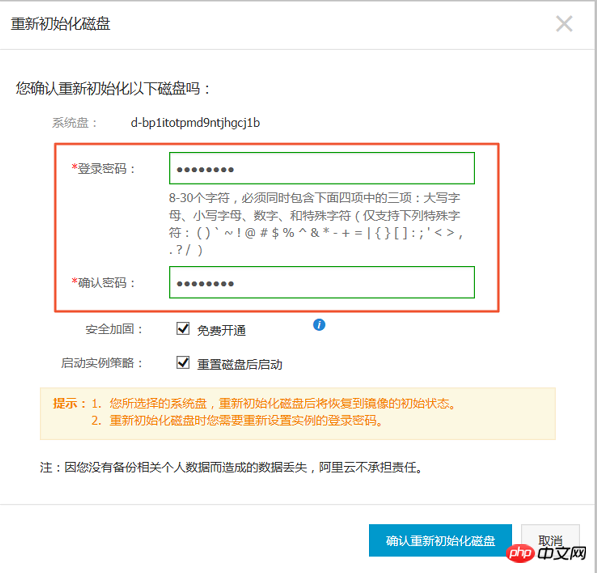
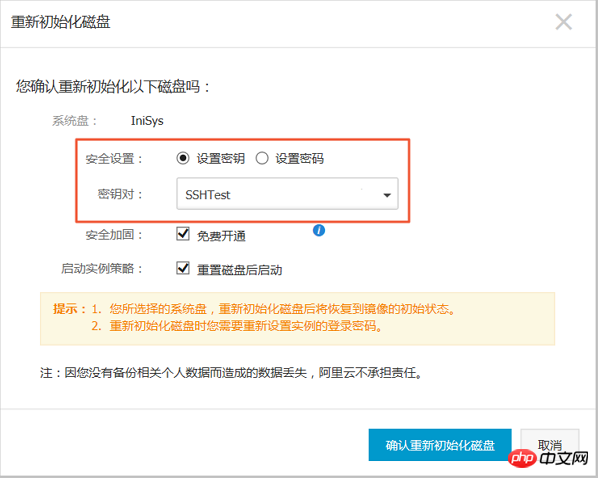
In the pop-up Reinitialize Disk dialog box, complete the following settings:
Set the verification method:
Windows instance: Reset the instance login password. You can use the old password or specify a new password.

#Linux instance: Select Set Key or Set Password, and bind the key pair or reset the password. You can use the old password or specify a new password. 
(Optional) Security hardening: Select Free activation. After activating the security hardening function, your instance will automatically load cloud server security components for free, providing security functions such as website backdoor detection, remote login reminders, and brute force interception.
(Optional) Start instance strategy: Select Start after resetting the disk. After initialization is complete, the instance starts automatically.
Click to confirm reinitializing the disk.
Only applicable to main account users: After obtaining and entering the SMS verification code, click Confirm to start initializing the system disk.
Applicable only to Linux instances: If the data disk is mounted before initialization, you need to re-create the mount point information and mount the file system.
Note
In a Linux instance, reinitializing the system disk will not change the contents of the data disk, but the mounting information of the data disk will be lost, so this step needs to be performed.
After the system disk is re-initialized, you need to redeploy the business (including applications and configurations) to restore the business as soon as possible.
Reinitialize the data disk
After reinitialization, the status of the data disk varies depending on the initial status of the cloud disk and the operating system of the instance:
Windows instance: Regardless of whether the data disk is created from a snapshot or is a brand new empty disk, after re-initialization, the data disk will be restored to its initial state after creation, but it can be used directly without performing other operations.
Linux example:
If the data disk is an empty disk when it is created: the file system and content of the data disk are completely lost, you must reformat, partition the data disk, and mount the data disk Partition.
Note
In this case, if you write the command to automatically mount the partition at boot in the /etc/fstab file before re-initialization, then after re-initialization, the system will automatically mount the partition at boot. The mount will fail and an exception will generally occur during startup. Therefore, before re-initializing the data disk, you must comment out the information about automatically mounting the data disk partition at boot in /etc/fstab.
If the data disk is created from a snapshot: the data disk will be restored to the state of the original snapshot. There is no need to remount the data disk partition, but all data generated after the data disk is successfully created will be lost.
In the step description of this article, /dev/vdb1 represents the data disk partition, and /InitTest represents the mount point. You can replace it according to the actual situation.
Prerequisite
The cloud disk has been mounted on the instance. For detailed operations, see Mounting a Cloud Disk.
Operation steps
Follow the following steps to reinitialize the data disk:
Applicable only to Linux instances: If the data disk is an empty disk when it is created, And you have added the command to automatically mount the data disk partition at startup in /etc/fstab, then you must comment out the command to mount the data disk partition at startup in /etc/fstab. The operation steps are as follows:
Remotely connect to the Linux instance.
Run vim /etc/fstab.
Press the i key to enter edit mode.
Find the data disk partition mounting information, add # to comment out the mounting information, as shown below.
# /dev/vdb1 /InitTest ext3 defaults 0 0
Press the Esc key to exit editing mode, enter :wq to save and exit.
Log in to the ECS management console.
In the left navigation bar, click Instances.
Select a region.
Find the instance that needs to initialize the data disk, click the instance ID to enter the instance details page.
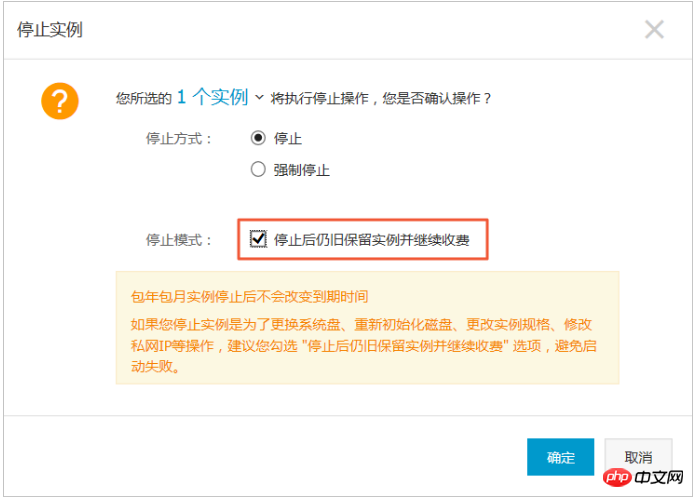
In the upper right corner of the page, click Stop to stop the instance.
Note
If it is a pay-as-you-go VPC type instance and the feature of no charge for pay-as-you-go instance downtime has been turned on, in the Reminder pop-up box, click OK. In the Stop Instance dialog box, select Keep the instance after stopping and continue to charge. If you use the no-charge mode, the instance may not be started successfully after reinitializing the data disk.

#After the instance enters the stopped state, click the instance disk in the left navigation bar.
Find the data disk, and in the Operation column, click Reinitialize the disk.
In the pop-up Reinitialize Disk dialog box, after carefully reading the prompts, click Confirm to reinitialize the disk.
Only applicable to main account users: After obtaining and entering the SMS verification code, click Confirm.
In the left navigation bar, click Instance Details.
In the upper right corner of the page, click Start to start the instance and complete the data disk initialization.
Applicable to Linux instances only: If the data disk is created as an empty disk, you must Linux format and mount the data disk.
After the data disk is reinitialized, you need to redeploy the business (including applications and configurations) to restore the business as soon as possible.
Related API
ReInitDisk
The above is the detailed content of How to use the reinitialize disk function to restore a cloud disk used as a system disk or data disk to the state when it was created. For more information, please follow other related articles on the PHP Chinese website!

