Home >Backend Development >Python Tutorial >Python crawler to create Scrapy crawler framework in Anaconda environment
Python crawler to create Scrapy crawler framework in Anaconda environment
- 不言Original
- 2018-09-07 15:38:426864browse
How to create Scrapy crawler framework in Anaconda environment? This article will introduce you to the steps to create a Scrapy crawler framework project in the Anaconda environment. It is worth reading.
Python crawler tutorial-31-Create Scrapy crawler framework project
First of all, this article is in the Anaconda environment, so if Anaconda is not installed, please go to the official website to download and install it first
Anaconda download address: https://www.anaconda.com/download/
Creation of Scrapy crawler framework project
0. Open [cmd]
1. Enter the Anaconda environment you want to use
Here we have created the project and analyze the role of the automatically generated files
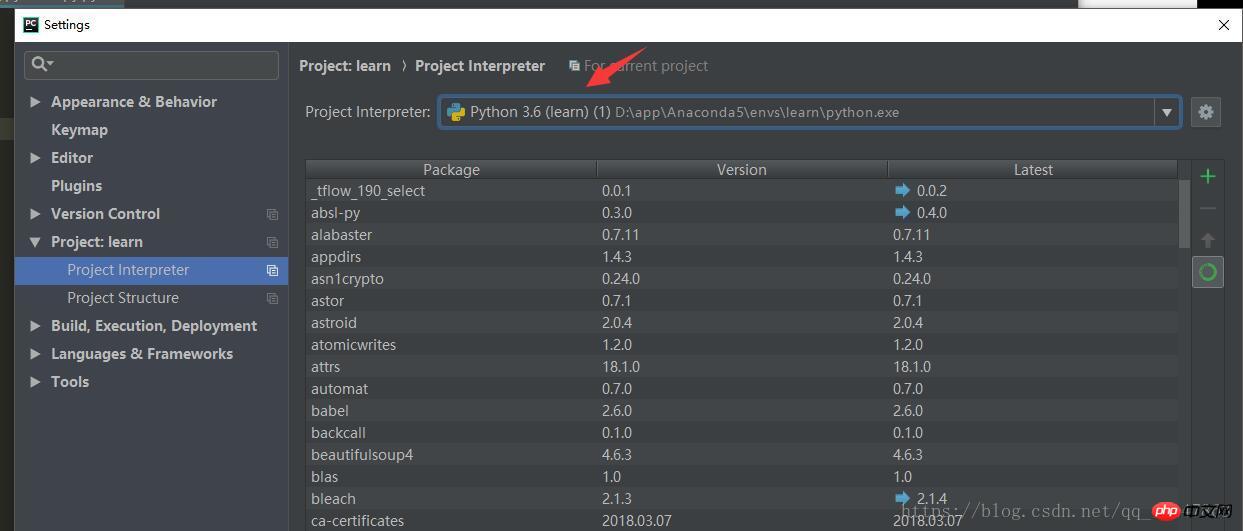
1. The environment name can be found under [Settings] in [Pycharm] Find

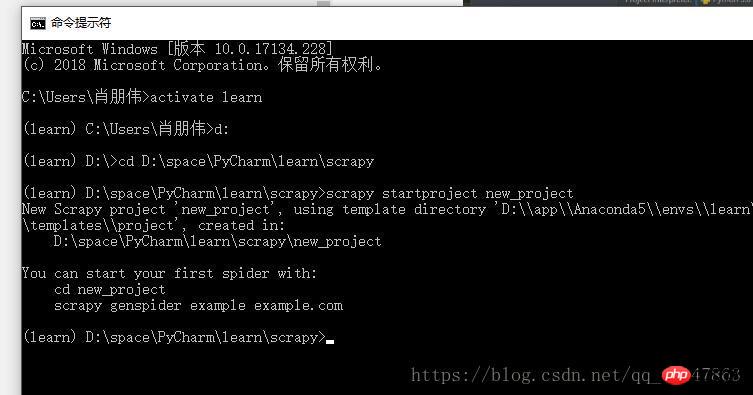
under [Project:] 2. Use the command: activate environment name, for example:
activate learn
3. Enter the desired The directory where the scrapy project is to be stored [Note]
4. New project: scrapy startproject xxx project name, for example:
scrapy startproject new_project
5. Operation screenshot:

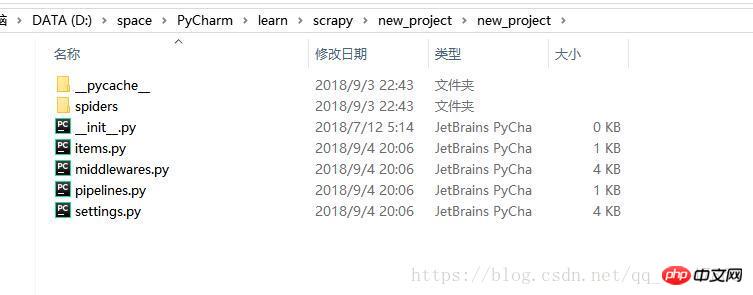
6. Open the directory in the file explorer and you will find that several files have been generated

7. Just use Pycharm to open the directory where the project is located
Development of Scrapy crawler framework project
0. Use Pycharm to open the project and take a screenshot:
The general process of project development:
The address spider/xxspider.py is responsible for decomposing and extracting the downloaded data
1. Clarify the target/product that needs to be crawled: write item. py
2. Download and create a python file in the spider directory to make a crawler:
3. Store content: pipelines.py
Pipeline.py file
Called when the spider object is closed
Called when the spider object is opened
Initializes some necessary parameters
The item extracted by spider is used as Parameters are passed in, and spider
This method must be implemented
Must return an Item object, and the discarded item will not be corresponding to the subsequent pipeline
pipelines file
After the crawler extracts the data and stores it in the item, the data saved in the item needs further processing, such as cleaning, deworming, storage, etc.
Pipeline needs to process the process_item function
process_item
_ init _: constructor
open_spider(spider):
close_spider(spider):
Spider directory
corresponds to the files under the folder spider
_ init _: initialize the crawler name, start _urls list
start_requests: generate Requests object exchange Download and return the response to Scrapy
parse: parse the corresponding item according to the returned response, and the item automatically enters the pipeline: if necessary, parse the url, and the url is automatically handed over to the requests module, and the cycle continues
start_requests: This method can be called once, read the start _urls content and start the loop process
name: Set the crawler name
start_urls: Set the url to start the first batch of crawling
allow_domains: list of domain names that spider is allowed to crawl
start_request(self): only called once
parse: detection encoding
log: log record
Related recommendations:
Detailed explanation of scrapy examples of python crawler framework
Scrapy crawler introductory tutorial four Spider (crawler)
A simple example of writing a web crawler using Python’s Scrapy framework
The above is the detailed content of Python crawler to create Scrapy crawler framework in Anaconda environment. For more information, please follow other related articles on the PHP Chinese website!

