Home >WeChat Applet >Mini Program Development >Introduction to express delivery query function developed by WeChat applet
Introduction to express delivery query function developed by WeChat applet
- 不言Original
- 2018-06-27 10:04:164333browse
This article mainly introduces the relevant information on the implementation of the express delivery query function in the development of WeChat applet. Here, the function of express delivery query in WeChat applet is implemented. Friends in need can refer to the following
WeChat applet express query Function:
product requirements,
prepare api,
code writing.
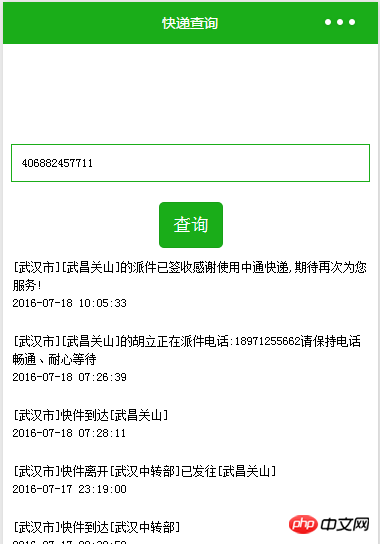
Step one: Product requirements, we need to implement a function as shown below, enter the express delivery number in the text box, click Query, and the express information we need will appear below
Step 2: Preparation
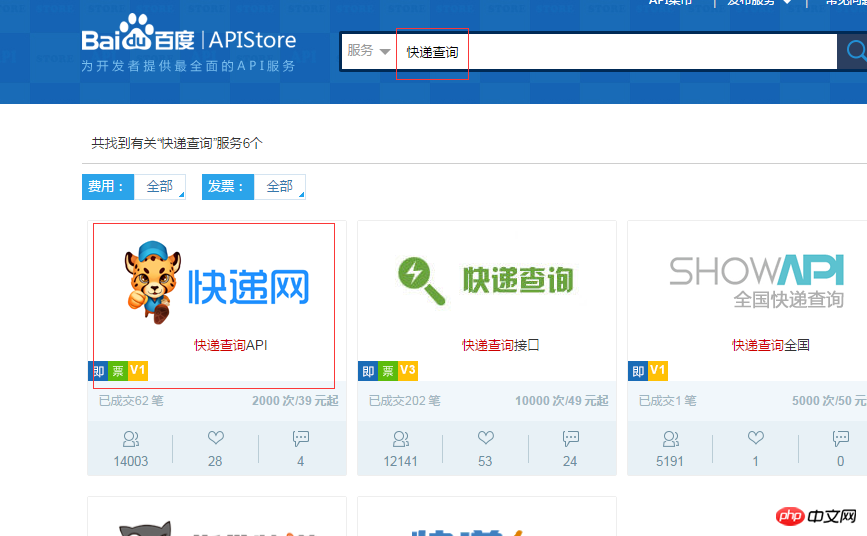
We first find an express API interface through http://apistore.baidu.com /We can see a lot of APIs. Let’s find an express query
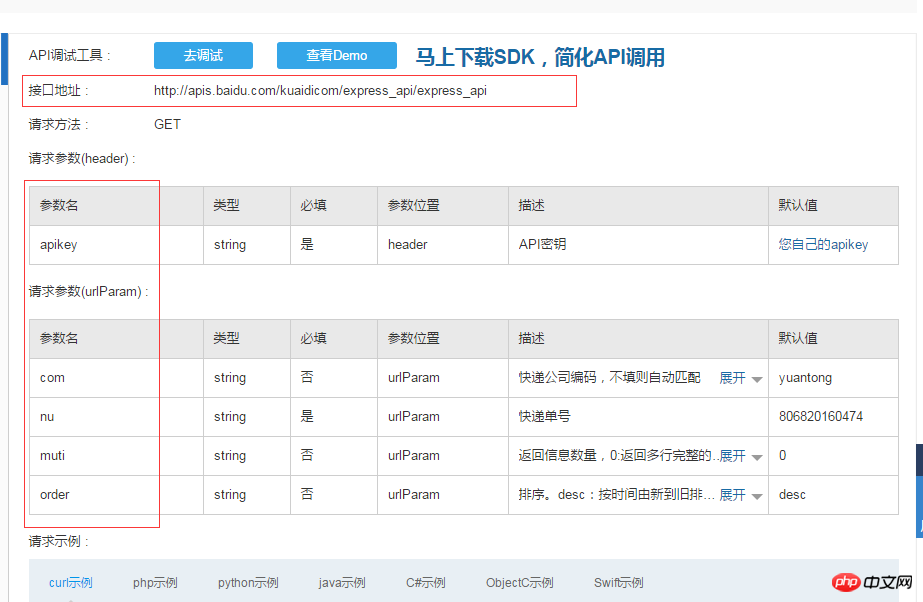
. We can see that there are interface addresses and some parameters. After making this preparation, start the coding work...
Step 3: Coding work
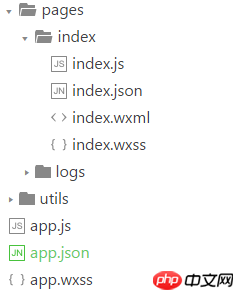
We create a new Express file, and then prepare the default file Complete
We now change our head navigation in app.js to a green background color
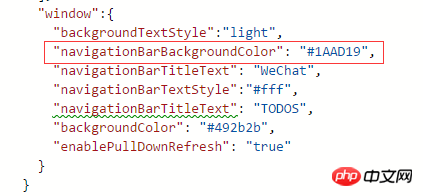
Set the name of the navigation in index.json: "Express Query"

In index.wxml, delete the default code and put in one of our text input boxes , a query button
<!--index.wxml-->
<view class="container">
  <input placeholder="请输入快递单号" bindinput="input" />
  <button type="primary" bindtap="btnClick"> 查询 </button>
</view>
Next we need to add a style to the text box and button: set
# in index.wxss ##
/**index.wxss**/
 input{border:1px solid #1AAD19; width:90%; height:20px; font-size:12px; padding:5px 10px;}
 button{margin-top:20px;}
Up to now our layout is ready as shown: 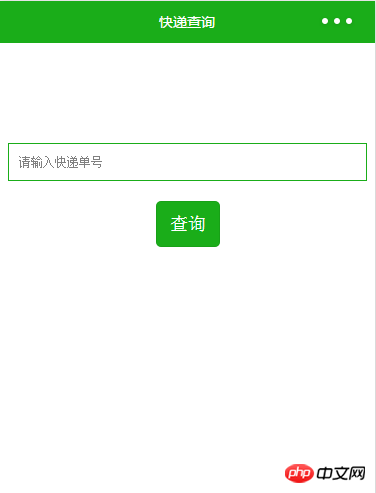
//设置一个发起网络请求的方法
 getExpressInfo:function(nu,cb){
  wx.request({
   url: 'http://apis.baidu.com/kuaidicom/express_api/express_api?muti=0&order=desc&com=zhongtong&nu='+nu,
   data: {
    x: '' ,
    y: ''
   },
   header: {
     'apikey': '247d486b40d7c8da473a9a794f900508'
   },
   success: function(res) {
    //console.log(res.data)
    cb(res.data);
   }
  })
 },
 globalData:{
  userInfo:null
 }
With such a request method, we need to add a click event to our query button: bindtap="btnClick", add the query event in index.js, Use the app to call the written request method getExpressInfo. Before that, we need to get the express order number entered in the text box. Bind a bindinput event to the text box, 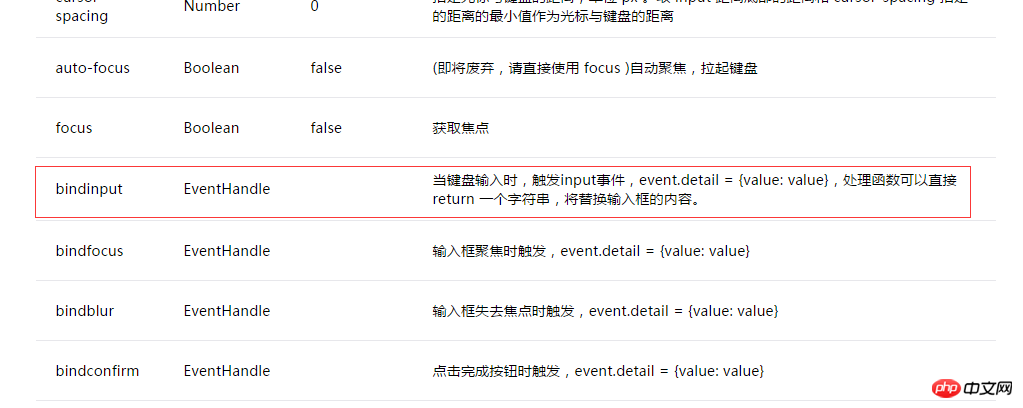
//index.js
//获取应用实例
var app = getApp()
Page({
 data: {
  motto: 'Hello World',
  userInfo: {},
  einputinfo:null,//输入框值
  expressInfo:null //快递信息
 },
 //事件处理函数
 bindViewTap: function() {
  wx.navigateTo({
   url: '../todos/todos'
  })
 },
 onLoad: function () {
  console.log('onLoad')
  var that = this
  //调用应用实例的方法获取全局数据
  app.getUserInfo(function(userInfo){
   //更新数据
   that.setData({
    userInfo:userInfo
   })
  })
 },
 //快递输入框事件
 input:function(e){
   this.setData({einputinfo:e.detail.value});
 },
 //查询事件
 btnClick:function(){
  var thisexpress=this;
  app.getExpressInfo(this.data.einputinfo,function(data){
    console.log(data);
    thisexpress.setData({expressInfo:data})
  })
 }
})
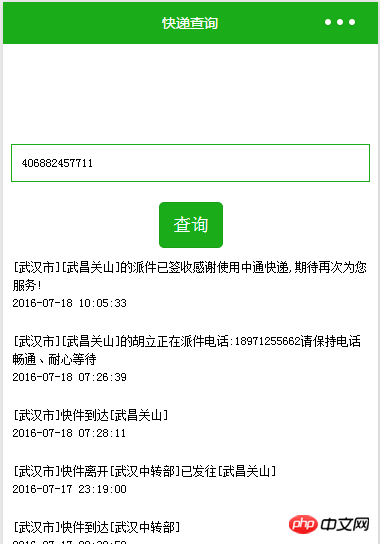
Finally we need to display the queried express information in index.wxml and use vx:for to loop the array.
<!--index.wxml--> <view class="container"> <input placeholder="请输入快递单号" bindinput="input" /> <button type="primary" bindtap="btnClick"> 查询 </button> </view>The style of the courier information displayed under the last step of setting:
- {{item.context}}
- {{item.time}}
/**index.wxss**/
 input{border:1px solid #1AAD19; width:90%; height:20px; font-size:12px; padding:5px 10px;}
 button{margin-top:20px;}
 .expressinfo{font-size:12px; line-height: 18px;padding:10px; text-align:left;}
 .expressinfo li{display:block}
At this point our entire query is completed...
About the implementation of the top navigation bar in the WeChat applet
Vidao implementation video in the WeChat applet Introduction to playback and barrage functions
WeChat applet realizes the effect of navigation bar tabs
The above is the detailed content of Introduction to express delivery query function developed by WeChat applet. For more information, please follow other related articles on the PHP Chinese website!
Related articles
See more- WeChat Mini Program Simple DEMO layout, logic, and style exercises
- Detailed explanation and examples of WeChat applet wx.request (interface calling method)
- WeChat Mini Program - Detailed explanation of WeChat login, WeChat payment, and template messages
- WeChat applet (application account) simple example application and detailed explanation of the example
- Detailed explanation of WeChat applet for loop

