Home >Web Front-end >CSS Tutorial >About the flexible layout of css flex
About the flexible layout of css flex
- 不言Original
- 2018-06-14 17:05:243107browse
This article mainly introduces relevant information on the detailed explanation of css flex elastic layout. The editor thinks it is quite good, so I will share it with you now and give it as a reference. Let’s follow the editor to take a look
Basic layout of the case
html
    <ul class="box">
        <li class="item"></li>
        <li class="item"></li>
        <li class="item"></li>
        <li class="item"></li>
    </ul>
css
        .box{
            display: -webkit-flex;
            display: flex;
        }
        .item{
            width: 200px;
            height: 300px;
            background: red;
            border: 1px solid #ccc;
            font-size: 50px;
            text-align: center;
            line-height: 300px;
            color:#fff;
        }
Because flex is mainly convenient and Mobile layout, so the test uses Google to simulate the mobile side to see the effect:
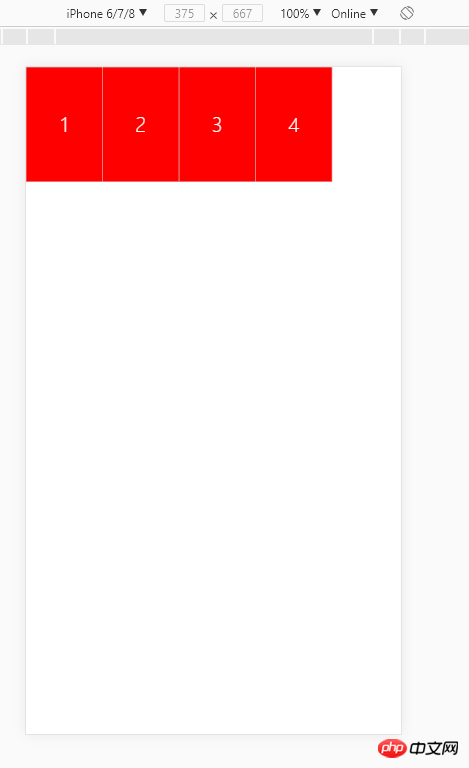
Because flex layout is used, the sub-elements are arranged horizontally by default, so float is not required and will not work. ;
Exploration of parent box properties
flex-direction
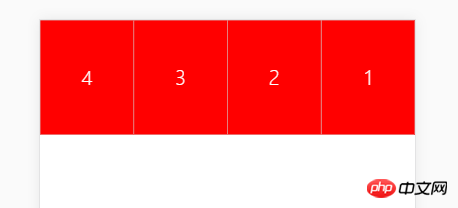
flex-direction represents child elements The arrangement direction and order; default row (horizontal, left to right); row-reverse means horizontal right to left
.box{
            display: -webkit-flex;
            display: flex;
            flex-direction:row-reverse;
        }
If each li is set Width: 3000px; (current screen width 980px), effect:
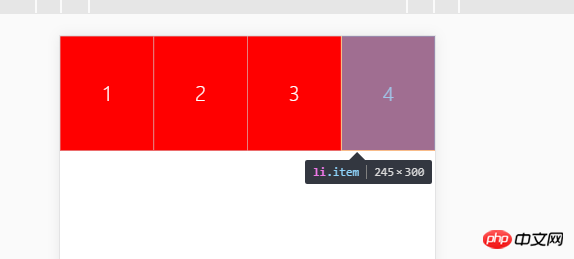
# If the width of the child element exceeds, not only will there be no line wrapping, but it will automatically adapt to the size and be divided into 25%;
The above split will only be split equally in row. If it is arranged vertically:
flex-direction: column;
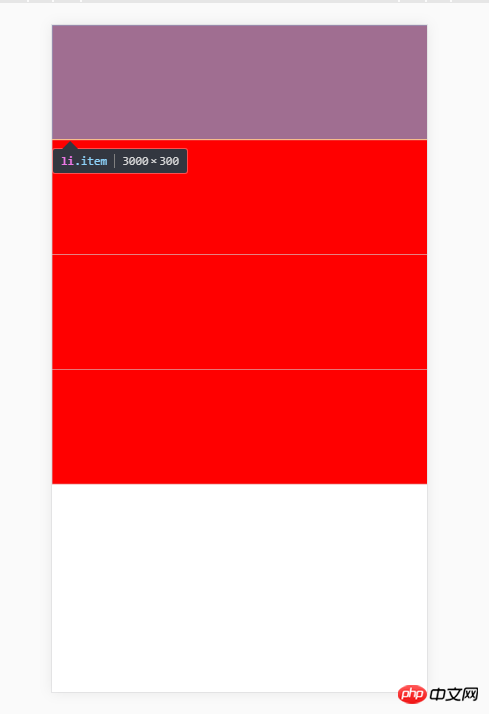
The element will not be squeezed and has a width of 3000px ; But please note that it is not wrapped because of insufficient space, but the column value specifies its vertical arrangement.
The following values can be adjusted to vertical arrangement in reverse order
flex-direction: column-reverse; //表示元素竖直 反向排
flex -wrap
flex-wrap Default nowrap: no line wrapping. The above 3000px sub-element is precisely because this vertical position does not wrap by default, so the above setting is 3000px wide and will not wrap;
The same code, if you add an additional sentence
.box{
            display: -webkit-flex;
            display: flex;
            flex-direction: row-reverse;
            flex-wrap: wrap;    //换行,第一行在上方。
        }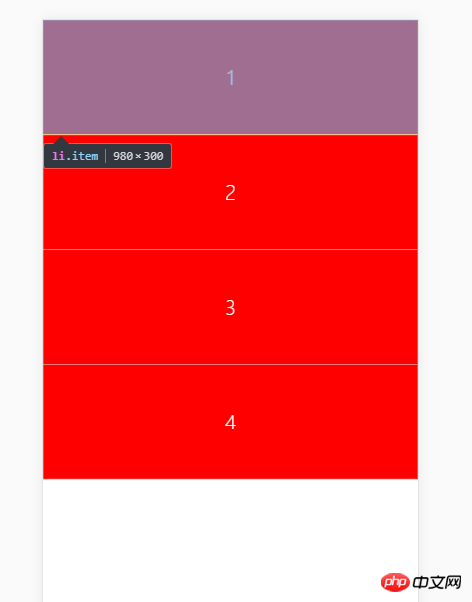
You can find that after setting it to wrap, the width of the sub-element becomes 100% of the screen width; this is like a flexible box stuffed into a box smaller than itself, and the flexible box automatically shrinks its own width.
If you write like this:
.box{
            display: -webkit-flex;
            display: flex;
            flex-direction: row-reverse;
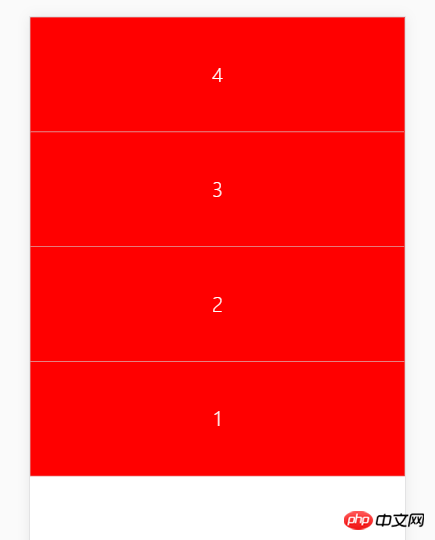
            flex-wrap: wrap-reverse;    //换行,第一行在下方。
        }
flex-flow
The flex-flow property is the flex-direction property and the abbreviation of flex-wrap property, the default value is row nowrap.
flex-flow:row wrap === flex-direction:row; flex-wrap: wrap
Change the code again:
.box{
      display: -webkit-flex;
      display: flex;
      flex-direction: row-reverse;
      flex-wrap: wrap-reverse;
    }

  可以写成

.box{
      display: -webkit-flex;
      display: flex;
      flex-flow:row-veverse wrap-reverse
    }
justify-content
It has five values, among which if item is compared to the text of a word document , flex-star can be regarded as left-aligned, flex-end: right-aligned; flex-center: centered;
focus on the value space-around: equally divide the free space of the content, and the space on both sides of each item Equal;
Suppose the free space is an area and there are k sub-elements. How much margin is added to each sub-element? ==> area/2k
This example:
.item{
    width:200px;
}
.box{
       display: -webkit-flex;
       display: flex;
       justify-content: space-around;
}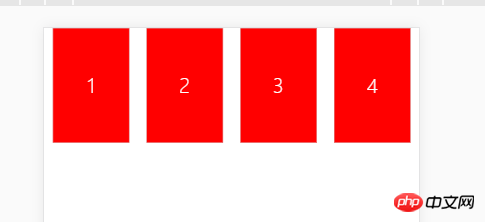
It is worth noting that the distance between items is one greater than the distance between the items and the border. times.
space-between: Align both ends, and the intervals between items are equal. Without the words
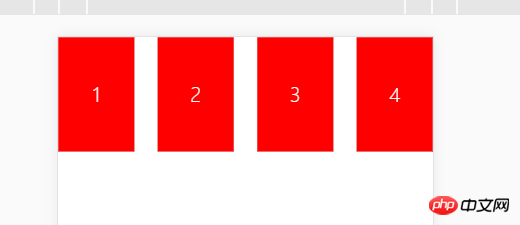
align-items
align, you can basically know that it is for the vertical direction;
.box{
            display: -webkit-flex;
            display: flex;
            justify-content: space-between;
            height: 1760px;
            align-items: center;

        }
Remember to add a height to the parent; this way you can see that the element is vertically centered
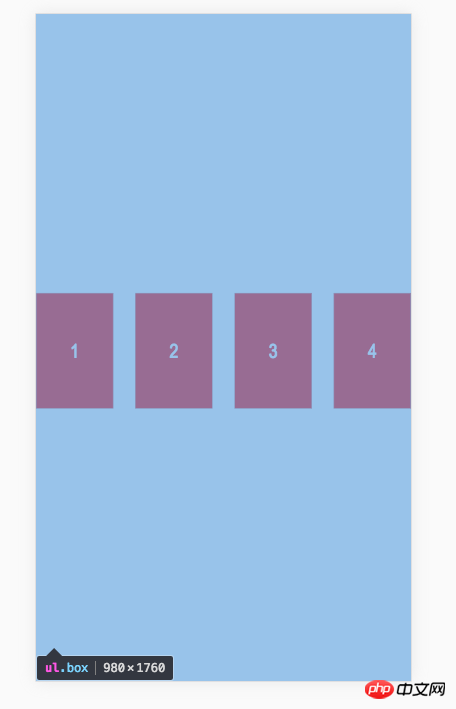
Other similar attributes will not be written one by one
flex-start: Align the starting point of the cross axis.
flex-end: The end point alignment of the cross axis.
stretch (default value): If the item does not set a height or is set to auto, it will occupy the entire height of the container.
Look at the baseline attribute: the baseline alignment of the first line of text of the item.
This attribute is relatively new, you can try:
.box{
     align-items: baseline;
     }

    <ul class="box">
        <li class="item" style="height: 150px;line-height: 150px">1</li>
        <li class="item" style="height: 500px;line-height: 500px">2</li>
        <li class="item" style="height: 250px;line-height: 250px">3</li>
        <li class="item" style="height: 170px;line-height: 170px">4</li>
    </ul>
Above I set different heights and line-heights for each item;
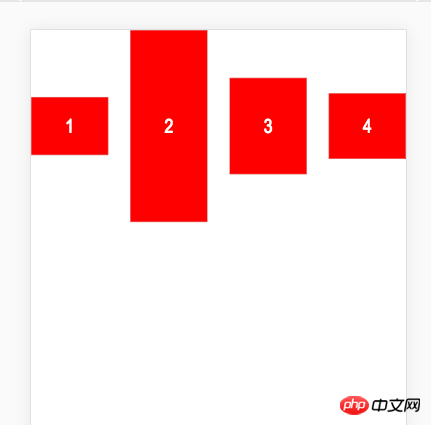
You can see that the container adjusts its position to align the text;
align-content
defines the alignment of multiple axes. This property has no effect if the project has only one axis.
.box{
            height: 1760px;   //高度要撑开
            display: -webkit-flex;
            display: flex;
            justify-content: space-between;
            flex-flow: row wrap; //横排 换行;产生多轴

        }


<ul class="box">
        <li class="item">1</li>
        <li class="item">2</li>
        <li class="item">3</li>
        <li class="item">4</li>
        <li class="item">5</li>
        <li class="item">6</li>
        <li class="item">7</li>
        <li class="item">8</li>
        <li class="item">9</li>
    </ul>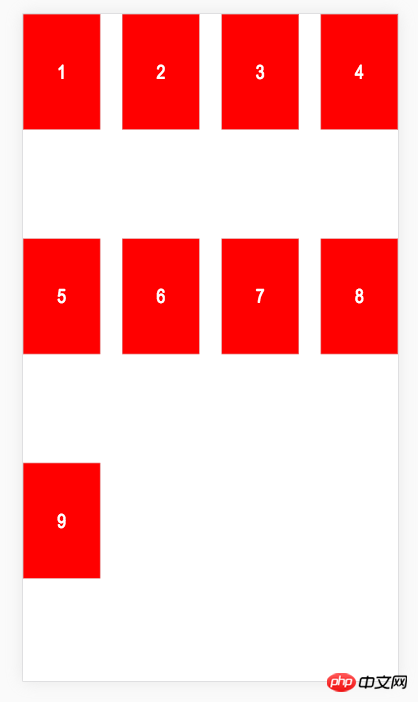
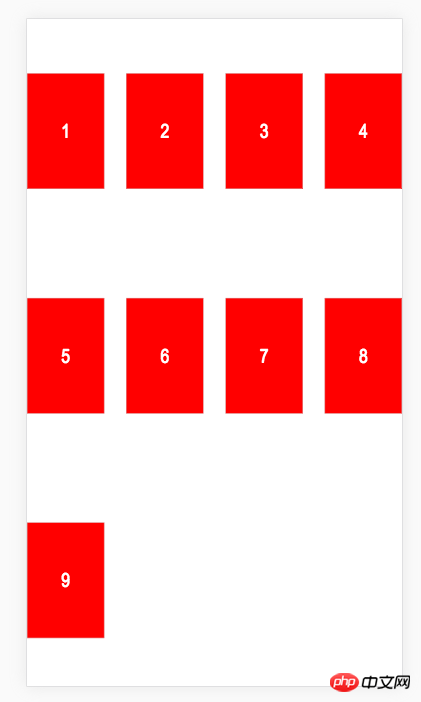
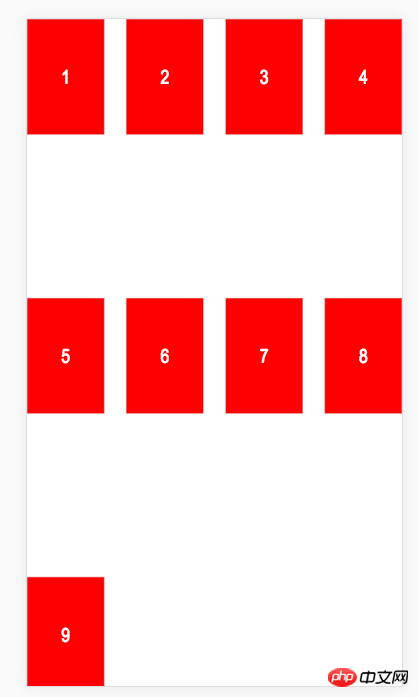
Try to add code
align-content: flex-end;
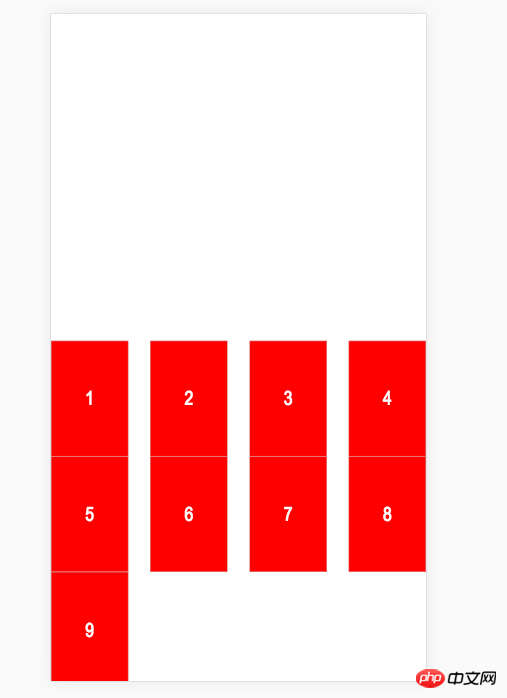
align-content:space-around;
align-content:space-between;
align-content : center;
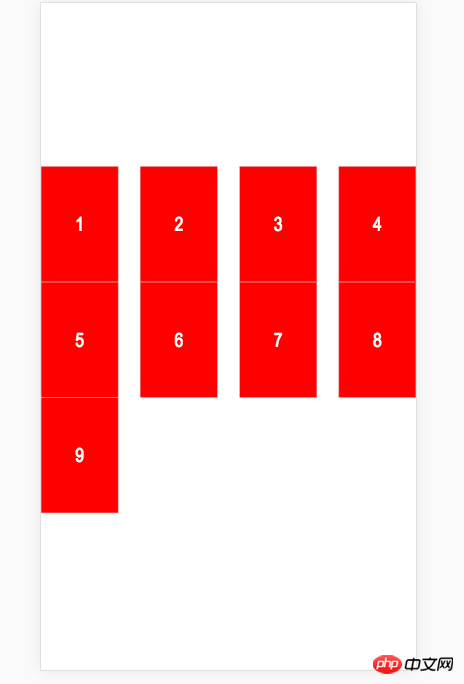
可以说,flex布局在父元素上对子元素垂直方向的控制还是非常到位和明确的;
子元素属性探究
order
大概可以理解为子元素的排队号码,默认都是0,越大排队越后;
<ul class="box">
        <li class="item" style="order:10">1</li>
        <li class="item" style="order:11">2</li>
        <li class="item">3</li>
        <li class="item">4</li>
        <li class="item">5</li>
        <li class="item">6</li>
        <li class="item">7</li>
        <li class="item">8</li>
        <li class="item">9</li>
    </ul>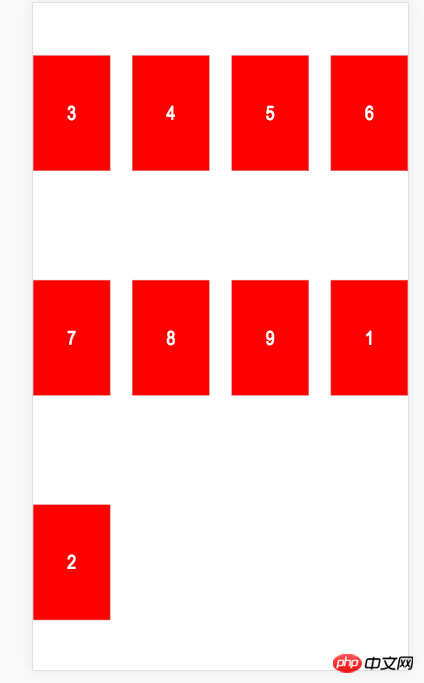
可以看到,1 号因为 order 设置为10排到了后面; 而2号因为更加大的order 而排到最后。
flex-grow 多余空间分配比例
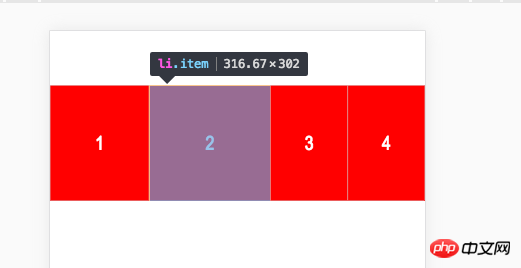
它的值是一个number,默认为0;只要有一个同轴元素被设定了flex-grow ,所有多余空间都会按照这个比例分配,并让元素占满整行。这个被分配的空间,是算在自身里面的;
<ul class="box">
        <li class="item" style="flex-grow:1;">1</li>
        <li class="item" style="flex-grow:2;">2</li>
        <li class="item">3</li>
        <li class="item">4</li>
        <li class="item">5</li>
        <li class="item">6</li>
        <li class="item">7</li>
        <li class="item">8</li>
        <li class="item">9</li>
    </ul>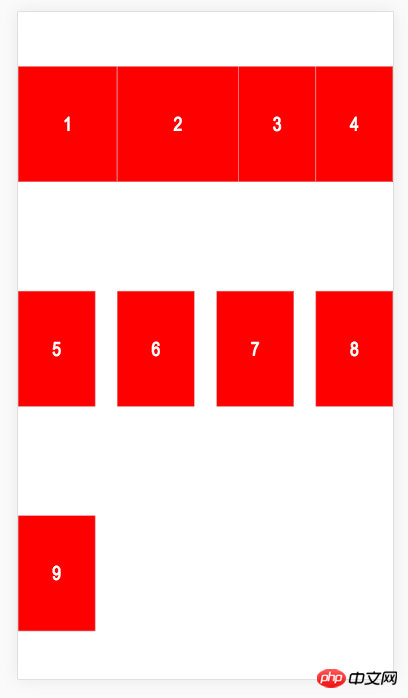
盒子宽度变大了,(就是grow啦)
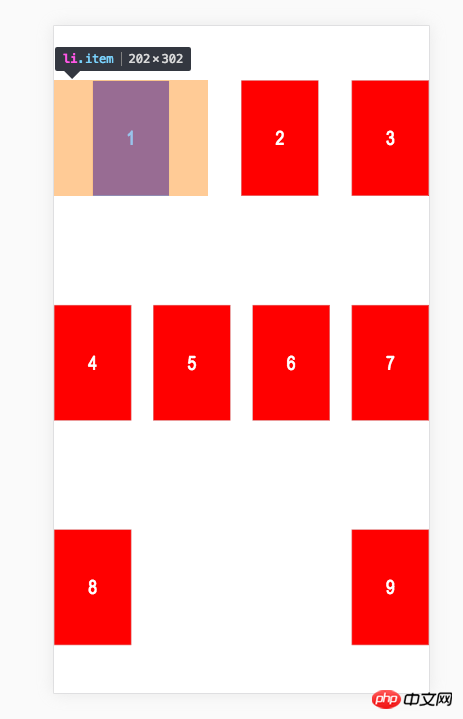
如果子元素有margin,那么会先计算横排多少个,再决定 flex-grow 分配的空间是多少
例如如下代码,
//没有设定 flex-grow 时
 <li class="item" style="flex-grow:0;margin: 0 100px;">1</li>
 <li class="item" style="flex-grow:0;">2</li>
//设定了 flex-grow 时
 <li class="item" style="flex-grow:2;margin: 0 100px;">1</li>
 <li class="item" style="flex-grow:1;">2</li>
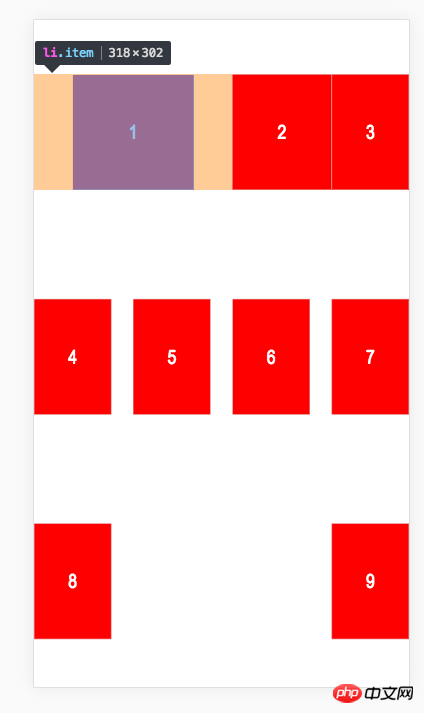
所以,margin 并不算 多余空间 ,不会被重新分配;
flex-shrink
此属性与 flex-grow 有点相反的意思,用于处理 不换行时,内容超出屏幕了,应该决定谁来缩小;
值越大 缩小比例越大;默认是 1
改一下代码;
.box{
    flex-flow:row nowrap;
}

<ul class="box">
        <li class="item">1</li>
        <li class="item">2</li>
        <li class="item">3</li>
        <li class="item">4</li>
        <li class="item">5</li>
    </ul>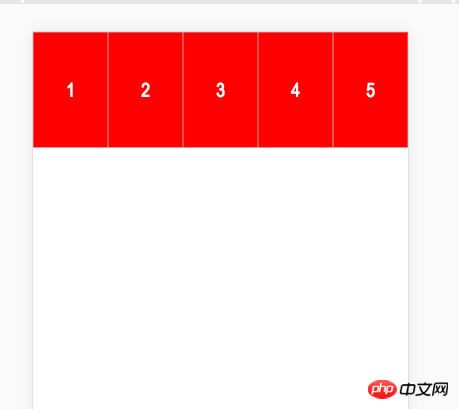
此时 父盒子规定不能换行;但是5个item 宽度已经超过屏幕宽了;此时大家是等比缩小
下面设置1号 flex-shrink:600
<ul class="box">
        <li class="item" style="flex-shrink:600;">1</li>
        <li class="item">2</li>
        <li class="item">3</li>
        <li class="item">4</li>
        <li class="item">5</li>
    </ul>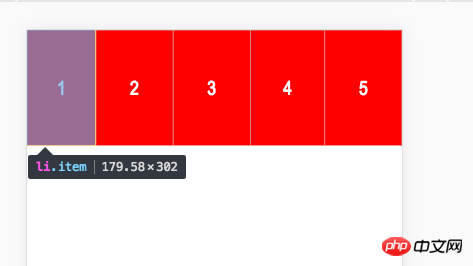
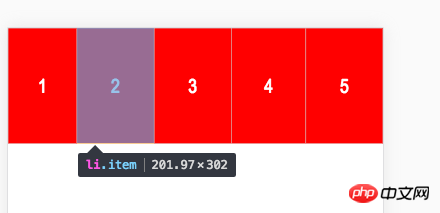
可以看到,尽管我把1号设置到缩放非常大了,但是实际宽度并没有很小;说明浏览器会自己决定内容是否已经足够放下,够了就停止缩放;
<ul class="box">
        <li class="item" style="flex-shrink:600;">1</li>
        <li class="item">2</li>
        <li class="item">3</li>
        <li class="item" style="flex-shrink:200;">4</li>
        <li class="item">5</li>
        <li class="item">6</li>
        <li class="item">7</li>
        <li class="item">8</li>
        <li class="item">9</li>
    </ul>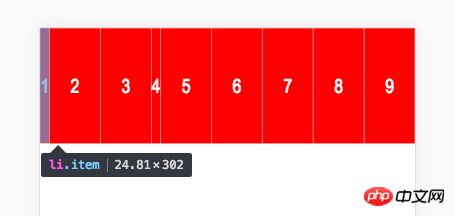
当内容非常多时,1号就明显被缩放得非常厉害,同时我发现,4号尽管设置200,但是它的大小跟被设为600的 1号是一样的。
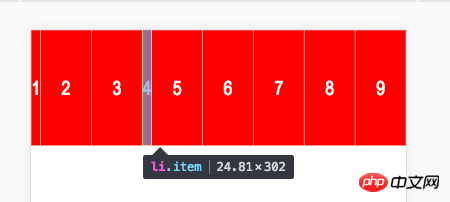
这是因为他们已经缩放到最后只能容纳文字的空间了;所以就不会再缩放下去;这跟文字占位一个道理
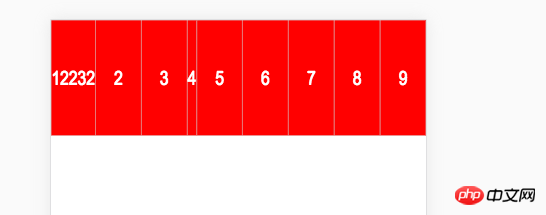
flex-basis
属性定义了在分配多余空间之前,项目占据的主轴空间(main size)。浏览器根据这个属性,计算主轴是否有多余空间。它的默认值为auto,即项目的本来大小。
简单来说,就是这个值会影响浏览器计算的输入值,有四种情况
1,本来就会超出,然后你设定的值比原值低(原值200px每个item),你的元素会被压缩。
 <ul class="box">
        <li class="item" style="flex-basis:100px;">1</li>
        <li class="item">2</li>
        <li class="item">3</li>
        <li class="item" style="">4</li>
        <li class="item">5</li>
        <li class="item">6</li>
        <li class="item">7</li>
        <li class="item">8</li>
        <li class="item">9</li>
    </ul>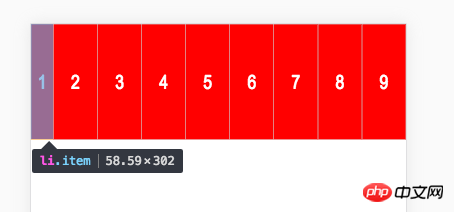
1,本来就会超出,然后你设定的值比原值大,你的元素会被相对放大些。
<ul class="box">
        <li class="item" style="flex-basis:600px;">1</li>
        <li class="item">2</li>
        <li class="item">3</li>
        <li class="item" style="">4</li>
        <li class="item">5</li>
        <li class="item">6</li>
        <li class="item">7</li>
        <li class="item">8</li>
        <li class="item">9</li>
    </ul>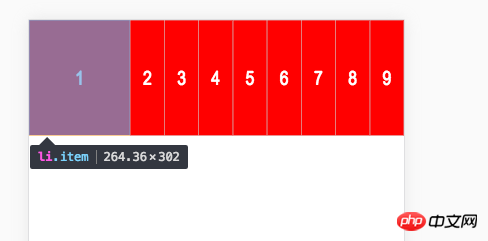
3 本来不会超出,你设定的值比原来小,你还是会小一点
 <ul class="box">
        <li class="item" style="flex-basis:100px;">1</li>
        <li class="item">2</li>
        <li class="item">3</li>
    </ul>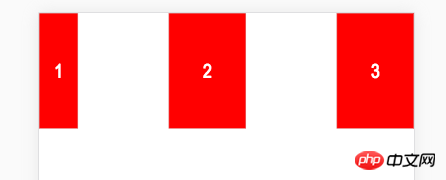
4 本来不会超出,你设定的值比原来大,你就会更大
<ul class="box">
        <li class="item" style="flex-basis:600px;">1</li>
        <li class="item">2</li>
        <li class="item">3</li>
    </ul>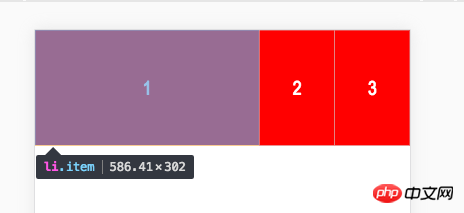
这个值你可以当做宽度来看,当设定为 跟原来一样的值得时候,基本没有变化
<ul class="box">
        <li class="item" style="flex-basis:200px;">1</li>
        <li class="item">2</li>
        <li class="item">3</li>
    </ul>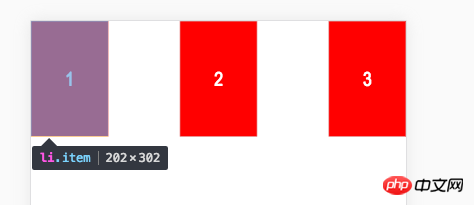
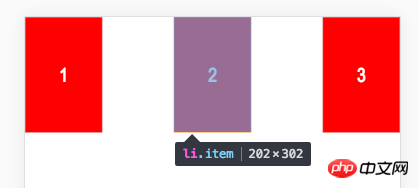
align-self
此子元素单独设置垂直方向对齐方式;默认auto 表示父亲怎么定义就怎么来;其他值跟align-items是一样的
<ul class="box">
        <li class="item" style="align-self: center">1</li>
        <li class="item" style="align-self: flex-end">2</li>
        <li class="item">3</li>
        <li class="item">4</li>
        <li class="item" style="align-self: center">5</li>
    </ul>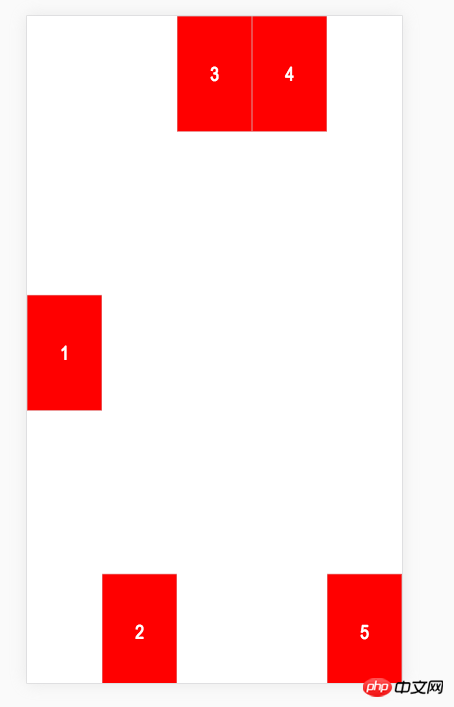
此属性主要是方便特殊定位 某个字元素
flex属性
是flex-grow, flex-shrink 和 flex-basis的简写,默认值为0 1 auto。后两个属性可选。
.item {
flex: none | [ <'flex-grow'> <'flex-shrink'>? || <'flex-basis'> ]
}该属性有两个快捷值:auto (1 1 auto) 和 none (0 0 auto)。
建议优先使用这个属性,而不是单独写三个分离的属性,因为浏览器会推算相关值。
最后
移动端使用flex 布局感觉还是非常给力的,并且通常满足各个屏幕自适应的要求;有机会还是要多实践起来。
以上就是本文的全部内容,希望对大家的学习有所帮助,更多相关内容请关注PHP中文网!
相关推荐:
The above is the detailed content of About the flexible layout of css flex. For more information, please follow other related articles on the PHP Chinese website!

