
Home >Backend Development >PHP Tutorial >Build php-nginx environment
Build php-nginx environment

- 不言Original
- 2018-06-02 16:18:001977browse
This article mainly introduces the construction of php-nginx environment, which has certain reference value. Now I share it with everyone. Friends in need can refer to it
***Background: I use Centos6.4 installed Linux system, when the system installation is completed, perform the following operations***
1. Install nginx system
UseSource packageInstall Nginx
Place the nginx source package in the linux /usr/local/src directory

Use command tar -zxvf nginx-1.9.15.tar.gz Decompress the source package

After decompression is completed The folder appears nginx-1.9.15

Usecd nginx-1.9.15 Enter the nginx-1.9.15 directory
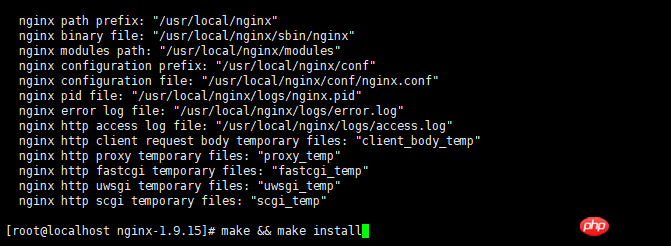
Use ./configure --prefix=/usr/local/nginx Command configuration information This command will automatically generate the nginx folder in the /usr/local directory

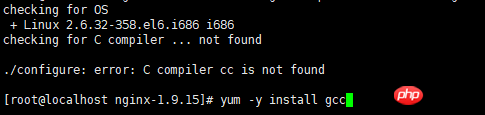
The following picture appears, gcc is missing and you need to install gcc
Use the command: yum -y install gcc Install gcc through yum
Continue to use the command after gcc installation is complete./configure --prefix=/usr/local/nginx Configuration information

The following situation appears: Use yum install pcre-devel to install pcre-devel

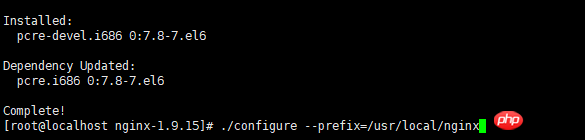
After the pcre-devel installation is completed, continue to use the command ./configure --prefix =/usr/local/nginx Configuration information
The following situation appears: Use yum install zlib-devel to install zlib-devel
 Continue to use the command after zlib-devel installation is complete ./configure --prefix=/usr/local/nginx Configuration information

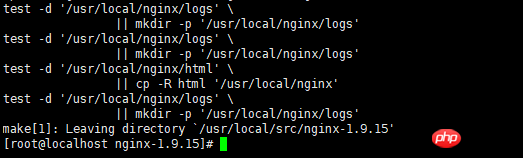
After configuring the information, use the command: make && make install Install Nginx
/usr/local/nginx
/usr/local/nginx/sbin/nginx
nginx stop command:/usr/local/nginx/sbin/nginx -s stop
nginx restart command: /usr/local/nginx/sbin/nginx -s reloadView nginx process:ps -ef | grep nginx

2. Install php-7.1.8
Usesource packageInstall PHP
nginx uses php-fpm, so we not only need to install php, but also need to install php-fpm.Place the php source code package in the linux /usr/local/src directory

Use the command tar -zxvf php-7.1.8.tar.gz to decompress the source code package

The folder appears after decompression is completed php-7.1.8

php-7.1.8 directory
Configuration--with-mysql \
--with-mysqli \
--with-pdo-mysql \
--with-gd \
--with-freetype-dir \
--with-curl \
--with-xmlrpc \
--with-curl \
--with-iconv=/usr/local/libiconv-1.14 \
--with-zlib \
--with-jpeg-dir \
--with-png-dir \
--with-openssl \
--with-libxml-dir \
--with-mcrypt=/usr/local/libmcrypt-2.5.7 \
--enable-fpm \
- -enable-static \
--disable-inline-optimization \
--enable-sockets \
--enable-zip \
--enable-calendar \
--enable- bcmath \
--enable-soap \
--enable-ftp \
--enable-mbstring \
--enable-shared \
--disable-fileinfo )
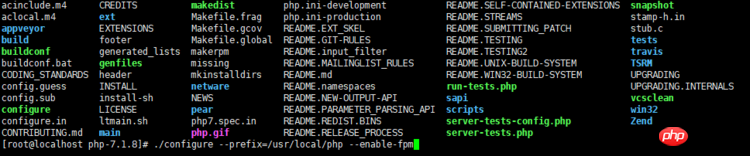
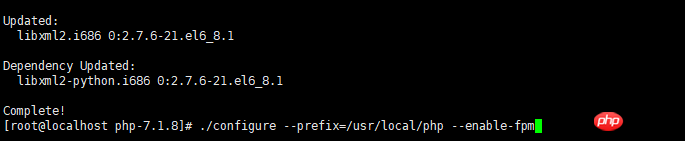
Use the command: yum -y install libxml2 Install libxml2 through yum
 ##After the installation of libxml2 is completed, continue to use ./configure --prefix=/usr /local/php --enable-fpm Configuration information
 #The same error occurs again, you need to install libxml2-devel
Use the command: yum install libxml2-devel Install libxml2-devel through yum
## After the installation of libxml2-devel is completed, continue to use ./configure --prefix=/usr/local/php --enable-fpm configuration information 
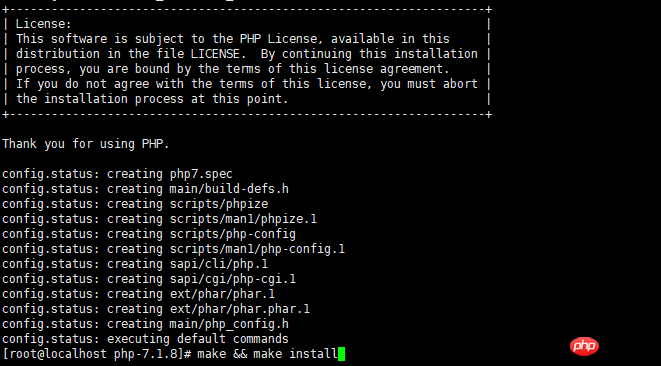
After configuring the information, use the command: make && make install to install php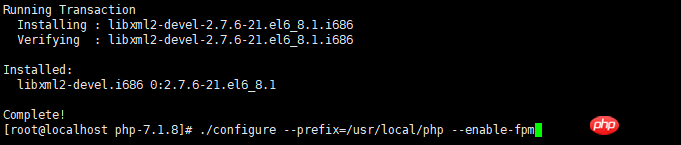
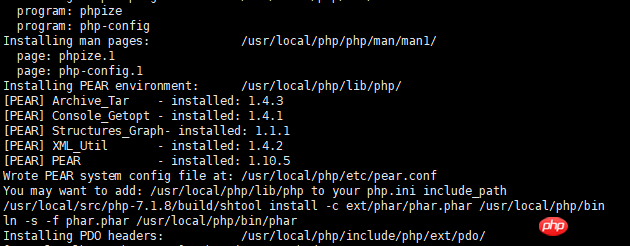 Create the
file:
In Use the command in the source code package directory: cp php.ini-production /usr/local/php/etc/php.ini
will php.ini-production file Copy to the
/usr/local/php/etcdirectory and rename it to php.ini
Createphp-fpm.conf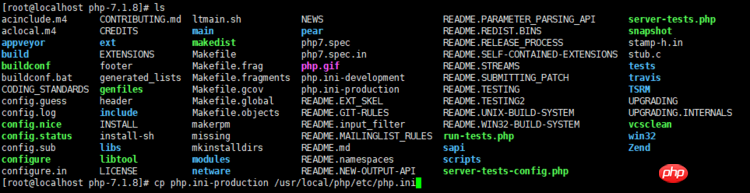 File:
File:
Use command:cd /usr/local/php/etc Enter the /usr/local/php/etc directory
Use the command in the directory: cp php-fpm.conf.default php-fpm.conf Copy the
php-fpm.conf.default file in the directory to the same directory Download and rename it to php-fpm.conf Create www.conf file: Use command: cd /usr/local/php/etc/php-fpm. dEnter the /usr/local/php/etc/php-fpm.d directory Use the command in the directory: cp www.conf.default www.conf Change the directory Copy the www.conf.default file to the same directory and rename it www.conf
php.ini file in the lib directory Use the command: cd /usr/local/php/etc Enter the /usr/local/php/etc directory Use the command in the directory: cp php.ini /usr/local/php/lib/php.ini Copy the php.ini file in this directory Go to the /usr/local/php/lib directory
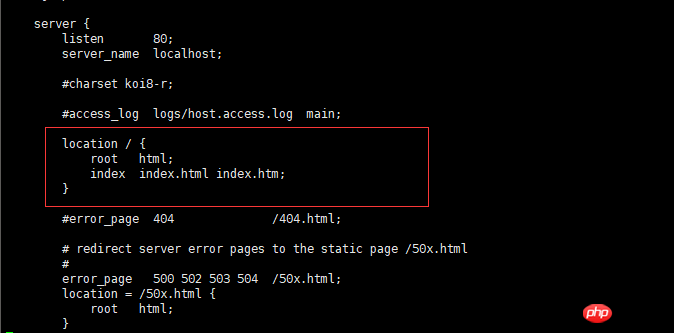
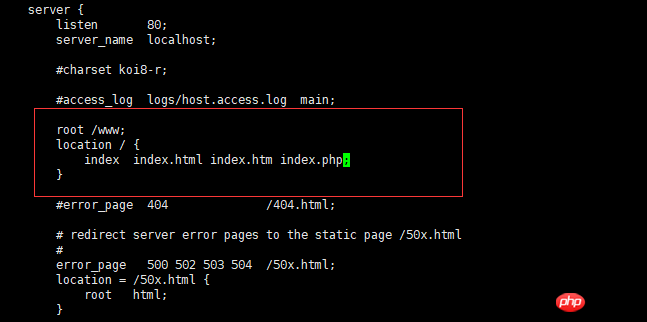
3. Use the command: Enter the nginx configuration file directory Use the command: Edit the configuration fileModify The location marked by the red box: Configure the server root directory to /www, and add index.php to the default access file. ## Location: Enable the connection between nginx and php. ## After modifying the nginx configuration, you need to restart nginx. php-fpm View process:
##4. Test 

 ##Configuration file created!
After the configuration file is created, you need to modify nginx.conf to connect php and nginx
 php-fpm startup command:
 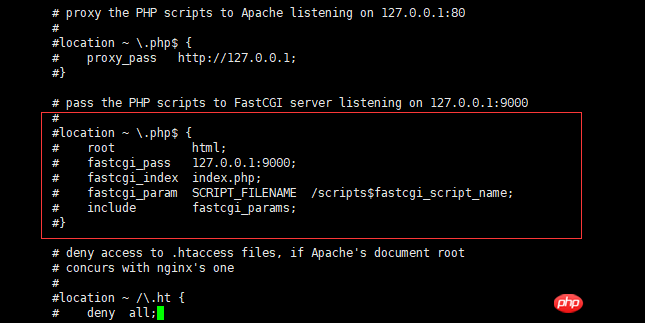 ps -ef | grep php-fpm
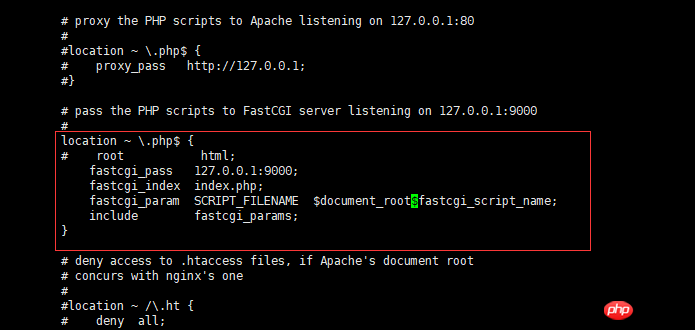
server {
                                    listen       80;
                                    server_name  localhost;
                                    root /www;       //将根目录改为/www
                                    #charset koi8-r;

                                    #access_log  logs/host.access.log  main;
                                   location / {
                                                #  root /www;
                                               index  index.html index.htm index.php;
                                    }
The above is the detailed content of Build php-nginx environment. For more information, please follow other related articles on the PHP Chinese website!