This time I will show you how to use WebSocket communication and what are the precautions for using WebSocket communication. The following is a practical case, let's take a look.
What is WebSocket?
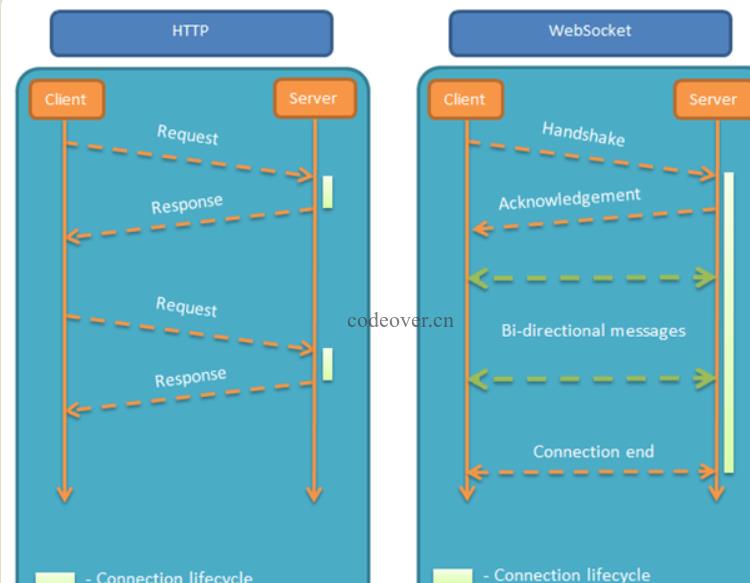
WebSocket is a standard protocol for bidirectional data transmission between client and server. But it has nothing to do with HTTP. It is an independent implementation based on TCP. In the past, if the client wanted to know the processing progress of the server, it had to constantly use Ajax to poll, and let the browser send a request to the server every few seconds, which put great pressure on the server. Another kind of polling is to use long poll, which is similar to making a phone call. It will not hang up until a message is received. In other words, after the client initiates a connection, if there is no message, the Response will not be returned to the client. , the connection phase is always blocked. And WebSocket solves these problems of HTTP. After the server completes the protocol upgrade (HTTP -> WebSocket), the server can actively push information to the client, solving the synchronization delay problem caused by polling. Since WebSocket only requires one HTTP handshake, the server can keep communicating with the client until the connection is closed. This eliminates the need for the server to repeatedly parse the HTTP protocol and reduces resource overhead.


Establish connection
Client request message HeaderClient request message:GET / HTTP/1.1 Upgrade: websocket Connection: Upgrade Host: example.com Origin: http://example.com Sec-WebSocket-Key: sN9cRrP/n9NdMgdcy2VJFQ== Sec-WebSocket-Version: 13Differences from traditional HTTP messages:
Upgrade: websocket
Connection: Upgrade
These two lines indicate that the WebSocket protocol is initiated.
Sec-WebSocket-Key: sN9cRrP/n9NdMgdcy2VJFQ==
Sec-WebSocket-Version: 13
Sec-WebSocket-Key is randomly generated by the browser and provides basic protection against malicious or unintentional connections. Sec-WebSocket-Version indicates the version of WebSocket. Initially, there were too many WebSocket protocols, and different manufacturers had their own protocol versions, but now it has been settled. If the server does not support this version, a Sec-WebSocket-Versionheader needs to be returned, which contains the version number supported by the server. Create a WebSocket object:
var ws = new websocket("ws://127.0.0.1:8001");ws means using the WebSocket protocol, followed by the address and port Complete client code:
<script>
var ws;
var box = document.getElementById('box');
function startWS() {
ws = new WebSocket('ws://127.0.0.1:8001');
ws.onopen = function (msg) {
console.log('WebSocket opened!');
};
ws.onmessage = function (message) {
console.log('receive message: ' + message.data);
box.insertAdjacentHTML('beforeend', '<p>' + message.data + '');
};
ws.onerror = function (error) {
console.log('Error: ' + error.name + error.number);
};
ws.onclose = function () {
console.log('WebSocket closed!');
};
}
function sendMessage() {
console.log('Sending a message...');
var text = document.getElementById('text');
ws.send(text.value);
}
window.onbeforeunload = function () {
ws.onclose = function () {}; // 首先关闭 WebSocket
ws.close()
};
</script>
Server response message Header
First let’s take a look at the server response message:HTTP/1.1 101 Switching Protocols Upgrade: websocket Connection: Upgrade Sec-WebSocket-Accept: HSmrc0sMlYUkAGmm5OPpG2HaGWk= Sec-WebSocket-Protocol: chatLet’s explain it line by line
- First, 101
- Then, Sec-WebSocket-Accept is the Sec-WebSocket-Key that has been confirmed by the server and encrypted;
- Finally, Sec-WebSocket-Protocol is is the protocol that represents the end use.
- Splice Sec-WebSocket-Key with 258EAFA5-E914-47DA-95CA-C5AB0DC85B11 ;
- Calculate the digest through SHA1 and convert it into a base64 string.
注意:Sec-WebSocket-Key/Sec-WebSocket-Accept 的换算,只能带来基本的保障,但连接是否安全、数据是否安全、客户端 / 服务端是否合法的 ws 客户端、ws 服务端,其实并没有实际性的保证。
创建主线程,用于实现接受 WebSocket 建立请求:
def create_socket():
 # 启动 Socket 并监听连接
 sock = socket.socket(socket.AF_INET, socket.SOCK_STREAM)
 try:
 sock.bind(('127.0.0.1', 8001))
 # 操作系统会在服务器 Socket 被关闭或服务器进程终止后马上释放该服务器的端口,否则操作系统会保留几分钟该端口。
 sock.setsockopt(socket.SOL_SOCKET, socket.SO_REUSEADDR, 1)
 sock.listen(5)
 except Exception as e:
 logging.error(e)
 return
 else:
 logging.info('Server running...')
 # 等待访问
 while True:
 conn, addr = sock.accept() # 此时会进入 waiting 状态
 data = str(conn.recv(1024))
 logging.debug(data)
 header_dict = {}
 header, _ = data.split(r'\r\n\r\n', 1)
 for line in header.split(r'\r\n')[1:]:
 key, val = line.split(': ', 1)
 header_dict[key] = val
 if 'Sec-WebSocket-Key' not in header_dict:
 logging.error('This socket is not websocket, client close.')
 conn.close()
 return
 magic_key = '258EAFA5-E914-47DA-95CA-C5AB0DC85B11'
 sec_key = header_dict['Sec-WebSocket-Key'] + magic_key
 key = base64.b64encode(hashlib.sha1(bytes(sec_key, encoding='utf-8')).digest())
 key_str = str(key)[2:30]
 logging.debug(key_str)
 response = 'HTTP/1.1 101 Switching Protocols\r\n' \
  'Connection: Upgrade\r\n' \
  'Upgrade: websocket\r\n' \
  'Sec-WebSocket-Accept: {0}\r\n' \
  'WebSocket-Protocol: chat\r\n\r\n'.format(key_str)
 conn.send(bytes(response, encoding='utf-8'))
 logging.debug('Send the handshake data')
 WebSocketThread(conn).start()
进行通信
服务端解析 WebSocket 报文
Server 端接收到 Client 发来的报文需要进行解析
Client 包格式

FIN: 占 1bit
0:不是消息的最后一个分片
1:是消息的最后一个分片
RSV1, RSV2, RSV3:各占 1bit
一般情况下全为 0。当客户端、服务端协商采用 WebSocket 扩展时,这三个标志位可以非
0,且值的含义由扩展进行定义。如果出现非零的值,且并没有采用 WebSocket 扩展,连接出错。
Opcode: 4bit
%x0:表示一个延续帧。当 Opcode 为 0 时,表示本次数据传输采用了数据分片,当前收到的数据帧为其中一个数据分片;
%x1:表示这是一个文本帧(text frame);
%x2:表示这是一个二进制帧(binary frame);
%x3-7:保留的操作代码,用于后续定义的非控制帧;
%x8:表示连接断开;
%x9:表示这是一个心跳请求(ping);
%xA:表示这是一个心跳响应(pong);
%xB-F:保留的操作代码,用于后续定义的控制帧。
Mask: 1bit
表示是否要对数据载荷进行掩码异或操作。
0:否
1:是
Payload length: 7bit or (7 + 16)bit or (7 + 64)bit
表示数据载荷的长度
0~126:数据的长度等于该值;
126:后续 2 个字节代表一个 16 位的无符号整数,该无符号整数的值为数据的长度;
127:后续 8 个字节代表一个 64 位的无符号整数(最高位为 0),该无符号整数的值为数据的长度。
Masking-key: 0 or 4bytes
当 Mask 为 1,则携带了 4 字节的 Masking-key;
当 Mask 为 0,则没有 Masking-key。
掩码算法:按位做循环异或运算,先对该位的索引取模来获得 Masking-key 中对应的值 x,然后对该位与 x 做异或,从而得到真实的 byte 数据。
注意:掩码的作用并不是为了防止数据泄密,而是为了防止早期版本的协议中存在的代理缓存污染攻击(proxy cache poisoning attacks)等问题。
Payload Data: 载荷数据
解析 WebSocket 报文代码如下:
def read_msg(data):
 logging.debug(data)
 msg_len = data[1] & 127 # 数据载荷的长度
 if msg_len == 126:
 mask = data[4:8] # Mask 掩码
 content = data[8:] # 消息内容
 elif msg_len == 127:
 mask = data[10:14]
 content = data[14:]
 else:
 mask = data[2:6]
 content = data[6:]
 raw_str = '' # 解码后的内容
 for i, d in enumerate(content):
 raw_str += chr(d ^ mask[i % 4])
 return raw_str
服务端发送 WebSocket 报文
返回时不携带掩码,所以 Mask 位为 0,再按载荷数据的大小写入长度,最后写入载荷数据。
struct 模块解析
struct.pack(fmt, v1, v2, ...)
按照给定的格式 fmt,把数据封装成字符串 ( 实际上是类似于 C 结构体的字节流 )
struct 中支持的格式如下表:
| Format | C Type | Python type | Standard size |
|---|---|---|---|
| x | pad byte | no value | |
| c | char | bytes of length 1 | 1 |
| b | signed char | integer | 1 |
| B | unsigned char | integer | 1 |
| ? | _Bool | bool | 1 |
| h | short | integer | 2 |
| H | unsigned short | integer | 2 |
| i | int | integer | 4 |
| I | unsigned int | integer | 4 |
| l | long | integer | 4 |
| L | unsigned long | integer | 4 |
| q | long long | integer | 8 |
| Q | unsigned long long | integer | 8 |
| n | ssize_t | integer | |
| N | size_t | integer | |
| e | -7 | float | 2 |
| f | float | float | 4 |
| d | double | float | 8 |
| s | char[] | bytes | |
| p | char[] | bytes | |
| P | void * | integer |
为了同 C 语言中的结构体交换数据,还要考虑有的 C 或 C++ 编译器使用了字节对齐,通常是以 4 个字节为单位的 32 位系统,故而 struct 根据本地机器字节顺序转换。可以用格式中的第一个字符来改变对齐方式,定义如下:
| Character | Byte order | Size | Alignment |
|---|---|---|---|
| @ | native | native | native |
| = | native | standard | none |
| little-endian | standard | none | |
| > | big-endian | standard | none |
| ! | network (= big-endian) | standard | none |
发送 WebSocket 报文代码如下:
def write_msg(message):
 data = struct.pack('B', 129) # 写入第一个字节,10000001
 # 写入包长度
 msg_len = len(message)
 if msg_len <p style="text-align: left;"><span style="color: #ff0000"><strong>总结</strong></span></p><p style="text-align: left;">没有其他能像 WebSocket 一样实现全双工传输的技术了,迄今为止,大部分开发者还是使用 Ajax 轮询来实现,但这是个不太优雅的解决办法,WebSocket 虽然用的人不多,可能是因为协议刚出来的时候有安全性的问题以及兼容的浏览器比较少,但现在都有解决。如果你有这些需求可以考虑使用 WebSocket:</p>
多个用户之间进行交互;
需要频繁地向服务端请求更新数据。
比如弹幕、消息订阅、多玩家游戏、协同编辑、股票基金实时报价、视频会议、在线教育等需要高实时的场景。
相信看了本文案例你已经掌握了方法,更多精彩请关注php中文网其它相关文章!
推荐阅读:
The above is the detailed content of How to communicate using WebSocket. For more information, please follow other related articles on the PHP Chinese website!
 SpringBoot怎么整合WebSocket实现后端向前端发送消息May 11, 2023 pm 02:07 PM
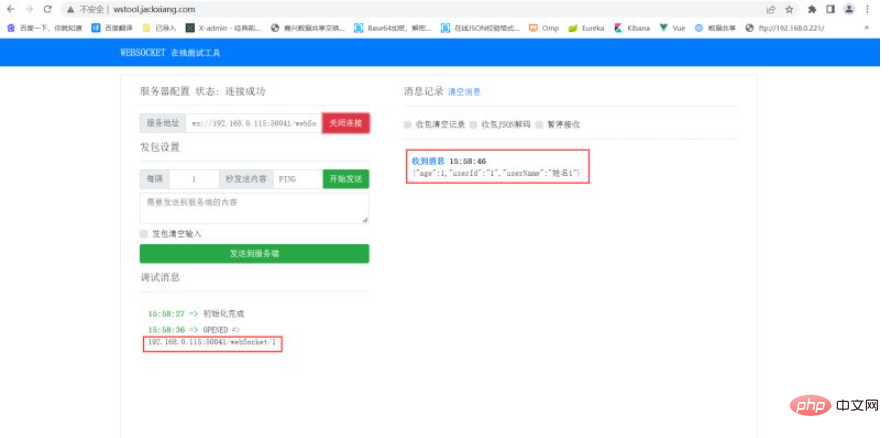
一、什么是websocket接口使用websocket建立长连接,服务端和客户端可以互相通信,服务端只要有数据更新,就可以主动推给客户端。WebSocket使得客户端和服务器之间的数据交换变得更加简单,允许服务端主动向客户端推送数据。在WebSocketAPI中,浏览器和服务器只需要完成一次握手,两者之间就直接可以创建持久性的连接,并进行双向数据传输。在WebSocketAPI中,浏览器和服务器只需要做一个握手的动作,然后,浏览器和服务器之间就形成了一条快速通道。两者之间就直接可以数据互相传送。
 SpringBoot怎么实现WebSocket即时通讯May 12, 2023 am 09:13 AM
1、引入依赖org.springframework.bootspring-boot-starter-websocketorg.projectlomboklombokcom.alibabafastjson1.2.32、WebSocketConfig开启WebSocketpackagecom.shucha.deveiface.web.config;/***@authortqf*@Description*@Version1.0*@since2022-04-1215:35*/importorg.spri
 Python服务器编程:实现WebSocket服务端Jun 19, 2023 am 09:51 AM
近年来,WebSocket技术日渐流行,成为了浏览器与服务器之间进行实时通信的标准选择。在Python中,我们可以通过一些成熟的库来实现WebSocket服务端的开发。本文将在介绍WebSocket技术的基础上,探索如何利用Python开发WebSocket服务端。一、什么是WebSocketWebSocket是一种在单个TCP
 在ThinkPHP6中使用Nginx反向代理WebsocketJun 20, 2023 pm 09:31 PM
在近几年的互联网应用中,Websocket已经成为了一种非常重要的通信协议。ThinkPHP6作为一款优秀的PHP开发框架,也提供了对Websocket的支持。不过,在使用Websocket时,我们通常会涉及到跨域、负载均衡等问题,因此,在这篇文章中,我们将介绍如何在ThinkPHP6中使用Nginx反向代理Websocket。首先,我们需要明确一下Webs
 浏览器支持WebTransport?它能替代WebSockets?Feb 23, 2023 pm 03:36 PM
许多应用程序,如游戏和直播等场景,需要一种机制来尽可能快地发送消息,同时可以接受无序、不可靠的数据传输方式。本机应用程序虽然可以使用原始 UDP 套接字,但这些在 Web 上不可用,因为它们缺乏加密、拥塞控制、同意发送机制(以防止 DDoS 攻击)。
 SpringBoot中怎么使用WebSocket实现点对点消息May 16, 2023 pm 12:58 PM
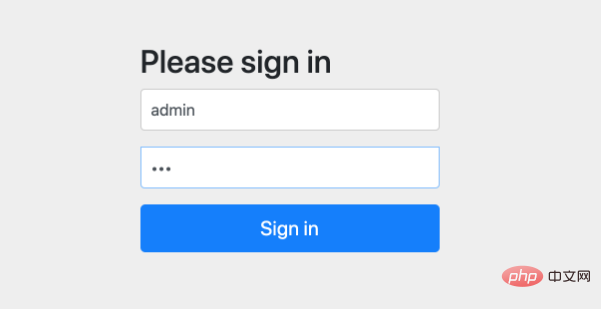
一、添加依赖,配置使用SpringSecurity里的用户。org.springframework.bootspring-boot-starter-security我们现在需要配置用户信息和权限配置。@ConfigurationpublicclassWebSecurityConfigextendsWebSecurityConfigurerAdapter{//指定密码的加密方式@SuppressWarnings("deprecation")@BeanPasswordEncode
 Spring Boot中使用WebSocket实现推送和通知功能Jun 23, 2023 am 11:47 AM
在现代Web应用程序开发中,WebSocket是实现即时通信和实时数据传输的常用技术。SpringBoot框架提供了集成WebSocket的支持,使得开发者可以非常方便地实现推送和通知功能。本文将介绍SpringBoot中如何使用WebSocket实现推送和通知功能,并演示一个简单的实时在线聊天室的实现。创建SpringBoot项目首先,我们需要创建一
 PHP+Socket系列之实现websocket聊天室Feb 02, 2023 pm 04:39 PM
本篇文章给大家带来了关于php+socket的相关知识,其中主要介绍了怎么使用php原生socket实现一个简易的web聊天室?感兴趣的朋友下面一起来看一下,希望对大家有帮助。


Hot AI Tools

Undresser.AI Undress
AI-powered app for creating realistic nude photos

AI Clothes Remover
Online AI tool for removing clothes from photos.

Undress AI Tool
Undress images for free

Clothoff.io
AI clothes remover

AI Hentai Generator
Generate AI Hentai for free.

Hot Article

Hot Tools

Safe Exam Browser
Safe Exam Browser is a secure browser environment for taking online exams securely. This software turns any computer into a secure workstation. It controls access to any utility and prevents students from using unauthorized resources.

SAP NetWeaver Server Adapter for Eclipse
Integrate Eclipse with SAP NetWeaver application server.

SublimeText3 Chinese version
Chinese version, very easy to use

DVWA
Damn Vulnerable Web App (DVWA) is a PHP/MySQL web application that is very vulnerable. Its main goals are to be an aid for security professionals to test their skills and tools in a legal environment, to help web developers better understand the process of securing web applications, and to help teachers/students teach/learn in a classroom environment Web application security. The goal of DVWA is to practice some of the most common web vulnerabilities through a simple and straightforward interface, with varying degrees of difficulty. Please note that this software

Dreamweaver Mac version
Visual web development tools


