

This time I will show you how to make and use Vue ripplebutton component, what are the notes for making and using Vue ripple button component, the following is a practical case, one Get up and take a look.
Let me talk about the usage first:
<zk-button>默认按钮</zk-button>
<zk-button>默认按钮</zk-button>
<zk-button>定义速度和初始的波浪透明度</zk-button>
Principle:
What is used here is canvas requestAnimationFrame (For compatibility, you can find solutions online.) Some of the ripples drawn are made with css transform setTimeout, which I don’t feel good about.
Template:
<template>
 <button>
  <canvas></canvas>
  <slot></slot>
 </button>
</template>
The click code is as follows (I have added detailed comments)
ripple(event) {
 // 清除上次没有执行的动画
 if (this.timer) {
  window.cancelAnimationFrame(this.timer);
 }
 this.el = event.target;
 // 执行初始化
 if (!this.initialized) {
  this.initialized = true;
  this.init(this.el);
 }
 this.radius = 0;
 // 点击坐标原点
 this.origin.x = event.offsetX;
 this.origin.y = event.offsetY;
 this.context.clearRect(0, 0, this.el.width, this.el.height);
 this.el.style.opacity = this.opacity;
 this.draw();
},
Here mainly initializes the canvas and obtains user clicks position coordinates and start drawing.
Loop drawing
draw() {
 this.context.beginPath();
 // 绘制波纹
 this.context.arc(this.origin.x, this.origin.y, this.radius, 0, 2 * Math.PI, false);
 this.context.fillStyle = this.color;
 this.context.fill();
 // 定义下次的绘制半径和透明度
 this.radius += this.speed;
 this.el.style.opacity -= this.speedOpacity;
 // 通过判断半径小于元素宽度或者还有透明度,不断绘制圆形
 if (this.radius  0) {
  this.timer = window.requestAnimationFrame(this.draw);
 } else {
  // 清除画布
  this.context.clearRect(0, 0, this.el.width, this.el.height);
  this.el.style.opacity = 0;
 }
}
Summary:
I did not copy the complete code above. If you want to see the source code, you can download it and take a look.
I believe you have mastered the method after reading the case in this article. For more exciting information, please pay attention to other related articles on the php Chinese website!
Recommended reading:
How to use Vux in a Vue project
Opening and closing the menu without JS
The above is the detailed content of How to make and use Vue ripple button component. For more information, please follow other related articles on the PHP Chinese website!

 如何修复 Microsoft Teams 白屏Apr 17, 2023 pm 05:07 PM
重新启动Microsoft团队如果您在启动Teams后出现空白屏幕,则一个很好的起点是重新启动应用程序本身。要关闭并重新启动MicrosoftTeams,请执行以下操作:右键单击任务栏通知区域中的Teams图标,然后从菜单中单击退出。从“开始”菜单或桌面快捷方式重新启动MicrosoftTeams并查看它是否有效。从任务管理器关闭MicrosoftTeams如果Teams进程的基本重新启动不起作用,请进入任务管理器并结束任务。要从任务管理器关闭Teams,请执行以下操作
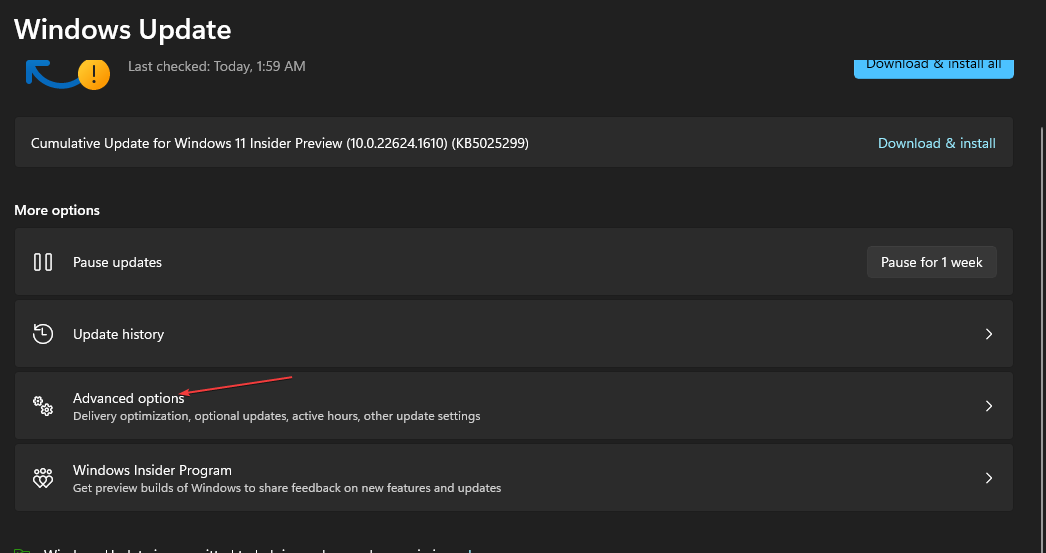 在 Windows 中禁用传递优化服务的 5 种方法May 17, 2023 am 09:31 AM
许多原因可能使你想要禁用传递优化服务在你的Windows电脑上。但是,我们的读者抱怨不知道要遵循的正确步骤。本指南将通过几个步骤讨论禁用传递优化服务的方法。要了解有关服务的更多信息,您可能需要查看我们的如何打开services.msc指南以获取更多信息。传递优化服务有什么作用?传递优化服务是具有云托管解决方案的HTTP下载程序。它允许Windows设备从备用来源下载Windows更新、升级、应用程序和其他大型包文件。此外,它还通过允许部署中的多个设备下载这些包来帮助减少带宽消耗。此外,Windo
 什么是 Windows 安全按钮?所有你必须知道的Apr 13, 2023 pm 10:22 PM
Windows 安全按钮是什么?顾名思义,Windows 安全按钮是一项安全功能,可让您安全地访问登录菜单并使用密码登录您的设备。 在这种情况下,智能手机绝对领先。但是 Windows 便携式设备(例如平板电脑)已经开始添加一个 Windows 安全按钮,它不仅仅是一种将不需要的用户拒之门外的方式。它还提供额外的登录菜单选项。尽管如果您试图在台式 PC 或笔记本电脑上找到 Windows 安全按钮,您可能会感到失望。这是为什么?平板电脑与个人电脑Windows 安全按钮是一个物理按钮,存在于平板
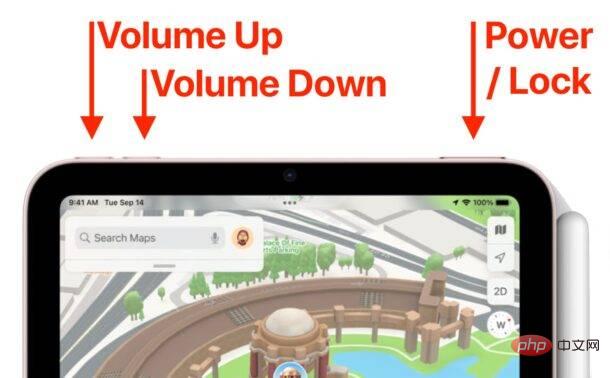 如何重启、强制重启和关闭 iPad Mini 6Apr 29, 2023 pm 12:19 PM
如何强制重启iPadMini6强制重启iPadMini6是通过一系列按钮按下来完成的,它的工作原理如下:按下并释放音量调高按下并释放降低音量按住电源/锁定按钮,直到您在屏幕上看到Apple标志,表明iPadMini已强制重启仅此而已,您已经强制重启了iPadMini6!强制重启通常用于故障排除原因,例如iPadMini被冻结、应用程序被冻结或发生其他一些一般性不当行为。关于强制重启第6代iPadMini的程序需要注意的一点是,对于所有其他具有超薄边框并使用
 重写后:
如何解决 PS5 控制器在 Windows 11 上未被识别的问题May 09, 2023 pm 10:16 PM
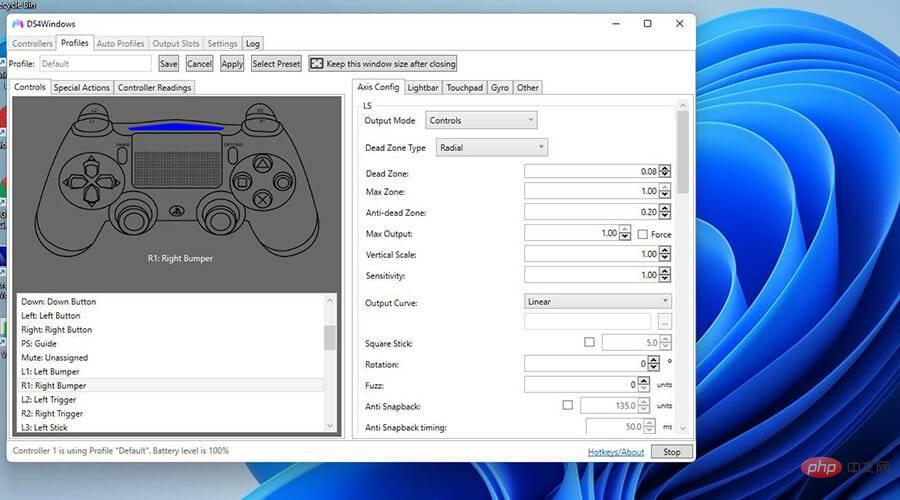
重写后:
如何解决 PS5 控制器在 Windows 11 上未被识别的问题May 09, 2023 pm 10:16 PM<h3>关于连接我的PS5控制器,我应该知道什么?</h3><p>与DualSense控制器一样好,有报告称控制器未连接或未被检测到。解决此问题的最简单方法是使用适当的USB电缆将控制器连接到您的PC。</p><p>有些游戏本身就支持DualSense。在这些情况下,您只需插入控制器即可。但这引发了其他问题,例如如果您没有USB电缆或不想使用USB电缆怎么办
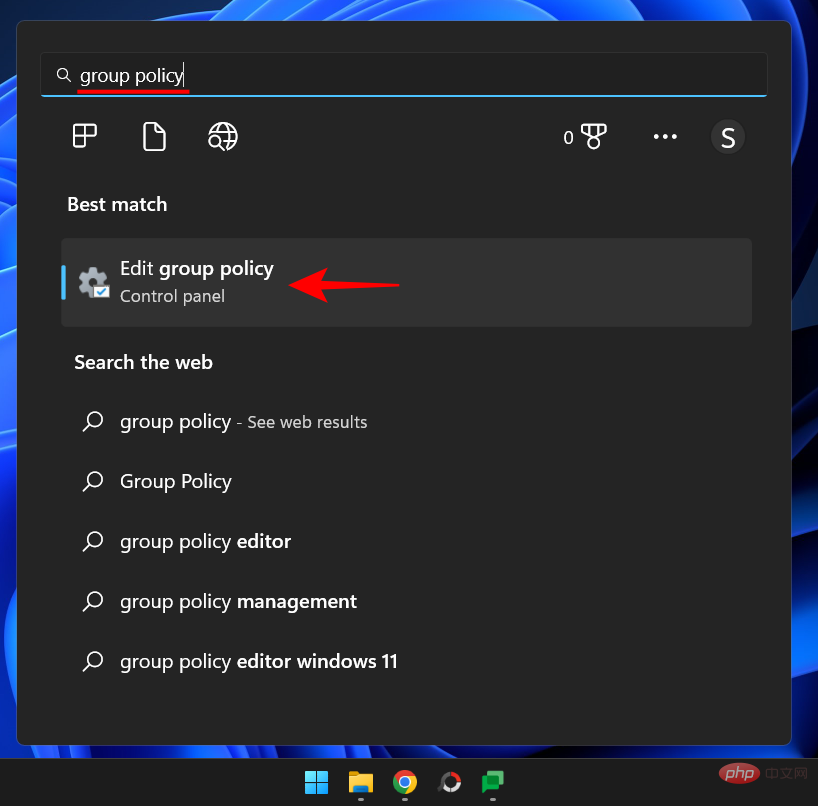
 如何清空 Microsoft Edge 浏览器的下载记录?Apr 21, 2023 am 09:34 AM
<ul><li><strong>点击进入:</strong>ChatGPT工具插件导航大全</li></ul><h2>在Edge中查找和删除下载历史记录</h2><p>与其他浏览器一样,Edge有一个<strong>下载
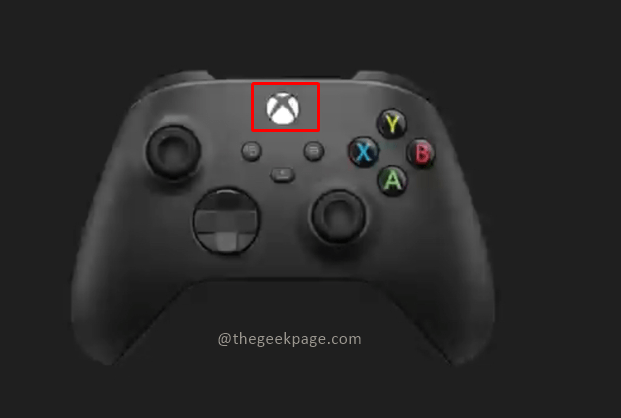 如何重置 Xbox Series S 或 X 的控制器Jun 03, 2023 pm 08:19 PM
Xbox游戏机是游戏玩家的最爱。有了新的SeriesX和SeriesS,游戏几乎是一种栩栩如生的体验。Xbox的控制器是体验游戏效果的主要工具。有时控制器连接被切断或在尝试将控制器连接到主控制台时遇到一些错误。这可能是由于与配对相关的各种问题。这可以通过几个简单的步骤来克服。重置XboxSeriesS或XboxSeriesX的控制器第1步:按住控制器上的Xbox按钮几秒钟,关闭控制器。第2步:在屏幕上,转到关闭控制器,然后按按钮A选择该选项。注意:如果您一直按X
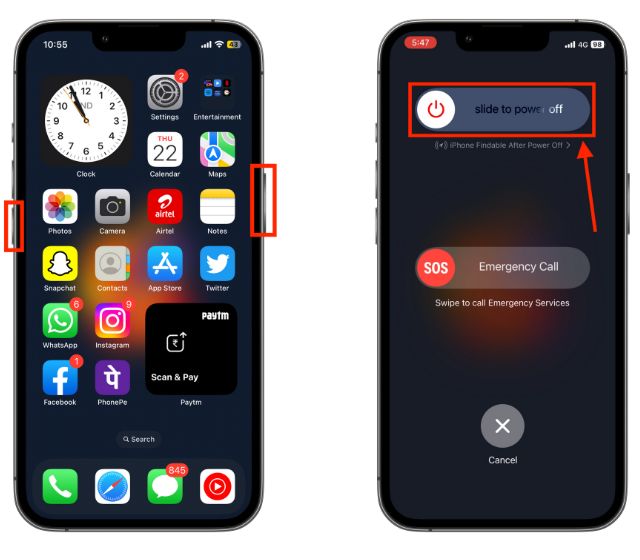 如何重新启动您的 iPhone(所有型号)Jul 18, 2023 pm 04:57 PM
如何使用面容ID重新启动iPhone请按照以下步骤了解如何重启具有面容ID的iPhone。此方法适用于重新启动iPhone14,iPhone13,iPhone12,iPhone11,iPhoneXS和iPhoneX。1.按住电源按钮和任一音量按钮,直到出现“滑动关闭电源”选项。2.向右拖动滑块,您的iPhone将关闭。3.现在,等待30秒,然后按住电源按钮,直到屏幕上出现Apple徽标。如何使用TouchID重新启动iPhone在iPhoneX发布之前,重新启动iPhone比当前型号更容易,因为


Hot AI Tools

Undresser.AI Undress
AI-powered app for creating realistic nude photos

AI Clothes Remover
Online AI tool for removing clothes from photos.

Undress AI Tool
Undress images for free

Clothoff.io
AI clothes remover

AI Hentai Generator
Generate AI Hentai for free.

Hot Article
Hot Tools

Safe Exam Browser
Safe Exam Browser is a secure browser environment for taking online exams securely. This software turns any computer into a secure workstation. It controls access to any utility and prevents students from using unauthorized resources.

SAP NetWeaver Server Adapter for Eclipse
Integrate Eclipse with SAP NetWeaver application server.

SublimeText3 Chinese version
Chinese version, very easy to use

DVWA
Damn Vulnerable Web App (DVWA) is a PHP/MySQL web application that is very vulnerable. Its main goals are to be an aid for security professionals to test their skills and tools in a legal environment, to help web developers better understand the process of securing web applications, and to help teachers/students teach/learn in a classroom environment Web application security. The goal of DVWA is to practice some of the most common web vulnerabilities through a simple and straightforward interface, with varying degrees of difficulty. Please note that this software

Dreamweaver Mac version
Visual web development tools

