
Home >Backend Development >PHP Tutorial >Detailed explanation of sending emails with PHPMailer
Detailed explanation of sending emails with PHPMailer
- 墨辰丷Original
- 2018-05-29 10:04:351690browse
PHPMailer is an encapsulated PHP email sending class that supports sending emails with HTML content and image attachments. The prerequisite is to set up the mail server to realize the email sending function. This article will share with you the email sending function of PHPMailer. Let’s take a look.
PHPMailer is an encapsulated PHP email sending class that supports sending emails with HTML content and image attachments. The prerequisite is to set up the mail server. Implement the email sending function.
HTML
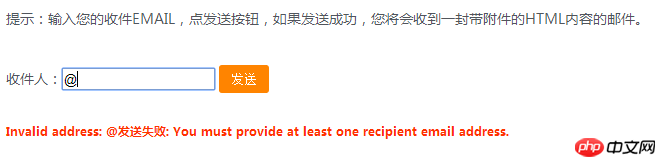
First we place an inbox input box and a send email button:
Recipient:
<input type="text" class="input_text" id="email" name="email" value="@"/>
<input type="button" class="btn" id="send" value="发送"/>
jQuery$(function()
{
$("#send").click(function()
{
var email = $("#email").val();
$("#send").addClass("loading").val("loading...").attr("disabled", "disabled");
$.post("ajax.php",
{
"email": email
},
function(data)
{
if (data == 1)
{
$("#result").html("发送成功,请注意查收您的邮件!");
} else {
$("#result").html(data);
}
$("#send").removeAttr("disabled").removeClass("loading").val("发送");
});
});
});
Ajax.phprequire_once('class.phpmailer.php');
$address = $_POST['email'];
//收件人email
$mail = new PHPMailer();
//实例化 $mail->IsSMTP();
// 启用SMTP
$mail->Host = "smtp.163.com";
//SMTP服务器
以163邮箱为例子
$mail->Port = 25;
//邮件发送端口
$mail->SMTPAuth = true;
//启用SMTP认证
$mail->CharSet = "UTF-8";
//字符集
$mail->Encoding = " 64";
//编码方式
$email_system = "hjl416148489_3@163.com";
$mail->Username = $email_system;
//你的邮箱
$mail->Password = "";
//你的密码
$mail->Subject = "你好";
//邮件标题
$mail->From = $email_system;
//发件人地址(也就是你的邮箱)
$mail->FromName = "素材火";
//发件人姓名
$mail->AddAddress($address, "亲");
//添加收件人(地址,昵称)
$mail->AddAttachment('send.xls', '我的附件.xls');
// 添加附件,并指定名称 $mail->IsHTML(true);
//支持html格式内容 $mail->Add dedImage("logo.jpg", "my-attach", "logo.jpg");
//设置邮件中的图片
$mail->Body = '你好, <b>朋友</b>! <br/>这是一封来自<a href="http://www.erdangjiade.com" target="_blank">erdangjiade.com</a>的邮件!<br/>
<img alt="erdangjiade" src="cid:my-attach">';
//邮件主体内容
//发送
if (!$mail->Send())
{
echo "发送失败: " . $mail->ErrorInfo;
}
else
{
echo "1";
}
The above is the entire content of this article, I hope it will be helpful to everyone's study.
Related recommendations:
phpmailerUsing php to send emails case analysis
PHPMAILER implements the function of sending emails in PHP
Share how PHP uses PHPMailer to send emails
The above is the detailed content of Detailed explanation of sending emails with PHPMailer. For more information, please follow other related articles on the PHP Chinese website!